jpappas
-
Posts
476 -
Joined
-
Last visited
Content Type
Profiles
Forums
Events
Everything posted by jpappas
-
Al, I use Proxy models when animating TWO, but I haven't ever created one yet! But looking through my own notes, I found I jotted down some instructions at one point on how to do it: -- create a proxy version of a model -- 1. open the model you want to create a proxy for 2. save the model as it's proxy name (man_proxy.mdl) 3. strip down the CPs and geometry of the proxy model - don't touch any bones or constraints - you can replace entire parts like hands with boxes -- Working in Choreography -- 1. drag the Proxy model into new Choreography 2. work with the proxy model as needed 3. when you want to switch to the real model: - click the Shortcut to in the Properties panel - change it to the real model -- Working in Action window -- 1. create a new Action, choose the proxy model 2. work with it as needed 3. when you want to switch: - close the Action window - right-click the Action in PWS - select Edit with and choose the real model -- fix Constraints to work using a proxy -- 1. make sure both the real model, proxy and props have Embedded = On 2. in the PWS, in the Choreography right-click the Shortcut to Proxy 3. select Rename, rename the proxy shortcut back to the original model name 4. now select the proxy model in the Objects container and switch Embedded to Off -Jim
-
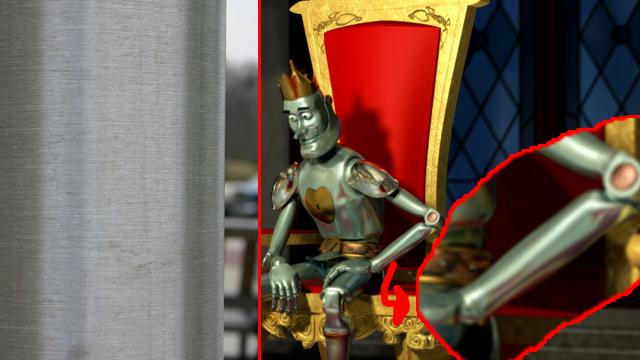
Hi guys, One thing I wanted to ask about is why not add something to mimic the look of a metal's micro surface bumps and the way they break up the specular elements? This may not be the right name for it, I was also trying to talk about this last night on the TWO chat but couldn't describe it well enough then either! But a picture is worth a thousand words so I've included one, on the left is a photograph of a metal pole, on the right, our beloved Tinman. This metal pole might show the effect too much, but don't metal surfaces exhibit this to some degree no matter how smooth they are? I think when I look at the Tinman this is part of what seems missing. His specular shine is so perfect it's... well, I don't want to say like plastic, but... I'd say it's just a bit too perfect. Would this idea help separate both the Tinman and the Silver Surfer from the background or in general just add to the look of metal? As this is turning into a very educational thread, please jump in and clarify if I'm on the wrong track here. thanks! -Jim

-
Wanderer, If you've completed "The Door is Stuck" and "Can You Say That" then I'm assuming you must have the Animate button selected, but I think I know what you're saying and it's something which does take some getting used to. A keyframe represents the change from the last keyframe, and if there is no last keyframe, then it's the change all the way back to 0:00. So if you move Shaggy's right arm at time frame 3:00 and it's the first time you've touched his right arm, it will begin moving from time frame 0:00 all the way to your keyframe at 3:00. So let's say you really intended for his arm to remain motionless from 0:00 to let's say frame 2:50 and then only move from 2:50 - 3:00, you need to have keyframes for each of these times, 0:00, 2:50, and 3:00. The keyframes at 0:00 and 2:50 will have the arm in the same position since they represent how long you're holding the arm motionless, then the keyframe at 3:00 will be the new position it moves to. I think Robcat made a diagram or animation that describes this better, I'll try to find that link. -Jim
-
Dhar, I love it! The lighting and the camera angles are the perfect compliment to the music. And I really like watching the musicians playing the solos. Ok, now I've got to watch it again! -Jim
-
Hey, Thought this thread was a good place for this. Found a website with incredible pictures of the sun, (and I think it's updated every few minutes from a satellite): http://soho.esac.esa.int/data/realtime/eit_304/# -Jim
-
Al, To add Specular reflections (these are the bright glints things have from light sources): 1. in your Light's Options, you need to turn on Specularity. If you have an outdoor scene like this and you're using more than one light, you should only have Specularity turned on for the light representing the sun. The idea is that you don't want specularity coming from your own fill lights, etc., you want to have specularity only for lights in your scene that represent real lights. 2. in your Models Surface Attributes, set a Specular Color (white is fine), set the Specular Size to some value, stick with a small size probably between 10-25% since metal is reflective you want a small specular size. Then set the Specular Intensity to some value depending on how pronounced you want it. You can give different Specular settings to different groups, so the cockpit material could be more Specular than the body of the plane, etc... When you do this you will see a very uniform Specular reflection in your render which, while it looks good, doesn't actually occur much in real life! Objects that have a very smooth surface are usually plastic, so this is often a reason why CG renders in general can look plasticky. To get past that, you could create a grayscale bump map decal for your object which helps break up the perfectly smooth specular appearance, or, you could actually create grayscale specular size and specular intensity decals. -Jim
-
My first attempt at bump mapping in AM
jpappas replied to Duke's topic in Work In Progress / Sweatbox
Hey Leo, You certainly don't need to worry about modelling something like this! Heck, I made mine just for fun too, that's what A:M is for! If you plan to model the audio cable coming out of the microphone I'd love to see more posts here on how you attack it. I ended up making a series of cylinders each with a bone so I could move and twist the cable as needed, but it didn't work the way I had hoped, so I have to revisit that at some point. -Jim -
My first attempt at bump mapping in AM
jpappas replied to Duke's topic in Work In Progress / Sweatbox
Leo, We're both working on the same old fashioned microphone! Actually, I got to a point where I thought it looked OK so I haven't touched it in a few weeks. http://www.hash.com/forums/index.php?s=&am...st&p=196875 I like the look of your bump map on the top, my suggestion would be to keep it, and if possible to shrink the lines so the wire mesh is even tighter. For the bottom, isn't the bottom of these microphones solid? I thought they only recorded from the top, but just for artistic purposes, I do think making the bottom look different maks it look more interesting. BTW, if you ever flick by CNN during the Larry King show I noticed the show uses a CG image of this exact microphone for when it goes to a commercial break. -Jim -
Technodandy, very nice work on the model, it looks great! Rodney, I had no idea this was possible! A:M surprises me all the time. I just tried it and sure enough, there it is and it works like a charm. So let me spell this out again to make sure I've got it right: The basic idea is to clear the Choreography of everything else, remove the cameras, lights, ground, etc.. and you're left with a blank Choreography that acts like another modeling window. You then can drag instances of a fully textured model and use them to make up a new model. Then when you're happy, you export the Choreography as a model. Then you can start any new project and import that model as needed. It brings up some very interesting possibilities. My floating city for the last image contest for example, was mostly assembled in the Choreography. I guess its possible to save that whole thing as a model itself. Unreal. -Jim
-
Duke, You not only fixed the problems, but it looks like you also finished the rest of it -- a very cool looking model, nice! -Jim
-
Hi, That hover board is casting an unusual looking shadow. Are you using Transparency or a CookieCutter texture map? -Jim
-
Hi, Check out the Path Ease (walk then wave) video tutorial here, I think it's what you're looking for: http://www.hash.com/VM/ -Jim
-
That's one of the DarkSim Procedural Materials, you can download them for free from here: http://www.darksim.com/html/simbiontam.html The plugin that allows A:M to use the DarkSim materials is called Simbiont and is also free, but if you have A:M version 13.0 or above you don't need to get it, it's part of the A:M install and ready to go. Just create a new Material, change the Attribute to Darksim, then you'll see where you can click to load a material in, and just navigate to where you downloaded the materials. -Jim
-
Hi, I'm not sure what's going on, but you could be right thinking it could be something with the video card, I just made a new model, imported an image as a rotoscope and it looks OK for me, I'm using V13.0j on WinXp, on a laptop with a not-so-great ATI card, set to Direct-X. In fact, my tip about Control-D doesn't seem to affect whether rotoscopes are drawn, it must just affect decals. Does this only happen with the rotoscope or any decal in the model window? If it's just the rotoscope then you could do a workaround that should at least keep your workflow going (while you figure this problem out on the side). Make a square patch, group it and call the group MyRotoscope or something like that. Apply your rotoscope image as a decal to the patch, size it accordingly, then just set it so you can't select it, you can then even control the Transparency of it just using the regular Transparency Surface Attribute of the MyRotoscope group. -Jim
-
Julian, Very nice! Yes, please share what you've learned about using Planet Glow. It's one of about a dozen things about A:M that I have on my "check-out-this-cool-feature" list. -Jim BTW, the swathes of nebula gas really add a nice touch to the images. Is that particle smoke or some other effect? Thx, -Jim
-
Hi, Just a guess, but hitting Control-D will turn decals on or off in the realtime preview. You might have them turned off? -Jim
-
Well, I did create a bug report for this, I'm pretty sure it's a bug as the Help system says there should be a Quality setting on these Volumetric Effects, just like Lights have. -Jim
-
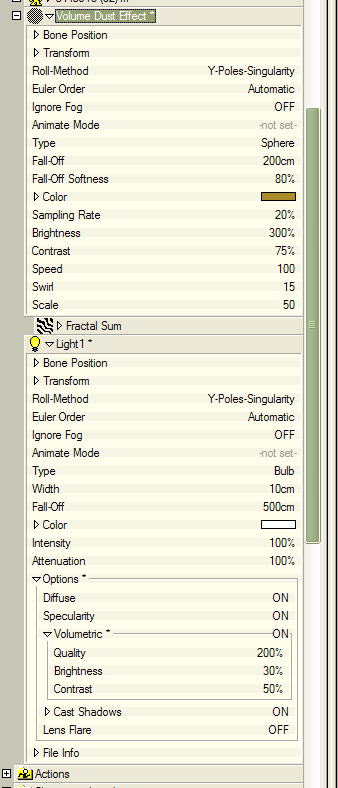
Hi, I saw this banding on a recent animation I did. But here's the thing, yes, there is a Quality setting if you create a Light and turn Volumetric on. But if you just create a new Volumetric Effect (instead of a Light), like Volumetric Dust, Mist or Steam, the banding is pretty bad and there is no Quality setting. I wasn't sure before, but now I'm thinking this is a bug. Can anyone verify this? If so, I'd be willing to file a bug report. The picture shows the properties for both a Volumetric Effect and a Light with Volumetric turned on. -Jim
-
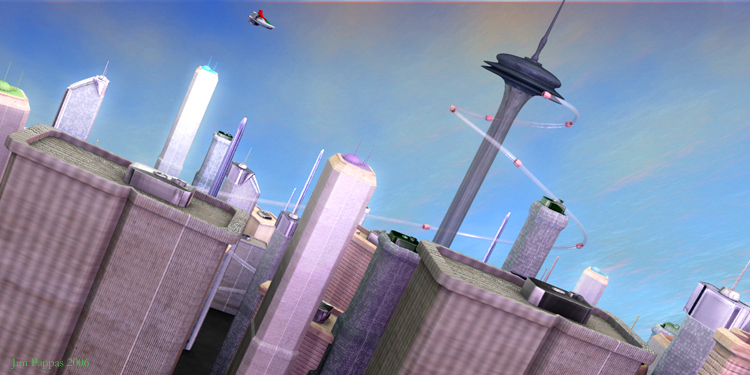
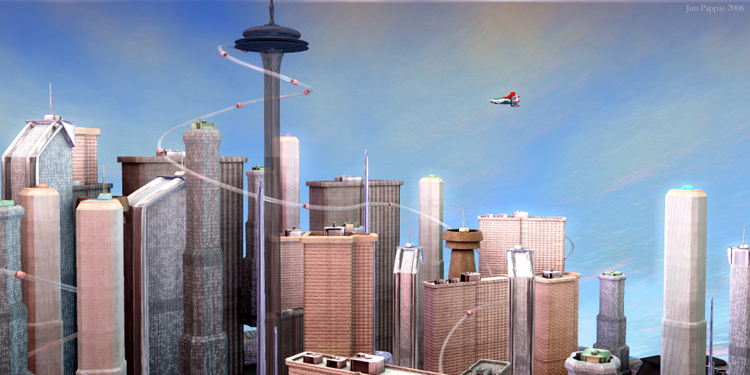
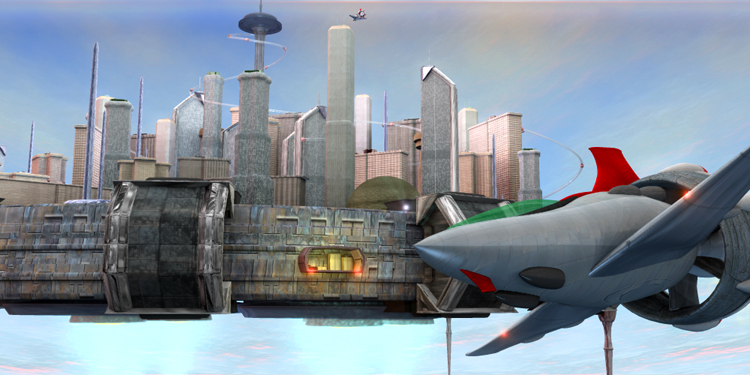
Floating City - from Image Contest
jpappas replied to jpappas's topic in Work In Progress / Sweatbox
Micah, Thanks. The Stereo forum is calling so look for it soon with your red/blue glasses on. -Jim -
Floating City - from Image Contest
jpappas replied to jpappas's topic in Work In Progress / Sweatbox
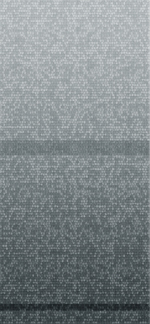
Hey! Thanks for that, I appreciate every vote! About the building decals, I created them and kind of stumbled on a few great techniques by accident. They're just simple grids of gray lines, but I overlayed a white-black Gradient in Soft Light mode over them, white at the top, going to black at the bottom. Then to make what looks like little windows I just used a Texture filter on the grid, I think it was Photoshop's Patchwork. I made the decal 4 times wider than the width of the building, then I just applied the decals to the buildings as Cylinder maps -- works perfectly, even though the building is square. Speaking of the overall concept, I've been thinking of all the influences that might have caused this to pop into my brain, and realized how much of a staple floating cities are in science fiction. I was able to think of these off the top of my head, I'd be interested to hear what others I missed! 1. mother ship/city from Close Encounters of the Third Kind 2. the Comet Empire from Star Blazers (Yamato) 3. Bespin/Cloud City from Empire Strikes Back 4. the one from that Star Trek TOS episode where the gas on the ground made the ground inhabitants dumb 5. Macross city in the SDF-1 from Robotech -Jim
-
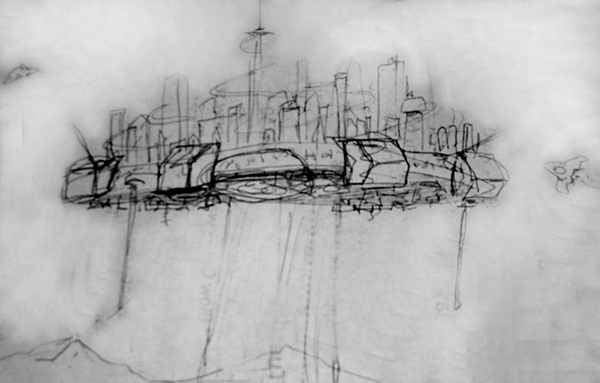
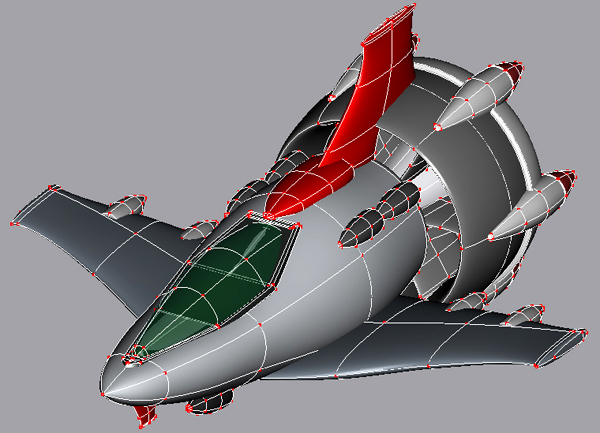
Hi, This was my first time entering an Image Contest, and it was really a blast! I was busy the week before finishing off "The Door is Stuck" in TAOAM (check it out in New Users and give me some critiques on that too if you get a second). Then I jumped right into this, it took about 4 days, give or take. I'll post some wireframes and other images here if anyone is interested. To start, if anyone wants a good laugh, here's my chicken-scratch sketch where this began: -Jim ...and some wireframes: -Jim ...and some shots from other angles:
-
Hi Ross, I can only confirm what you are seeing. I used Volumetric Dust in my recent animation for The Door's Stuck and like you say, it's an effect that seems to work only when the color chosen is a bright color. I'm thinking, that may just be how it works? Just thinking out loud now, Volumetric effects usually refer to things involved with lights, like dust swirling and made visible by a light, so maybe that's it. One other thing that I noticed was that the effect caused very visible banding in the area it was rendered. The Help file talks about this and says to increase the Quality setting to get rid of the banding (keeping in mind it makes for a longer render). I haven't seen a Quality setting under the Volume Dust properties in either V13 or V11. Unless its referring to increasing the number of passes for MultiPass, I'm not sure. I ended up using it anyway since the scene was a fast moving object and the banding was less noticable due to that. I'm thinking at this point that a better option for dark fog or dark dust/smoke is probably to use Particle sprites. -Jim
-
Check this post in the main forum for more information. The voting won't start until Sept. 7th, Steve will let everyone know when it's time and how to vote. http://www.hash.com/forums/index.php?s=&am...st&p=194442 -Jim
-
Hi, I think you just need to find your own workflow and make checking other Views a habit. If I move the arm in the Left view, I always check Top and Front. Sometimes I just press T and twist my view around. And let's say I'm rotating the arm, I'd rather hit R for the Rotate tool and grab just one axis; the rotate is more predictable for me this way. BTW, I don't do this myself yet, but another thing you can do is open multiple windows and set each one to a different View, so as you move something in one, you can instantly see what it looks like in the others. Another thing I like to do is save multiple copies of my project as I work on it. Sometimes if you move something and because of IK or some other thing, it ends up twisting another part of the model, it's just easier and quicker to go back to your last good state and go foward again. Hope some of this helps! -Jim
-
Hey Hashers, I added Volumetric Dust for Exercise 6 but it's rendering with very noticable banding. The Help file says to increase the Quality setting for the Volumetric effect to get rid of the banding, but unless my eyes fail me, I can't seem to see it. Can anyone verify this? I'm not sure if this is a bug or I'm just looking in the wrong place. Here's a picture of what I see for my Volumetric Dust properties. I'm running V13 f. thanks! -Jim