


agep
-
Posts
2,099 -
Joined
-
Last visited
-
Days Won
1
Content Type
Profiles
Forums
Events
Posts posted by agep
-
-
Thank you guys!
I am not sure I agree, unless you are talking about personal taste. Here is the original photo which I based the texture of:Great looking texture... I think it is a little bright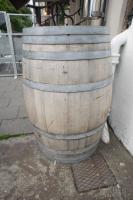
-
*I've just renamed this thread from "Old barrels" to "Free textures", since I am going to use this thread for updates
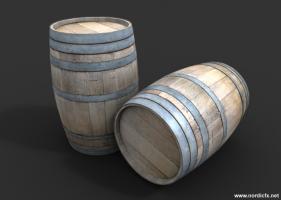
Hi guys
Here is a simple barrel model I made while making textures for my new site. Please let me know what you think.
I have attached the model in case anyone wants it, but you will have to download the textures from my site though

http://nordicfx.net/?portfolio=barrel-texture-001
-
So... when are you going to texture the buildings?.. haha, just kidding. It looks wonderful, I love the style! Great work
-
Hi friends
I am proud to present my new website. It is all about free textures and HDRI environments. I have put a lot of work into the content, and I hope to add more regularly. The textures are high res and tileable. The HDRI's are also high res, and comes with matching backplates
also feel free to follow me on twitter where I am going to post updates:
If you spot any spelling errors or bad sentence structure/wording, please let me know
Best regards
Stian
-
Clever! I like itidea...We see "light dims" on screen but the dots over the i's are like LED lights and they are so bright that we can't really read the words.
Then a hand or finger or something puts a lightdim on each dot (or maybe they just fly in on their own), that cuts the glare, and we can now read "light dims". Yay.
-
Yeah, and it is not out of beta yet! The official release is this autumn I believe2.5 million people bought that @ 14 euros ea.? Think I'm in the wrong business hehe -
Gratulere med dagen! Happy birthday!
-
It looks like you've added the texture as a group image, which will add one instance of the texture to each patch. If you select a patch and right click it you can rotate the images by selecting "Roate Images". You got group images by dropping the texture onto the group. If you want regular decals you have to drop the texture onto the model name or into the modelling window
-
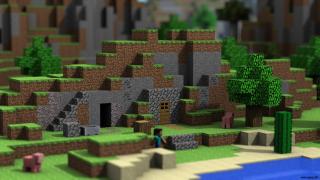
Hi guys
I've just completed a fanart video. It is some kind of intro maybe? not sure what to call it.
It is based of the game Minecraft which I have become an addict of. Heavy use of Newton
-
Thank you! I had a great day
-
Thank you guys!
-
does it render correct if you go back to version 15? Make sure you don't have a duplicate model in there. I have seen similar render artifacts when I have hit [E] by accident
-
Here's an example that steps the light. A bit on the red side.
This looks absolutely wonderful!
-
Very nice! I like it very much
-
Stian seems to use (or used) pfhoe (not free - but reasonable price)
Yeah, I am still using PFHoe. I absolutely recommend it. You don't get the tweaking options the big guys do have, but PFHoe is very easy to use and do a great job most of the times
-
I have sent you an email.What's the additional software to convert to .stl? And is it possible to send me something you've printed? Write me at gerrymooney(at)earthlink(dot)net. -
Hi guys
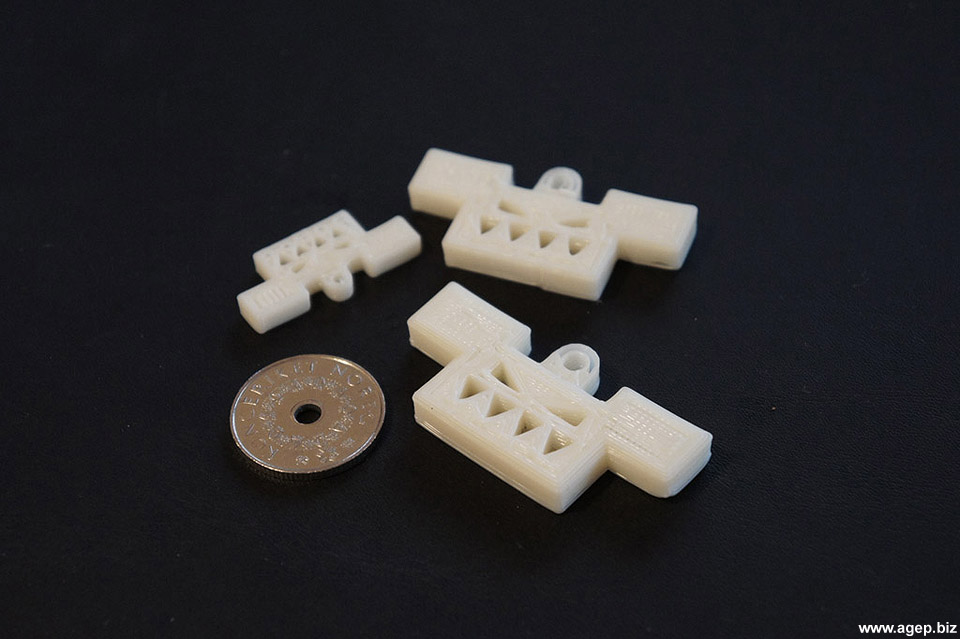
The resolution is between 0.2mm to 0.35mm depending on how well it is calibrated. At the moment I export .obj models from A:M which I convert to .stl in another software. I believe they are experimenting in using .obj files in the makerbot software, so I might not need a second software to convert to .stl in in the future.
Since the printer is laying down layers of plastic, the layers are visible, but it is possible to sand it to get a smooth surface
-
It has happened a few times at the bottom of the model. But the build platform is heated (110c) to prevent thatIs there any evidence of shrinking or curling in the printed parts?
There is a few rules that apply when you do a print. The model has to be solid, no holes, eg an A:M sphere wont do it, because of the holes on the top and the bottom. Though, you can intersect two solid objects, like two cube primitives but the internal toolpath of the print might get a bit complex. Since the cathedral model consists of many non solid models I just rendered a depthmap which I the ran through an application that converts the map to a toolpath. Think of it like a displacementmap on a plane
I'm curious about the cathedral print. Was the square backing necessary or something you chose to add?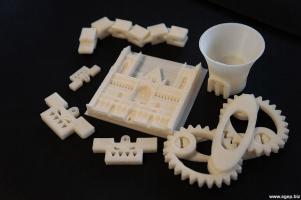
-
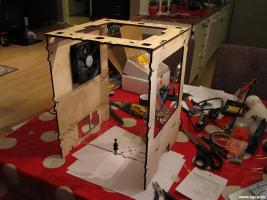
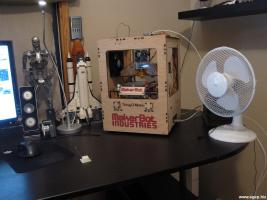
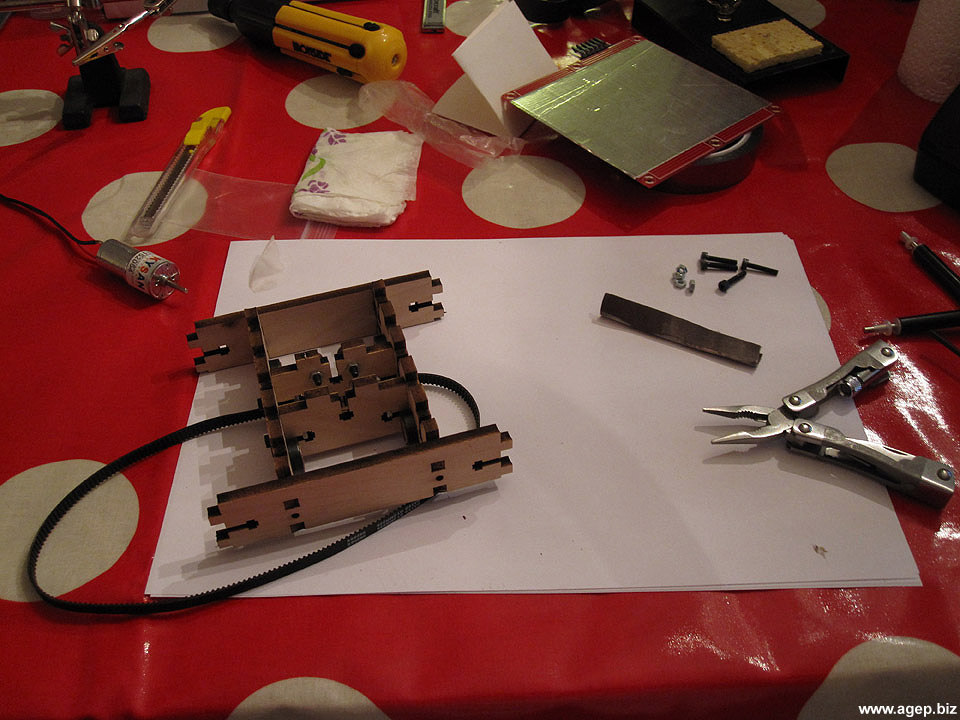
Yeah. Actually it is lasercut plywood (I had to clean the ash of it while buildingMy first impression from your photos was that you had to use the cardboard box it came in as the cabinet . ). But since it is open source you can download the drawings and cut them out in whatever material you want, metal or something. And if you already have a printer, you can print the body of a new one (in many pieces though)
-
how big is the biggest thing you can make?
It can print 4"x4"x6"
All the prints you see are 3D models. I have not printed a whole character yet, but I did print a bust for a friend that came out very nice. There is a few limits, especially when the model has a steep overhang, though this can be fixed by printing support structures that you cut away afterwardsthat's very cool agep...did you use a 3d character jet?... -
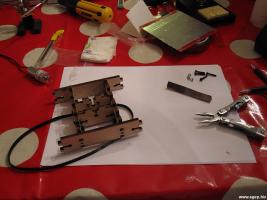
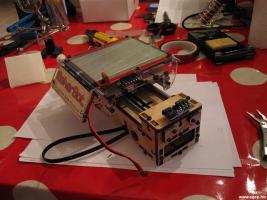
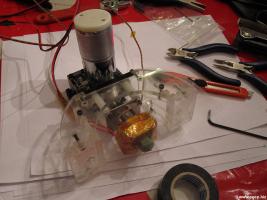
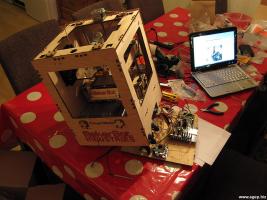
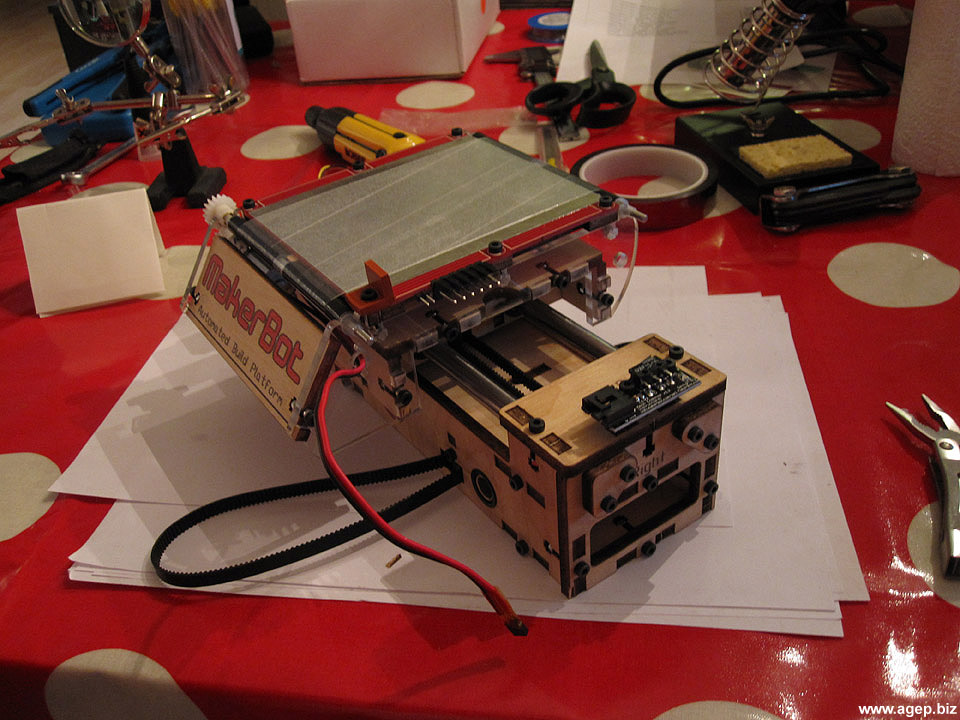
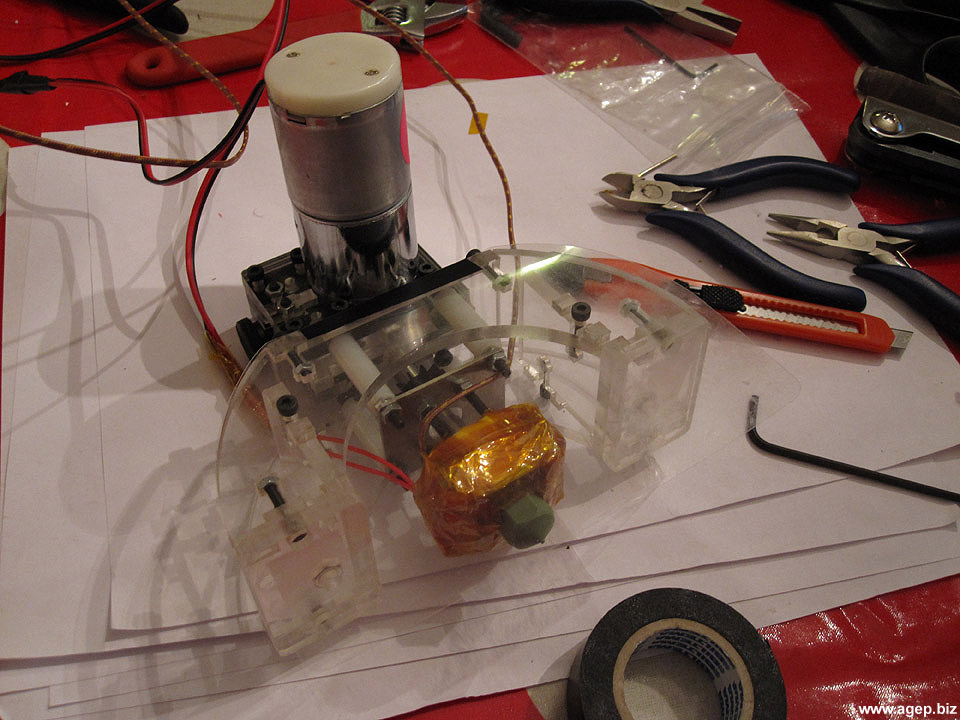
Hi guys
I recently bought a new toy, an open source 3D printer from www.makerbot.com
The device came as a kit, and I had to teach myself basic soldering (there was a few times where I had to solder). It took me about five days to build the kit. The printer prints using ABS Plasticfilament, which is cheap and very sturdy. ABS is the same material that legos are made of. The resolution of the printer is between 0.2mm and 0.35mm layer thickness, depending on how it is calibrated. I use the .OBJ export plugin in A:M, import the .OBJ into a second software to have it exported as .STL.
I have attached photos of a few prints and the building process. I have also attached a link to a timelapse of the printer in action.

The building:
-
Great model! You have done a nice job on the textures
-
You are the best Rodger! Impressive looking model!
-
On your Youtube page you said you could keyframe that. Photoshop has a timeline now?
The plugin pops up in its own window, where you can load all the frames and do all the settings and keyframing. I am using PhotoShop CS3


Norway?
in Off Topic
Posted
Hi Guys. I am okay, and as far as I know, all my family is safe. I have been watching the news 24/7 the last couple of days, and I just cant believe what I am seeing. It is absolutely shocking