


agep
-
Posts
2,099 -
Joined
-
Last visited
-
Days Won
1
Content Type
Profiles
Forums
Events
Posts posted by agep
-
-
Very nice indeed!
-
Do you have the MK7 or are you still using the mk6.
I believe I am still on MK6. I got my Makerbot Thing-O-Matic pretty early so I have the DC version
-
I skipped beveling the model to save time. Making bevels would not make much different because they probably would be to small to be much noticeable on the print anyway
-
Very cool
 .
.Was a lot of meassuring involved?
See you
*Fuchur*
The slide caliper sure made it easier than just eyeballing it. I probably spent 45 minutes on the 3D model. I only had access to the bracket, not the safety gate itself
-
I am no handyman. Give me a hammer or any kind of powertools, and I have no clue what to do with them. However, give me a broken PC and I can fix it!
So when people ask me if I can 3D print them some parts they are missing I usually take upon thchallengege, because that means I can use Animation:Master to fix real world stuff
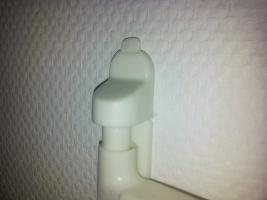
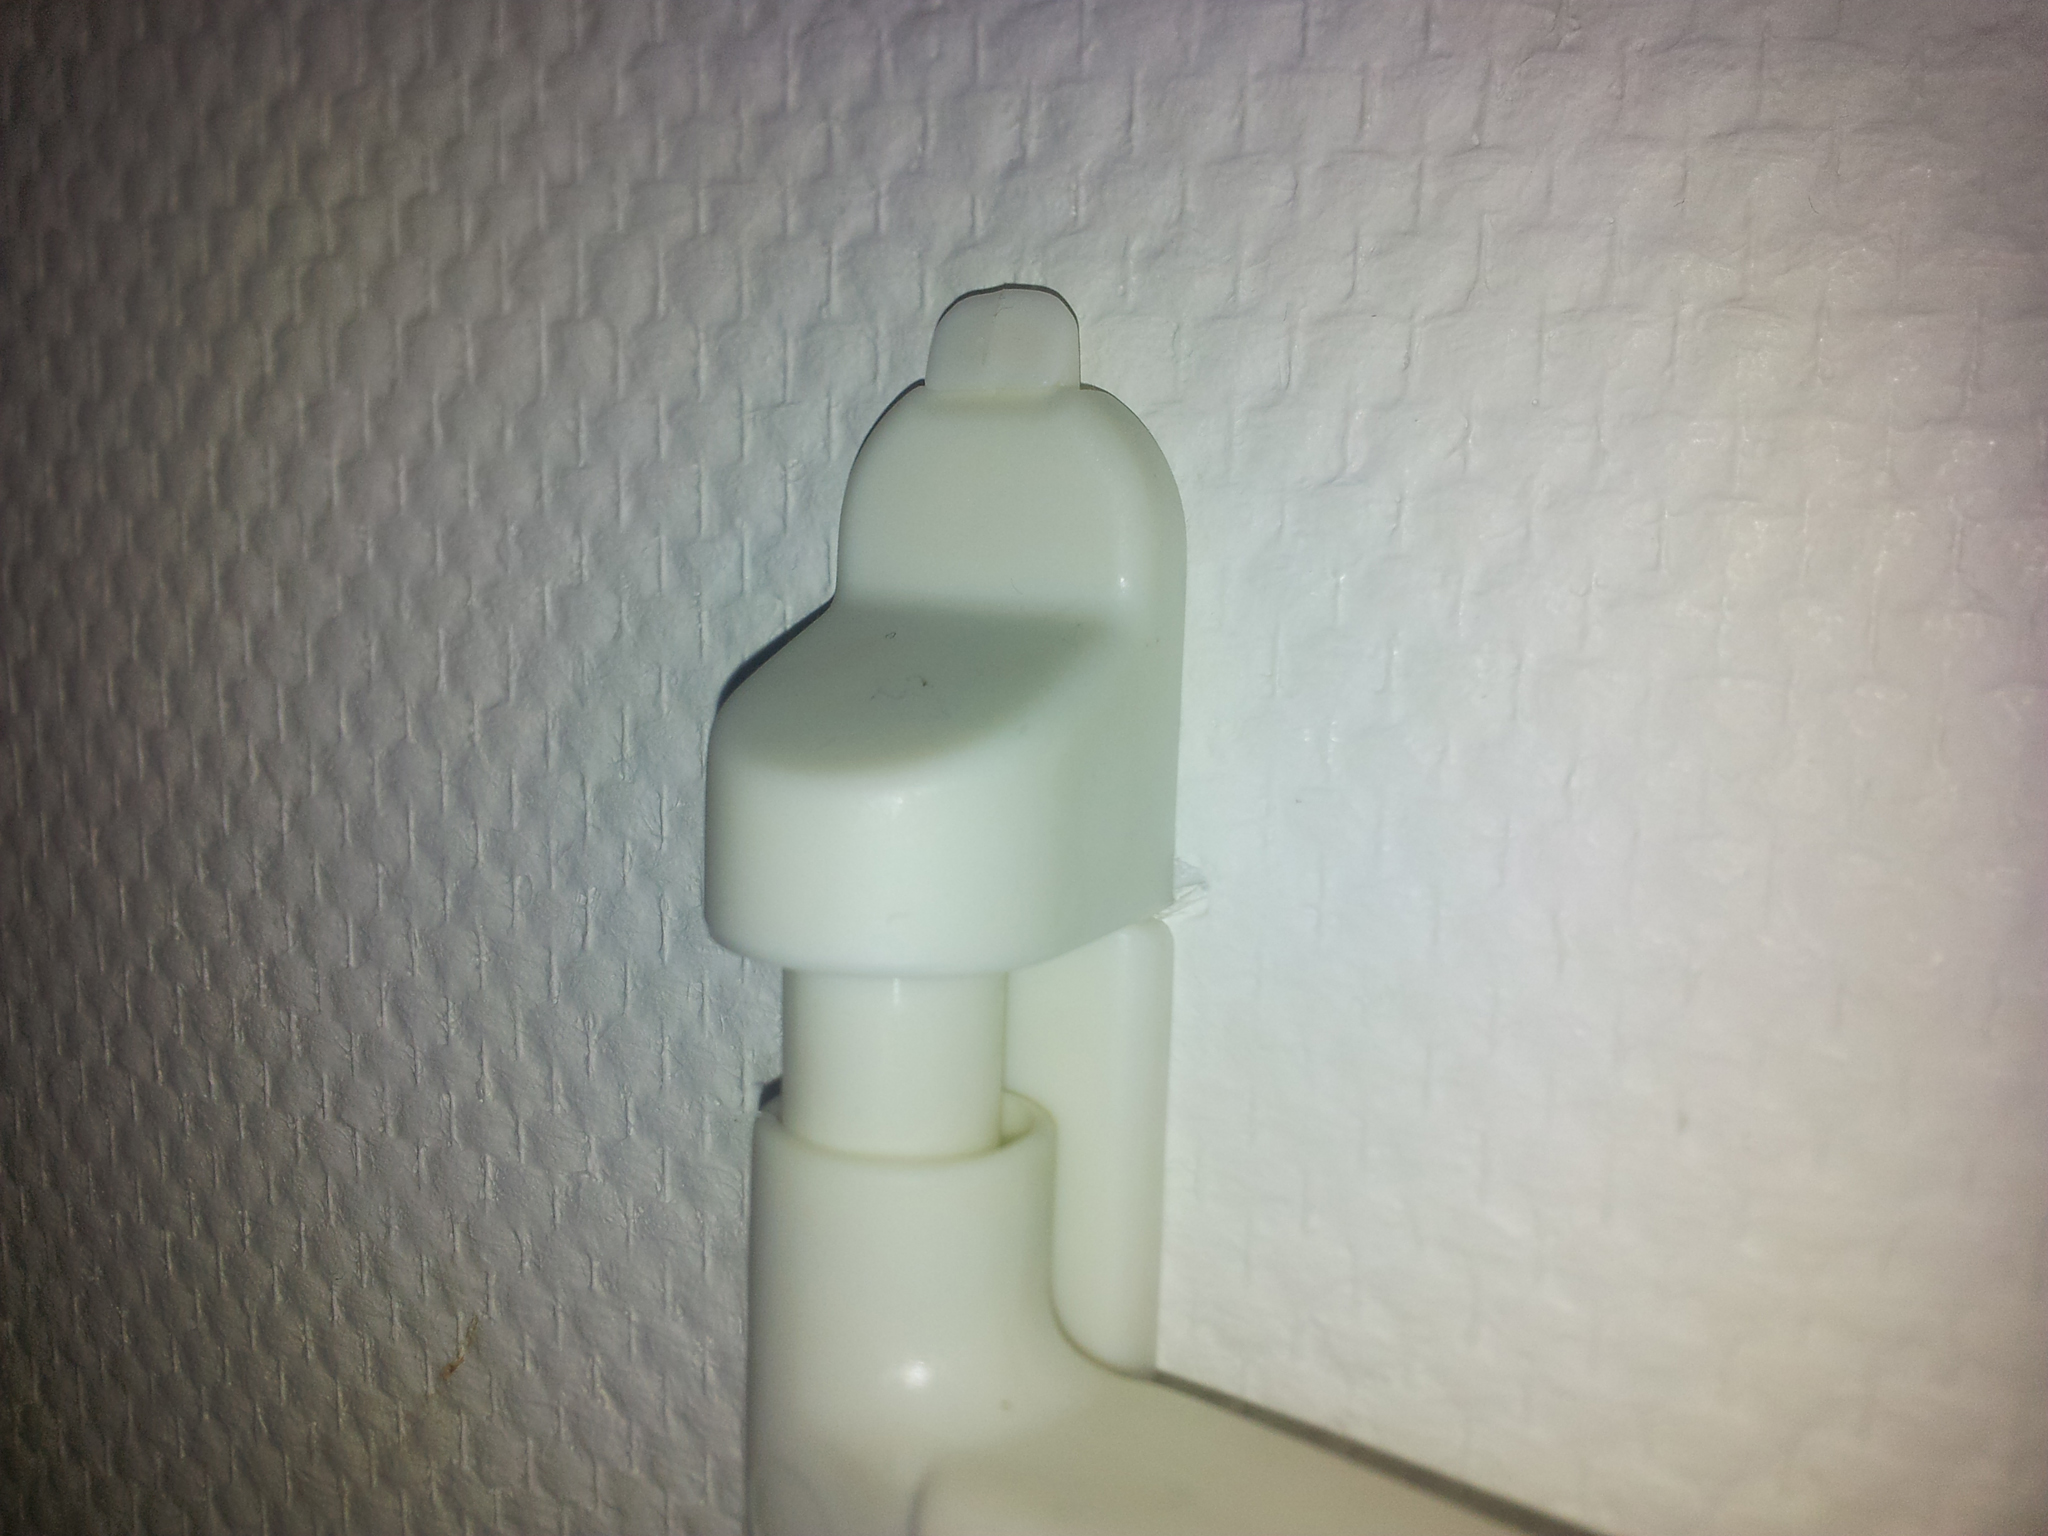
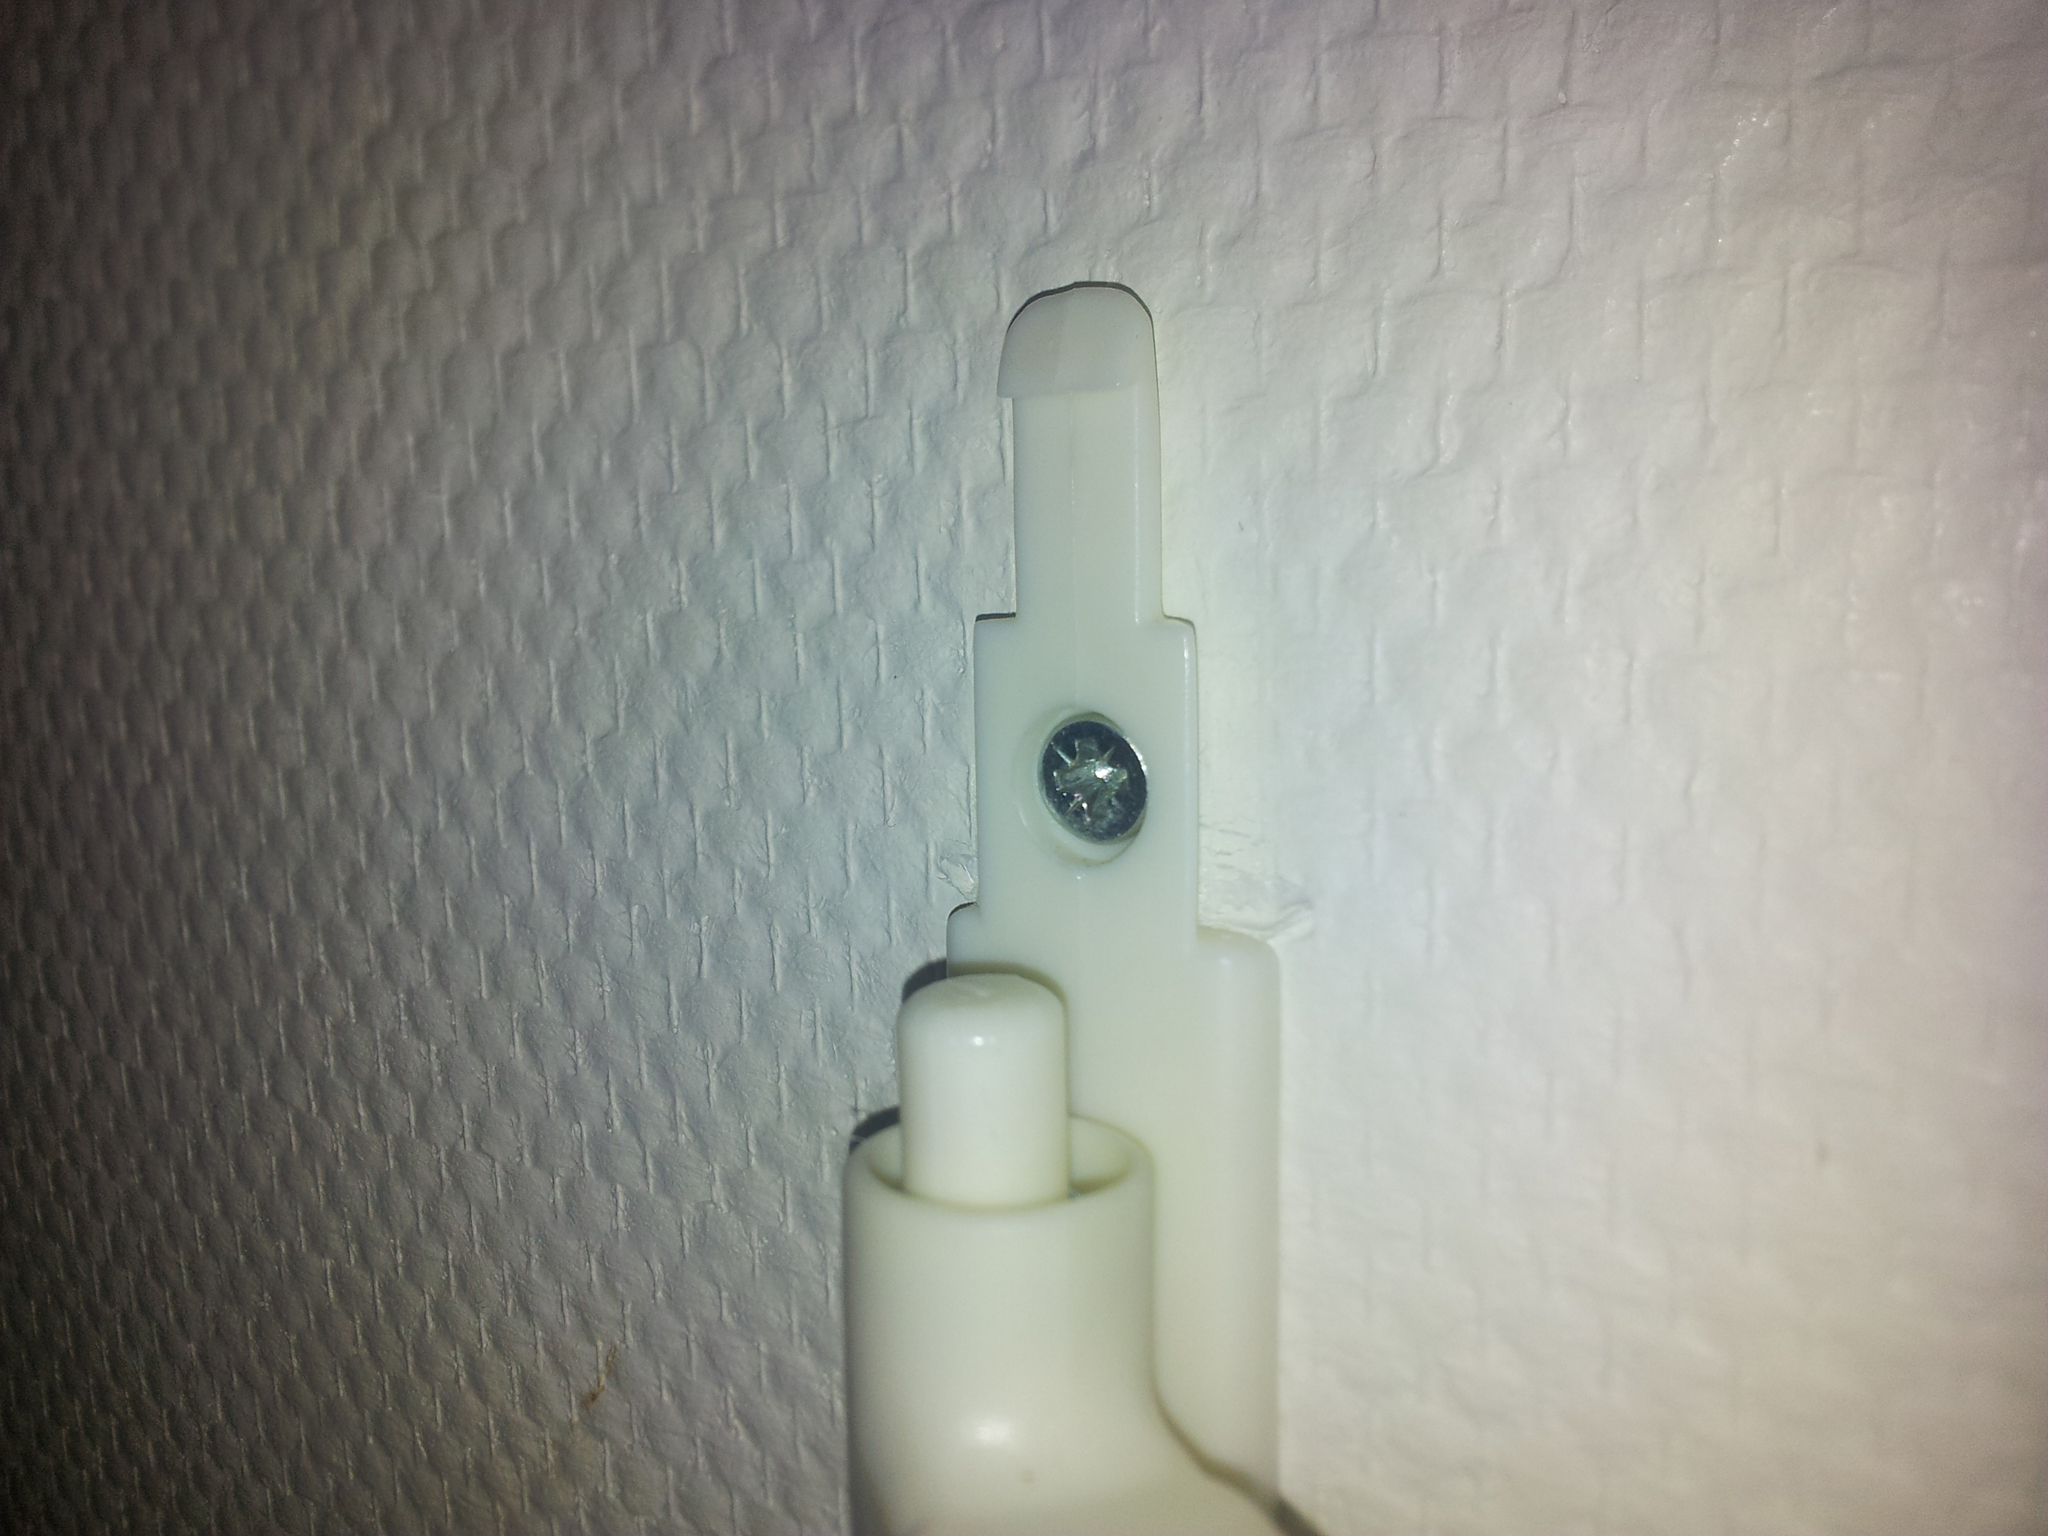
In this case someone was missing one of the brackets for their baby safety gate
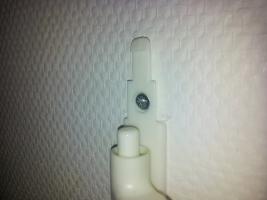
Here is the one bracket they have:
Missing bracket:
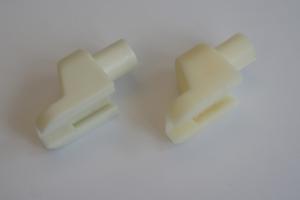
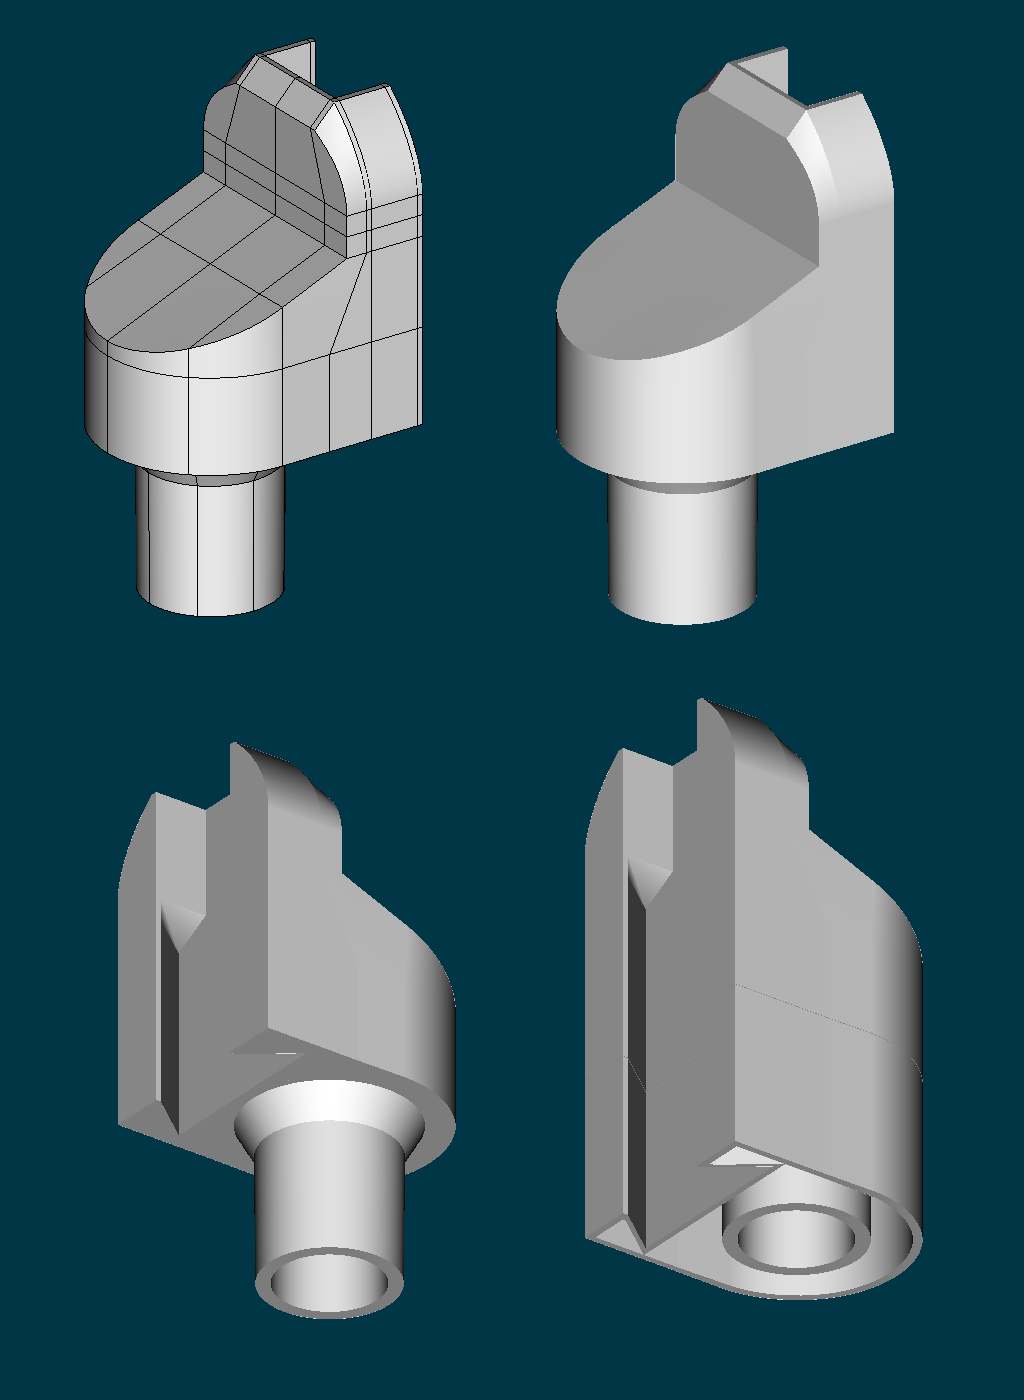
Using a slide caliper and the original bracket I was able to recreate it in A:M fairly easily:
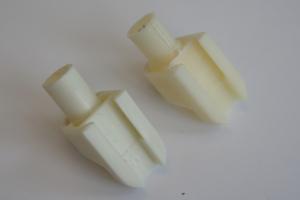
The bottom right version shows it with support material. The bracket got printed in standing position, and due to the overhang it needed some support. The support was just a single wall outline that was easy to remove once printed

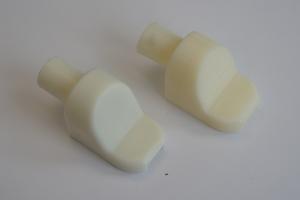
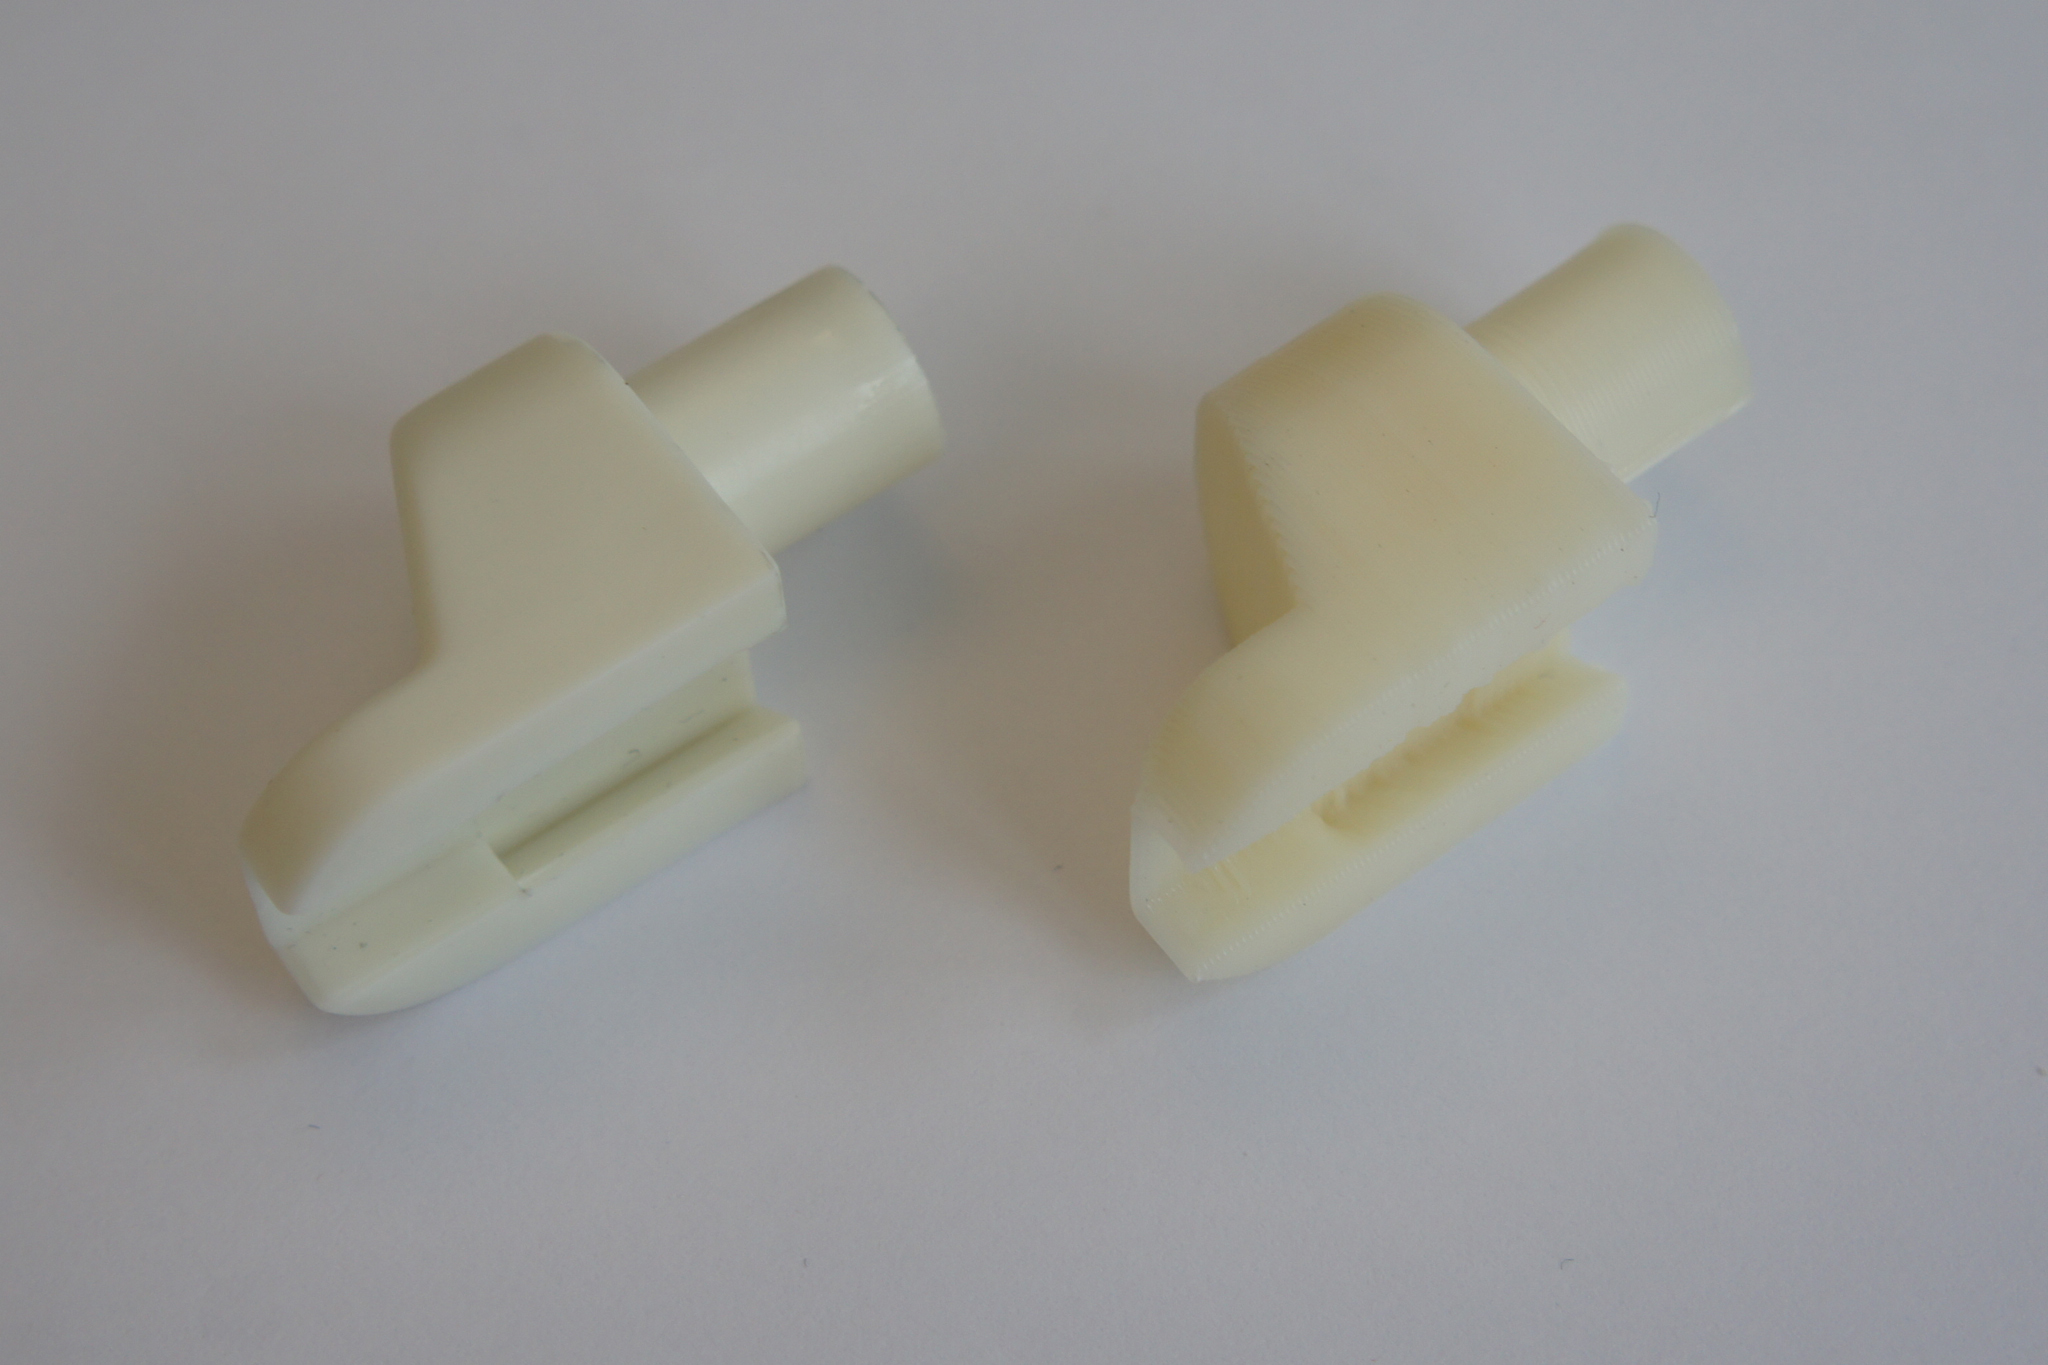
After a few testprints and adjustments the final piece was ready. The print took approximately 30 minutes. It is printed in ABS plastic which is the same plastic Legos are made of. Original bracket to the left:
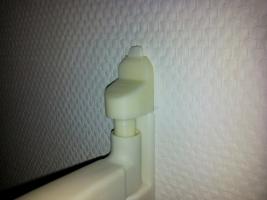
The printed bracket fitted to the safety gate:
I spent most of the evening making the part, which they probably could have gotten for free just by sending the manufacturer an e-mail since the part was missing on arrival. But for me this was just a fun challenge
Best regards
Stian
-
My makerbot handles intersecting models, The toolpath gets generated with the internal mesh and it gets printed. But with a single skin the toolpath will be much cleanerSo it's not really possible to have intersecting meshes in the model, it has to be one single skin, correct? -
Interesting technique. Thanks for the walkthrough
-
@Stian: I agree. It's partly post work I'm doing for Photoshop, but I like that it gives it all a "miniature" look which plays well with this being puppets. I also think that using the roughness combined with dof helps to sell the effect.
Absolutely! By the way, how do you do it in Photoshop? I have used DOFPro a lot. It is a plugin in Photoshop. Very easy and quick to adjust the DOF. You do need an depthmap though, but that is easy to make, just a pure white render with black fog. Anyway, the DOFPro lets you adjust the strenght and the focal point, and it also do image sequences even with keyframing
-
I must say that the DOF fits your renders very well
-
This is very cool stuff, I love the puppet style
-
Happy birthday Marcos!
-
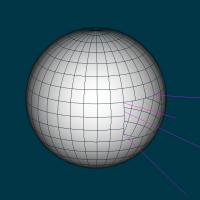
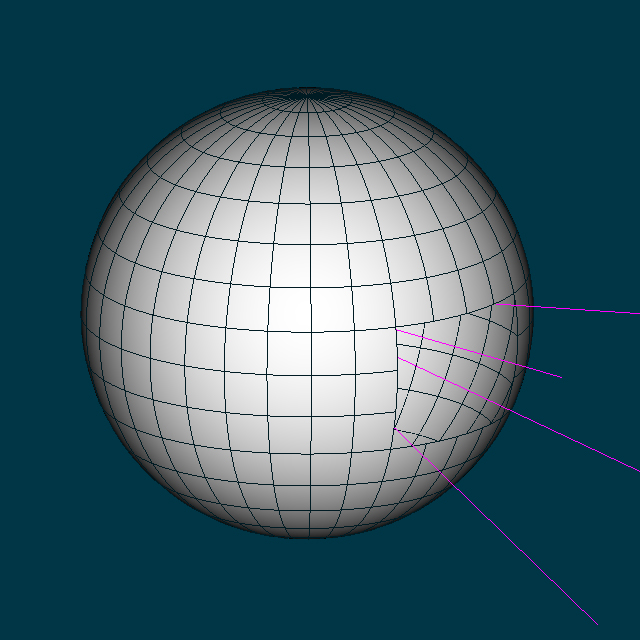
I think there is still some hope by using my method, with the small hole/window in the sphere. You can constraint the environment sphere to the camera and set the Projection Map material to Global Axis ON. this will make the hole/window follow the camera while the environment map is static. I hope the attached video explains it a bit better
-
This looks amazing Mark!
-
I dont think it is possible. I wish it was. One of my "workaround" are to cut a hole in the sphere where the camera looks through. The reflections provided by the rest of the sphere is usually sufficient for most of my projects
-
Here is a legovideo I made some time ago. I used a simple material with reflection and a luminaire with superbright white exr decal and rendered with AO
The video includes the breakdown
-
Happy birthday Rodney!
-
I'm sorry for your loss!
-
Separate models as in separate .mdl files? Or just meshes within the same .mdl file that don't touch/interconnect? If they are separate .mdl files, I presume you'd be arranging them together as action objects.All panels are separate models as they would be in real life. The groove is just a simple mesh behind themAh, yeah sorry. I meant separate mesh that does not connect, not separate mdl. Though, when the model gets complex I do split it up into several mdl and assemble them in an action (action object). For this bus, the wheels are action objects
-
Lovely style as always Nancy!
-
All panels are separate models as they would be in real life. The groove is just a simple mesh behind themThanks so much, agep, for showing the detail. Learning these sorts of things will really help me the next time I model a vehicle.Also, on this bus the panels are separated with a grey groove betweenIs the grey groove attached to the panels, or just "floating" with them? In other words, if you select a point on a panel and hit the "/" key, does it select only the panel, or does it select the grey groove and/or other panels?
-
Thank you guys!
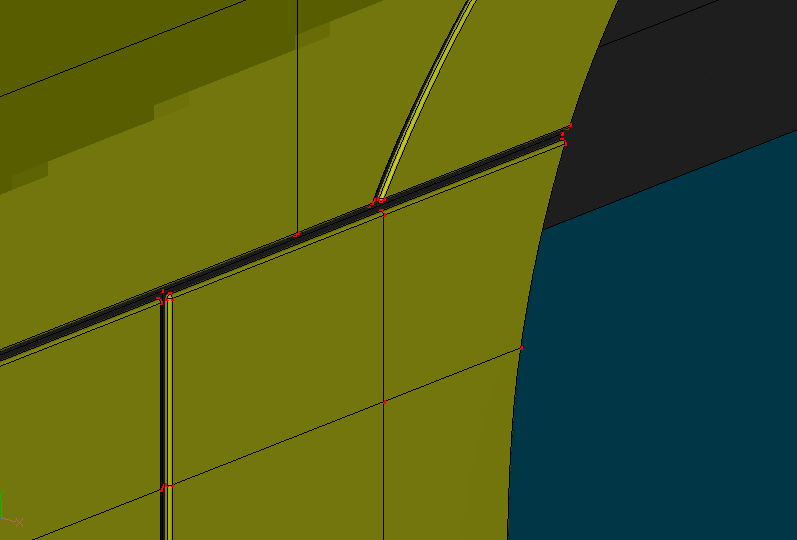
I always add edgesbtw, did you add a "thickness" or edges to the panels that make up the body? I have uploaded a screenshot where you can see a few panels meet.Also, on this bus the panels are separated with a grey groove between

-
Duo
in Ain't No Way
Very nice!
-
-
Thanks guys!
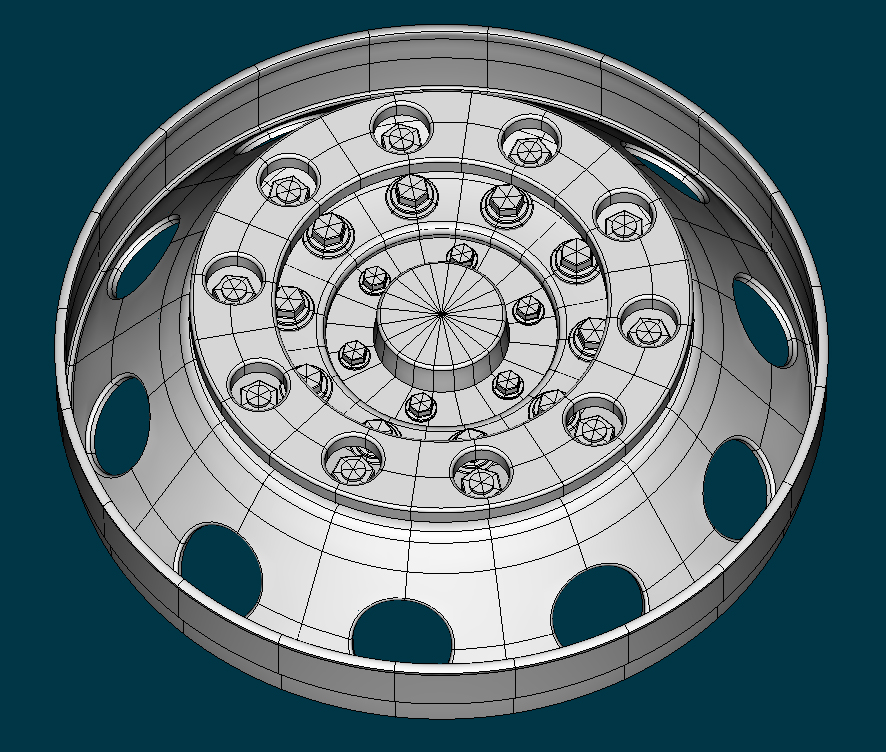
The final patchcount is 61990Do you have a final patch count?
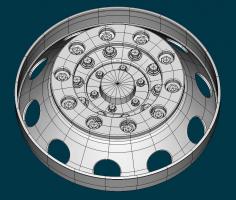
Thanks. No, this is regular AO with a HDRI environmentAmazing model... are you using jenpy AO ?
Here is a screenshot. I have also added the model so that you can take a closer lookI'm curious to see your splinage for the wheel hubs to see how you solved the problem of cutting round holes in a conical surface.Best regards
Stian


Warehouse through the years
in Work In Progress / Sweatbox
Posted
Awsome progression. Thanks for sharing