


agep
-
Posts
2,099 -
Joined
-
Last visited
-
Days Won
1
Content Type
Profiles
Forums
Events
Posts posted by agep
-
-
Thank you everyone for the kind words!
What is the patch count now, Stian?54 models with a total of 734,742 patches

-
Hi guys!
This project is far from dead, its just slow progress.
Anyway, I have finally completed the first row of statues on the west front. Two more rows to go.
I have used parts of the GenMan as a basemesh
Best regards
Stian
-
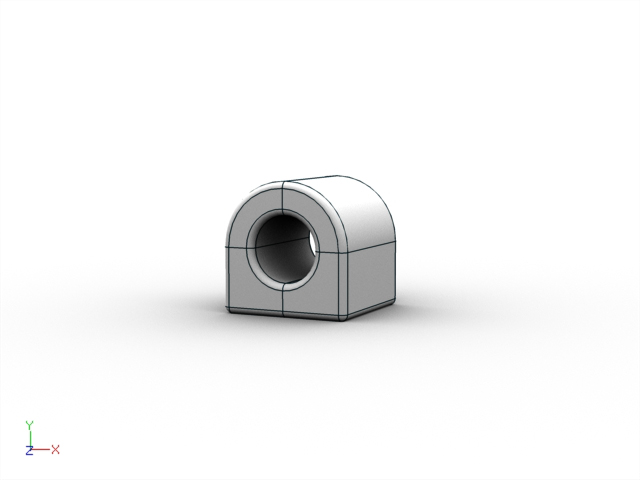
Clever solution Mark
-
Nice tracking. With shadows, this would look very nice!
-
-
Thanks
That is regular motion blur (rendered)How did you do the wheel motion blur? -
Thanks!
I wonder, how did you achieve the different linethicknesses in the wireframerendering?Not sure what you mean. Do you refer to where I have separated the car into its various parts? like the door frame and petrol cap? if so, that is because there is several splines rings around its edge, making it look like a thick spline
-
Thank you everyone!
-
Thanks Mark!
-
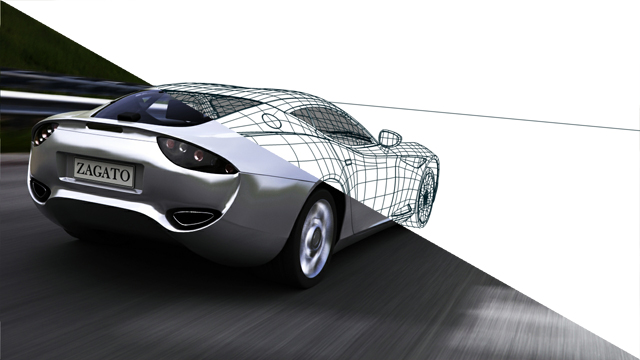
Hi
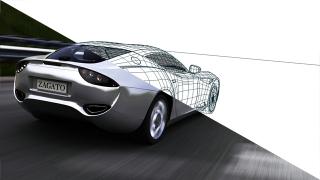
I've modelled the Zagato Perana Z-One. While modelling the car, I rendered out wireframes of the progress. I put it together and uploaded the time-lapse video to YouTube
Please take a look and tell me what you think
Best watched in HD
You might not like the color adjustments I have done to the final image, I was just experimenting, I have no knowledge when it comes to color adjustment. But I hope you like it anyway
Best regards
Stian
Small teaser:
-
Thanks for the comments!
7 hours? Did you render that on a Commodore 64?
WHAT? Do you think I am stupid? I use my Amiga 500 for rendering!
It really depends on the project, and what looks good. I often have to drag it around in the Chor too see what gives the best reflections. Sometimes it is behind the camera, sometimes I use several of them. In this case it is very big and directly above the groundThe Luminare is what I was curious about. How big was it and where did you place it?
-
Thank you for the comments!
Thanks! Just AO. Used a white luminaire to add the reflections, no other environment. I used 25 passes, AO sampling set to only 20%. The rendertime was a bit huge, about 7 hours per frame I think. You can see a wireframe of the setup in the youtube link in the first postYour render and lighting is very nice. AO, right? How many passes and how long to render? Did you use an actual environment? Would you share a wire of your chor? I'd love to see the whole setup. I did some minor post on the render though, added DOF and minor color adjusting
-
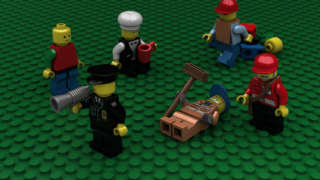
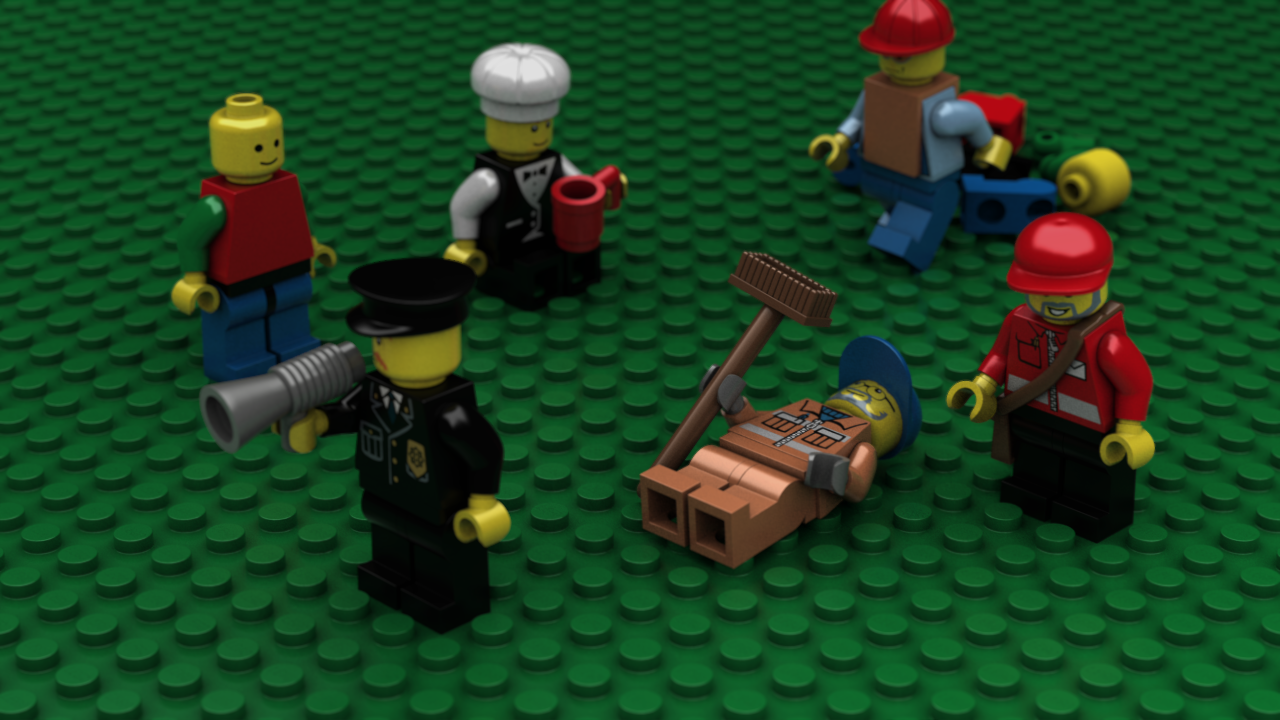
Hi friends
I have always wanted to model a Lego minifig, so I did this small project while taking a break from other projects. All the textures is done in A:M
-
Very cool!
-
As Nancy mentioned, the depth-map is created by removing all textures, materials and lights in the scene, and then render with fog. The depth map is attached. The white reflection is created by a luminaire. The luminaire is simply just a plain with light aimed at it to make it pure and bright white. The rest is regular AO.
I think it took eight hours (overnight) to render, with occlusion sampling set to 100%

-
Very very nice model pixelplucker. And thanks for sharing!
I hope you don't mind but I just had to do a AO render of it
The dof is not done in A:M though. I rendered out a depth map and used DOF PRO

-
The animals made me laugh! They are so cool looking, I love the design! Keep up the great job!
-
Very smooth animation, and nice splining
-
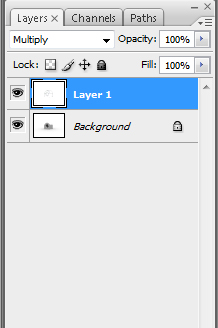
Since I don't remember exactly how I did it, I had to try to replicate the technique. I think I came pretty close.
First of all, set your spline color to black, Tools -> Customize -> Appearance -> Item -> Objects
Remove all your materials and decals from your model, remove all the lights from your choreography and set Global Ambiance Type to Global Color (this is to create the bright white render, with black wireframe. Render using Shaded & Wireframe, 16 (or above) multipass, adaptive
Then do an basic white AO render
In Photoshop, put the wireframe render on top of the AO render, set it to Multiply

and voilà!
Here is the project file with the two separate render setups, and the PSD file. Hope you find it helpful
-
Robert, I love all the experimenting you have done with A:M lately
-
Thanks guys!
The zoom function is deactivated at the moment since I have not rendered any higher resolution. When the cathedral is done, I promise I'll crank up the resolution
-
Happy birthday my friend!
-
Thank you guys!
I have been playing with flash, and made a small interactive turntable, nothing fancy.
Still a lot to do though
The file is 40MB, so be patient:)
The zoom is deactivated at the moment
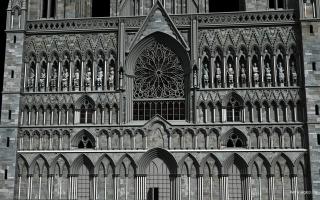
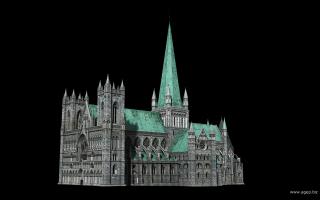
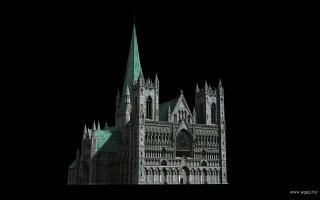
Nidarosdomen Cathedral - Flash 360
Screenshot

-
Those drawings looks fantastic Will!
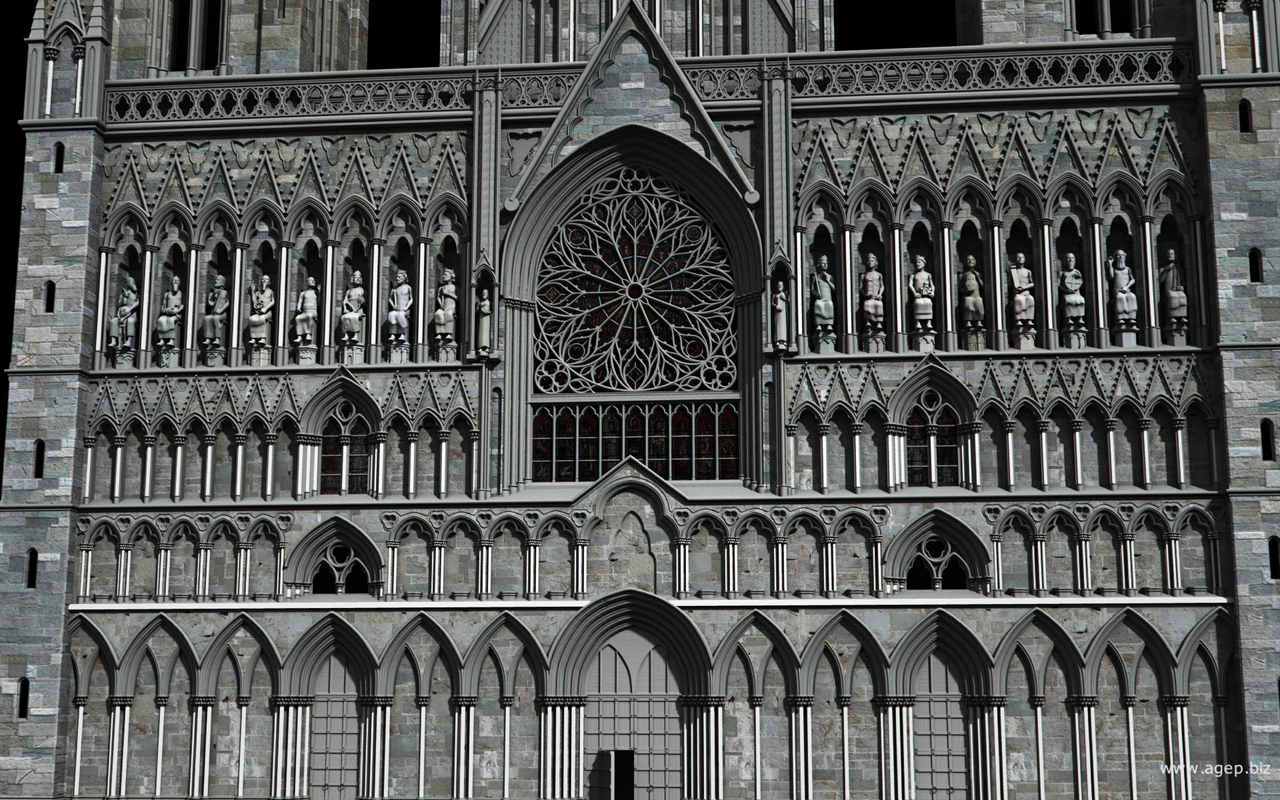

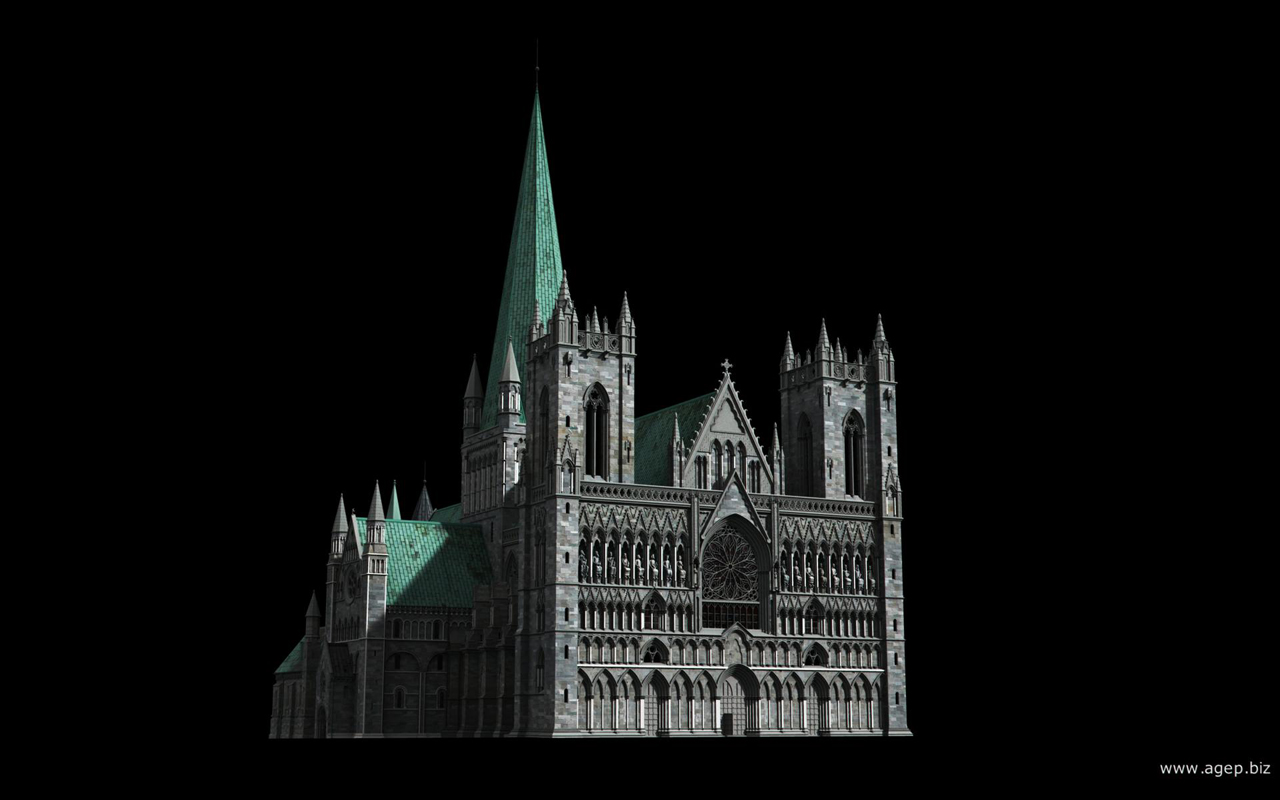


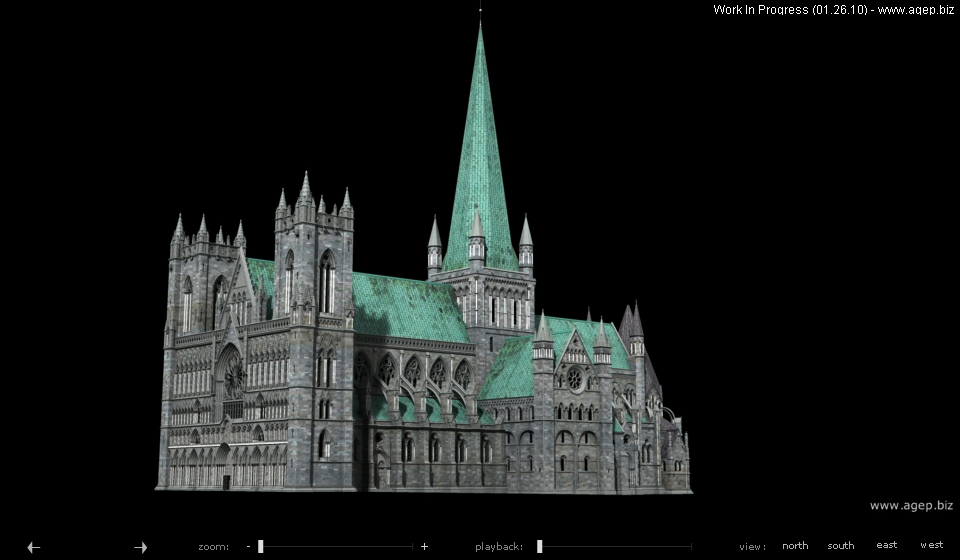
Nidaros Cathedral
in Showcase
Posted
Thanks!
Neither. I used Normal MapsThe walls are very simple textured. I made various tileable textures based on photos I have taken. These where applied to the model using BitMap Plus