JohnArtbox
-
Posts
1,303 -
Joined
-
Last visited
Content Type
Profiles
Forums
Events
Everything posted by JohnArtbox
-
Fusion 5.1 directly supports AM OpenEXR files. Add a loader and then click on the format tab. Under the RGBA tabs select the channel that you wish to use EG AmbienceR, AmbienceG, AmbienceB and AmbienceA. For the next layer of the OpenFX Tab add another loader and then select the Keylight layers in the same manner. Works like a charm.
-
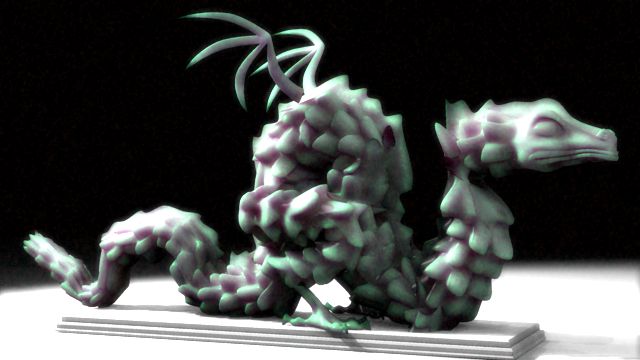
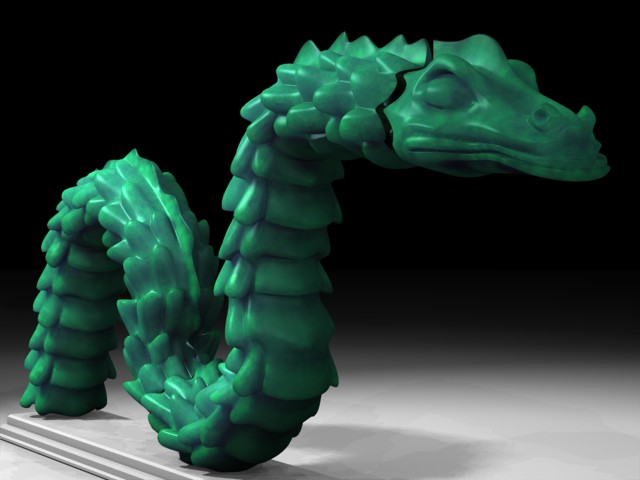
Small update, I've done some work on the back legs and added skeletal wings(mainly to try and work out size and placement). There's quite a few deformation problems from the bones, but it's early days and I'll fix those once the basic form's done. Enjoy Some minor image tweaking done in AM Composite, Exposure, Bloom and Film Grain

-
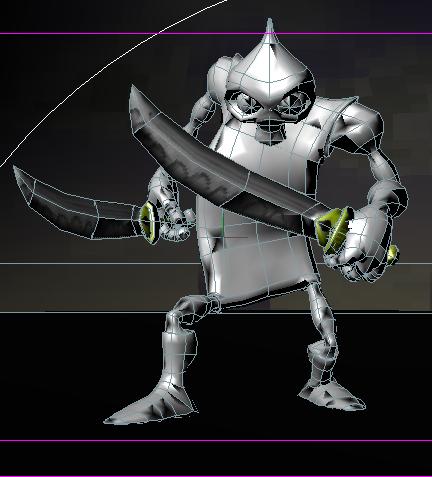
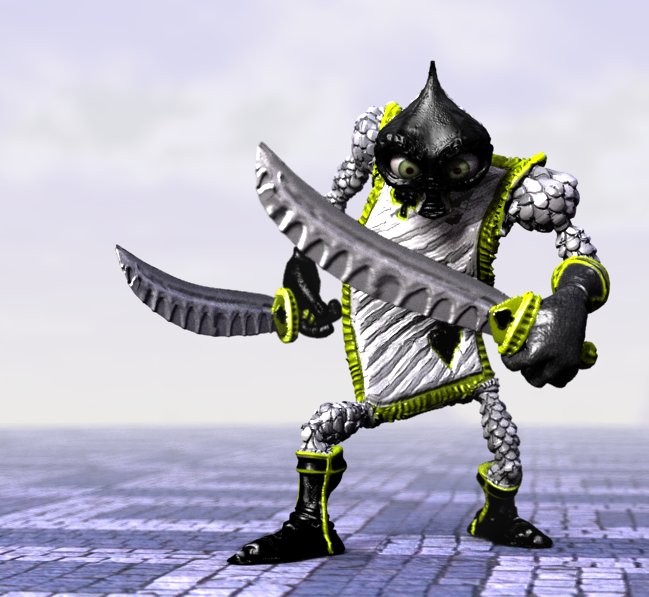
Quickanswers Totlover:Thanks Colin: All modelled. Here's the wireframe Al: Here's a series of renders with different options Nancy:Legs, wings and tail eventually.
-
The SSS thread in the main forum raised the classic Jade Dragon SSS benchmark and I needed to take an evening away from rigging and animating, so here it is. I really like this new feature . It's easy to use, relatively quick to render and allround pretty damn impressive. Eventually, I'm thinking I'll add the classic display case surrounds and see how far I can push it as the SSS feature evolves
-
Just thought I should post something... This is a small background test to see how some of the elements mix together, and to introduce ambient occlusion into the mix. Because the end use is for animation, I've included a small test animation. test.mpg To all those who've enquired, it's still happening...enjoy
-
I've attached a couple of renders the first is the base mesh while the second is the base mesh with displacement Dre4mer : Are you using AM13? The image takes advantage of its vastly improved displacement capabilities. [attachmentid=20150][attachmentid=20151] and to show what the decals look like: Colour [attachmentid=20152] Displacement [attachmentid=20153]
-
Thanks all... Robcat:All I can think of is that the screenshot's from my tablet pc which has very limited realtime 3d capabilities. The render isn't creased at all. Gazz: one keylight and ambient occlusion with image based lighting. It's a bit lazy, but it provides a simple effective illumination. Dre4mer: The model used 3dpainter's automapping and was painted with projection paint. I haven't noticed the distortion...do you have an example?
-
Thanks for the comments ... Serg:it's all displacement, the model is quite simple. [attachmentid=20096] I rendered out a turnable animation to give an allround vview of the model.[attachmentid=20097] CardKnightRotate.zip
-
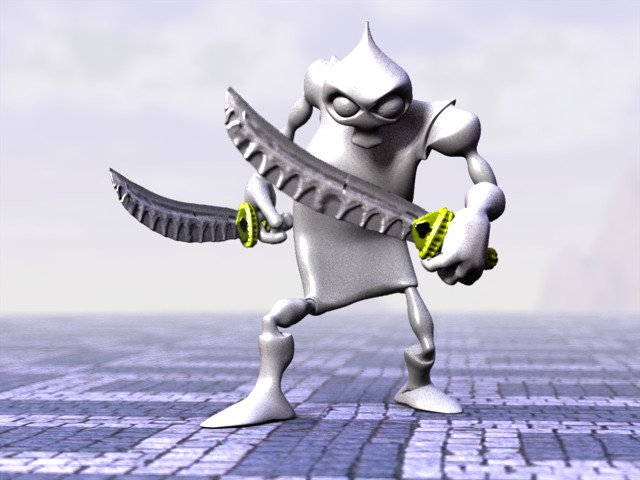
It's been a while, but I had this image of the playing card knights from Alice in Wonderland, and I wanted to put 3D Painter through its' paces. I have to say I really like 3D Painter and its integration with AM. That plus the fact that there's a new version of Mirrorsplines for AM13 really made my day. And when did Hash add the mirror all smartskin option? It's really cool too. Currently the model only has a color and a displacement map, I'll probably add a reflectivity map tomorrow.
-
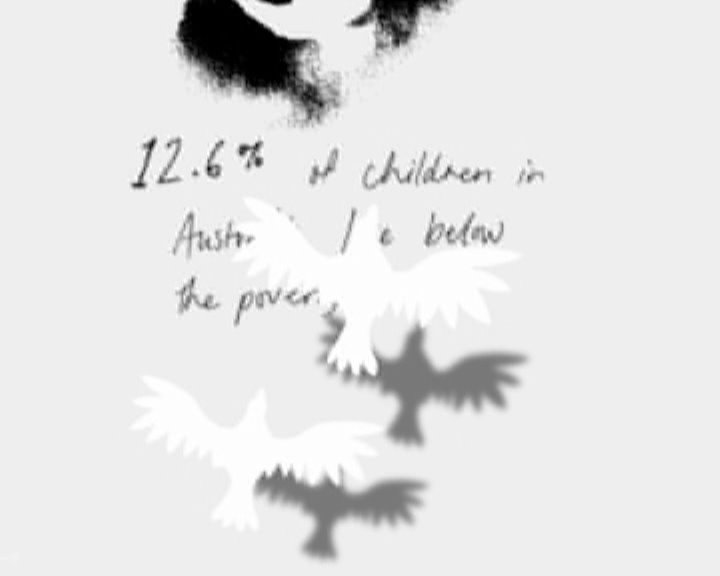
Thanks for the comments... You're right about the legibility of the text...but it was taken from a book given to everyone who attended the dinner it was shown at, and was the subject of a predinner talk. So I couldn't/didn't want to steal the thunder from main event. The video was just to be played as people sat down at a fundraising dinner, if they paid attention, they got glimpses at most. It was fun to do....but I imagine most of the invitees where probably introducing themselves and/or catching up with friends. As for the direction, I just couldn't train the birds to fly backwards
-
I just finished a small presentation for the Wesley Mission. Their major symbol is the dove so I built a simple 3d dove as a unifying element. The project only had a two day turnaround, so I rendered it in realtime shaded mode and then used Mirage to add drop shadows. I also rendered the doves to load into Mirage's particle engine for the transitions. [attachmentid=18054] SOMVideo Unfortunately it's not streaming so it'll take a while to load (5mb), or you can right click and save the swf.
-
Couldn't render this scene for a while. but when Yves added the ability for zbuffer shadows to intereact with cookie cut map transparency I pulled it back out and rendered a small animation for my demo tape. [attachmentid=15939] homeOfficeA.mov
-
Moving right along... I've still got a fair bit of work to do...but this is probably it for a while. Off the top of my head I need to animate his face, fix the tomato when it gets hit by the blade, get a better background, speed the timing up a bit. [attachmentid=15900] roman.mov
-
Final...at least for the moment [attachmentid=15887] The groundcover is a tiling cookiecut texture on planes with a few real 3d models in the foreground stampedeB.mov
-
New groundcover [attachmentid=15814]
-
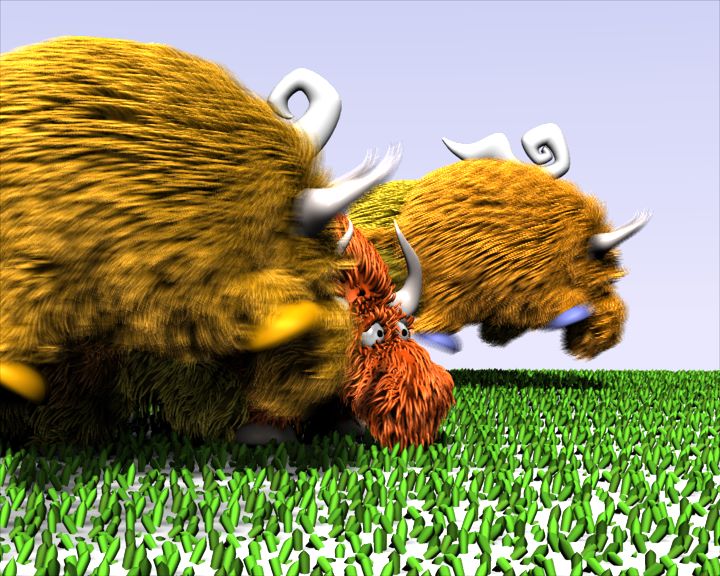
I ditched dynamics on the fur as too hard for the moment. Thanksfor the information though guys. Here's the most recent render.. At the moment I'm changing the groundcover to imageplanes with cookie cut maps because the fur takes a long time to render and isn't really adding enough to justify the increase. A quick test takes my rendertime from 20 minutes a frame down to 5 minutes without the grass material. [attachmentid=15789] [attachmentid=15788] stampedeA.mov
-
Hi all, I'm trying to render a scene with some furry animals stampeding. In the initial test renders the fur goes crazy stretching beyond it's length and penetrating the kows's bodies. I've tried setting dynamic sample at various figures up to 2048 and all of the different dynamic types without success. Setting the dynamic type to none removes the hair stretching, but doesn't fix the hair penetrating the skin.....has anyone come up with a recipe for hair collision detection that works? I downloaded the hair tech talk which unfortunately is a comprehensive reference to everything but collision detection. [attachmentid=15598] stampede.mov
-
Are you using the latest version of 8.5? if not you can download it from ftp.hash.com/pub/updates. 8.5 was one of the most stable AM versions by the end of its evolution. For something like this an image and a wireframe make it easier to understand.(Edit:Damn, Eric beat me to it ) For example if the cube has one patch on each side,then you may have more luck with a cube with 4 patches a side. Or try the planar projection map and see if that produces the same problem. If not use that. Good luck
-

Railroad Station Waiting Room
JohnArtbox replied to R Reynolds's topic in Work In Progress / Sweatbox
Neat project Roger...your attention to detail is fantastic as always. -
quick animation trial..first pass only lots to do. He will actually kick a tomato(about a quarter his size) at the peak of the jump. [attachmentid=15003] Mike: not a short...some shots for the demo tape and maybe a spec ad. Real world integration and camera tracking is planned. Dimos : I haven't done much hd, but if you're willing to live with shadow maps and faked reflection, short render times are possible. Compositing and breaking your chors into layers will help tremendously. Dan: the breastplate is a combination of colour and bump decals combined with an environment map material. The skin's an aesthetic decision...plus I was seeing how far I could use environment maps roman.mov
-
Somehow things are getting a bit blurry?
JohnArtbox replied to Eric2575's topic in Work In Progress / Sweatbox
The problem with the incorrect back shadow usually occurs when an object is not double sided/closed. If your cupboard already has a back, I can't help -
Dimos Stian..great model, lots of character and a lovely cartoony feel. Look forward to seeing more
-
Thanks guys, you're good for the ego Dimos: From memory PAL res was taking between 15 and 20 minutes with reflections & soft shadows. Not really a long time, but enough that I started to look for ways to cut it down. The turntable animation is set at 400x400 uses no procedural materials, has no reflections and uses zbufferred lights, although I did add Yves Skin Shader. It rendered at 25 seconds a frame. For anyone interested in the light setup it's my simple default 3 point light setup(I posted it in the default lighting thread). Luckbat: For a while I've been leaning towards the idea that a renderer can be used like a paintbrush. Instead of the slavish hunt to duplicate reality, use models and textures to create 3d sketches. Forget radiousity and encompassing reality, instead embrace shadow and environment maps, textures, painted elements, compositing and stage design.
-
Rendertime was killing me(lots of soft reflections) so I had to rethink my setup. I'm stripping everything down, no more procedural materials and reflections, everything is done with decals and environment maps. [attachmentid=14843] romanA.mov
-
ZachBG's Awesome Olypic Animation
JohnArtbox replied to Atomike's topic in Work In Progress / Sweatbox
Zach that was great