John Bigboote
-
Posts
6,562 -
Joined
-
Last visited
-
Days Won
58
Content Type
Profiles
Forums
Events
Everything posted by John Bigboote
-
Welcome!
-

IBL- Image Based Lighting question on how-to...
John Bigboote replied to John Bigboote's topic in A:M Rendering
I shall test that, then. I sort of got the look I was after (moving ibl lights) by using an image and keyframing it's 'azimuth' setting in the chor dialogue. Another 'forget about it' feature when using IBL lighting... Sub-surface scattering (SSS) even if you have minimal IBL amount and plenty of scene lights. -
IBL- Image Based Lighting question on how-to...
John Bigboote replied to John Bigboote's topic in A:M Rendering
I've noticed... the IBL feature does not seem to support an imported image sequence. -
Community Model- AManda
John Bigboote replied to John Bigboote's topic in Work In Progress / Sweatbox
Rodney, no... just 1 light in that scene... renders quick at just under 3min per frame @1280X720.... an inverse(negative) white light would render as eminating darkness... I suppose a red light would be green in inverse-land. Negative lights are a powerful feature I stumbled on by chance! Here is an animation! Hit Cntrl_L in quicktime to make it loop. AMandaY_LOOPER.mov -
Community Model- AManda
John Bigboote replied to John Bigboote's topic in Work In Progress / Sweatbox
More toying with IBL renders... the 1st image uses the image I posted as the lighting source, the 2nd has the image used as fog is lighting the scene, both have 1 additional light near the camera with shadows and specularity on. I do not know where the green fill is coming from on the 1st image...
-
IBL- Image Based Lighting question on how-to...
John Bigboote replied to John Bigboote's topic in A:M Rendering
The ground is the standard ground plane with roughness and size added... the background is fog with camera color set to black. AManda has ignore fog set to ON. I intend to upload the mdl and prj to the AManda forum whence I finally am satisfied with an animation render loop. You have me wondering about the ibl/ao relationship... i might need to do some tests to see if it really works as you mentioned, and then to see if I can somehow speed-up the render. If I was only doing a still image I wouldnt care, but I need to chugg-out 300 frames (or more) overnight (using 8 NetRender cores) and cant abide by more than 5min per frame @1280X720 -
IBL- Image Based Lighting question on how-to...
John Bigboote replied to John Bigboote's topic in A:M Rendering
Not so sure... I have it working without A:M's AO feature... which is SOOOO render costly. Here is a sample frame from AManda, rendering quite swiftly... I have the IBL set at 80% and a light off near camera at 20% and adding shadows and specularity. I am using the SSAO feature, but I don't think it needs it for the IBL to light the scene. Learning a LOT, I like IBL! The 1st image (eyes closed) Has no AO of any variety, yet the IBL still lights it up nicely... and you can see what the SSAO brings to the table, defines details like the hair nicely. (I was also playing with DOF in the 1st image, 5 passes- the 2nd image is the standard non-multipass renderer, much quicker.)
-
IBL- Image Based Lighting question on how-to...
John Bigboote replied to John Bigboote's topic in A:M Rendering
I continue to struggle with the feedback on A:M's IBL feature, I find it best to make changes and then save and reopen the project. Also, there is an 'exposure' setting that helps to push-up a little bit... default is zero, but somewhere around 1 to 2 pumps-up the image's lighting value. -
Community Model- AManda
John Bigboote replied to John Bigboote's topic in Work In Progress / Sweatbox
Progress on hair. AManda_Loop1.mp4 -
I've been known to 'embellish' a story as time goes on... people will notice, 'every time you retell that story- the water gets hotter!"
-
Welcome back MrJeff! Adobe products are the way to go, editorially- these days. I need to re-discover Adobe Animate.
-
Community Model- AManda
John Bigboote replied to John Bigboote's topic in Work In Progress / Sweatbox
Rodney- I think Martin rewrote the code(or had one of his guys do it) around version 12 or 13. The new hair was supposed to be better ar collision-detection... which was something I was very excited about. If you look at the image of the AManda with the hair resting and her shoulders and not passing through her shoulders That is the look I have strived for. Rob- I think there is a myriad of uses for direction mapping. One thing that I did learn in my tests. Is that the color map affects the base root Of the hair and that as the hair gets longer and further away from the base the dynamics take over and anything can happen. But having that initial direction can be instrumental in getting the look you are after. -
Community Model- AManda
John Bigboote replied to John Bigboote's topic in Work In Progress / Sweatbox
Awesome- Thanks Rodney- I'm OFF! EDIT- I see it is a rather old demo... uses the 'old' style of hair... hope it works with today's hair. (did you use the new hair for your test?- I'm sure you probably did...) EDIT-image- WHOA! Look at all the properties the old-style hair could have image-controlled!
-
Community Model- AManda
John Bigboote replied to John Bigboote's topic in Work In Progress / Sweatbox
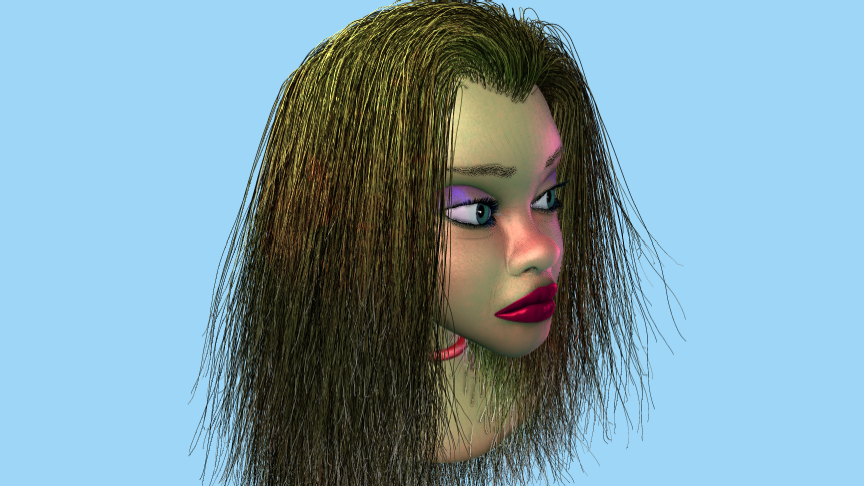
I am getting really good feedback from the image-based hair controls for 'density' and 'length', and I am using a different method for 'color' (the hair's color property offers the ability to change color and other factors such as ambiance, specularity, variation amount... down the length of the hair strand- which is really very cool and you can see it in the image above where the hair's roots are darker then get blonder as they lenghten...) These 2 controls work off a simple greyscale image, for length black means short and white means long and for density black means no hair and white means full hair. BUT I can not get a handle on the 'direction' option. I've tried greyscale and a 'normal map' type color image, and experimented with variants of both but can not seem to determine what makes a hair go off in a predetermined direction. Anyone have any input on how this might work? ALSO- the key I am finding is to test-test-test, with full animation feedback. I am using my NetRender WITHOUT baking the hair at all, and it is working fantastically. -
Community Model- AManda
John Bigboote replied to John Bigboote's topic in Work In Progress / Sweatbox
You can tweeek endlessly when it comes to hair! Thought I would post a WIP, this is a fun project to have going on in the background. In this image, you can see the force which is keeping the hair at bay from the forehead and face.
-
Hi Silvien- welcome aboard!
-
Community Model- AManda
John Bigboote replied to John Bigboote's topic in Work In Progress / Sweatbox
Looking good. Next is to experiment with the 'direction' feature... LOTS of tweeking has been done, but I will provide the .prj which will let you peek behind the curtains if there are any questions...
-
I've seen this... are you using dynamics in the grass? Next time you see it try this... give the spacebar a firm 'whack', this tells the particles to re-calculate and typically sorts it out without jumping thru further hoops. Your grass is just A:M Hair, right? (or is there a grass feature I am unawares of?)
-
Community Model- AManda
John Bigboote replied to John Bigboote's topic in Work In Progress / Sweatbox
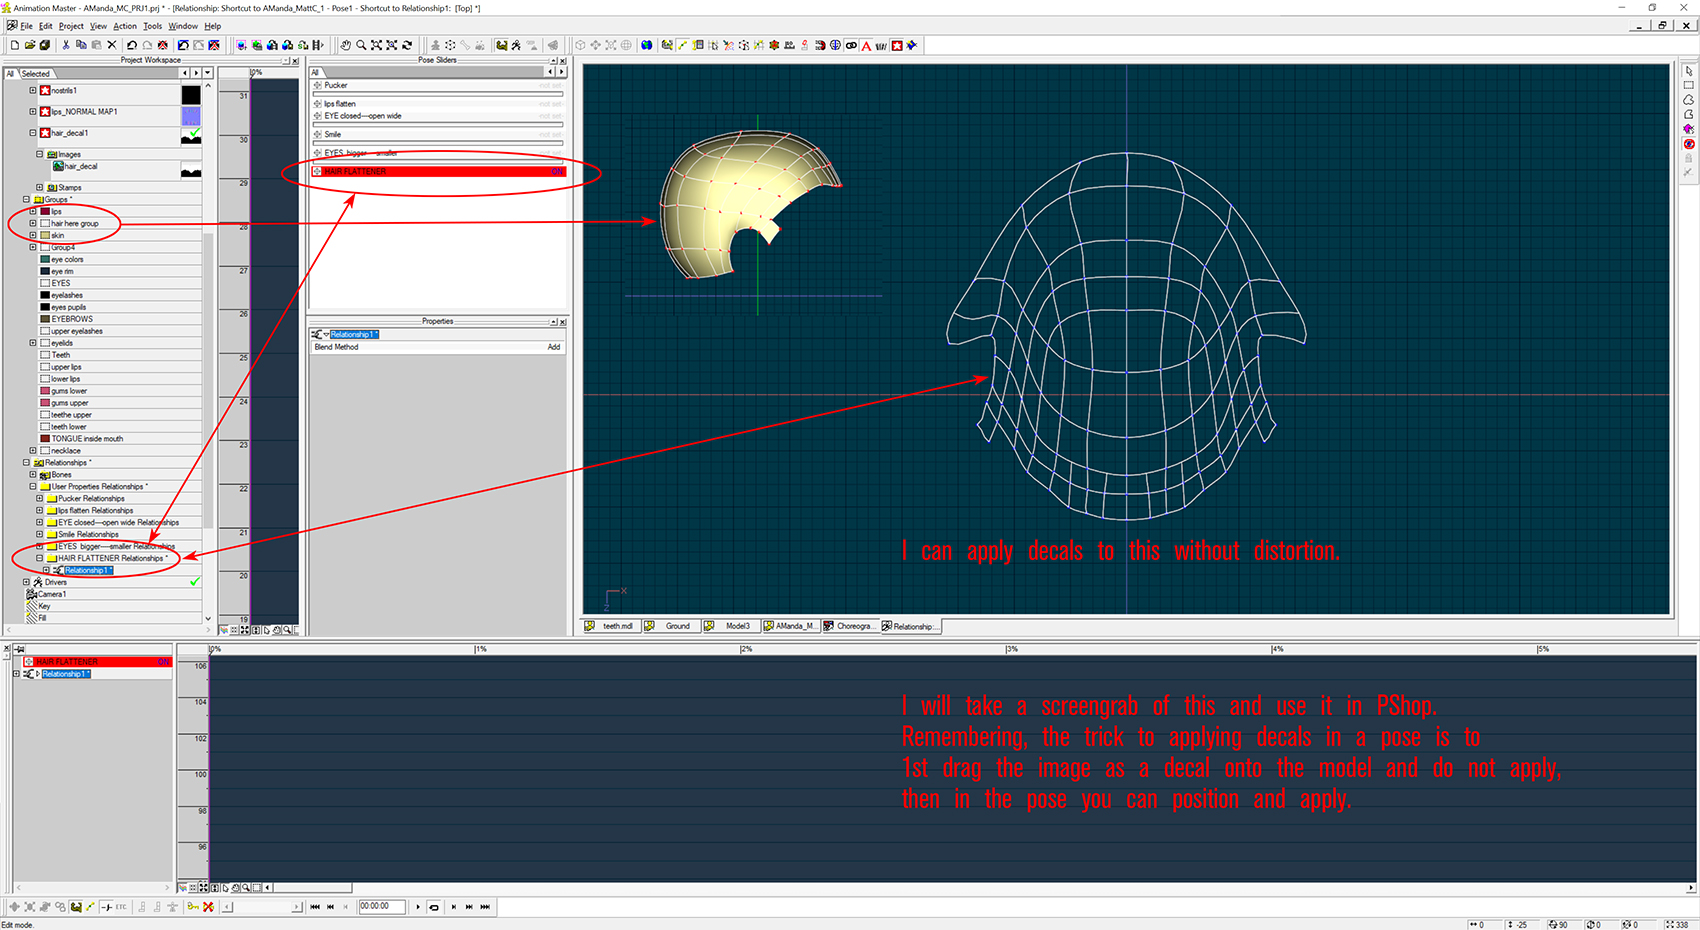
This is the Reader's Digest version of UV mapping in A:M... rather simple. I selected the scalp group (I had named 'hair-here'...) hid everything else and made a new pose, named it 'HAIR FLATTENER' and did a distortion, and scale operations and then played with bias handles and moved CP's as I saw fit until I got a nice flat mass to apply decals to.
-
Community Model- AManda
John Bigboote replied to John Bigboote's topic in Work In Progress / Sweatbox
AND- as predicted, the hair went caber-wonkey upon render with the simple head move. Not too bad...(movie file attached) it is mostly a cavalcade of hair-mass falling forwards as the head tilts and overpowering the force- I am not sure the force is the way to go, I have experimented with them in the past and wound-up with models that have 4-5 forces attahed to the head and I am forever adjusting magnitudes... so- I will experiment with these image-driven hair properties... length and direction. Now- how would the direction option work? I imagine like a normal map where various colors shade the normal in differing directions? FIRSTLY... I will need to make a pose where I flatten my hair group of patches so that I can properly UV these images I will be making in Photoshomp. NEXT- our AManda will be needing a body... anyone? AManda4.mp4 -
Community Model- AManda
John Bigboote replied to John Bigboote's topic in Work In Progress / Sweatbox
SO- when making a hair decal- I know that an alpha channel is not needed and that white means hair and black means, no hair... so with length I suppose it would follow suite where... black means very short hair and white is very long hair and the shades of grey in between are the intermediaries? I will investigate this tomorrow! -
Community Model- AManda
John Bigboote replied to John Bigboote's topic in Work In Progress / Sweatbox
OH YEAH! Really good idea there, Sarge! -
Community Model- AManda
John Bigboote replied to John Bigboote's topic in Work In Progress / Sweatbox
Thanks-we'll see if it all flies caber-wonky in animation.... the trick here is a FORCE on the hair... I finally nudged it's magnitude all the way up to 50,000... it is constrained to her head-bone to move with it... so in the 2nd picture you can better see the 'widow's peak'... ALSO- you will see in the animation that I added your teeth model to her with some gums and a tongue. -
Community Model- AManda
John Bigboote replied to John Bigboote's topic in Work In Progress / Sweatbox
OK--- did a little work on hair today... still a lot to tweek. I will let a test animation render overnight. I dug-up this old thread where I learnt to use an image to control hair placement, giving AManda a nice widows-peak that does not rely on patches... https://www.hash.com/forums/index.php?showtopic=34198&hl=hair+decal&do=findComment&comment=290226
-
Getting AimAt and Path Constraints for Camera in Chor
John Bigboote replied to RS3D's topic in Open Forum
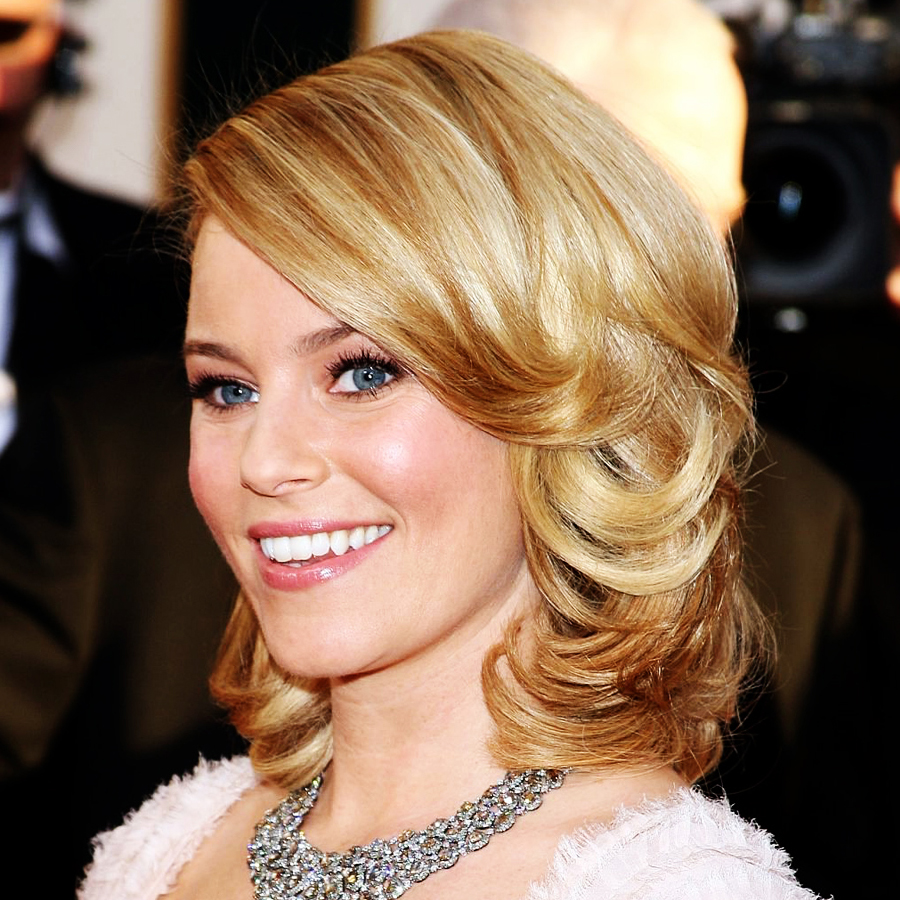
HEY! Amanda is looking good! Are you using the SSS? Y'know, for that action you could have left the camera alone and just rotated the model- but your way you get to see the 360degree lighting... very good! I am hoping to get a little time to give the girl some A:M Hair... I am looking at various Elizabeth Banks hairdo's for reference...