mtpeak2
-
Posts
5,719 -
Joined
-
Last visited
-
Days Won
1
Content Type
Profiles
Forums
Events
Everything posted by mtpeak2
-
Hopefully this wasn't too difficult for you. If you have any questions or problems with a particular step, please post in the corresponding thread. Thanks. YOU CAN NOW ASSIGN AND WEIGHT CPS IN YOUR MODEL
-
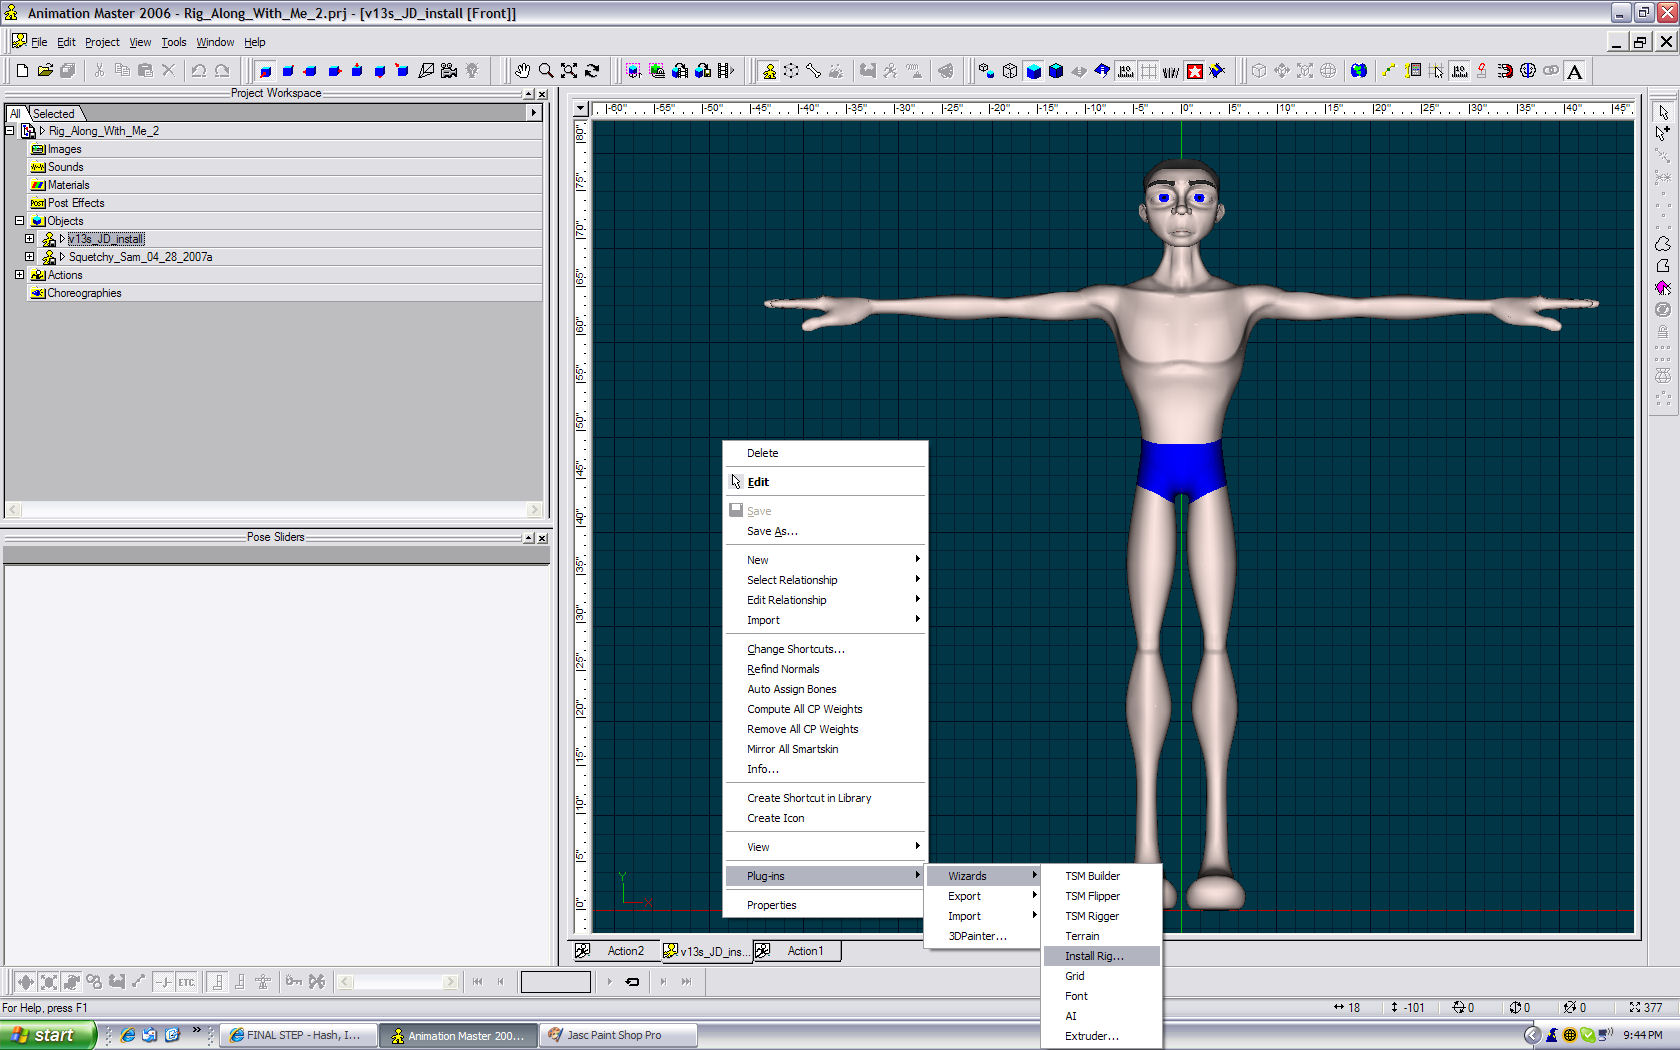
Right click in modeling window and choose plug-ins>wizards>install rig

-
Before running the "install rig" plug-in, this is also very important. Go to bones mode and translate, in the Y and Z axis, the "FACE interface-Master" bone using the translate manipulator, while holding down the control key, to position the interface infront of the face. Note: I did not add this to the install process, because I didn't want it in the way when of assigning cps to the face. Unfortunately, this has to be done before running the plug-in due to constraints and parenting in the rig. I will try to find a way around it. Save model.
-
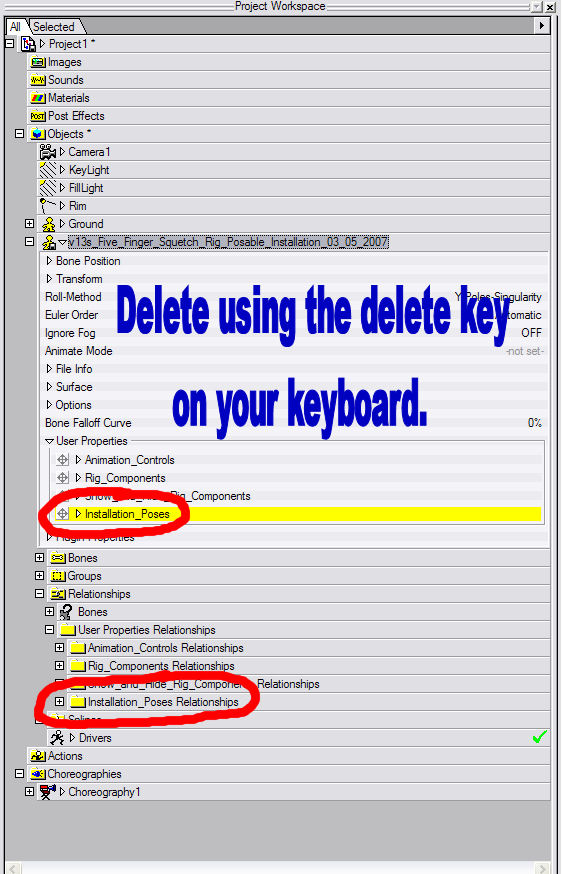
Start a new project and open the "JD_export" model. Delete the installation pose folder from the user properties and the relationship folder of your model. Save model.
-
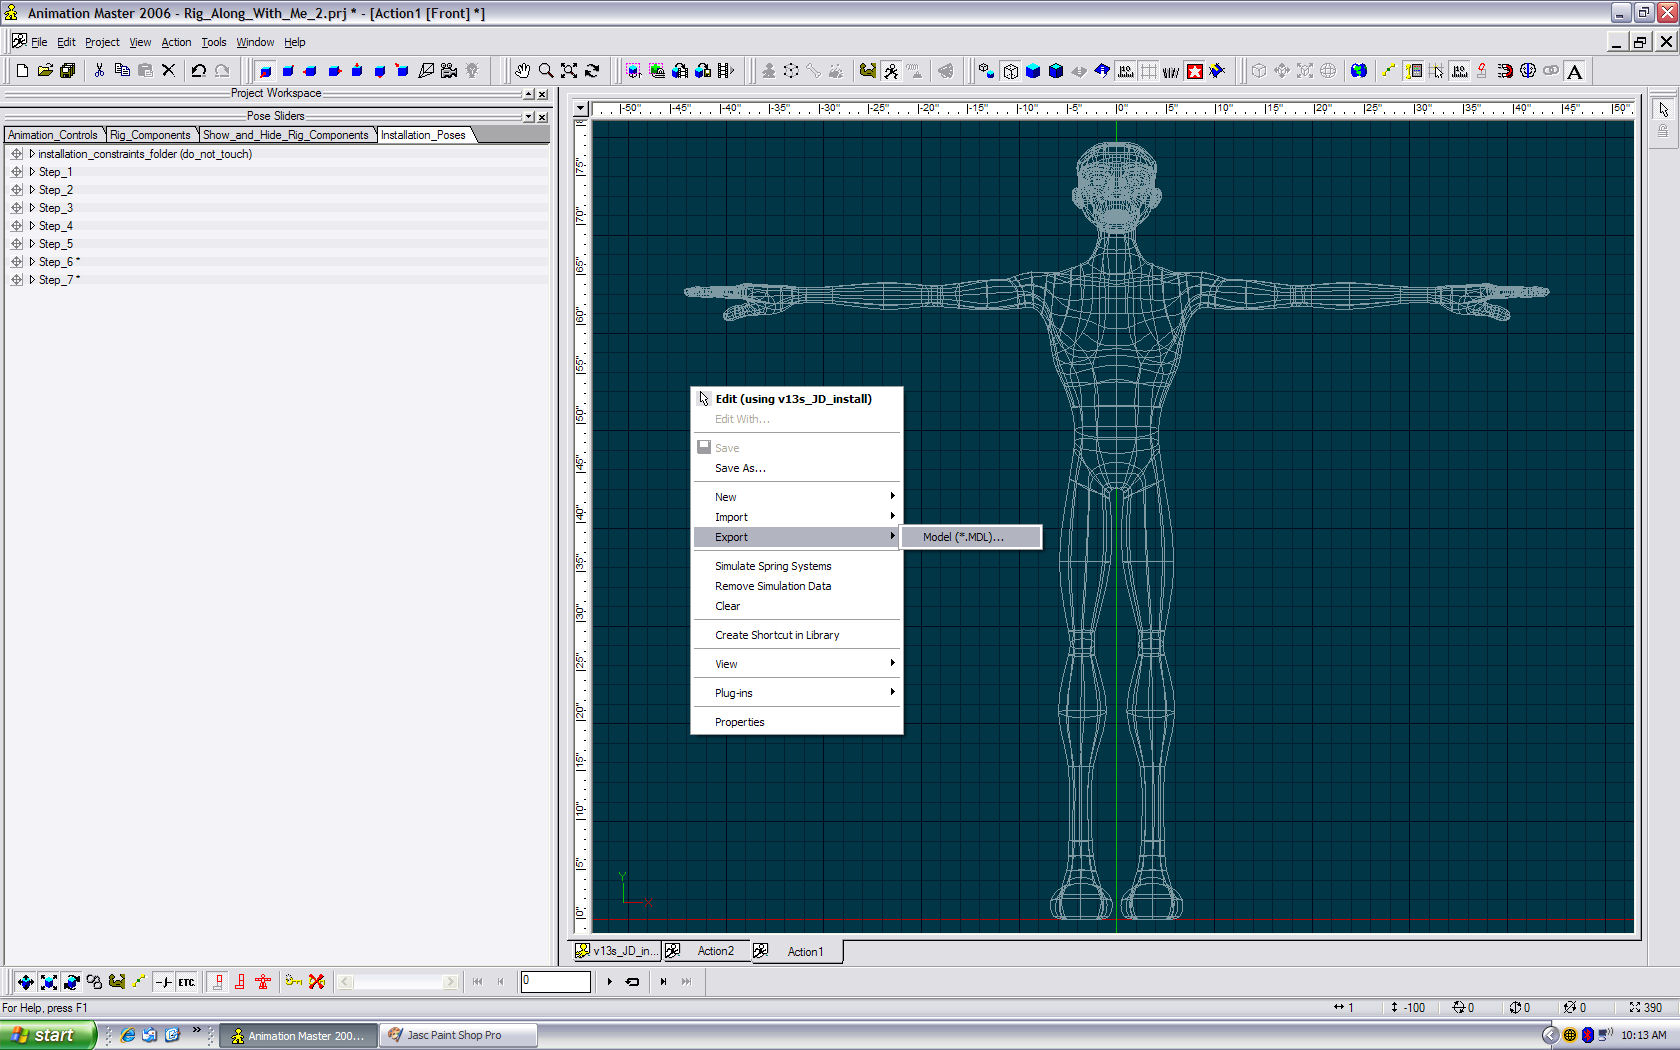
After resetting the pose, right click in a blank space of the action window. Select export>model, and save the model as "JD_export".
-
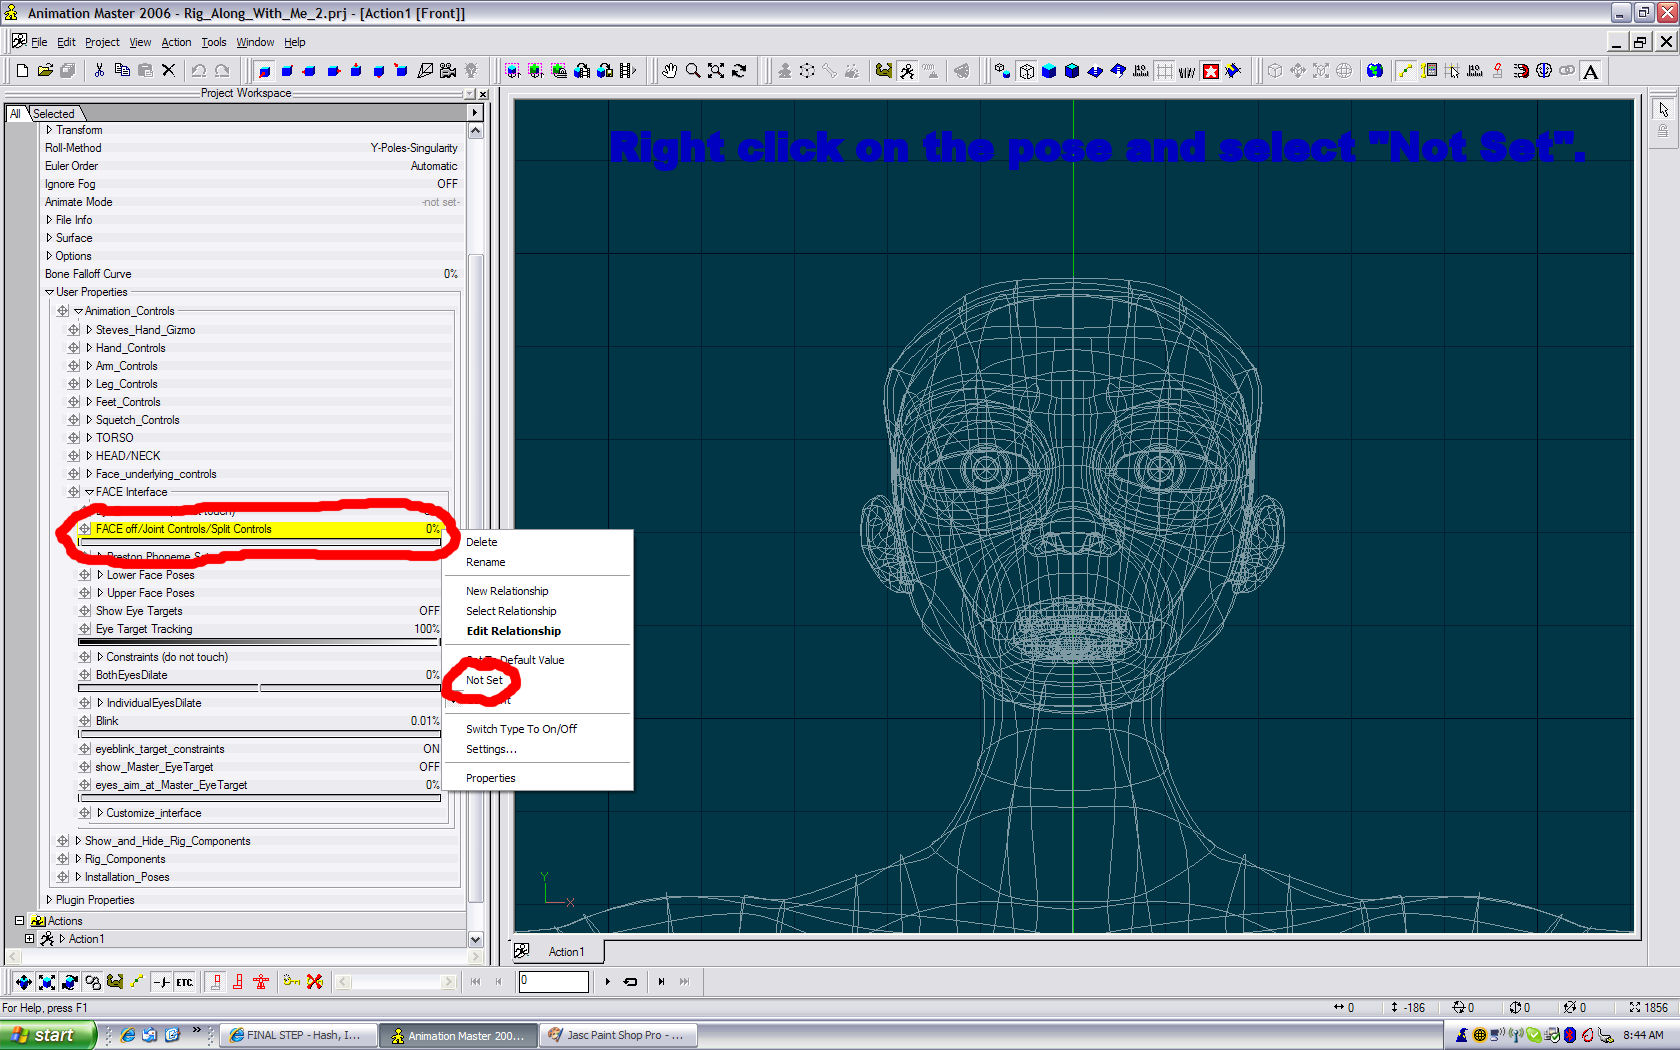
Before exporting your model, Go to the "Animation Controls" pose folder>"FACE interface" pose folder, in the models user properties. Right click on the "FACE off/Joint Controls/Split Controls" pose and set it to "not set" and hit the spacebar to refresh the screen in the action window. This is very important.
-
Boy that was easy. Save project. ONTO THE FINAL STEP
-
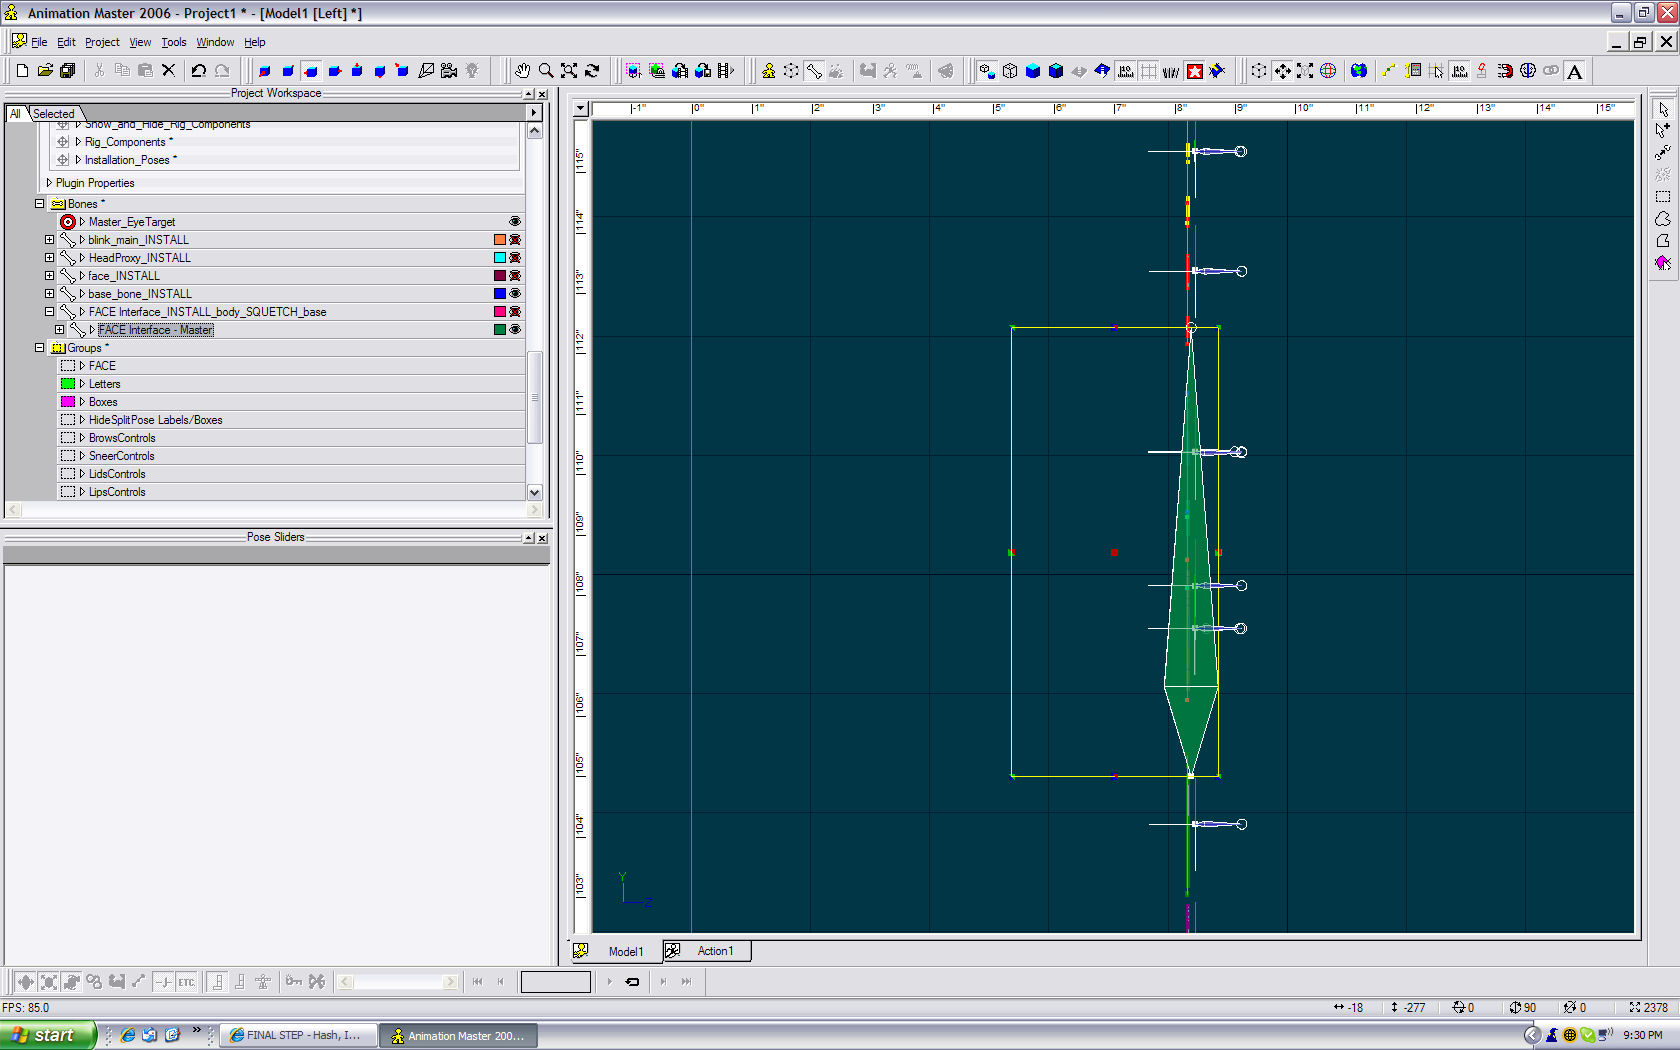
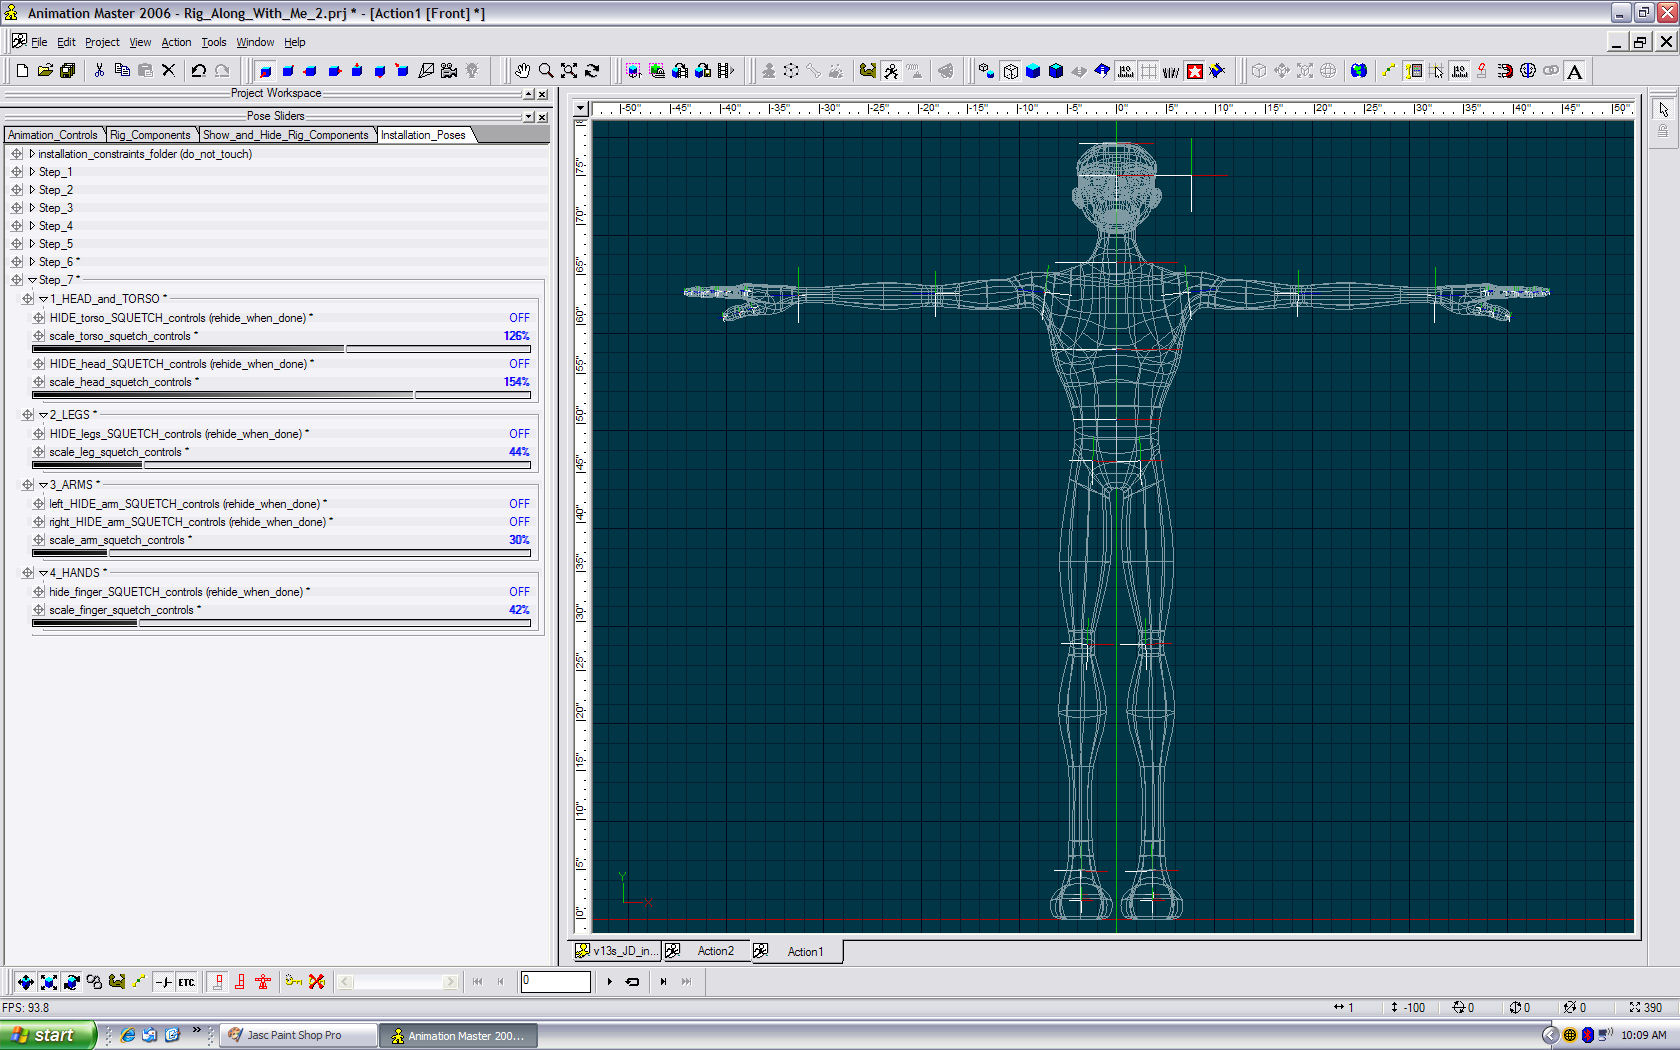
Scale all squetch nulls to the desired size.
-
Save project. ONTO STEP 7
-
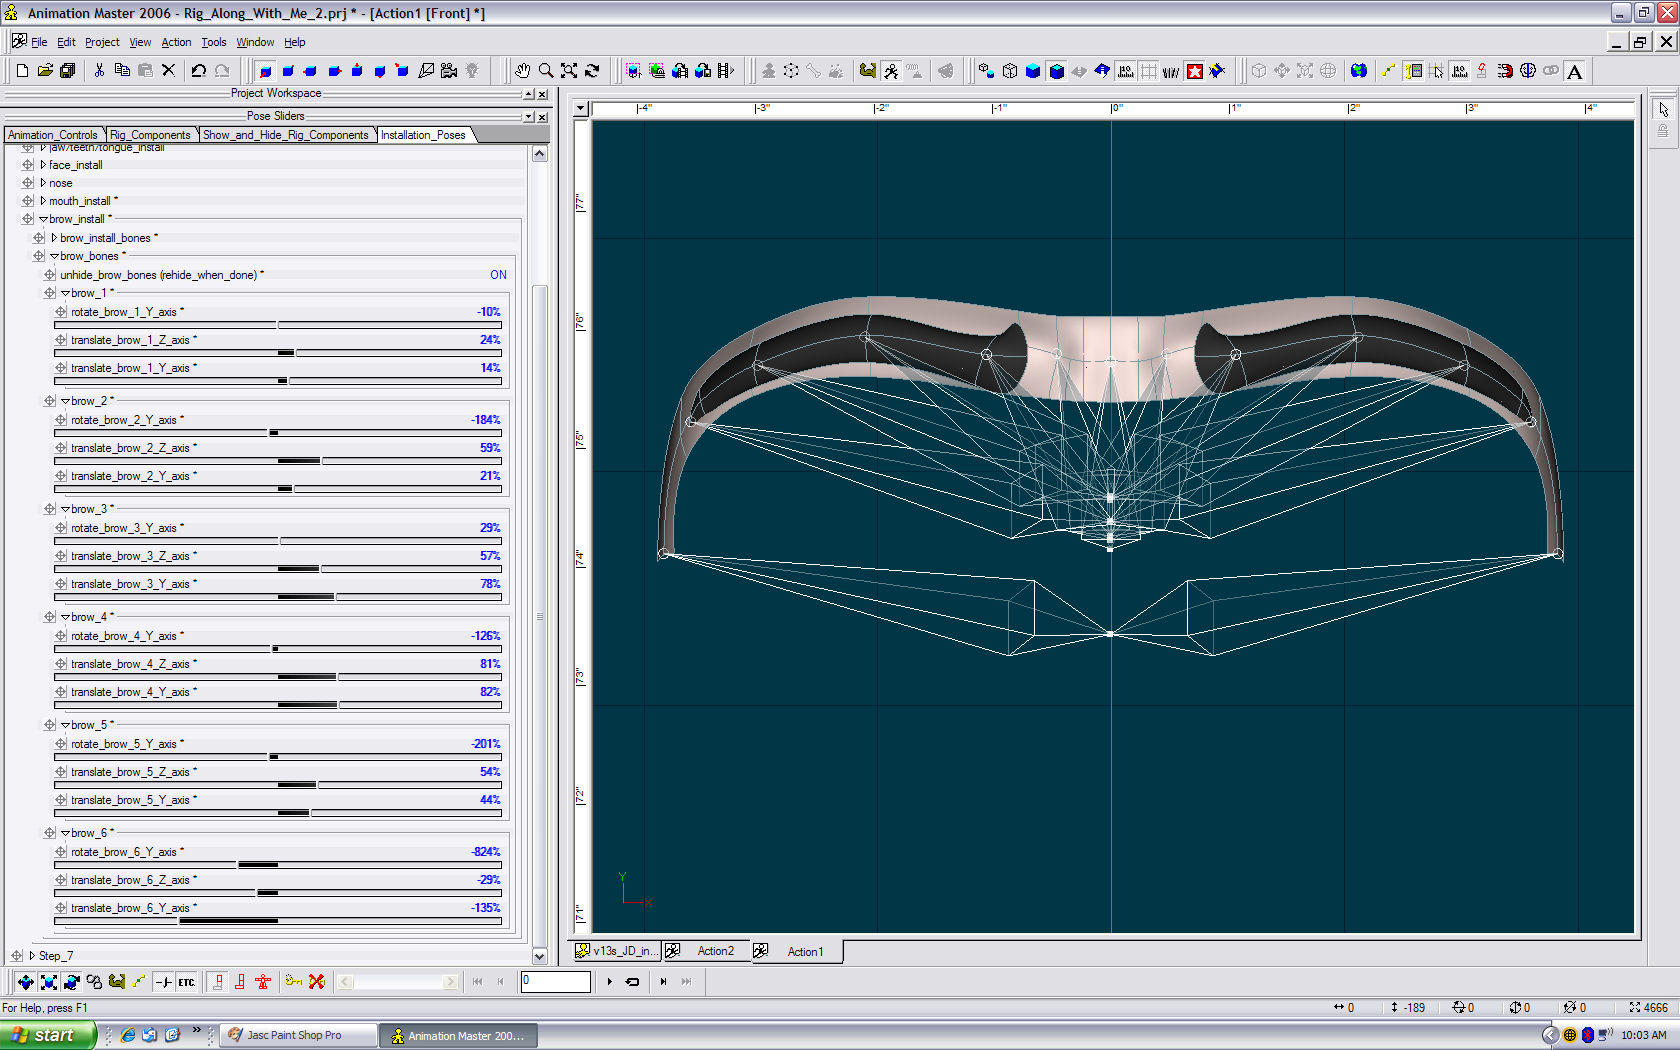
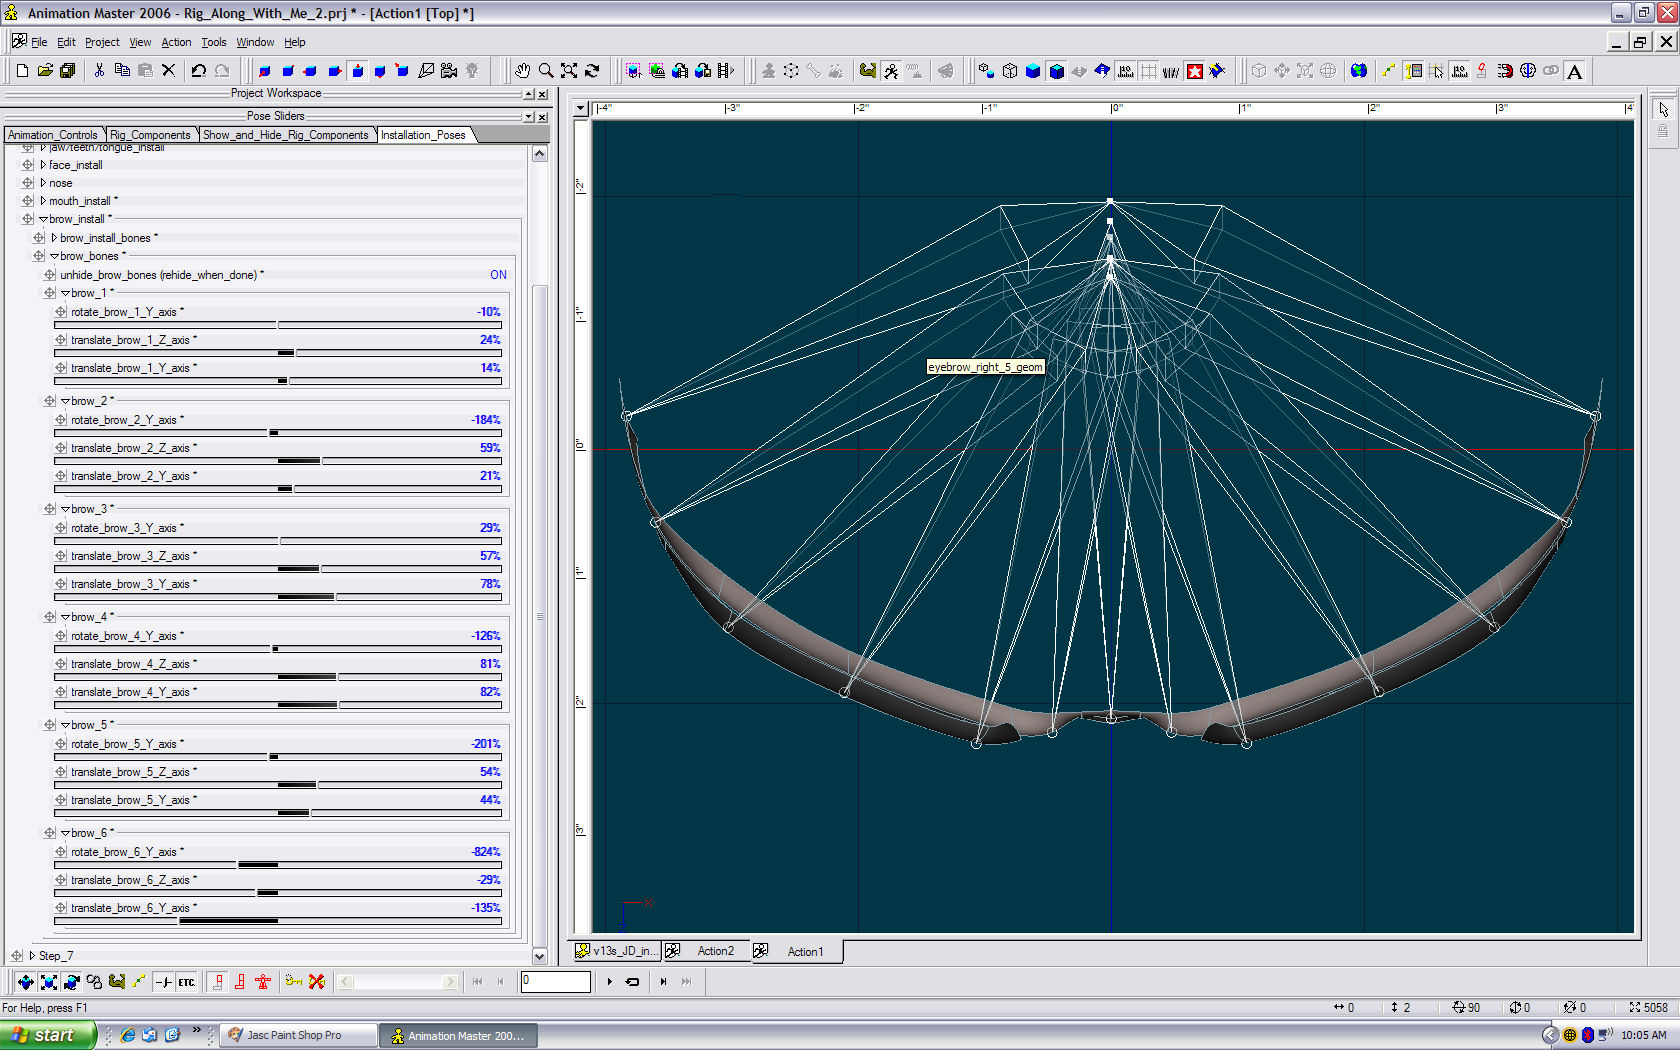
Go to muscle mode. Go to the groups folder and select the brow group and hide the rest. Go back to skeletal mode. Unhide the brow bones. Translate and rotate the brow bones. (front, side, top) Rehide the brow bone. Unhide the rest of the mesh in muscle mode. Note: Positioning these bones has the same concept as the face install bones. Centering the tip of the bones on the patch or cp in the front, side and top views.
-
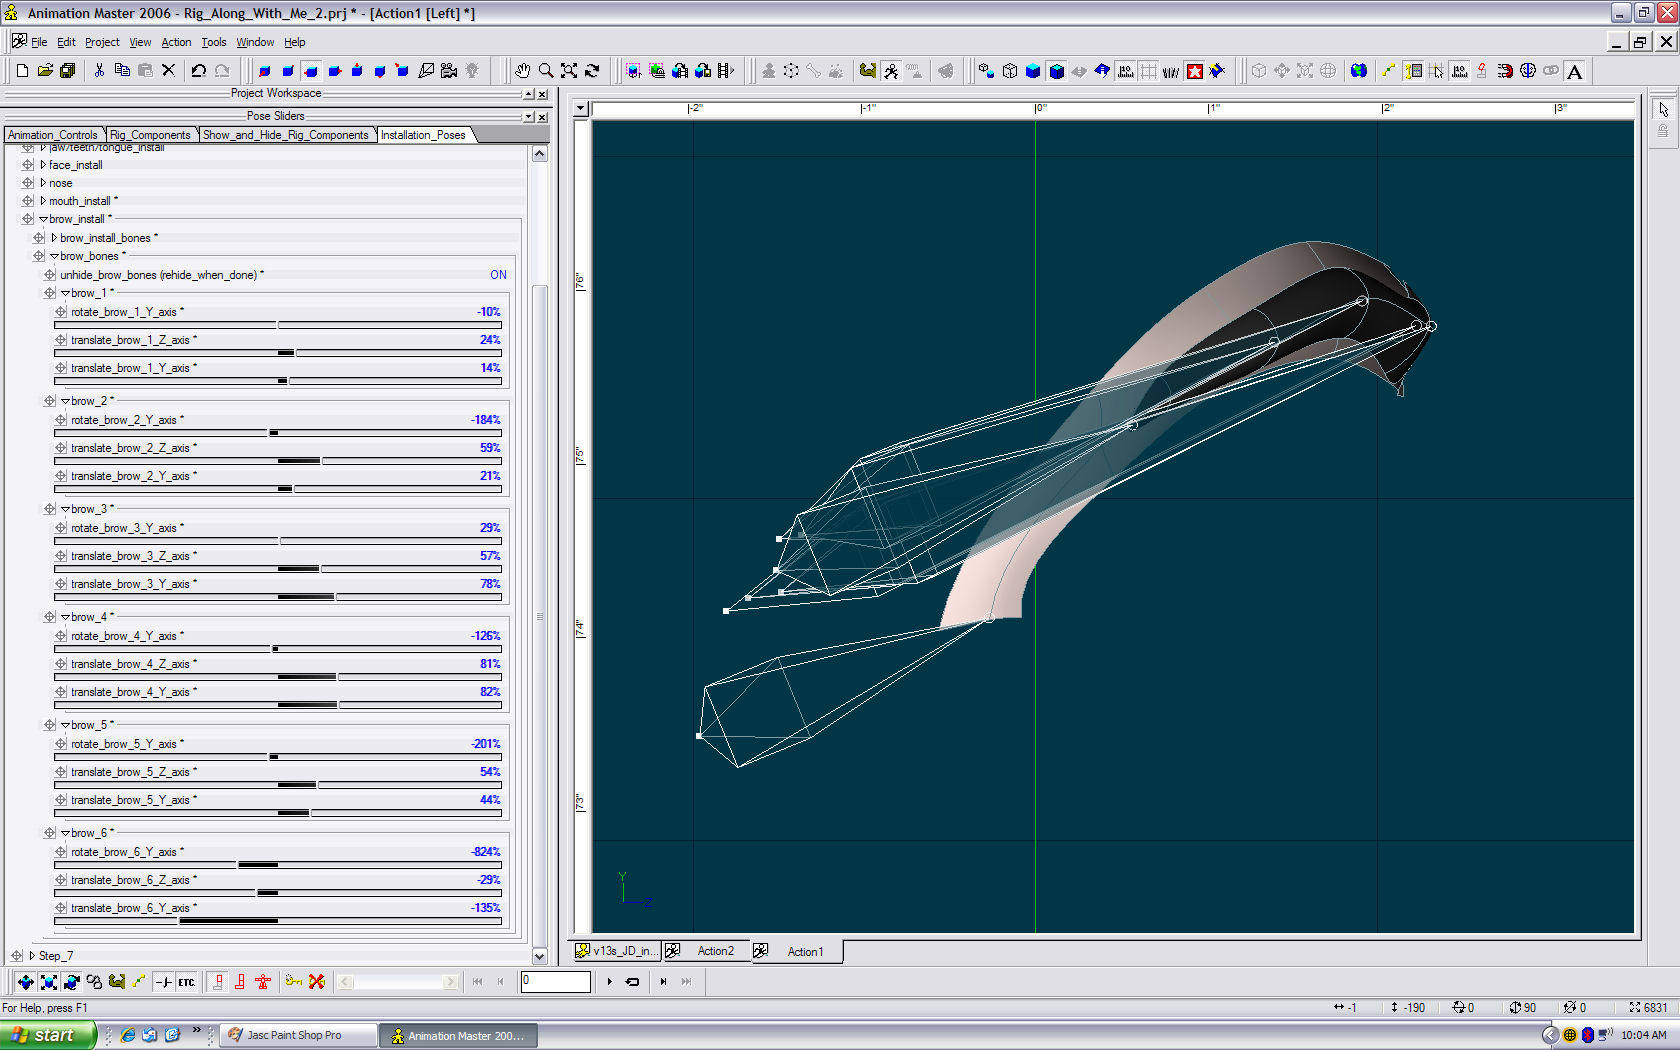
Unhide brow install bones. Translate, rotate and scale the brow install bones. (side view) Rehide brow install bones. Note: This setup is designed to help you scale, center and give you good rotation of the brow geom bones.
-
Reload A:M and see if you still have a problem with translating the toe install bones or try hitting the space bar to update the screen. I have no problem on my end.
-
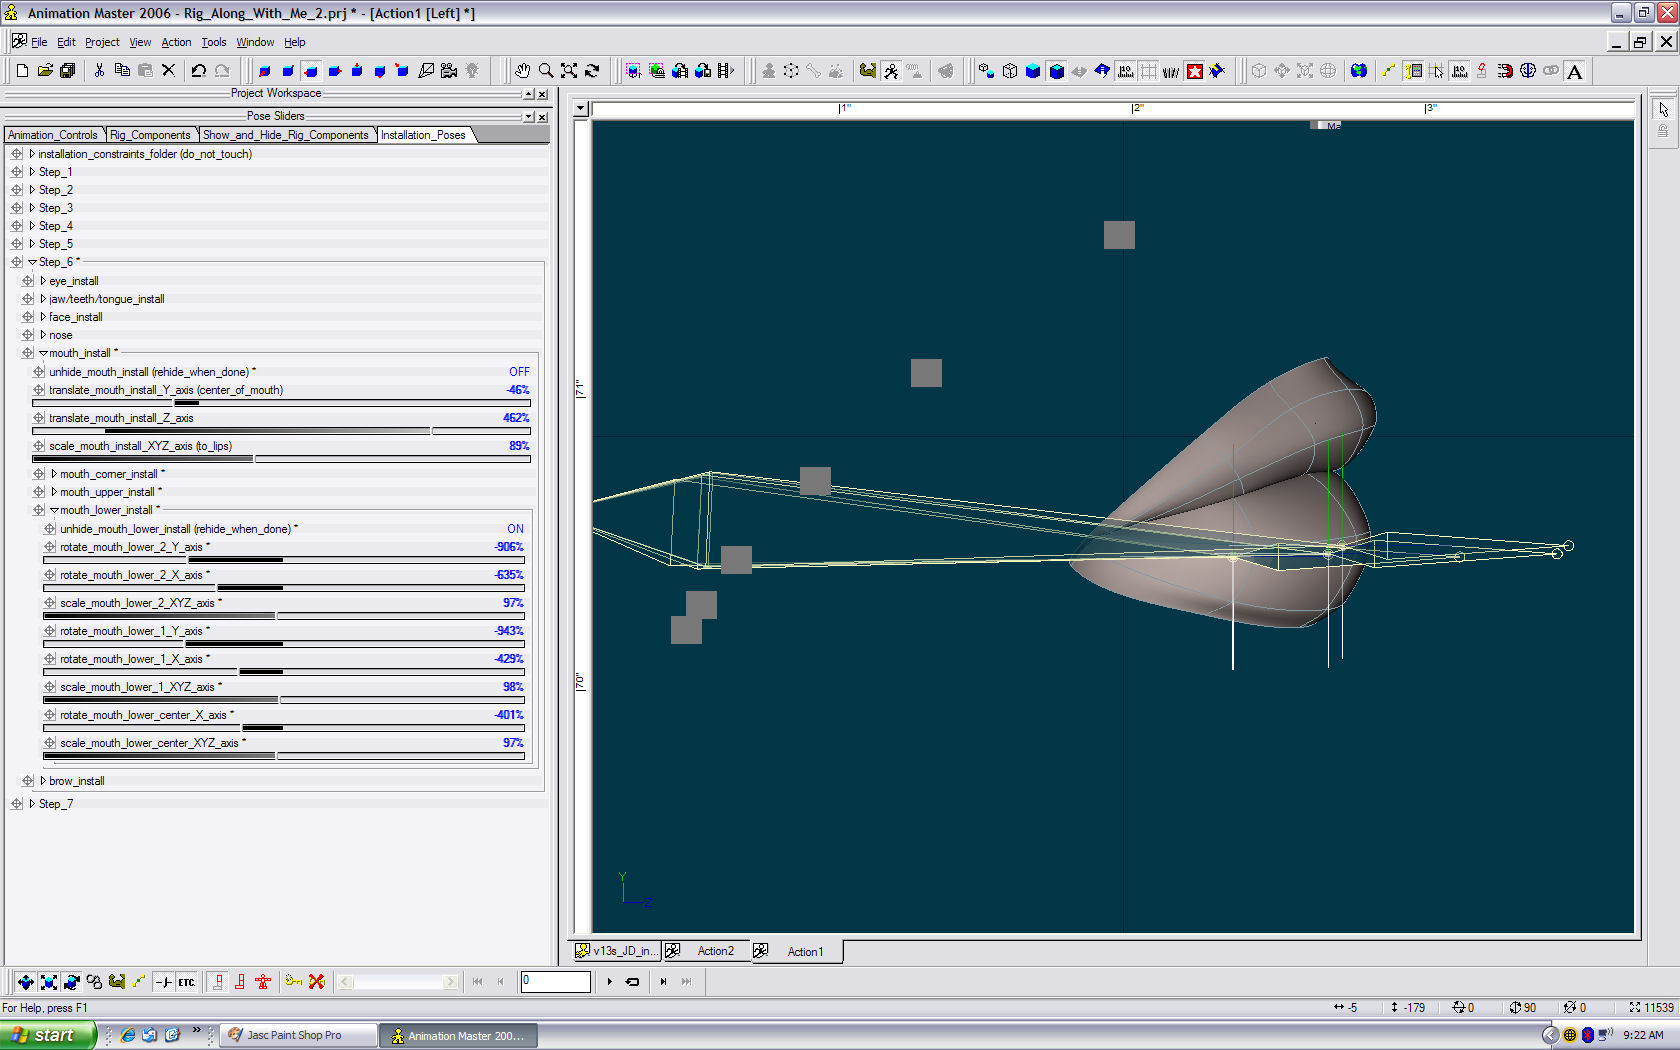
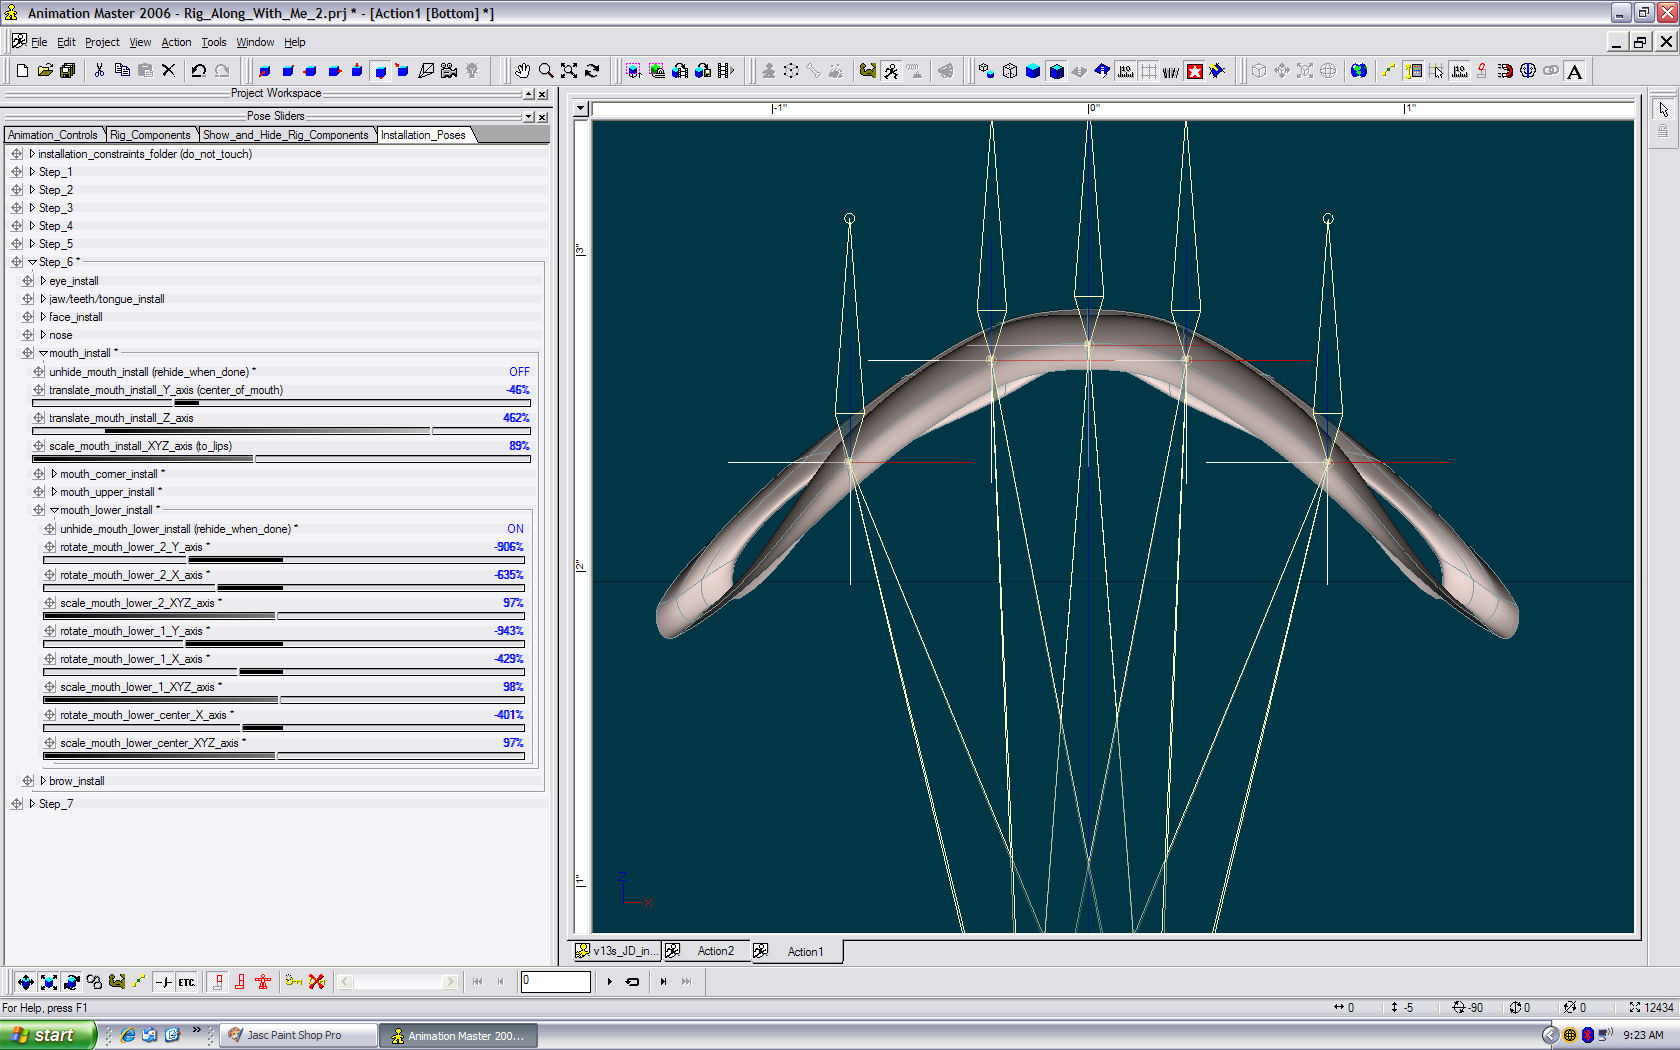
Unhide mouth lower install bones. Rotate and scale mouth lower install bones. (front, side, top views) Rehide mouth lower install bones. Go into muscle mode and unhide the rest of the mesh.
-
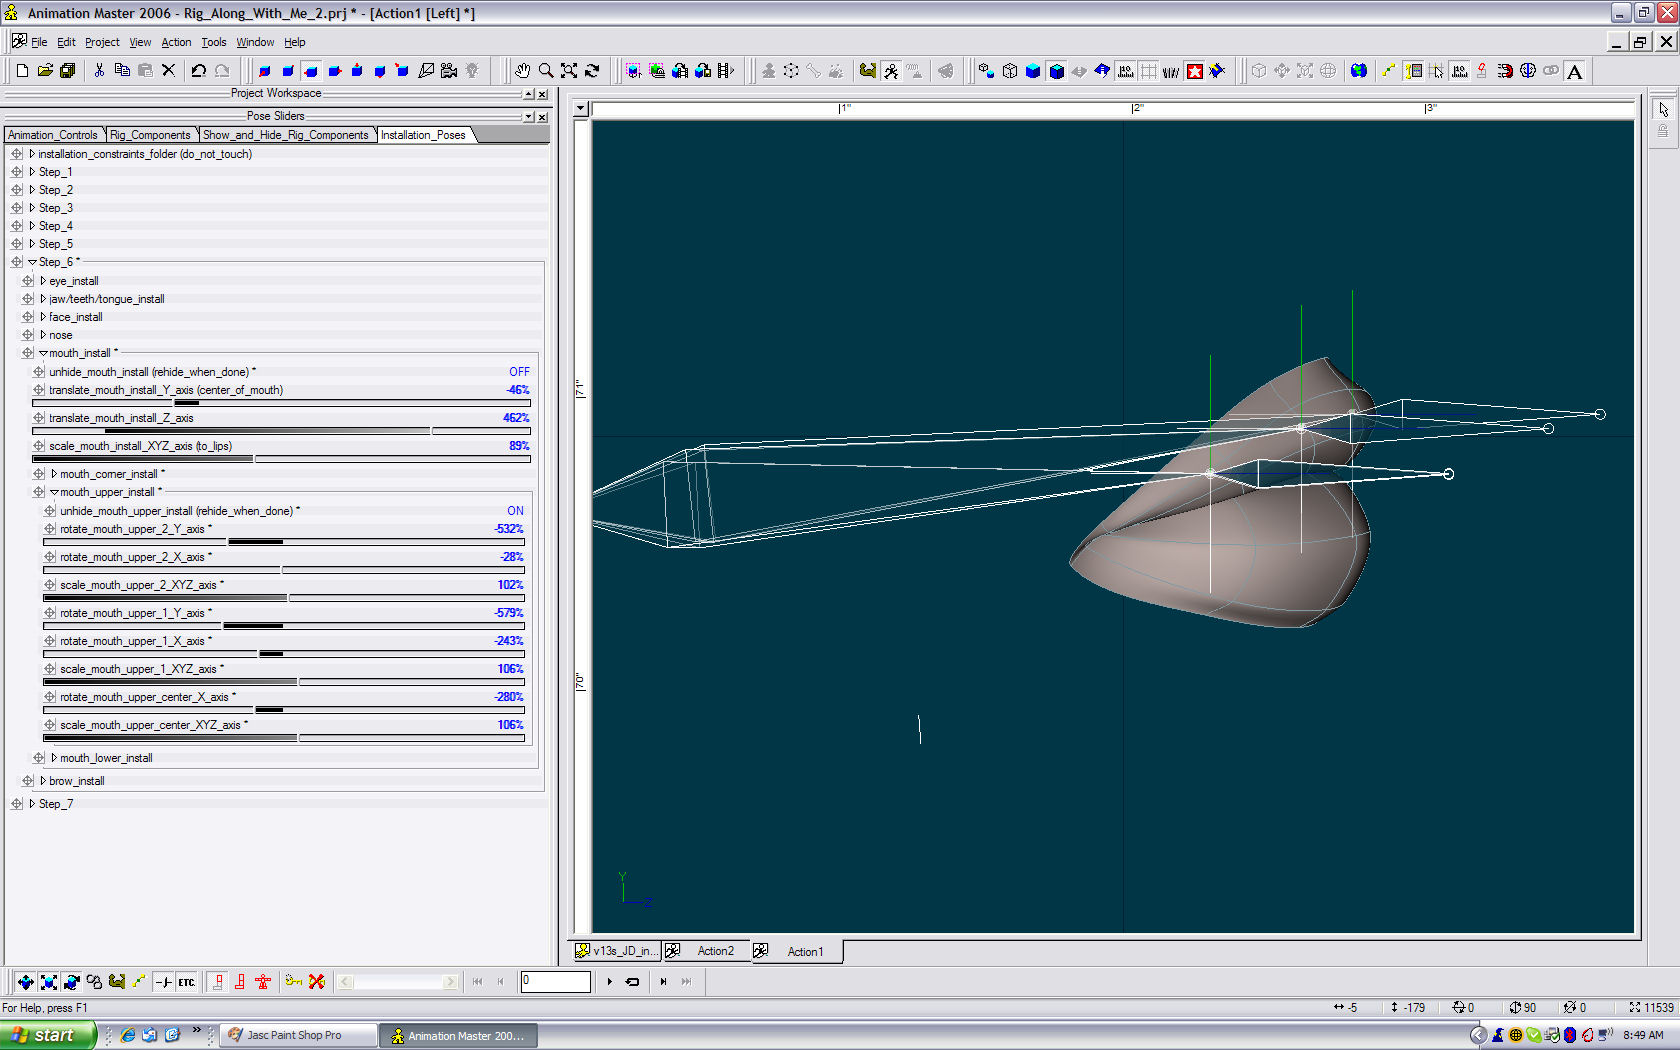
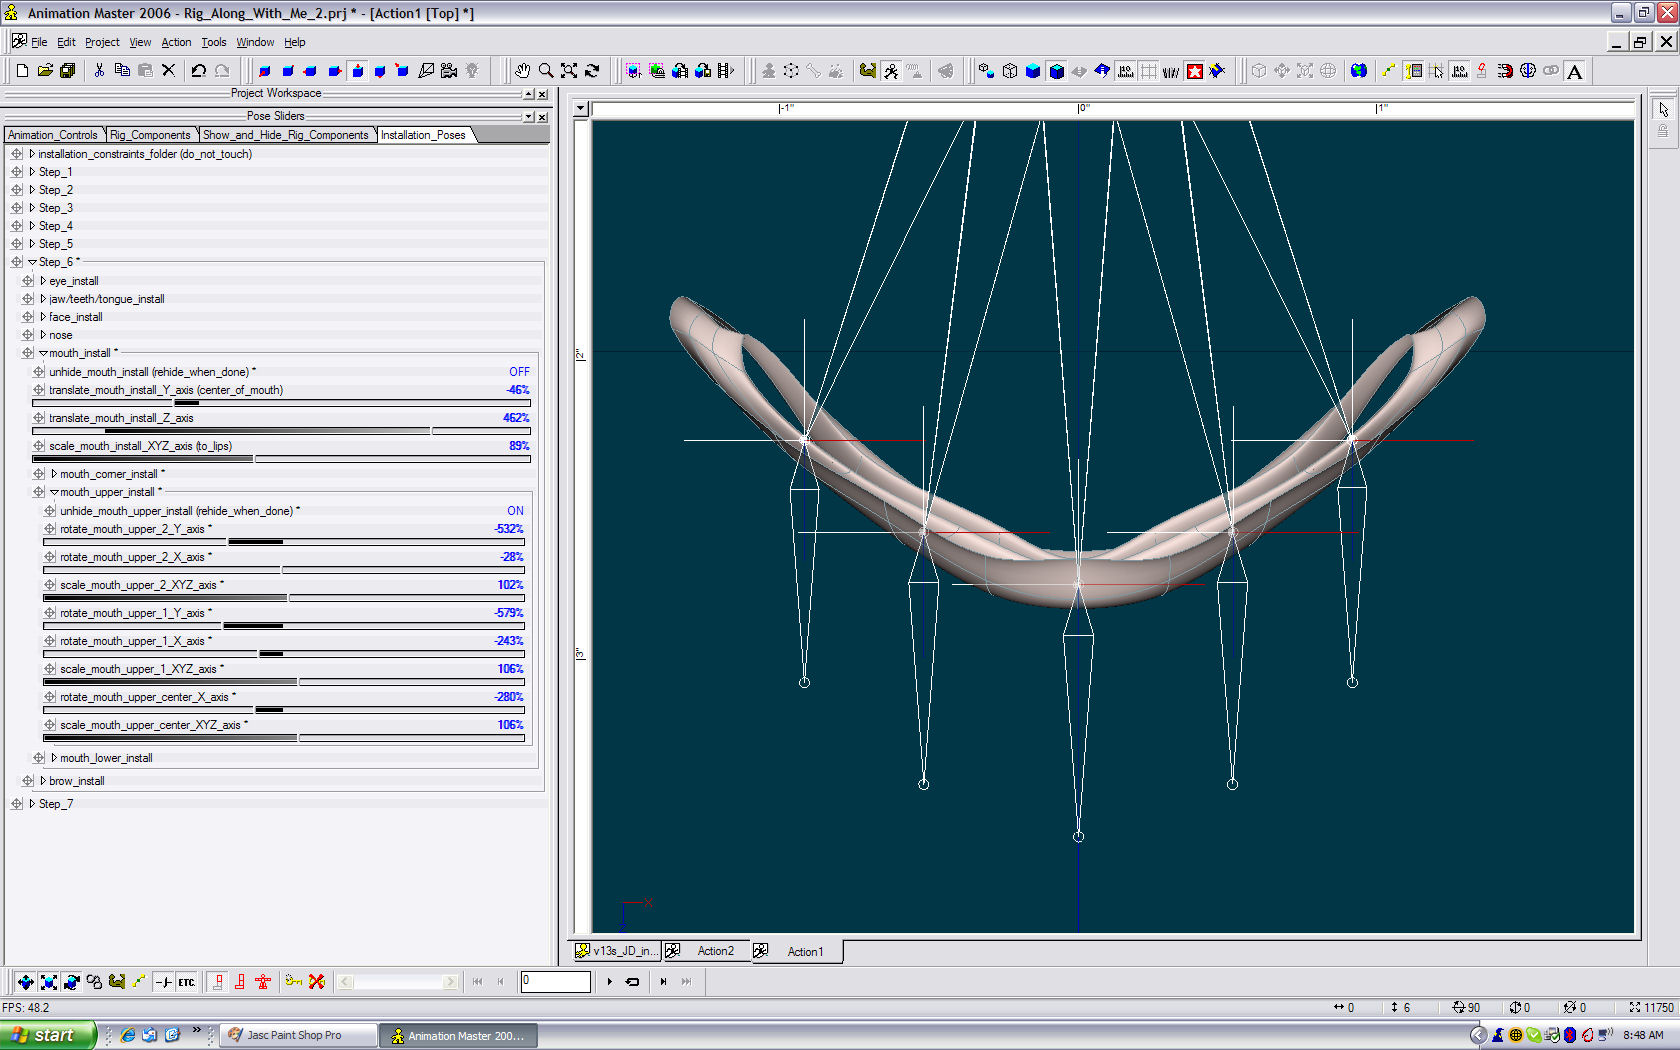
Unhide mouth upper install bones. Rotate and scale mouth upper install bones. (front, side, top views) Rehide mouth upper install bones.
-
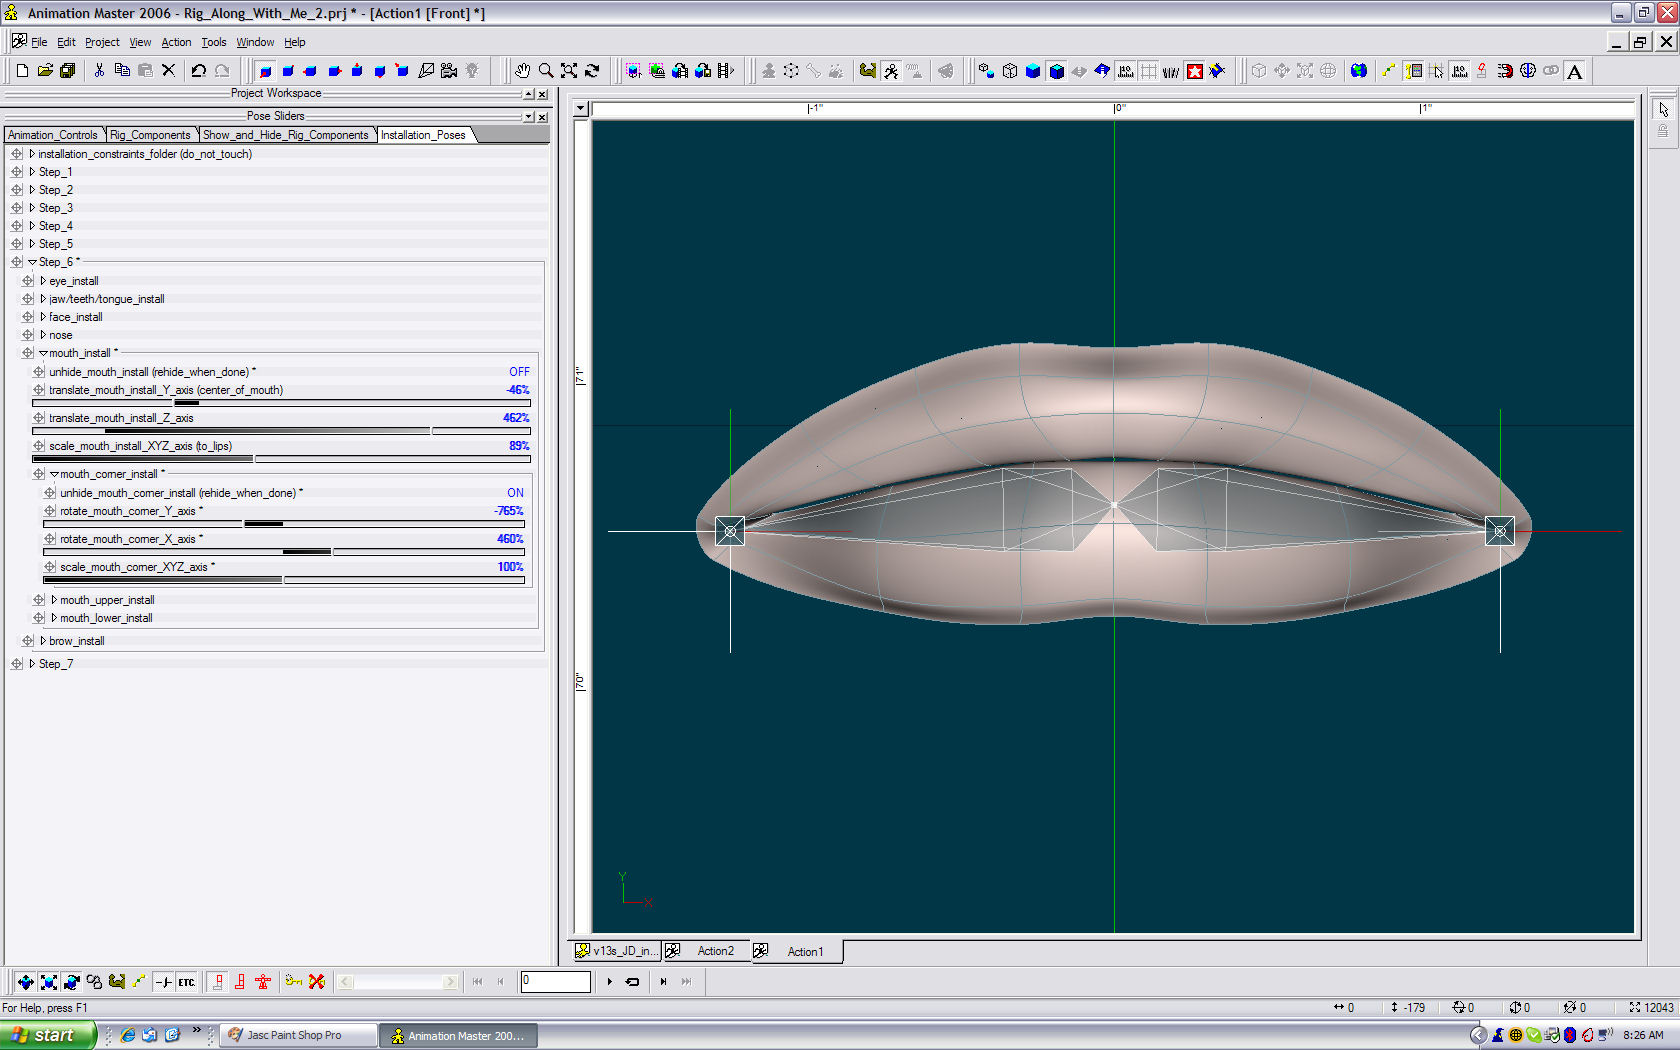
Go to muscle model. Go to the groups folder>mouth folder and select the lips group and hide the rest of the model. go back to skeletal mode and unhide the mouth corner install bones. Rotate and scale mouth corner install bones. (front, top views) Rehide mouth corner install bones.
-
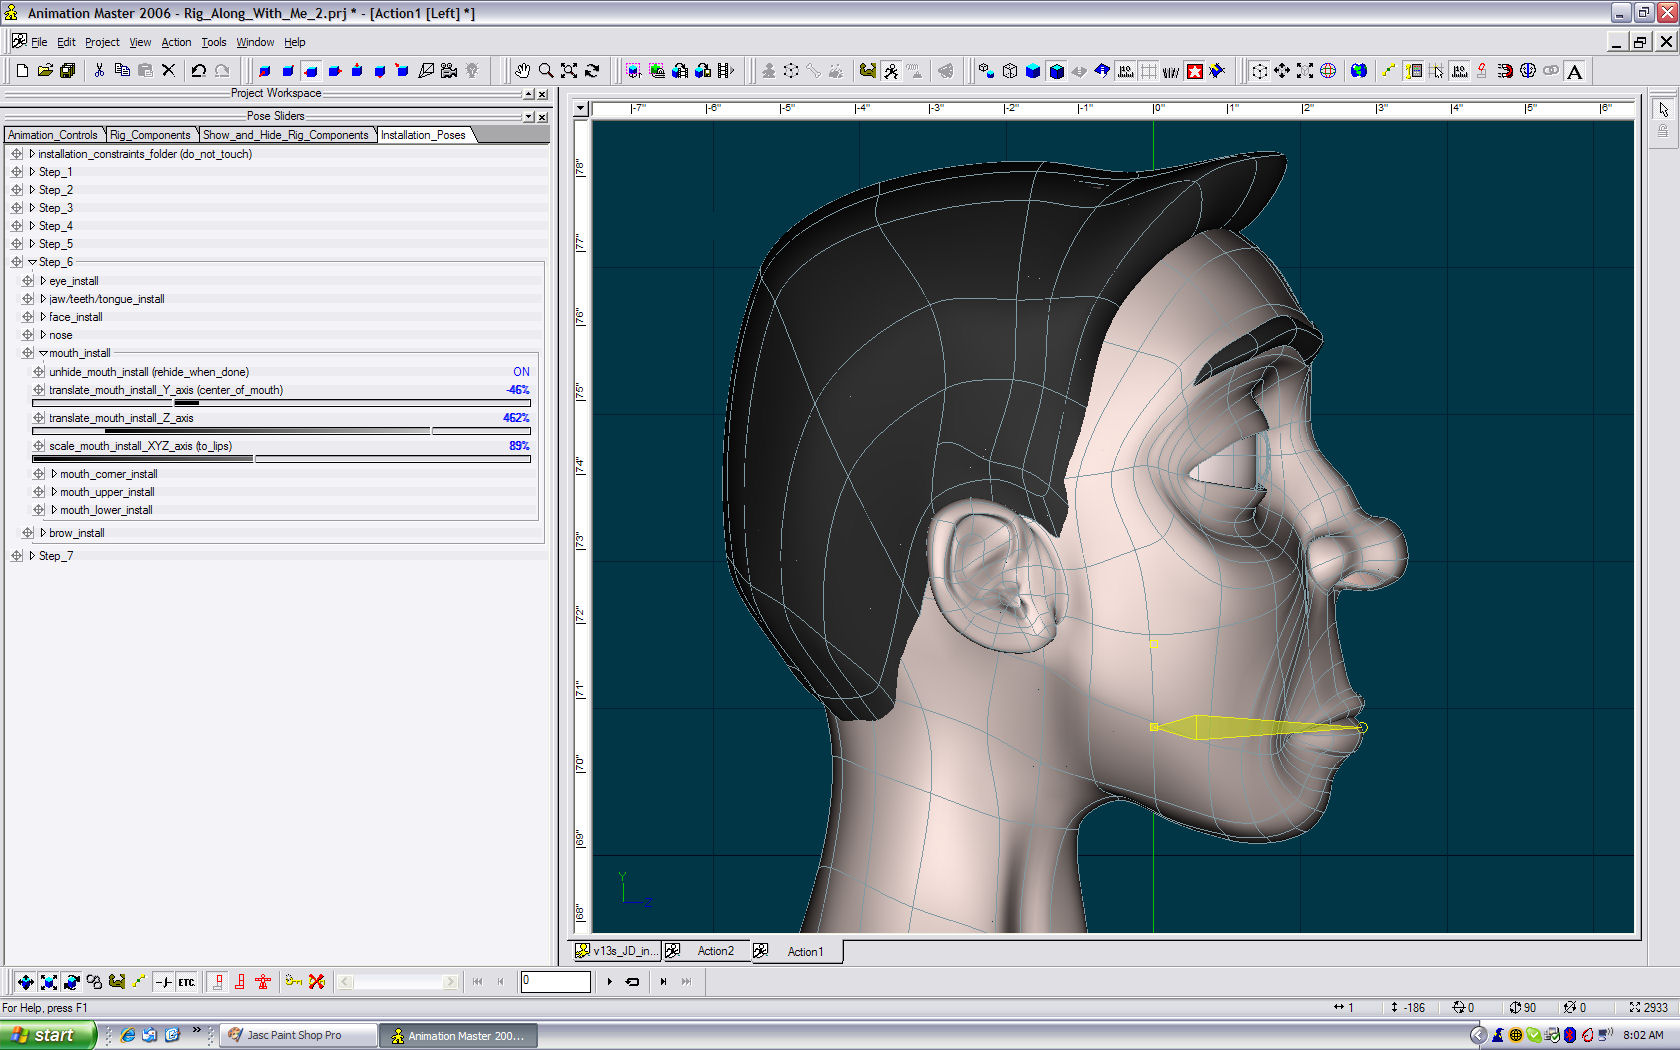
Unhide the mouth install bone. Translate the mouth install bone in the Y and X axis. (side view) Scale mouth install bone to the lips. (side view) Rehide mouth install bone.
-
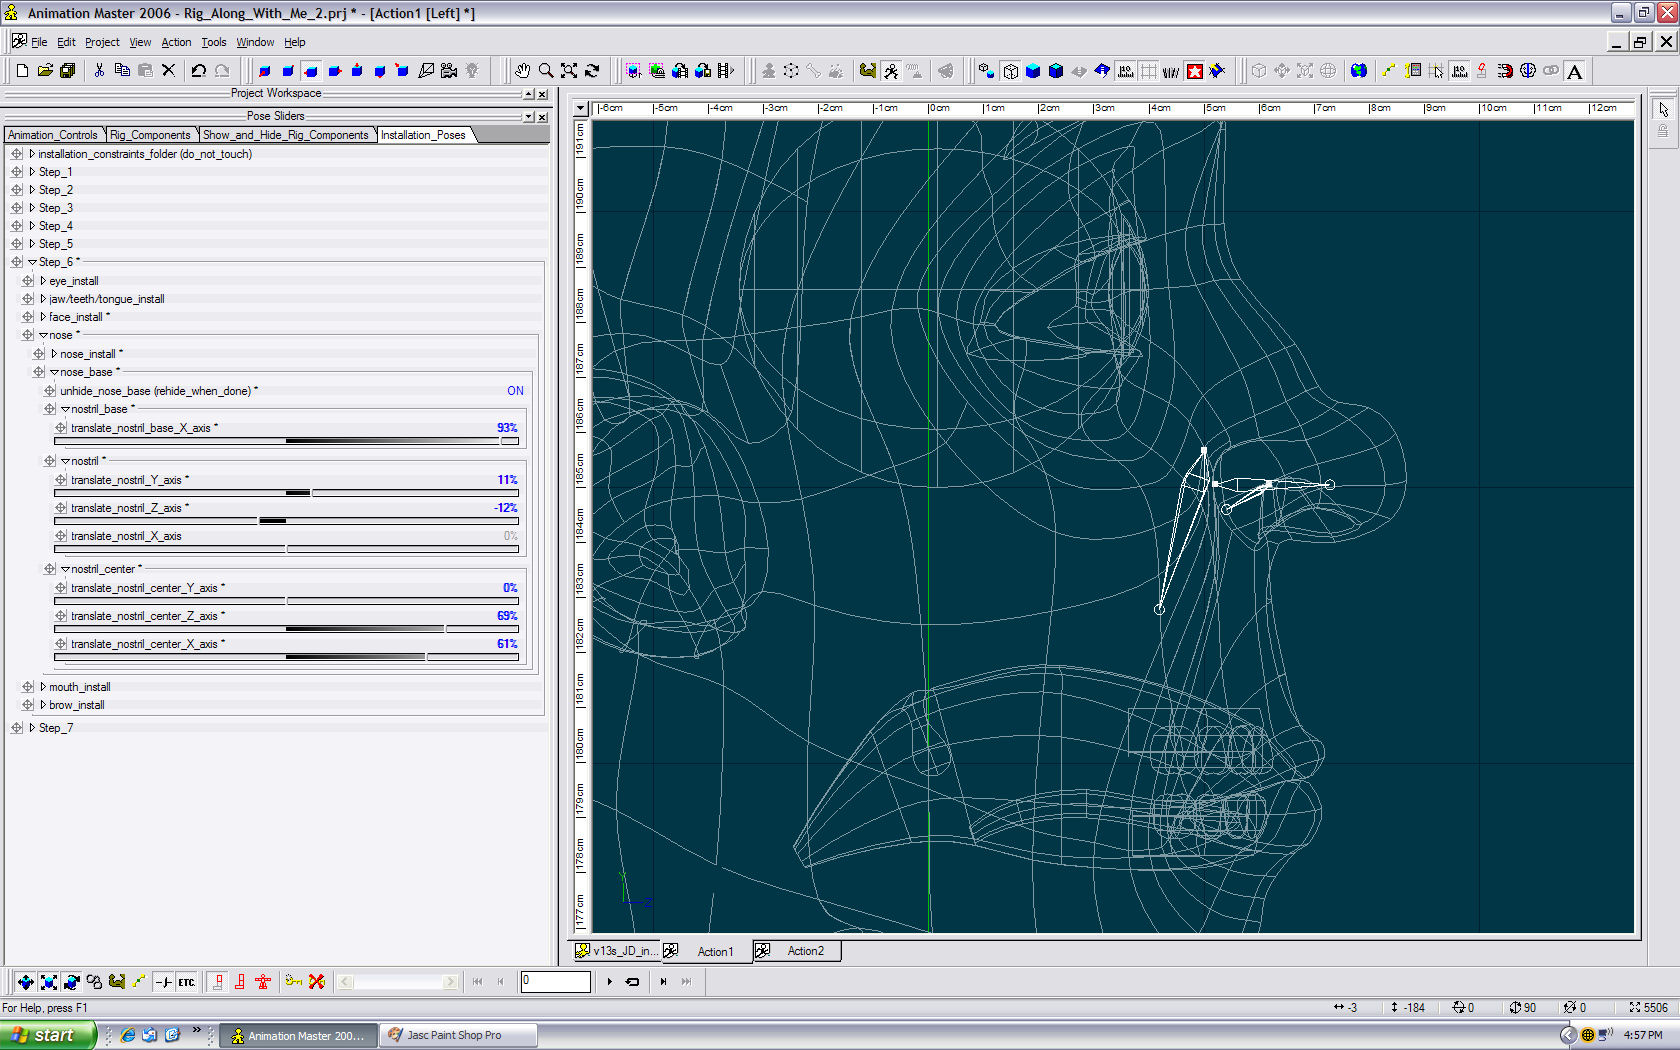
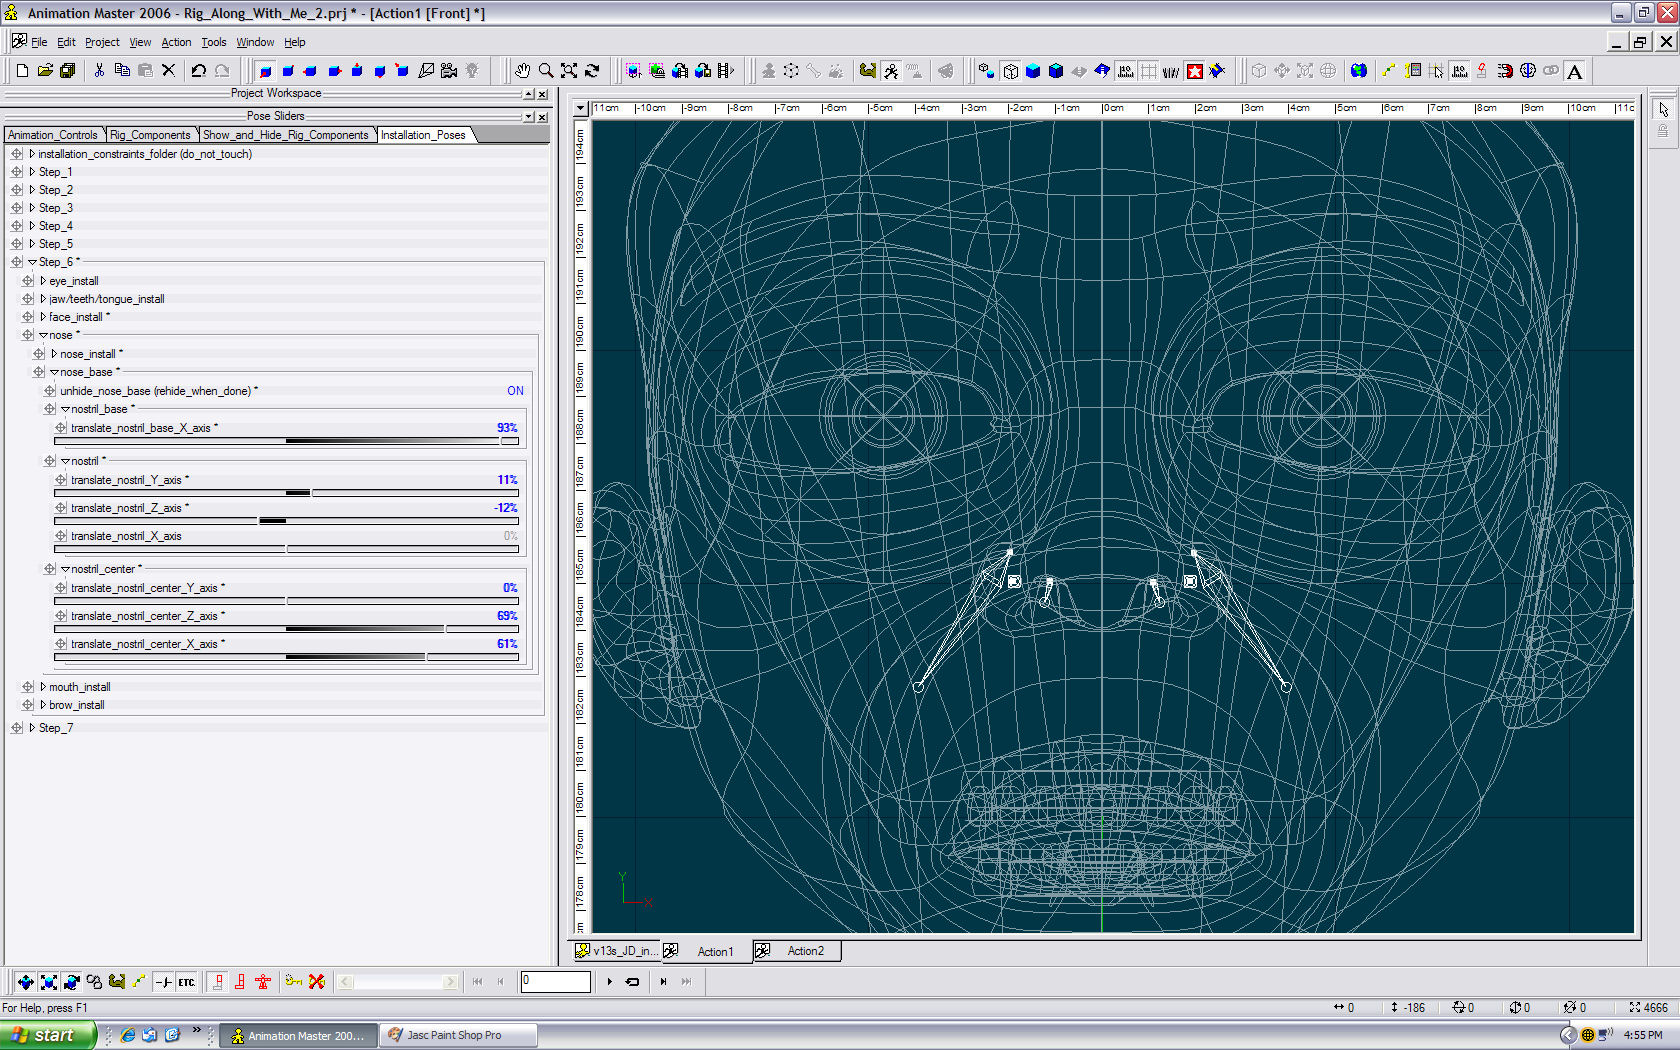
Translate the nostril base/nostril/nostril center on the Z axis. (side view) Rehide nostril base install bones. Note: Do not worry about the rotation of the nostril center bones, this is taken care of in the mouth install process.
-
Unhide the nostril base install bones. Translate the nostril base/nostril/nostril center in the Y and X axis. (front view)
-
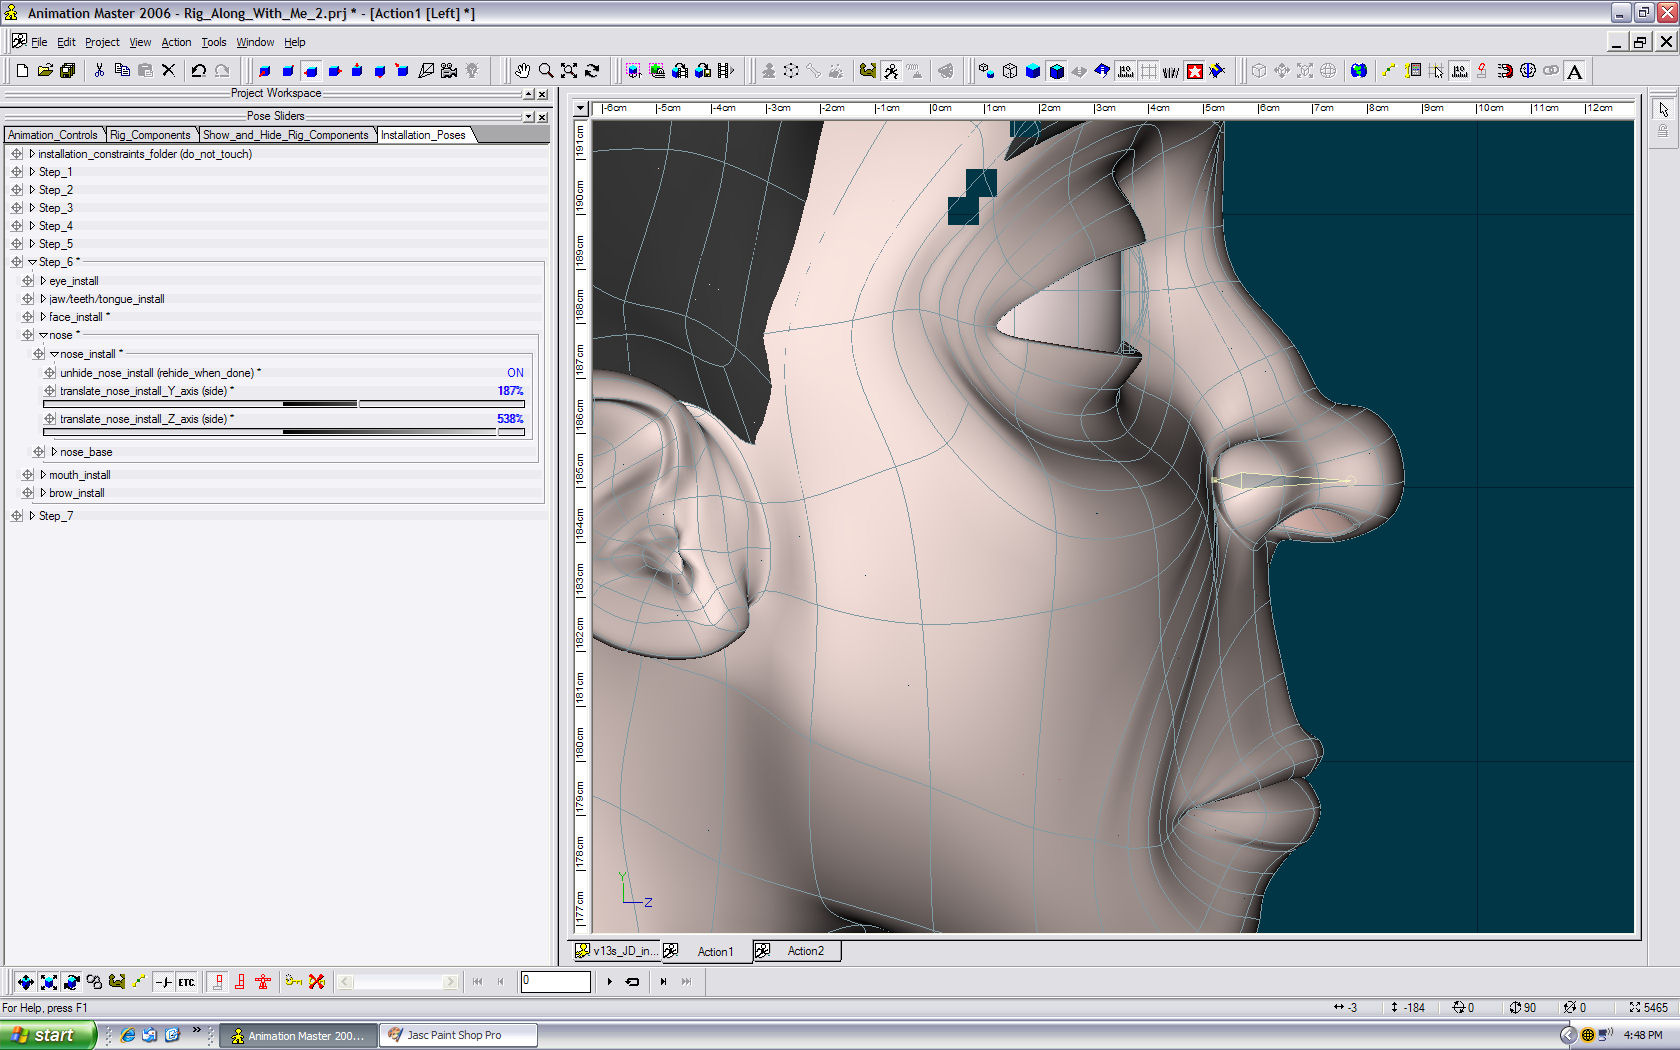
Unhide nose install bone. Translate in the Y and Z axis. (side view) Rehide nose install bone.
-
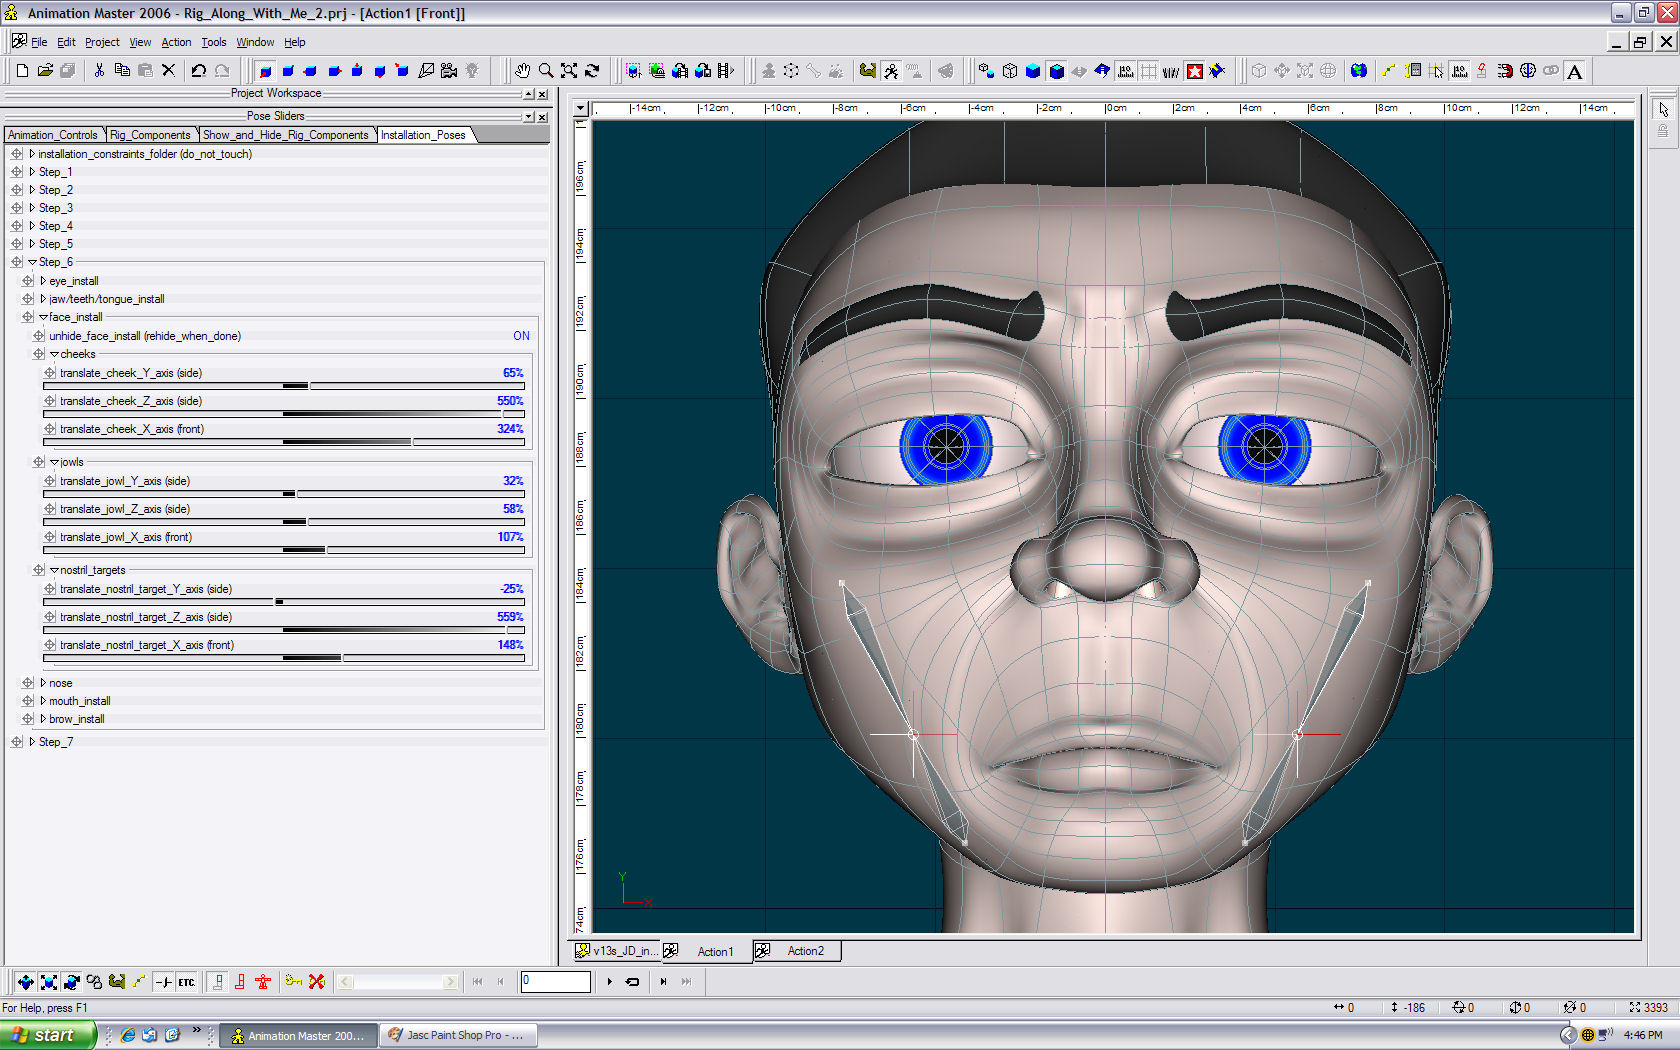
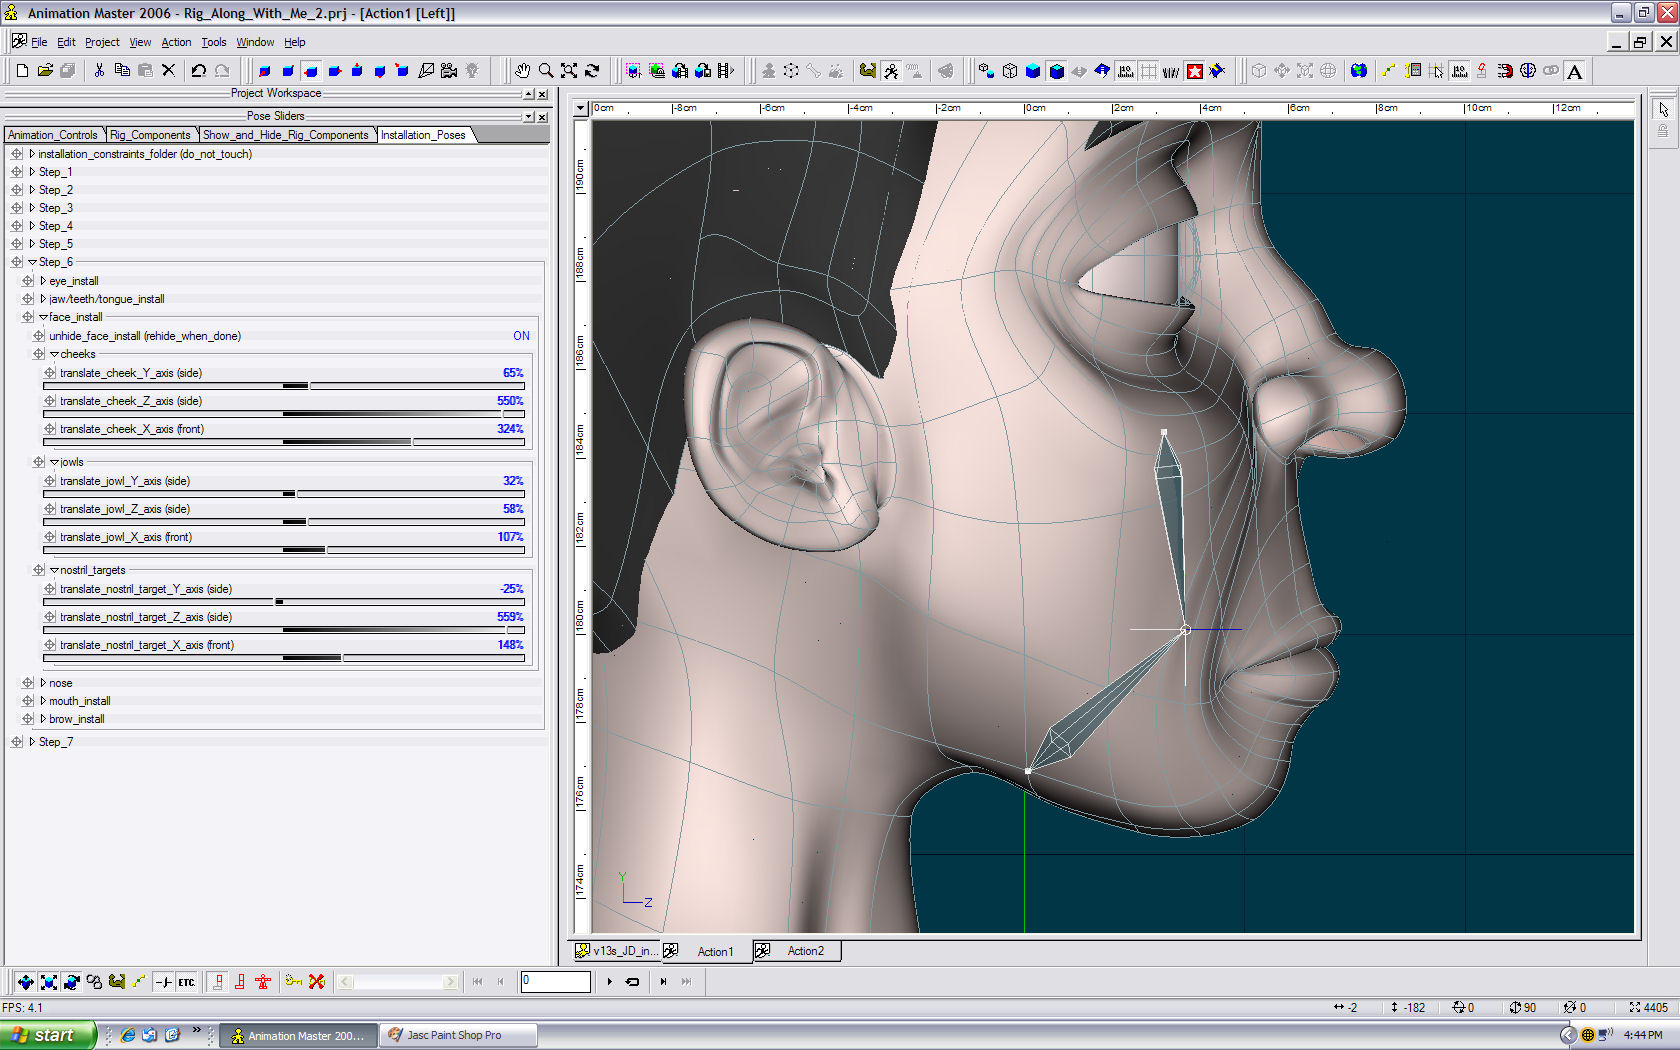
Translate the cheek/jowl/nostril targets in the X axis. (front view) Rehide the face install bones.
-
Unhide face install bones. Translate cheek/jowl/nostril target on the Y and Z axis. (side view) Note: Selecting a patch or cp and hiding the rest of the model will help in positioning these bones. Centering the base of the bones on the patch or cp from the front and side view will give you fairly accurate results.
-
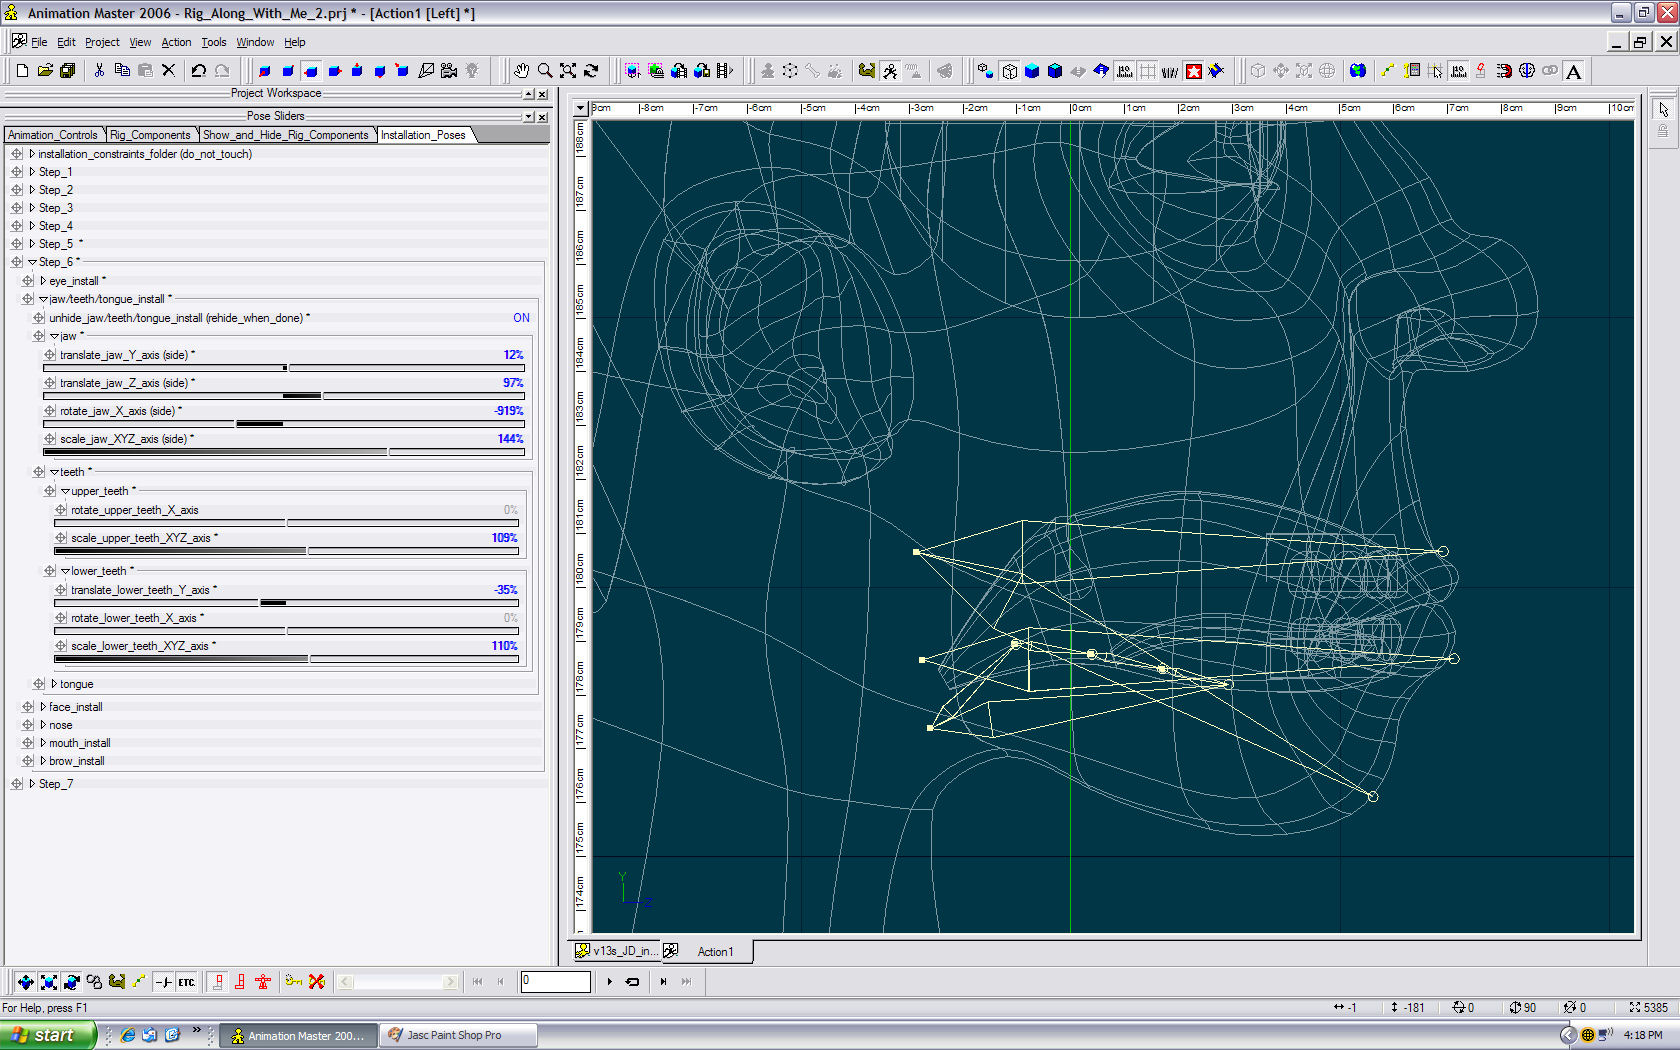
Go into muscle mode. Go to the groups folder and select mouth folder>tongue group and hide the rest of the model. Translate, rotate and scale the tongue install bones. Unhide the mesh in muscle mode. Rehide the jaw/teeth/tongue install bones.
-
Unhide the jaw/teeth/tongue install bones. Translate and rotate the jaw and teeth into position.
-
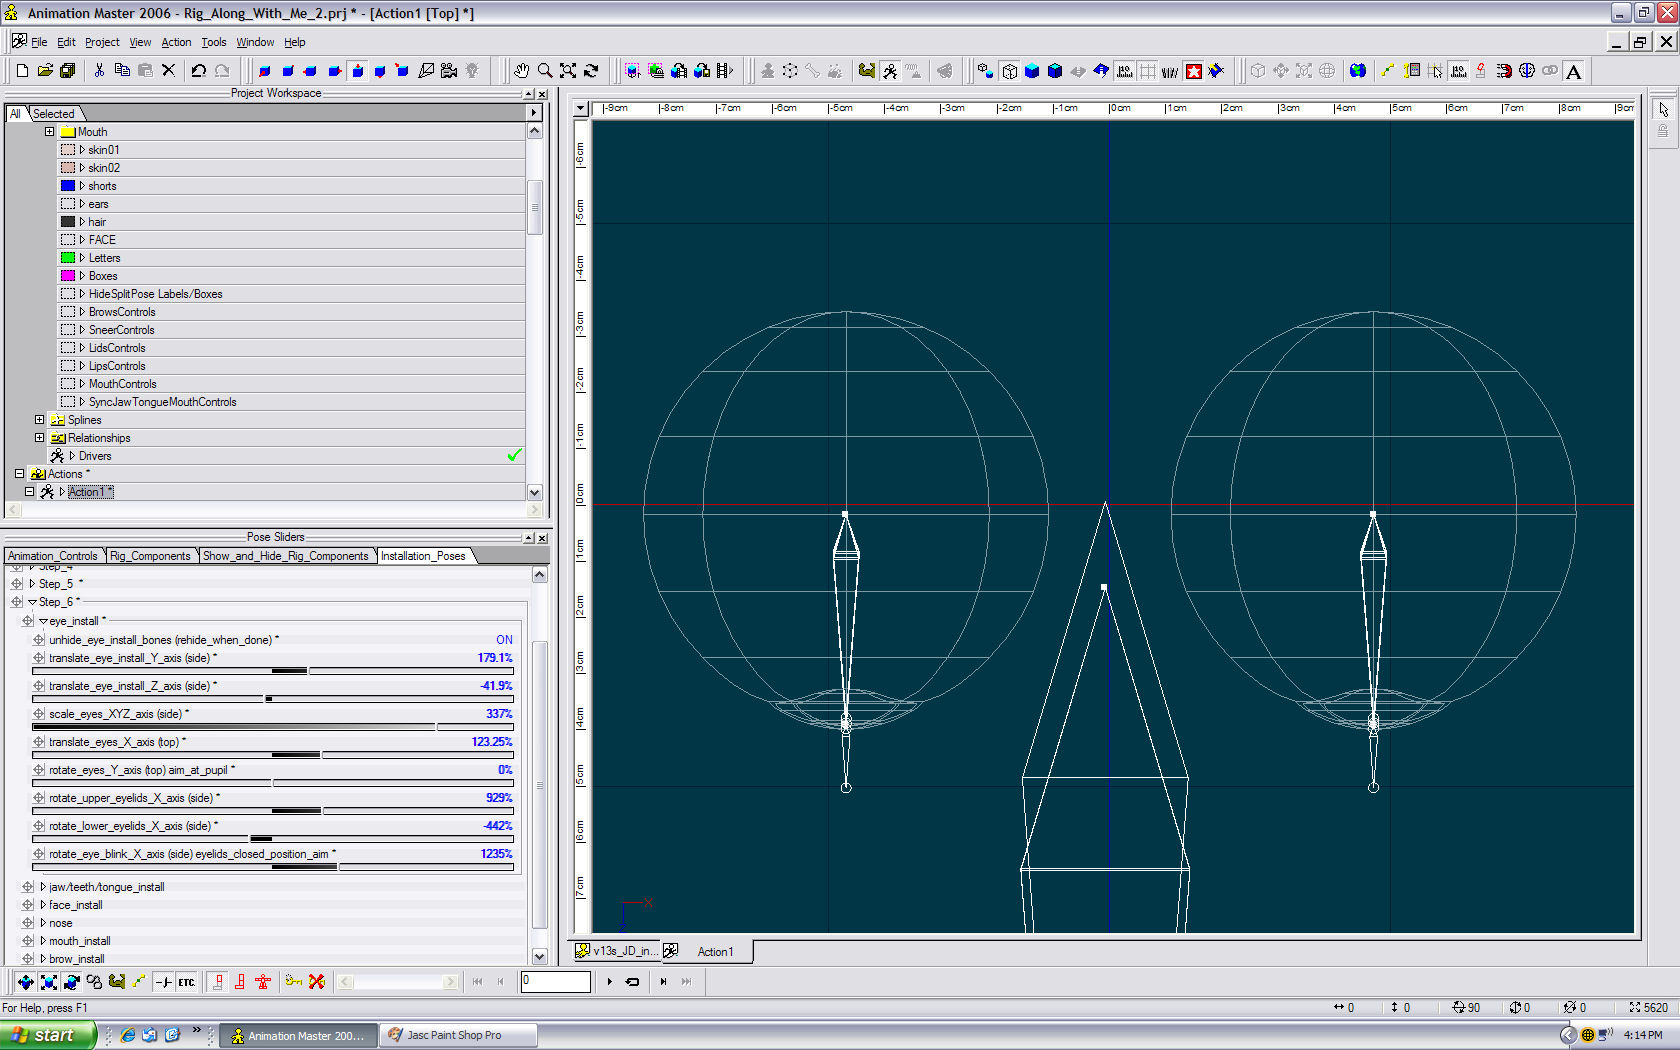
Translate the eye install bones on the X axis. (top view) Rehide eye install bones. Unhide the rest of the mesh in muscle mode.
-
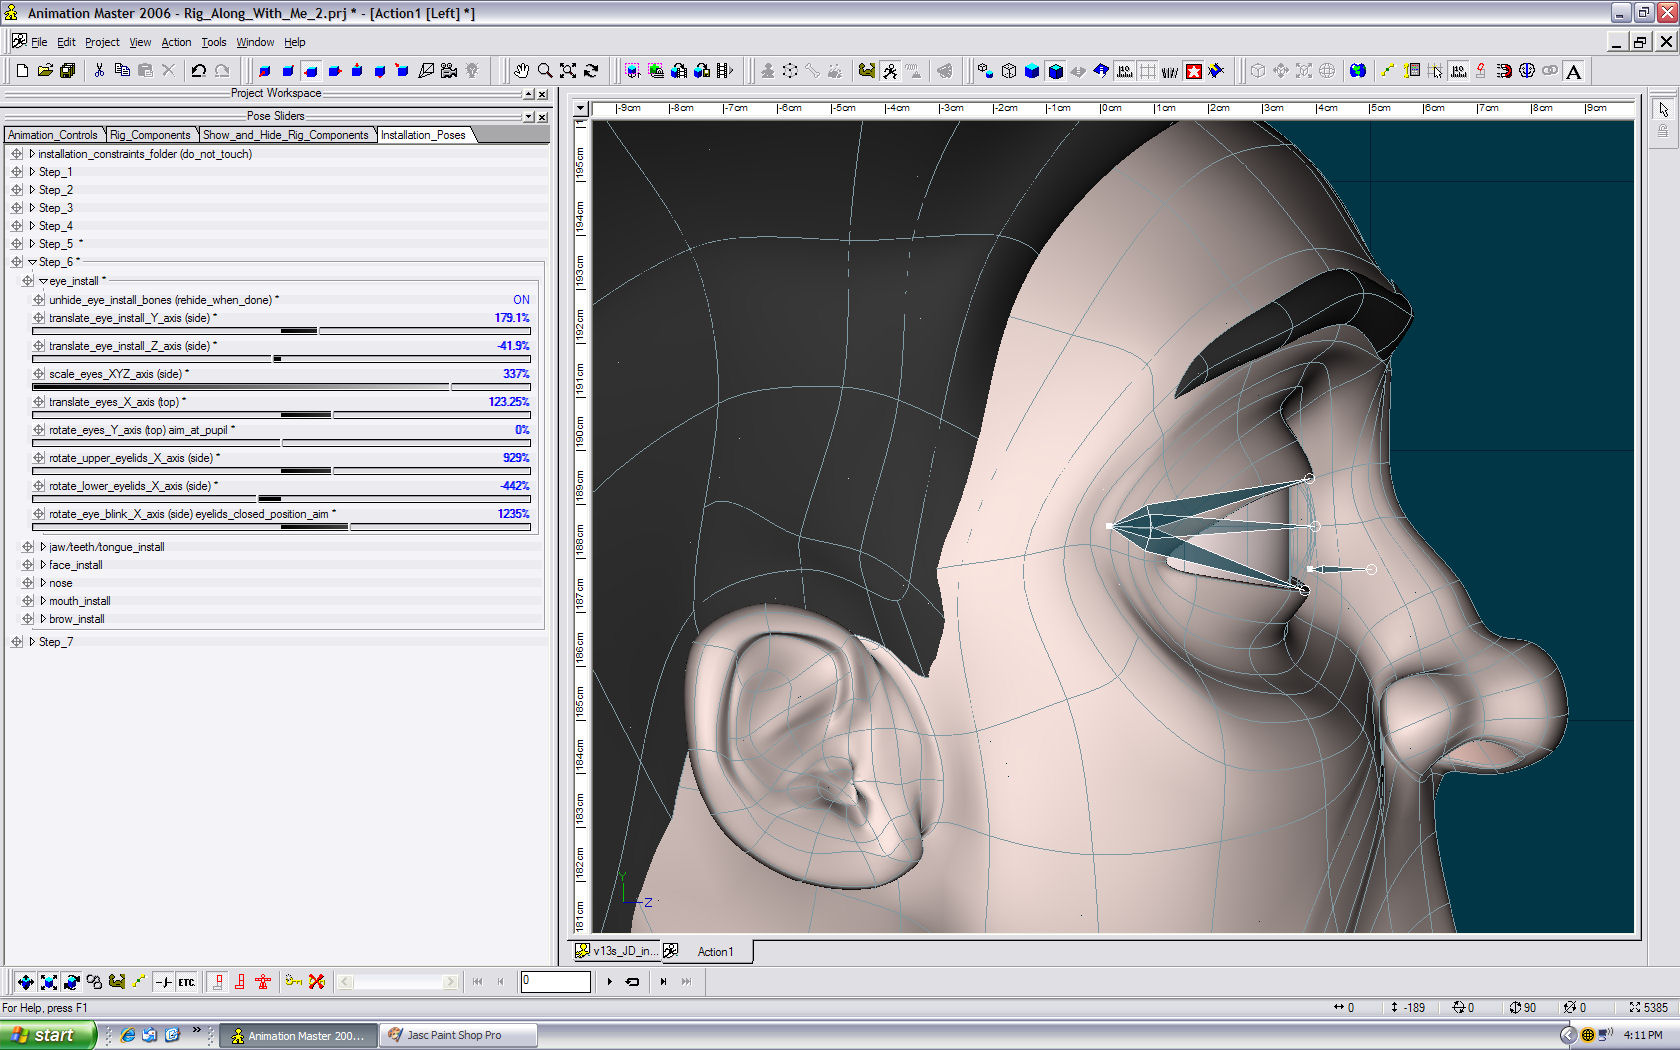
This step will require a little more detail. Go to muscle mode. Go to the JD model and open the groups folder>eyes folder and select the eyes group and hide the rest of the model. Go back to skeletal mode. Unhide eye install bones. Translate, rotate and scale eye install bones. (side view) Note: Setting the eyelid poses you will need the full mesh.