Meowx
-
Posts
406 -
Joined
-
Last visited
Content Type
Profiles
Forums
Events
Everything posted by Meowx
-
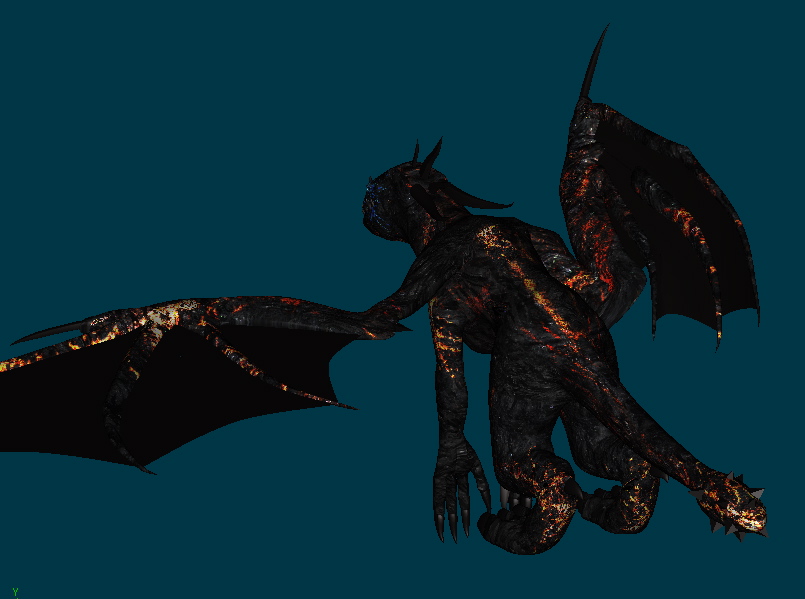
Alright, been making another dragon over the last couple days. Currently working on the rig, and oh my god am I in love with Matt right now. I used the basic concept behind his pterosaur rig and it's the most beautiful thing I've ever seen. I had started rigging the other dragon some time back, but kinda threw my hands up in the air and started working on another character after I got to the wings. Matt's rig not only makes the wings fold beautifully, but I've also added a midsection to the wing surface so it can move up and down with the air current as the wings flap. Drake_Wingtest.mov

-
Looking great! Style is very Burton + Picasso, something I've never really seen before.
-
Absolutely. Didn't even notice it, I'll be sure to post any future stuff over there!
-
You know, I'd have to go watch me some Star Wars to find out. If memory serves, they do turn on more than just the one axis.
-
Was digging through my old Hash folder and came across this model I did some years ago. It's not textured, the rigging is pretty basic FK stuff, and some of the splinework is downright head-scratching... but it doesn't look half bad. Figured I'd put it here for whoever wants to use it. Or, if you want to improve it - IK rig it, texture it, whatever - knock yourself out. Enjoy! AT_ST_2003v1.mdl.zip
-
Top notch splineage! I'm jealous. Have you rigged him yet?
-
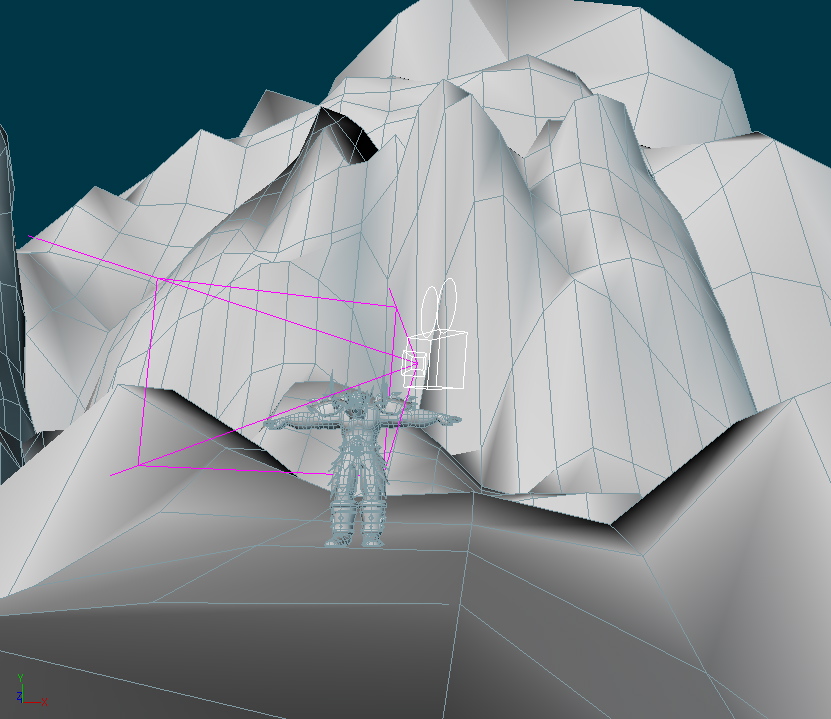
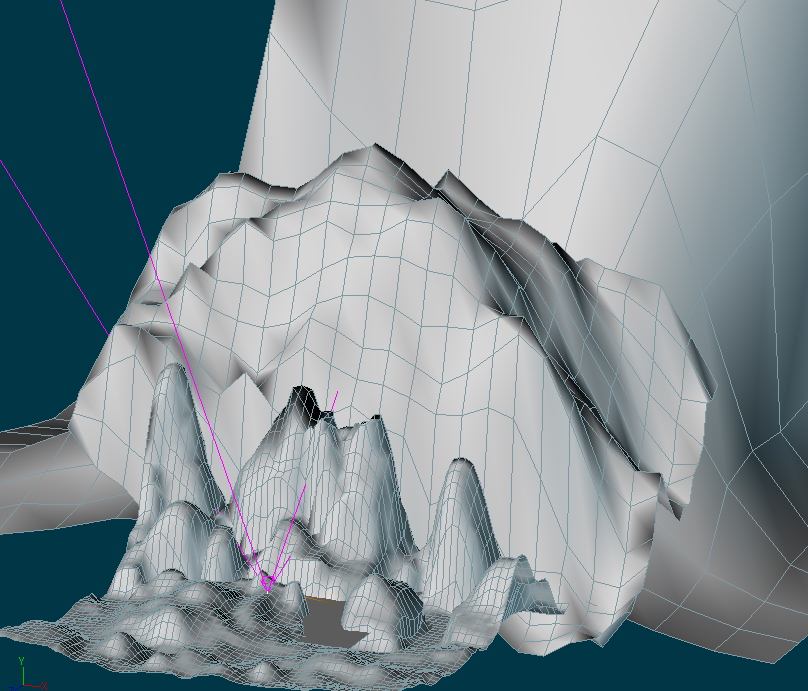
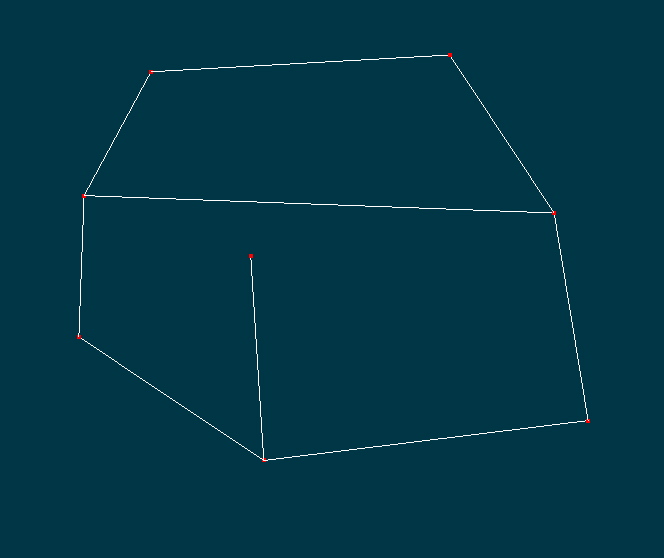
There will be two basic sets for this project; one indoor and one outdoor. Started playing around with the terrain wizard today and am getting a decent effect by "layering" the terrain by detail levels:
-
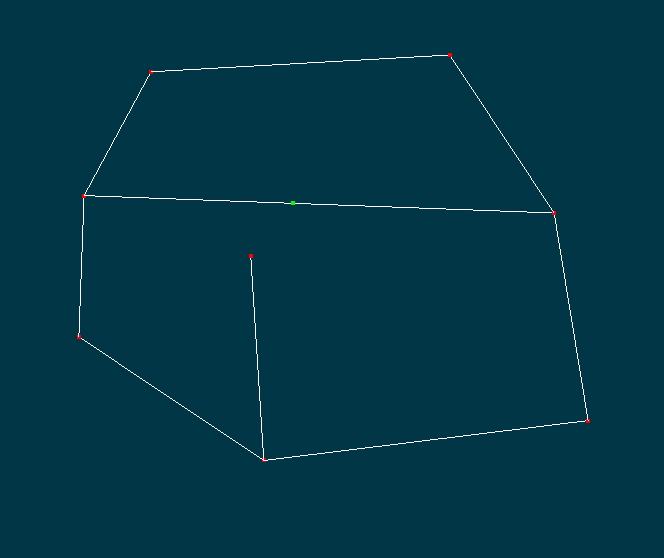
While I'm at it, looks like you're not using hooks. I remember back when I first started using A:M, I didn't really get hooks myself. They're the solution to your dead-end splines - the ones making harsh lines. For example, here's something like what you've got now. Detach the point by hitting shift-K and drag it away from the spline. Now you can delete that extra spline. In the future, this is what your model should look like before you make a hook - just end the spline hanging out in the air instead of attaching it and making a dead-end spline. Now, finally, drag that spline to the point you had it before and hit the ~ (tilde) key. The program will "hook" the spline into the middle of the other one - without creating a CP. This will make a much smoother line.
-
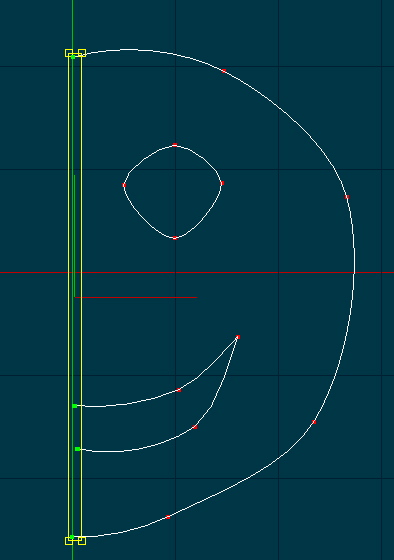
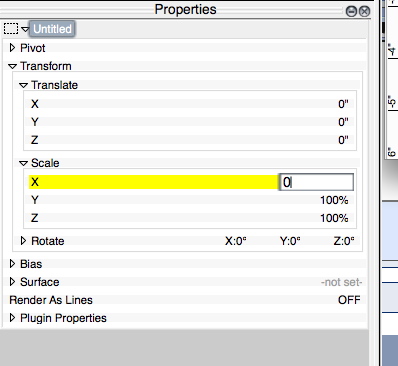
Looks like you're modeling the whole face at once. Standard technique for pretty much everything is to just model half. This reduces work time and ensures the result is even (I notice you have some very different splines on the left and right sides of the face). Here's how you do it. Here, I've modeled half of a happy face. Now I select all the points on the side we're going to mirror the object over. In this case, the left side. To make sure everything connects properly, these points should be aligned. I do this by scaling the X to zero in the properties box. Now I select all the points and shift click on that same side we're going to mirror over. (So the left side again.) Then I right click and choose "Copy/Flip/Attach." The shift click tells the program which side is the one you want to flip it over. And that's it! Now I have a perfectly symmetrical... pumpkin... guy... doorknob... face... thing.
-
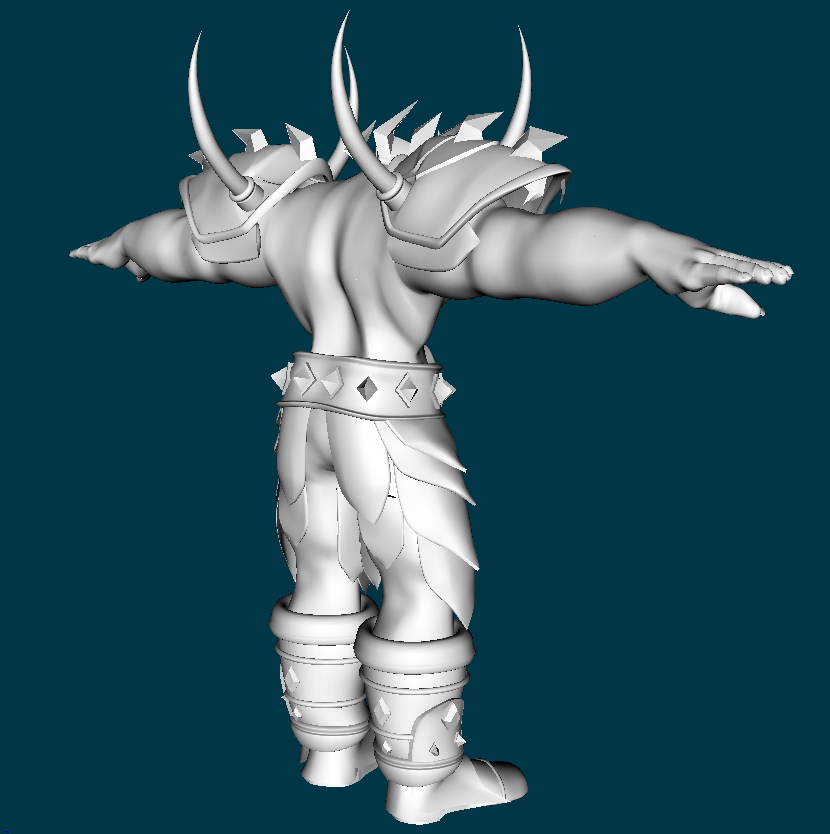
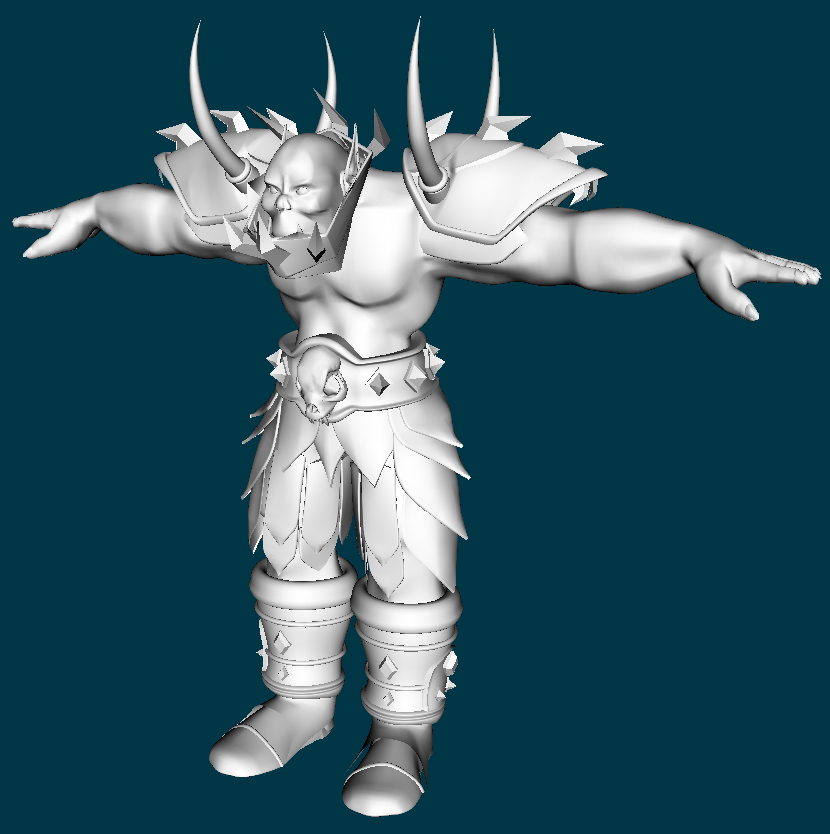
Finishing up the modeling on this guy, a little more armor and should be about ready to rig him up: And starting some texture work on the main antagonist; playing around with texture poses for eye FX: eyefx_test.mov (texture was made from cracked asphalt)
-
Problem is, I see it coming from very specific patches - and not evenly dispersed. For example, when I first made that test model and applied the particle mat to it, it emitted from all four patches on the left object... but only one of the patches on the right object. And both objects were grouped together (all the splines) with the emitter applied to the entire thing.
-
Using 15.0j on an Intel iMac 10.5.8. It seems that many patches don't emit sprite particles... randomly. I threw together a project quick to test it out, and a simple model revealed the same results. spritebug.zip If you've got the time, I'd love to hear if you have problems with this. Try dragging the particle emitter to different groups, or try copying the groups and then moving the emitter around. It sometimes seems to only work with certain patches of the groups, or emit unevenly. I haven't touched this particle system since I got it running great back in this thread, and I loaded it up today to find it not working at all. It coughs out a poof from a single patch and then just stops. Help!
-
...dammit Rob, I'm trying to get work done here and now I just want to make a "Wizard of Doorknobs" character.
-
BEHOLD
-
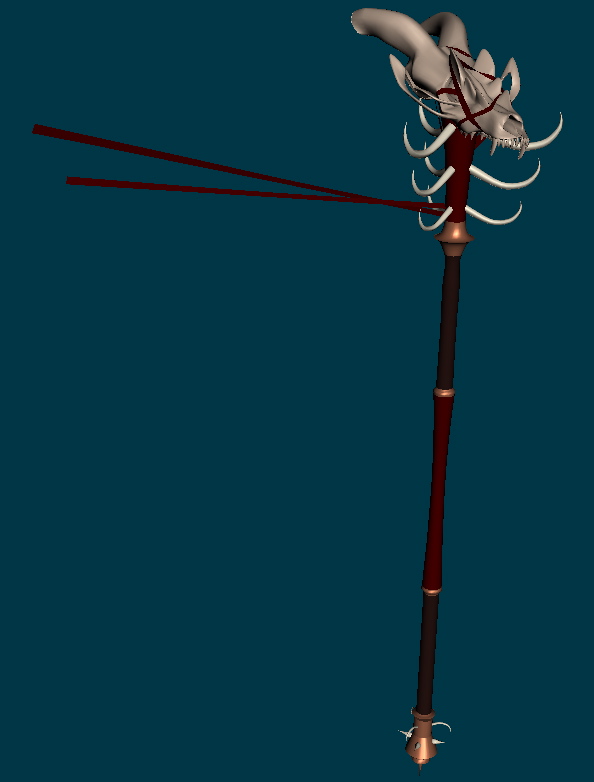
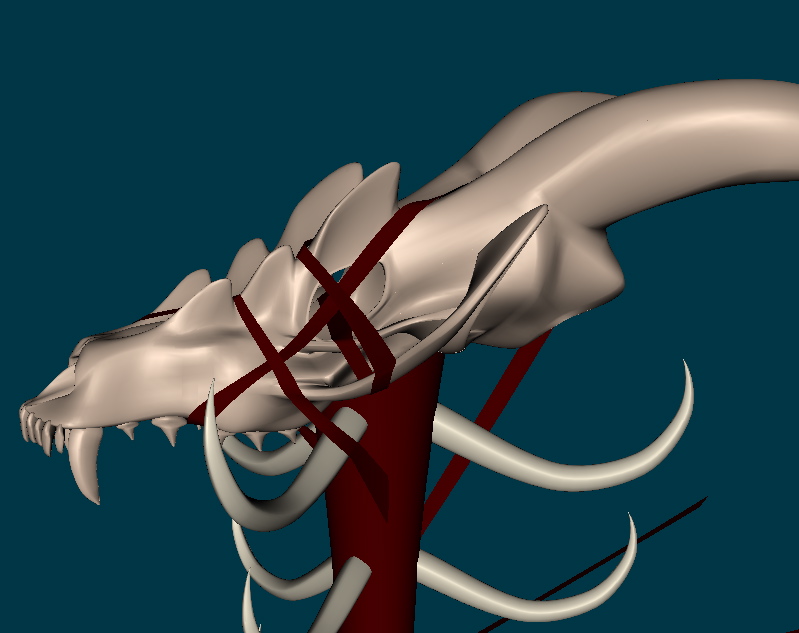
Had some spare time tonight, finished up the staff (sans texturing of course):
-
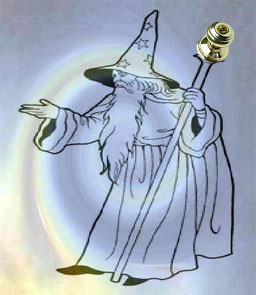
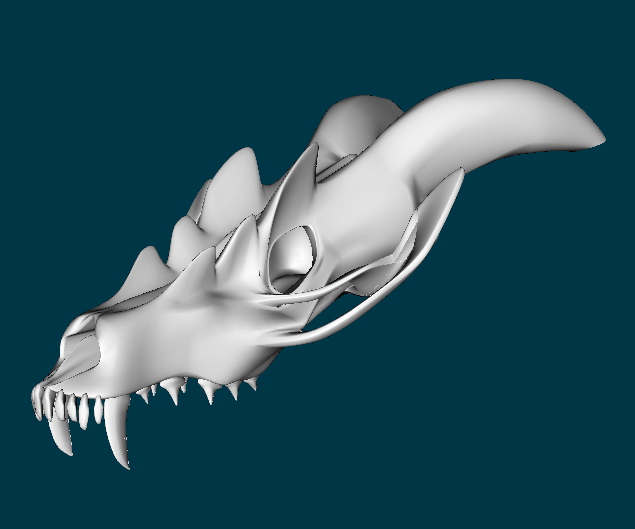
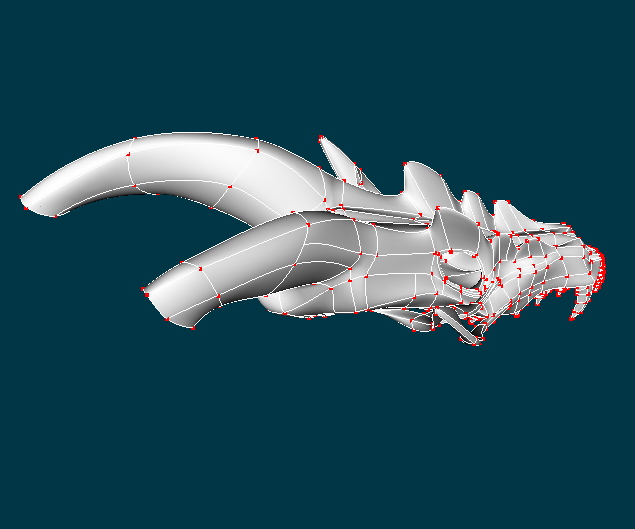
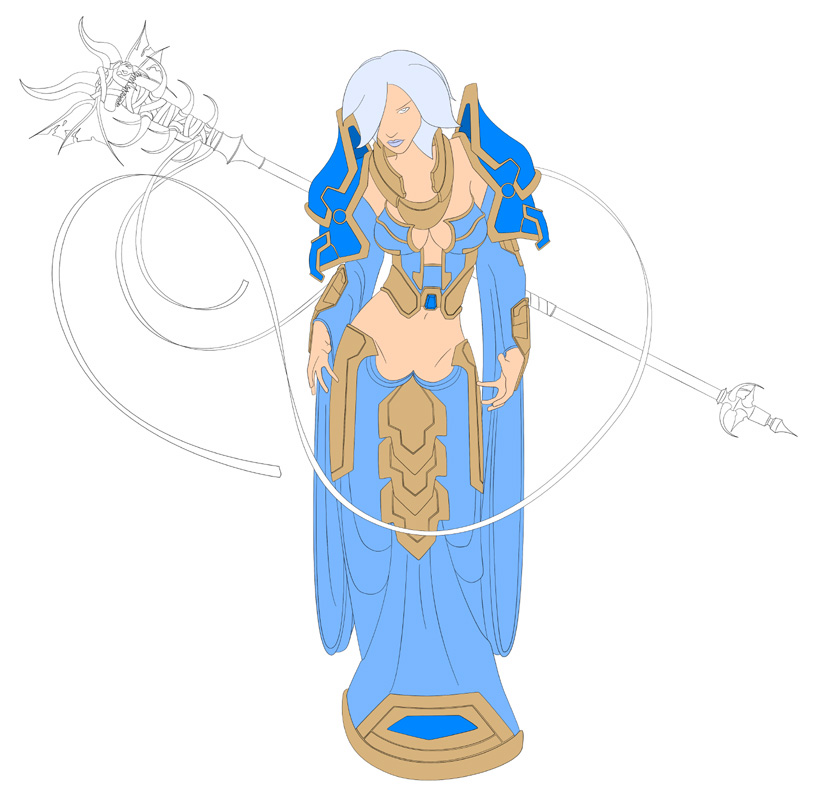
Awesome Rob, thanks! I'll check out damping, it's set at the default of 0.1 right now. Spent an hour or two on a dragon skull, meant for the top of a staff: Concept of said staff, and the character I'm working on atm: Kinda dreading the sleeves; the robe bottom has given me enough of a headache. I'll probably make them less baggy, or just do away with them altogether.
-
Came back to this after watching the cloth Tech Talk: http://www.hash.com/forums/index.php?showtopic=26015 The video was invaluable!! However, to anyone else having cloth issues - it's the tail end of the video you want. Most of the video goes over the basics of cloth; deflectors, modeling and animating with collision distances, etc. But around the 40 minute mark, just when you think it's "basics" video, there's the really good bits - explaining how to use subdivisions and to start and stop the simulation to work around tough spots. d b
-
Why hello there, Tom! edit: I would think his arms would be rather simple to create with a transparent spring texture on a regular ol' cylinder.
-

The little raindrop that couldn't
Meowx replied to robcat2075's topic in Work In Progress / Sweatbox
I really like it. Simple design, but with more complex technicalities driving it. Professional level without a doubt! -
Hmm, is there a known bug with particles + "on the fly" dynamics simulation? I was doing some test renders and noticed that my dynamics had all but died - their effects were very, very muted. Tried rendering without particles/hair and they were back to normal. Now, easy enough to bypass - just simulate springs first - but is this a known issue? This was also in a "shaded" movie render. I didn't try it with a full quality render.
-
Awesome, ty both! Must have been messing something up with the timeline window. Works fantastic now. d^_^b I'm actually REALLY happy with the result, here's a quick test render I did. Got exactly the effect I was going for. particles_test.mov And it takes almost no time at all to render because they're sprites. Thanks again!!
-
Trying to get a sprite particle system set up, and can't help but think I'm missing something basic here. I can't get the opacity to change over time. It's just constant. I adjust the opacity over time on the timeline, but it does nothing. And is it possible to use an animated format for a sprite? .gif or .mov? Had no luck with .mov, nothing renders. Thanks!
-
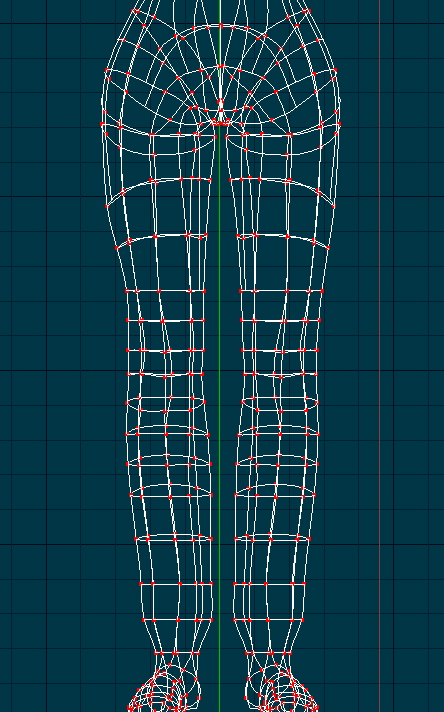
Here's a couple movies quick. It's not as bad as it was before now that I've added a few new splines to the legs, but the feet area in particular are still kinda questionable. That being said, this IS a test animation I had created for a different character - so I didn't really animate with a robe in mind at all. Do I just need to be a little more careful animating? http://www.modenstudios.com/clothF.mov http://www.modenstudios.com/clothB.mov
-
Yep! The simulation runs fine and the cloth behaves like it should, it just goes through the leg from time to time and then gets stuck.
-
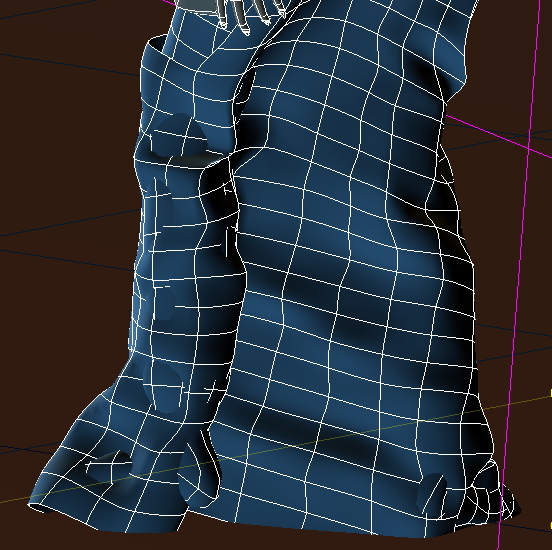
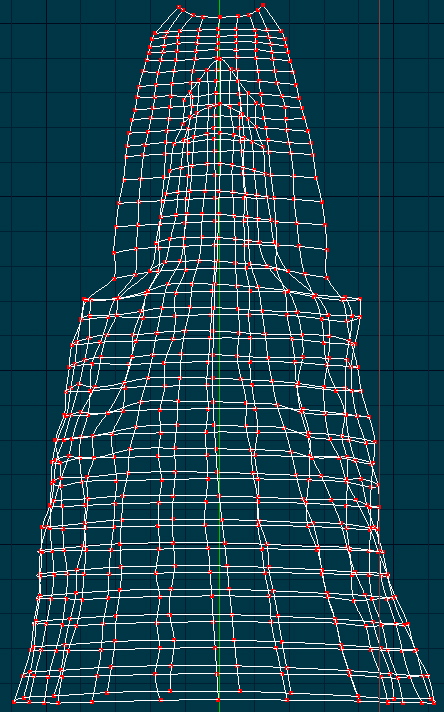
Having some problems getting a robe to work properly. It seems no matter what I do, the legs start going through and getting stuck. By the end of the simulation, I've got something like this: Is the mesh just not dense enough? Right now I've got the collision distance set to 0.2. If I put it to 0.3 or higher, the cloth disappears after a few frames (presumably too close; too many collisions).