Rodney
-
Posts
21,630 -
Joined
-
Last visited
-
Days Won
114
Content Type
Profiles
Forums
Events
Everything posted by Rodney
-

sorry started to play with PS and space prgm
Rodney replied to johnl3d's topic in Tinkering Gnome's Workshop
It may be a good thing that I didn't know you as a kid. For sure that'd be fodder for a nightmare. Here's the scenario for the movie chronicling my adventures: Little Rodney is sleeping Enters JohnL3D induced sleep cycle Screams and wakes up Mom says, "There. There. It's okay. Can you tell me what happened in your dream?" Wide-eyed little Rodney says, "I-I-I had another T-T-Tinkering Gnome nightmare! The... The... Gate!". -
It's funny you mention Yves. I just ran across this:
-
Some of the variation might be due to A:M knowing where the UV CPs originated from. In my movie for instance a simple click reattached two out of three CPs on the same UV patch. If it was just a little bit more accurately placed I'm sure the third would also have attached. As it wasn't I had to separately attached that. I guess the important thing is that whether attached or unattached the decal is still going to show up on those patches. Attaching simply facilitates moving those patches around. Added: Some of the difference in what we are seeing may be due to the fact that you are using a mouse while I am tapping with my finger on that little rectangular square on my laptop. I'm certainly satisfied. Although DARN IT!!! just now I realized I should have included ROTATION and SCALING of some patches. Maybe next video.
-
Coming at you as soon as I can upload it. See attached! Like I said you'll have to trust that I am using the proper keys. Maybe I could record my fingers strokes with a webcamera and have someone certify that both video streams were in fact conducted simultaneously. I believe that at the time I indicate I am using the Ctrl Alt Click method you can observe that I am not using your Select Move Click method to do the attaching. Note that I have not watched this myself except to add the captions so I'm not sure how well it gonna play out. Edit: Could have been better but not bad. I probably should have noted that the decal is that gray square otherwise some folks might not know what we are looking at. DecalViewEnhancements.mov
-
Thanks Nancy! I'd love to get that locked down because, unless you've redefined those keys, they should be attachin'.
-
Congratulations Gene. Here's a new vote!
-
Yes, but at least now I can type in a name for the group before I crash. As soon as he fixes that bug then I won't. In other words, I don't think we are suppose to name UV Groups... yet. As of this moment there is nowhere in the PWS for UV named groups to show up. I'd appreciate it if someone could confirm this. I believe that anyone who attempts to open the Property panel, select a group of CPs in the UV Editor and name the resulting Group will soon wish they had saved their project.
-
What Nancy said here. I don't recall anything in your tutorial that won't still work here. It's interesting to note that I thought I saw a place to name the UV Groups but if it's there I don't think it's fully implemented yet. It looked like I named the group in the properties panel but it didn't take and I couldn't find a trace of it after it closed. Edit: Tried it again and as soon as I named it I dropped to the desktop. So, I don't think that works.
-
Nancy, You've been misreading me or else I typo'd something. It's not Alt Click that attaches CPs. Alt Click is a documented method for removing/detaching entire patches. That is the reason I said keep doing that if you want to remove patches. It is working exactly as it should. The keys I've been using for attaching CPs is Ctrl+Alt+Click. I'd upload a video but you'd have to trust that I was actually Control Alt Clicking. Will I haven't forgotten you... we are all simultaneously posting. Gonna make you a believer if I hafta come to your house! This is exactly what I thought I already had everyone believing a day or so ago. It's like I suddenly walked through a strange 'CtrlAltClick doesn't work in anyone but Rodney's dimension' portal. Am I really the only one that sees Ctrl+Alt+Click working?
-
I note that with both methods we can connect multiple CPs anywhere in the decal at the same time as long as they are aligned over the top of each other. Perhaps Steffen could increase the tolerance so that CPs connect when they are 'close enough' as sometimes the CPs appear to be over the top of each other but the only way to find out if they are attached is to attempt to move them.
-
I would like to find out why Ctrl Alt Click is not working for some people. But the good news is that now some of us have two ways to connect CPs in the UV Editor: Align/Select/Move/Click and Align/Select/Ctrl+Alt+Click Isn't it fun exploring new features. It should be emphasized that with Nancy's method we can not only reattach CPs but entire patches provided they haven't been altered too badly (this is what I take Nancy means by coplanar etc).
-
You mean like some kind of undo button to get back to the state before breaking any of the CPs? I'm investigating what you've added here because the only way I was able to attach CPs was with the Ctrl Alt Click method. Edit: That method works for me too. I think you've just discovered an undocumented feature! So once again with feeling. Here is Nancy's shortcut method (as it is working for me): (Disconnect some CPs in the UV Editor first in order to test this) - Align two CPs over the top of each other - Select both CPs and move them (anywhere) but do not release them - Click on the CPs At this point the CPs connect for me. (I'm not sure about all of that coplaner stuff. Thus far I've just needed to make sure they are on top of each other before selecting or else it won't connect the CPs.)
-
I should have said that this is how Alt Clicking is designed to work according to Steffen. So keep doing that if you want to separate patches.
-
Well, I don't know about restoring to the original connection but Ctrl Alt Click will attach any two CPs in the UV Editor together. Reconnecting is a rather exacting (five step) process. If you fail at any one stage you'll likely not reconnect the CPs. Make sure you: MAKE SURE YOU ARE USING A:M VERSION 17 - Place the two CPs you wish to connect exactly over the top of each other (there is surely a tolerance here but it's not very big) *I suspect this would be the primary reason why Ctrl Alt Click will not work for some people (Just for good measure at this stage select some other/third CP at this stage to make sure you aren't going to miss selecting both CPs in the next stage. - Select both CPs by surrounding them them with a mouse defined bounding box - Hold down the Control Key - While holding down the Control Key now hold down the Alt key - Click with the mouse on top of the CPs Note: At this point you can then place another CP over the top of these two CPs and after a Ctrl Alt Click have three connected CPs. Added: Maybe we can encourage Will to update his tutorial as the game has officially changed.
-
Do you folks need a video? Or just a better explanation? Does the following not work for you in the UV Editor?
-
That's such a popular subject that it's got its own topic: http://www.hash.com/forums/index.php?showtopic=42992
-
It was a dark and stormy night.
Rodney replied to Simon Edmondson's topic in Work In Progress / Sweatbox
Well, that makes sense then. Carry on. Carry on! We might need to see the camera view in order to refine our comments. The action of the character is smooth enough. My suggestion would be to break up the symmetry. If one leg/knee goes down first and the body follows, that would accomplish that. I would suggest trying this yourself but I know you can't. Perhaps you could have someone else perform the action and you could video and study their action? I can see that you are close but it's hard to tell from this angle. -
It was a dark and stormy night.
Rodney replied to Simon Edmondson's topic in Work In Progress / Sweatbox
Gerry is on to something here. Unless you are going for humor here you may want to pursue a slightly different camera angle. While not necessarily gospel there is something to the theory that straight on shots like this are ideal for comedy and lighthearted works. That may be what you are going for here but I assume not because of the 'dark and stormy' theme. Are you intentionally trying to lighten the mood or building up to the punchline of a joke? If you are then the flatness may be an asset for you. If not, consider a camera move. I guess ultimately I'd have to say that at this point beyond the obvious that he is opening/adjusting something, I don't really know what is going on. Take heart though... six isolated seconds does not give us a lot of time to figure out what is going on. Rock on! -
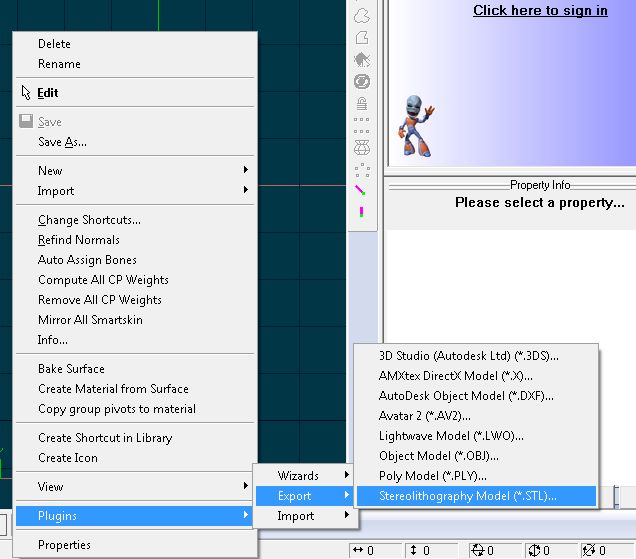
Charles, Wow! That's amazing work. I especially like the instructions you created to go with the STL models. Another excellent use of A:M! http://thingiverse-production.s3.amazonaws...nstructions.pdf Nice touch! Not answering for Charles here but want to make sure everyone knows... A:M now exports to STL format. (See image below) P.S. Welcome back Gorf!

-
Great write up Will. Short. Concise. Informative. You've opened my eyes a little more. I was thinking in terms of final rendered imagery and hadn't even thought about realtime resolution and animation. That should be at the fore. (I know your article is saying that because A:M spline patches are resolution independent we are already covered for both, I had just been focused on final rendering resolutions, static images and such.) I guess what I am considering here is whether there is a minimal or even optimal resolution given current images as found on many websites appearing blurry on Retina displays. In the past low rez generally worked for me but now I sense that I may be need to be more cautious of rendering out to lower resolutions. There also seems to me an opportunity to leverage both high and low resolution to take advantage of a greater range of clarity vs blur. You know those old theories that state things like "the farther away an object is the more it appears blurry". It presents something of an opportunity that did not exist before.
-
Is anyone up on the specifics/requirements regarding creating images for Mac Retina Displays? I've read a few articles but lost the one that I thought outlined it best. For those that haven't heard of this before it's related to how Mac displays are now produced with pixels spaced closer together which allow for crisper displaying of shapes and lines. This has ushered in a requirement for higher resolution images because the lower rez (normal pictures found all over the web) now look blurry by comparison. Has anyone seen a definitive guide?
-
Herein is one aspect that needs to be further defined. Are we talking about subdivision in a Model Converter? For import? For export? Optimized for a Renderer? Which one? Optimized for a Graphics Card? Which one and should we assume it is for modeling, animating or final rendering in real-time? While the end goal of each of these might be to make surfaces smooth, each of these will have different approaches and requirements. For fast playback one might assume the exceptions (things that require more computation) are simply skipped or approximated for the purpose of displaying in real time.
-
I've see that same thing before. Perhaps in Martin's patch technology write-up?* Edit: Didn't find it. It may also help in the understanding of it all to why such a change is needed. For instance, is there a specific issue you've run into or are you simply trying to explore and optimize? Here's a write up I'm sure you've seen Malo. I include it here for those that want to catch up: http://www.cs.sfu.ca/~torsten/Teaching/Cmp...ML/08_2Dcurves/ Of interest to me was the very last slide where it talks about testing for sharp edges and exceptions (this would be the realm of three point patches). It should be no surprise to see that they suggest handling those differently than the rest of the mesh. From that early Pixar paper you pointed to that seems to be where the scientists have been spending a lot of their time.
-
Nice pic Robert! I think that is closer to how the patches are (or can be) optimally subdivided.
-
I believe Robert is referring to A:M only. Previous to A:M (Animation:Apprentice etc.) others were certainly used. Hash Inc made an attempt to push the tech to graphics cards but (as I understand it) the math is easier to understand when using polygons. I see ut as the equivalent of working with straight math versus dealing with intensive algorithms. The algorithms perform better but someone first must create and then optimize the algorithms. This as opposed to crunching the obvious numbers via "perform math, perform math, perform math and recycle." Nice images Malo. They nicely illustrate your idea. (Disclaimer: The following is VERY naive) I can't say much regarding your thoughts on three sided patch division except to say that it appears that your proposed scheme would create shapes that are not rectangles (which are then subdivided into two polygons). They would appear to be modified rectangles/trapezoids. Therefore this new approach would have to be handled/interpreted in a different way than all other divisions, perhaps by sliding either the top/bottom or right/left sides within the given subdivision. I could see this going one way (to a renderer or to export) better than the other (import or continuity of 're-unsubdivided' or reconstituted splines). I'm trying to imagine how that would work for an importer it would have to test for both rectangles and trapezoids. I assume trapezoids first because they would be rarer and require more attention so they would have to be dealt with specially after ID'ing. So I'd guess we'd have to start with the question: Are all patches already (currently) simularly subdivided? If they are then implementing this new way to subdivide would constitute an exception which would work against optimizing. Of course, being an exception does not make it not worth pursuing. Exceptions to a rule often turn out to be that same rule (at least partially) optimized.