Search the Community
Showing results for 'project'.
-
Strange that I'm seeing the gif animation in the preview of this post but not in the post itself. As far as the project itself... When we download the project file it will of course be missing any referenced images. As such when I render it I get the melting ice and fire but not the character. Still a fun project even without the frozen guy thawing out in the render. Let's see if this appears in this post... yep. It does.
-
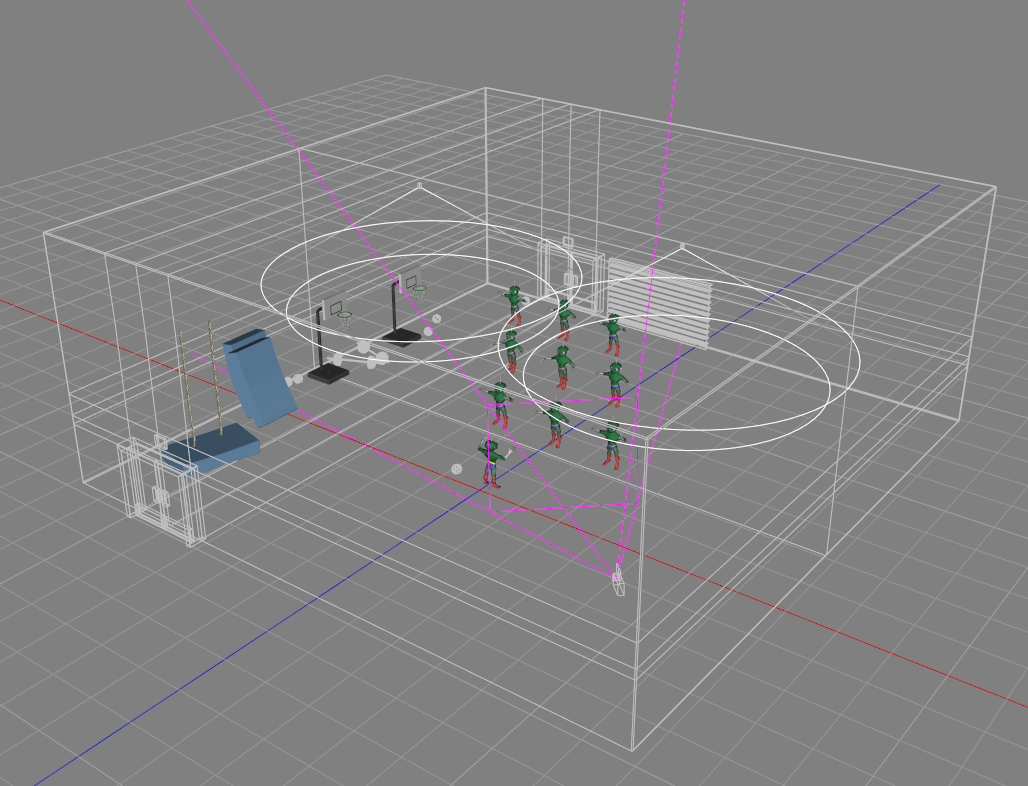
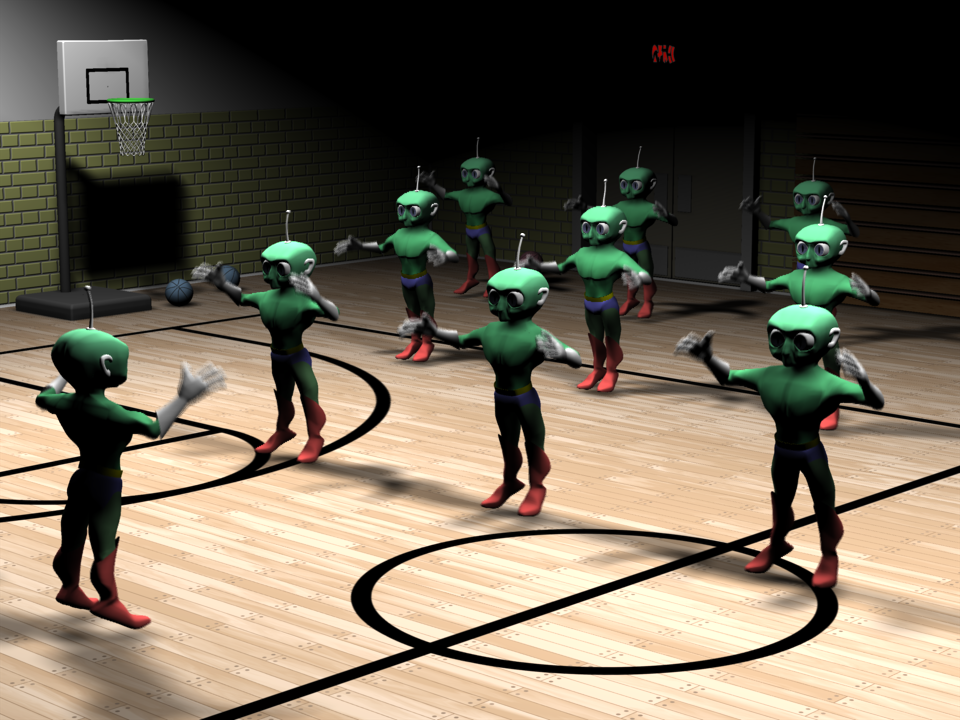
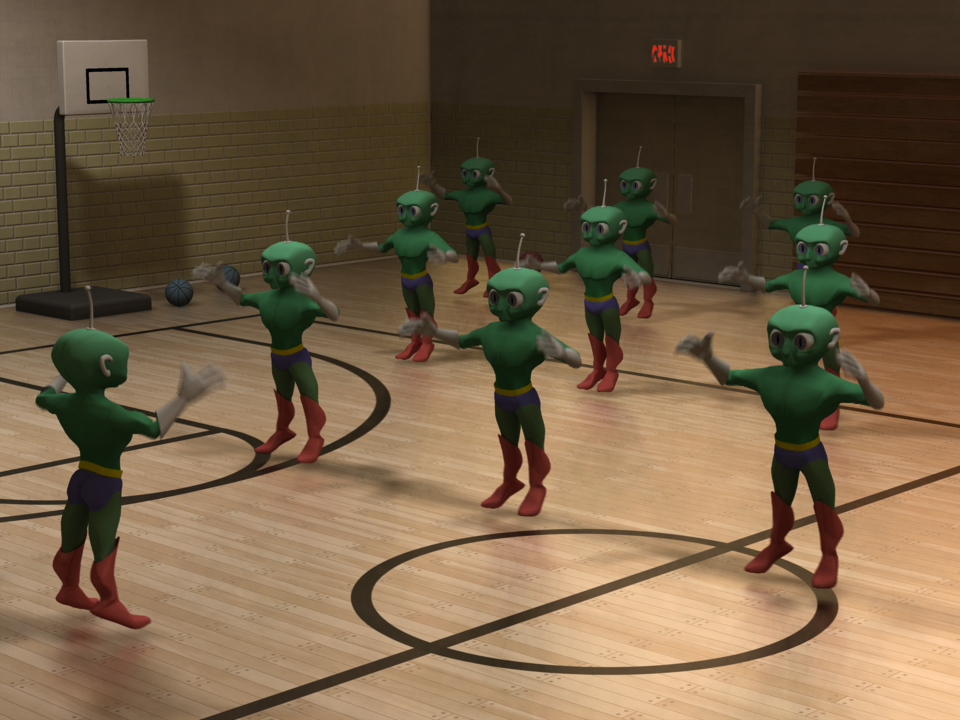
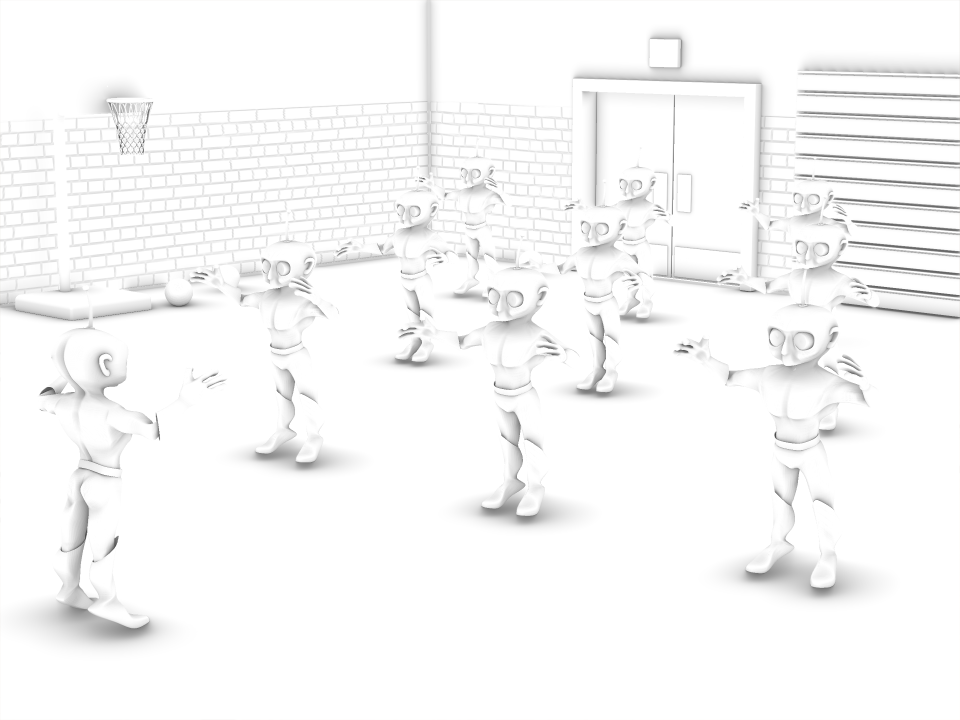
Here is another modern render of one of my old Animation Showdown animations. I added a school gymnasium set and rendered with radiosity. A birdseye view of the chor looks like this. The set is a completely enclosed box with two kleig lights in the ceiling... A conventional render with those two lights gets this... That is very severe. If I were going to use conventional lighting I would need add a number of fill lights in strategic places. Here is a radiosity render. The shadow areas are no longer pitch black and there is visible detail even where the lights do not directly shine. Overall, however, it is too dark for my taste. Increasing the Intensity of the lights so that the charcters were well illuminated caused the brightest spots on the floor to become overbright and clip. Instead I applied a gamma correction to the radiosity render. I''m liking this much better... Unfortunately, the shadowing that was indistinct in the raw render is now ever weaker. To give that some more bite i rendered a pass with ScreenSpace Ambient Occlusion (SSAO)... ... and composited that by "multiplying" it with the Radiosity. I did that in After Effects but an A:M "composite Project" can do the same operation. This PNG alternates "before" and "after"... SSAO has no anti-aliasing so I had to render those at 3x3 times the normal resolution to make smooth versions suitable for compositing. When A:M introduced Radiosity our computers weren't ready for it. Each render took so long that animation was unthinkable. But now with a modern CPU and NetRender it is within reach. My 640x480 test renders for this scene took only about 3 minutes per frame. After i got my settings decided and cranked up the quality, the full-frame final renders took only about 20 minutes each. Get started with Radiosity with Yves Poissant's Cornell Box Tutorial Learn more at Yves Poissant's Radiosity/Photon Mapping Pages


-
Can you upload a sample project where this happens, Robert?
-
project file oolldd1.prj
-
decal for face accidently erased xxxx.prj
-
You can make them talk wuith the right image on a simple project

-

Links to Earliest Web Pages with Hash AM Training material
Rodney replied to Samaritan2's topic in Open Forum
The project I've uploaded should open in v15 and v19. Probablly not v10 but it's easy enough to try. When in doubt use v19 unless there is some specific reason to go back versions... such as to use plugins are features no longer included in later release. Plugins usually need to be recompiled after time passes due to various changes both internally and externally to Animation:Master. I believe the attached in this post is the original project and that should open fine in v10... all the way through v19. A:M will prompt when saving to update so you'll have to make a decision at that time. For those that are curious you can also see various things that I modified. Stanley.zip -
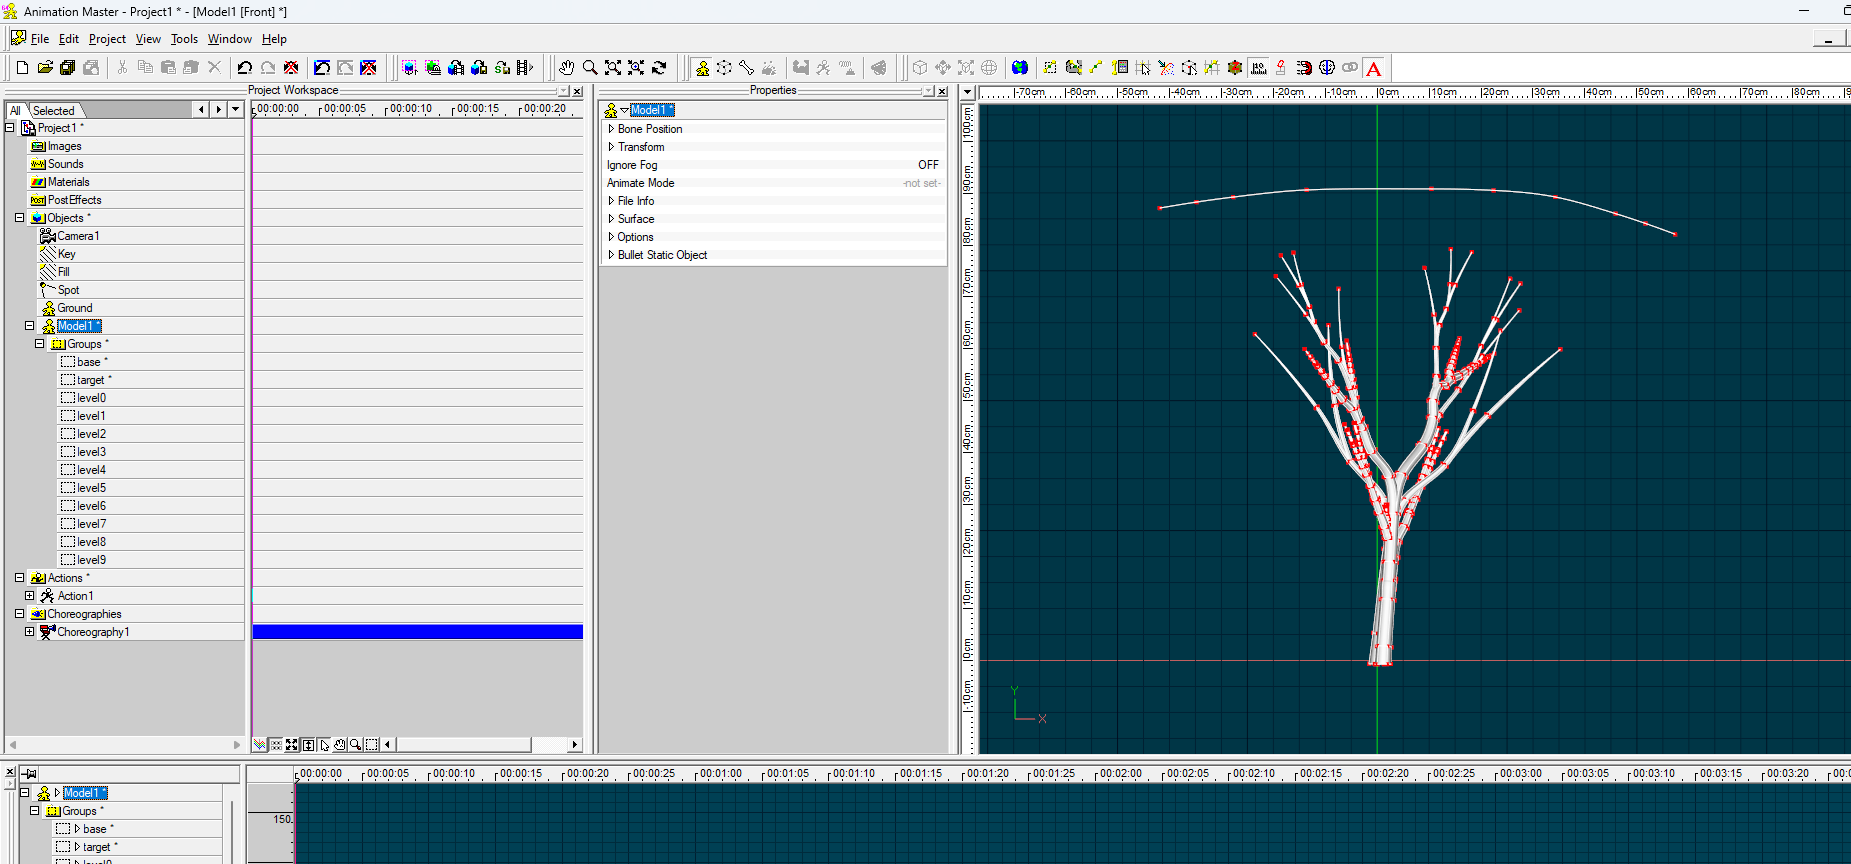
Hi Rusty, Always good to see you! There is the Treez plugin that is lauched from an Action. Perhaps you are thinking of that Plugin? It's not easily discoverable... had to remind myself how to use it but my memory came through for me. The key steps: Spline/Lathe a base shape - For example, Lathe a 2 control point spline into cylinder with 5 cross sections and then lop off/remove the top half leaving a circle. Select and name this group "base". Create a spline, plane, grid or set of splines and grids and place these above the circle/base as a target for the canopy to be created. If designed well you might be able to use these patches for leaves later. I call this group of splines and patches "target" although when generating using the Treez plugin It may be whatever is selected that becomes the target. Now the crucial launching step... Create an Action that uses this model, Right Click > Plugins > Treez This should launch and run to project the base toward the target. Edit: Just now see Robert's response and that will likely have more detail. Note that the target's control points are what determines where the branches will be generated and target.
-
How do I make a image file using Hash? is it even possible to make it?
Rodney replied to Pizza Time's topic in New Users
Regarding rendering images to file, Steffen was kind enough to add a Render option to the File menu. This is something even old time users of Animation:Master never had. That (in theory) makes rendering images more easily discoverable than using the classic Render icon. If we haven't saved our project, by default A:M will prompt us to save the project first and then take us to the Render options panel. Aside: In working with 2D folks I've noted that many simply don't have the term 'render' in their production vocabulary. For me. prior to engaging with 3D. I guess it meant 'to tear apart' but more closely means 'to separate or refine into detailed parts' as in 'the man drew a finely rendered drawing of the barn'. After introduction to 3D it just became the way we create images from our projects.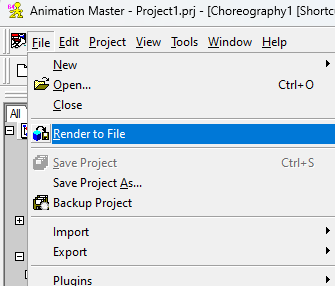
-
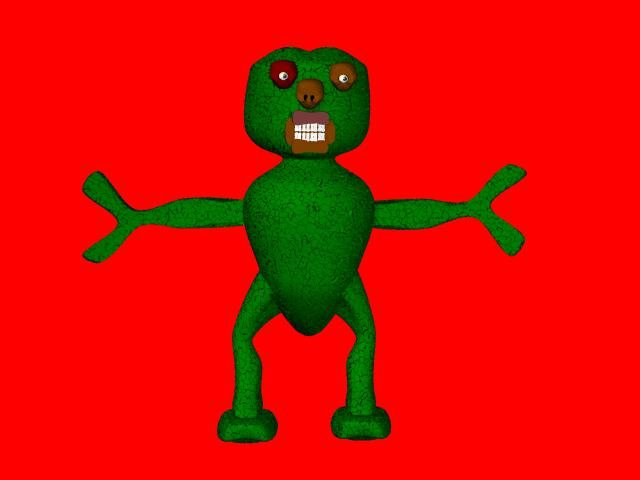
beentinkering around to make a monster as a project ..what if anything do you like or would make it better this is just a fun project
-
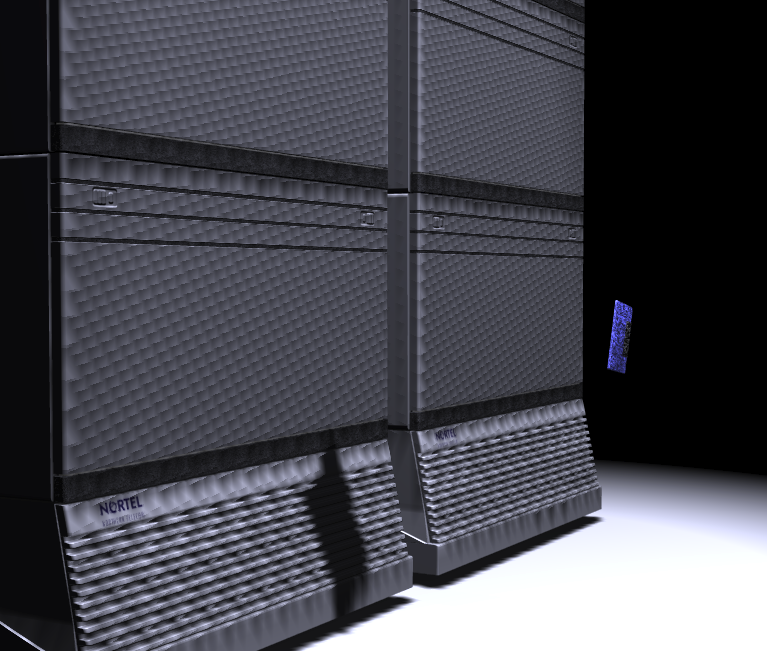
At the December 9 2023 Live Answer Time we talked about the Light "Bias" setting and I now recall the project where that had been a big problem... it was this "Parallel Reload" project! Here is a frame from a render with the bias setting not correctly set. The proper result is at the top of this thread. @Pizza Time
-
As a challenge to myself, I will start something to tie into my current project. I sat down last night late and decided to build a male and female head. Robert and I have been talking about aw transfer. Going to model something that use and low res mesh and transfer weighting to a denser mesh. I will post results shortly
-
I had something like that happen when i turned the constraints Pose on. 😮 I'm not sure how you got the long pants. Instead of turning the Constraints Pose on in the Chor, turn it on in the original model instance in the objects folder before you put the model in the chor. If you want to save your work you'll need to do Project>Embed All before you save a PRJ
-
Cool. I’ll try that. I also created a text file with the needed coordinates and saved that. I never save a project anymore. more than once or twice the project file would not open. Good thing I didn’t embed the component files. But that’s another topic!
-
John Purcell introduces functions, a form of reusable code. When you invoke a function, that causes the program to depart to another portion of your code, execute it, then return to just after the original function call. This first lesson on functions does not yet consider the important function return values or function parameters, but those are coming. Sample lesson idea: Copy the code of your Case and Switch program into a new C++ project and modify it to print the opening title and explanation via a function that is called, rather than having those hard coded into the main() loop of your program If your Case and Switch program didn't have an opening title and explanation... invent one for your function to print!
-
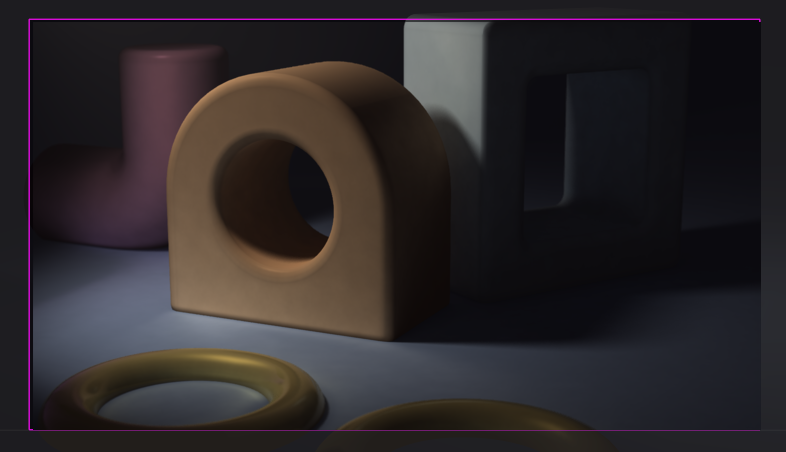
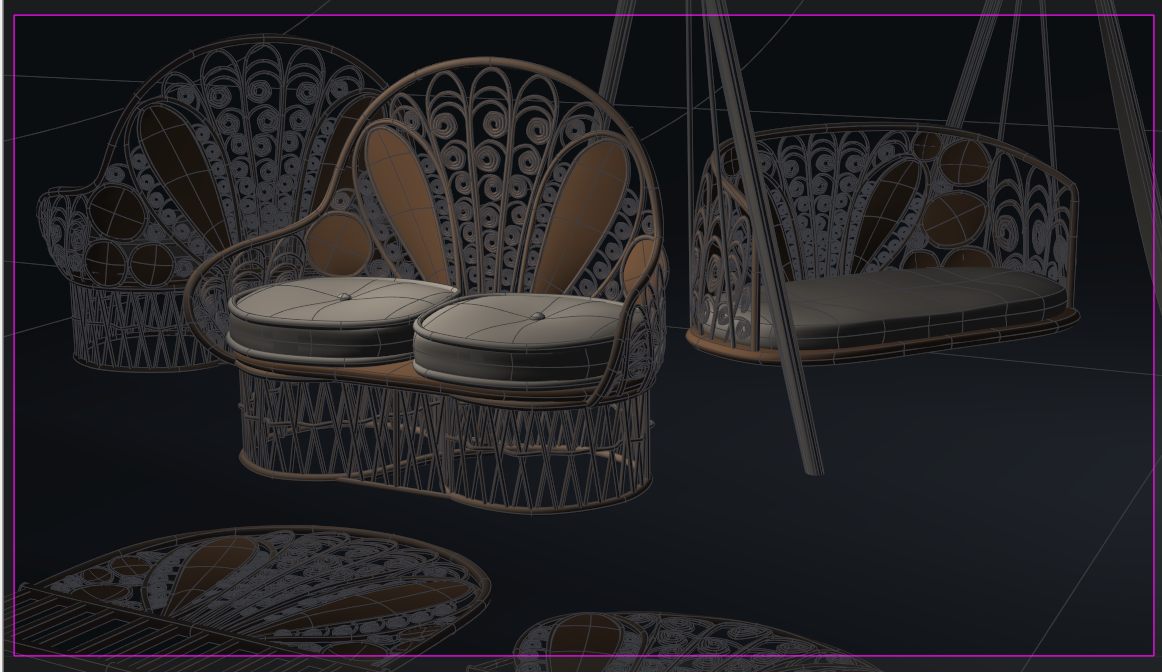
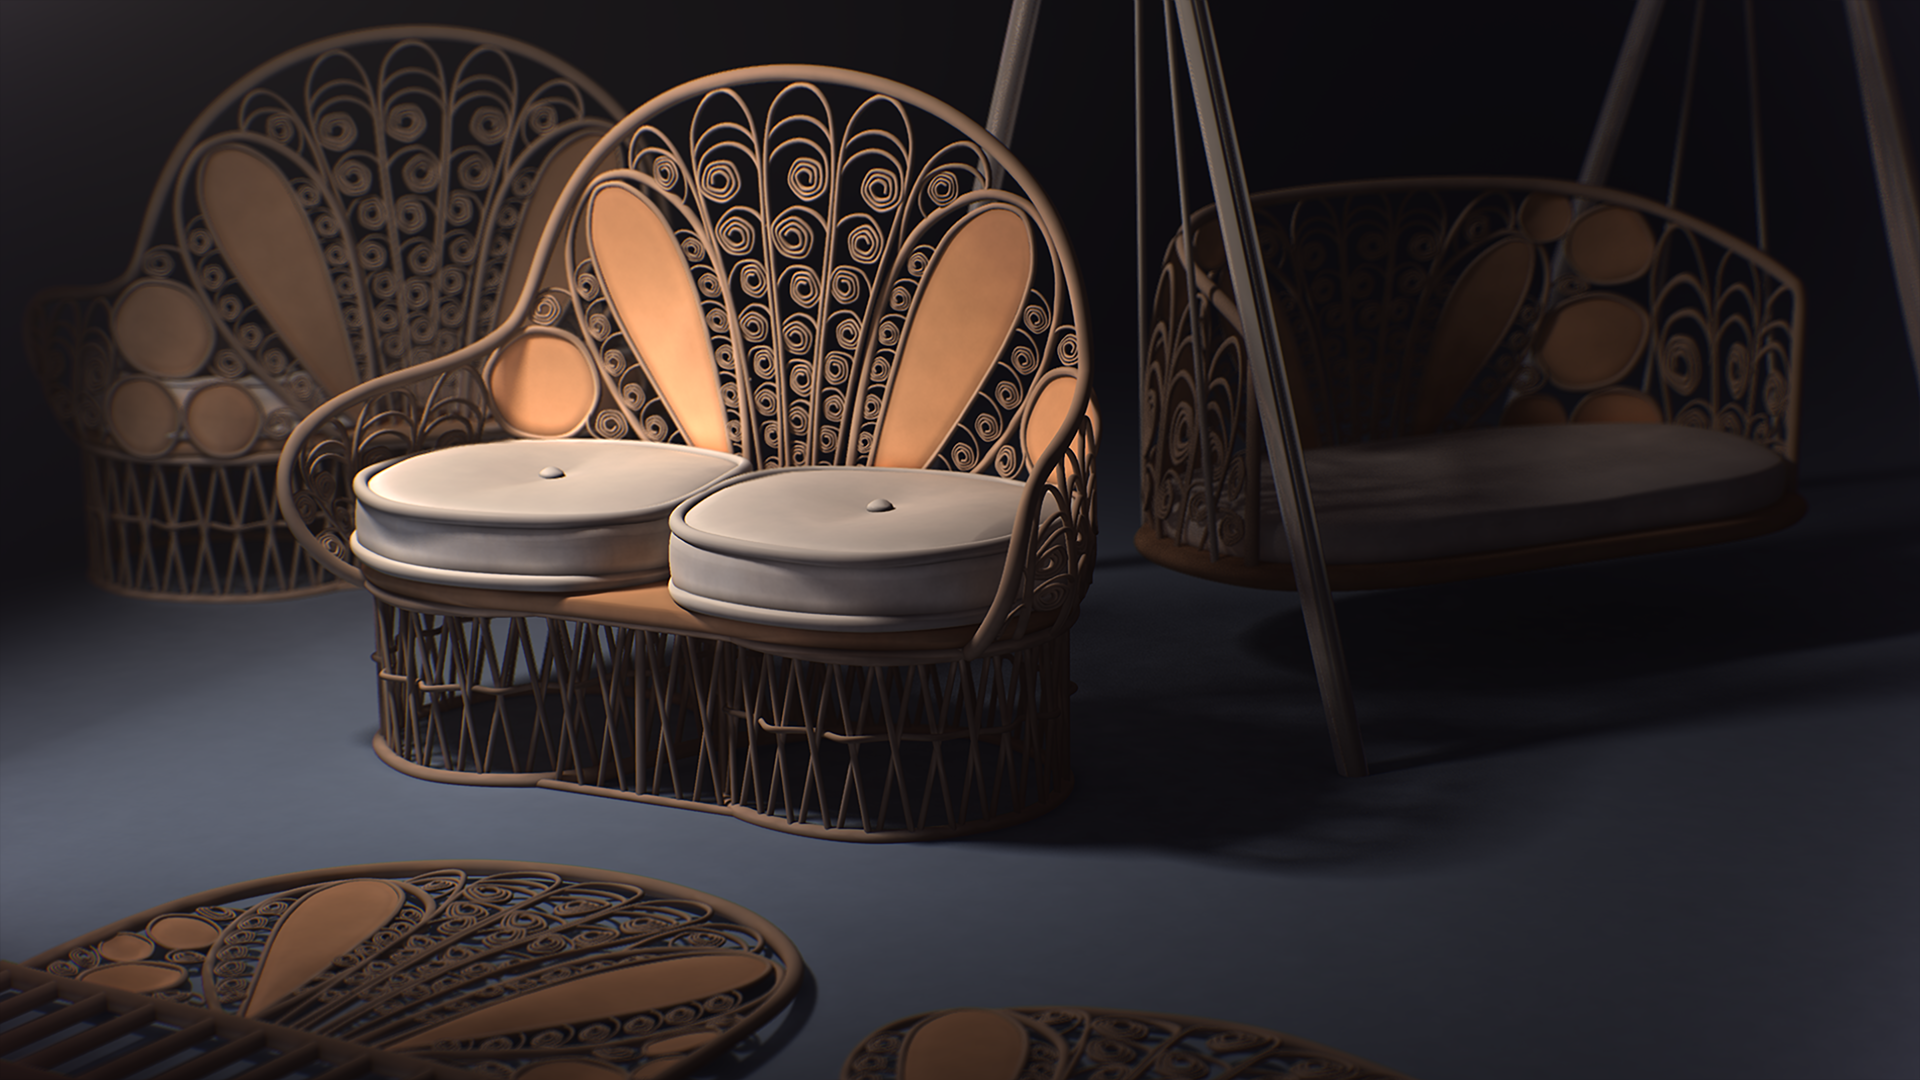
Hi Tim, Attached is a project file with the same lighting, just replaced the models with some objects from the library, most of the settings you will be looking for will be in the Choreography/Radiosity and Global Ambiance Type. Cheers 🍻 WickerBench_Lighting.prj
-
Yes, I entered the official contest! Before I entered the site and saw the examples. (happily) It took me more effort than I thought. Most time went up with the synchronity from seconds to Beats Per Minute. One thought during the project that stays me by was: it's not what I want to do with it, but how to keep up with it, Good promo for Animation:Master! ☺️
-
I rendered the project and the sprites were arrows. Open Gl rendered faster than Open Gl3....that's about it...
-
The switch structure simplifies situations that might be done with an if and many else ifs but only consider an integer value to decide which else if to do. sample project Golf scores are integers, so are the "par" values for the holes. A player's score on a hole can be just a number but it is often described by how many strokes above or below par it was. Also, there are names for each specific above or below possibility Write a program that prompts the user to input a par for a hole and the players number of strokes on that hole. Output par for the hole, the player's strokes, how many strokes above or below par he was and the golf word for that accomplishment (for up to 3 above or below par). Sample outputs: Golf Jargon! Enter your score for the hole: 5 Enter the par for the hole: 6 Your score was 5 Par for the hole was 6 You were 1 stroke(s) below par. You played a birdie Golf Jargon! Enter your score for the hole: 7 Enter the par for the hole: 6 Your score was 7 Par for the hole was 6 You were 1 stroke(s) above par. You played a bogey.
-
Hi Guys, Modeled these wicker furniture items for a project a few months back but thought would be cool to render together in a little scene. Cheers.
-
It wouldn't be hard to memorize the sizes of standard data types and hard code those when programs needed to use them. But part of the power of C++ is that you will be able to create your own data types... and make arrays of them, which could be any length. sizeof() helps you to bullet proof your code so that even if you change the size of your data type or the length of an array, your code can still operate on them without over-running or under-running the total data. project. Write a program that declares an array of strings without specifying a specific number of elements and initializes the elements with a set of data in that same declaration line. Report the size of the array in bytes, the size of an element in bytes, and the number of elements Print out all the array elements For example if the data in the declaration were: aardvark bat cat dingo eel The program output would be... Report on Array! The array is 200 bytes in size. One element is 40 bytes long. The array has 5 elements. 0 aardvark 1 bat 2 cat 3 dingo 4 ferret End of report. If the initialization data in the declaration line were changed to a different number of values: mockingbird narwhal owl parrot quail serpent tapir ...the program should need no other modification to correctly report... Report on Array! The array is 280 bytes in size. One element is 40 bytes long. The array has 7 elements. 0 mockingbird 1 narwhal 2 owl 3 parrot 4 quail 5 serpent 6 tapir End of report.
-
Installers: Windows: Windows 32Bit Windows 64Bit SDK: v19.5 SDK Change Log: Fixed 0007218: Gradient Materials not rendered with gradient Fixed 0007244: Bone positions corrupted on save and reload Changed: minidump files may have be greater, in this case please zip the dmp file before attaching to the bug report (command "zip -j9 dmp.zip *.dmp"shrinks the file up to 90%) Fixed 0007243: saving a project with relationships can corrupt projectfile Fixed 0007242: external modified decals not reloaded before final render Fixed 0007240: Constraints lost on close of Relationshipwindow close Fixed 0007238: PNG plugin bugs Fixed 0007237: Constrain cp motions during modelling rotations not working Fixed 0007234: Freeze after cancel load of missing asset Fixed 0007236: Freeze on missing asset Aslo bug 0007241 Fixed 0007232: Hair properties include several Toon Bias selections Fixed 0007235: Combiner not combining Updated For Security Reasons: External Libraries libpng bump to version 1.6.41 zlib bump to version 1.3 ziparchive bump to version 4.6.9 openexr bump to version 3.2 imath bump to version 3.2 jpeglib bump to version 0.9f
-
found this render and model converted to gif BasicMan.mdl
-
trying ooot simple idea simpleok.prj
- 1 reply
-
- 1
-

-
Arrays let you store a set of data under one name. Arrays can be a set of almost any data type, even one you created your self. Sample Project Write a program that prompts the user for 5 items of data, then prints the 5 items back out. Example output... I'm Using Arrays! ---------------- Enter a name: Crusty Enter a name: Dusty Enter a name: Musty Enter a name: Lusty Enter a name: Bartholomew These are the names you entered... Name 0 Crusty Name 1 Dusty Name 2 Musty Name 3 Lusty Name 4 Bartholomew Done! John Purcell suggested a program that stores the multiples of 12 in an array and then prints them out. The output might look like this... Twelves! the multiples of 12 are... 12 x 0 = 0 12 x 1 = 12 12 x 2 = 24 12 x 3 = 36 12 x 4 = 48 12 x 5 = 60 12 x 6 = 72 12 x 7 = 84 12 x 8 = 96 12 x 9 = 108 12 x 10 = 120 12 x 11 = 132 12 x 12 = 144 Done!