Search the Community
Showing results for 'project'.
-
 HEY HEY HEY!!!! everyone, I’m working on my Krystal character in A:M and I really need some help bringing her to life with actual animated staff actions. I’m looking for someone who can help create a few cool moves, such as: Staff swings and strikes A spinning sweep or twirl A kick-swing combo Blocking/defensive staff actions I’d be super grateful if anyone here could make a few action files or short examples that I can plug into my project. Even just a couple of polished moves would help me a lot and give me a base to build from. Pizza Time!!!!!!!!!!!!!!!!!!!!!!!!!!!!!!!! Krystal .zip 4b831477a003bfd9eb03c693edb2ec1.bmp
 -
here's a quick render so far and the project file logo.avi demo1.prj
-
found a simple model in my Animation Stuuf an tried him out orangeguy.PRJ

-
OK, one year later and I am posting again Some here might remember me from many years ago when I was using AM on daily basis to create my own characters and stories. Well I didn't get anywhere with my ideas other than a few smiles here and there. I tried publishers and some production companies to see if it generated any interest but never got much feedback so it was a bit of a dead duck. I did try the Children's Media Conference back in 2014 but again no interest and more recently another book publishers but that was a no go either. So my question or rather what I am thinking is should I revisit my project once more to see if I get anywhere with it or is the market for children’s characters and stories so saturated I should just tinker with my project for the fun of it? I know it is a question only I can answer but I would like to hear other people opinions since I know there are few people here who have done the same thing. Also with AI getting better and better the world of animation seems like it is going to get inundated with loads of stuff that looks all the same? Oh and here is the link to my project: Bella Bear. It's all a bit old now vintage 2006/7 but I think it could look a lot better. Looking forwards to other people's replies
-
Thanks! Yeah more artistically satisfying to make your own textures, using your own photos or painting them. Your project ends up being more unique in the end.
-
I returned to this to add a new option. After successful creation of the MP4 video and moving of the PNG sequence the script creates a thumbnail gif animation using the MP4 video. A few observations. We can render to the watchfolder or simply copy/paste a sequence into the directory. Either way the watchfolder script will see new images arrive and respond accordingly. I fired up Netrender and rendered to the watchfolder** and any excuse to use Netrender is a good excuse right? This isn't using Netrender's native ability to run scripts after completion but that might be something to consider as we could have Netrender communicate with the Watchfolder script to pass project names and more over to the script. One thing I forgot in the interim from using the watchfolder utility was that the .ini settings override the settings in the script itself so I kept wondering why even though I had changed the location of the watchfolder in the script it refused to watch the directory I specified. Well, Rodney, that's because computers only do what you tell them to do and you told this one to use the directory set in the .ini file. Once that was updated... all very good! At any rate, render a sequence of PNGs and automatically get a MP4 video, a smaller gif animation preview and datetime stamp a directory holding all of the PNGs. Rather quick too I must say. And while we are talking utilities to work with A:M files... Here's a test of a program that visits a github repository, previews the file (if preview image found), allows the file to be downloaded AND, if a zip file is located in that resources directory activates a button to allow that zipfile to be downloaded. Its more of a proof of concept than anything very useful. I'd like to have the program look inside the Animation:Master resource and share the preview/icon image stored there (if present) and display the File Info text (if present). Now that I've experimented with extracting the icon previews out of A:M files I think I might be up to that challenge. Note1: The program first looks for a preview that belongs to the actual resource. For instance, if cube.mdl has a PNG image in same directory named cube_preview.png it will display that. If that preview is not present the program will look for a preview.png image in that directory.. If that image isn't present it displays a default image. It'd be overkill but fun to have it have an option to look for an animated gif. Note2: The token field is what allows more usage via github. Github tokens can be set to expire and the one I'm using in this test expires in September. When scanning through a large repository the user will run out of free access quickly so having the token helps a lot. Without token: 60 requests per hour With token: 5000 requests per hour The count resets every hour. Note3: This demo does not use git although there is no reason why it couldn't be added so that models could also be uploaded to the repository. The exploration here was focused accessing resources that are online.
-
Digging through my HD again looking for some old projects. I was commissioned at one point by Hash to model Batman, such a fun project, thought now days I would probably model him with half as many patches, always less is more.. especially with splines.
-
...what's going on. I still run A:M on a legacy Mac Pro. I just bought a new PC specifically and only to run the new versions of A:M. But can I still buy Hash? I get the impression it's kind of a side project now and the support staff is very busy with other things. I perfectly understand how hard 5 spare minutes can be to find sometimes. If I order a permanent license from the Hash Store, will I get my activation code email right away, or whenever the staff finds the time? I'm eager to see what this Alienware gadget can do and Hash A:M is the only reason I bought it. Right now it's just sitting there receiving spam from Microsoft. Thanks.
-
When following a tutorial that teaches by making incremental additions to an previous project or when developing your own program in an incremental way, you may wish to leave an existing project as it is and proceed to work on a copy. Lets say I have project in my Visual Studio Solution named Wash002 and that I wish to preserve it as is and proceed with a copy of it. On your hard drive , find the folder that contains it. Copy the folder and paste it into the same directory. Rename the copied folder. I will name mine Wash003. In a program such as Notepad++ do Search> Find in Files... Use it to replace all text instances of "Wash002" with "Wash003" Do the same to replace the ALL CAPS version of the project name... Next use a utility like Power Rename (found in free MS Power Toys) to change all filenames in folder Wash003 that have a "Wash002" in their name to "Wash003" Next in Visual Studio, in the Solution Explorer, on your Solution title>Add>Existing Project... Navigate to your new project folder, open it and choose the .vcxproj file... In Visual Studio do File>Save All to make the newly added project saved in your Solution. I think this will work. @Rodney @Roger
-
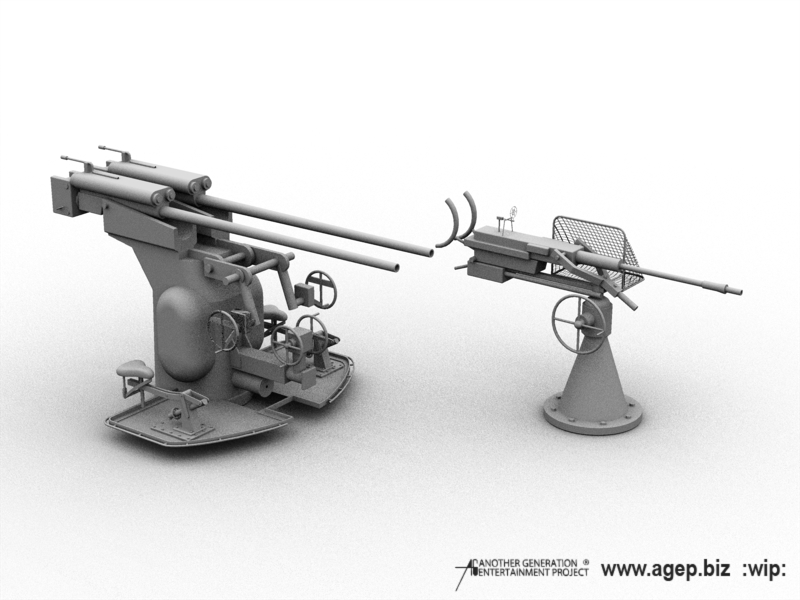
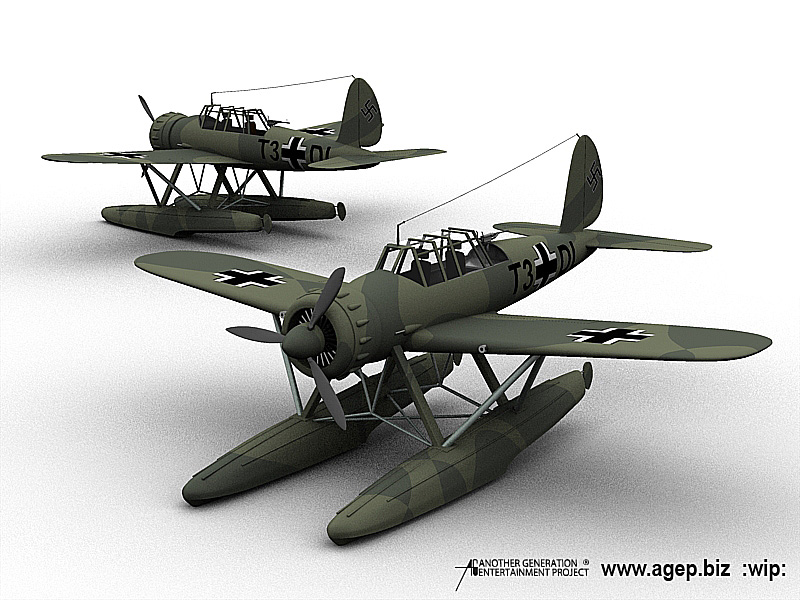
[moderator note: many interesting WIP pictures and closeups throughout the thread!] Hi fellow A:M'ers I've just started up an new and ambitious project (maybe to ambitious? ). Anyway, the project is to model the beautiful WWII cruiser KM Bismarck. I hope that I manage to keep an certain amount of details, but as you probably guess, this model is going to get an huge amount of patches. as it is now I have approximately 171K of them.... I make many of the parts of the ship as individual models, and assemble it all in an actions. Let me know what you think so far Best regards Stian UPDATED 03.08.06 assembled: [attachmentid=19199] [attachmentid=19200] [attachmentid=19201] [attachmentid=19202] arado floatplane: [attachmentid=19198] cannons: [attachmentid=17714] [attachmentid=17563] [attachmentid=17564] guns: [attachmentid=17616] [attachmentid=17640]
-
nothing too great but an okay tinkering with Hash Project1.prj
-
@gazzamataz It's always great to see you. From time to time over the years I've seen projects here in the A:M Forum that really capture my curiosity and not just from a general perspective but from one that I guess I would call 'commericial'. In most of these I think... this is a really intriguing concept. Where things get a bit more fluid is where I think, "is this commercial enough?" and "How could this be simplified/polished". I should say that your project reminds me of some of the classics like "HR Puff n' Stuff" which really capture the imagination (and definitely did when I saw the show as a kid. Music has it's songs that are 'ear worms' that we find ourselves humming or thinking of frequently. When thinking of HR Puff 'n Stuff some of the design elements are like this. I think of Cling and Clang as supporting characters but almost all of the characters have an odd appeal that captures the attention. Your 'Bella the Bear' has some of this 'odd intrique' and you've put a lot of effort into the concept over the years. As you've suggested the look and feel is definitely vintage early 2000 CGI which in its own way has some appeal but for most probably lends its self more to curiosity than commericial viability. So to the question at hand which is: ```should I revisit my project once more to see if I get anywhere with it or is the market for children’s characters and stories so saturated I should just tinker with my project for the fun of it?``` I do think you should revisit the project but I would suggest for the moment tinkering with a 'for the fun of it' focus. You already know Bella and Friends could use a refresh in order to test if the concept can be made more viably commercial. While you don't care 'Bella' to be something you don't want it to be it would be a good exercise to consider what a commercial marketing house that took on the project might do to make the concept more marketable. I don't know how familiar you are with Eastman and Laird's experience with 'Teenage Mutant Ninja Turtles' but their story is something of a legend. There comic book characters and concepts where purchased and adapted to 'kid friendly' animation and the world took that and ran with it. Some of that success was rather problematic... and lots of changes to characters and concepts happened. All of this to suggest that you firstly and foremostly need to make yourself happy. (While still having enough money to eat and have a roof over your head of course!) You might need to let go of your characters a little (but not to the point where you can't always do your own take as you see fit... in other words: reserve some rights to personal use). If tomorrow someone offered you a truckload of money to license 'Bella the Bear' and they ran with it... where would they take the concept? While having fun... within your limits of production capability... and while waiting for lightning to strike, insert yourself as that someone with the truckload of money and... run with it. I would start with the title concept "Bella the Bear". Bella is a bear. There's where I would start.
-
 2guysnow2.prj
-
sorting my collection and found this newdinosaur.mdl
-
2014_BusStop_v15c.prj
-

HELLO EVERYONE! John BigBoote aka Matt Campbell checking in...
robcat2075 replied to John Bigboote's topic in New Users
Good to see you here again, Matt. You know... there hasn't been a "Pass the Ball" project around here in quite a while... -
I am looking back at my 'Bella Bear' project I created back in circa 2006/7 so the files are old… I am having problems scrubbing through timelines using the latest version of AM. I keep getting 'Computing Dynamics' popping up and slowing everything down. Can someone tell me how to turn this off?
-
Gee fanx Rob! It was the latter… The fire and smoke coming out of Witchy Peg's broomstick. Going through all the files and renders I did on this project makes me realise how long I spent on it - months! But it is like going down memory lane it's all about 20 years old now I can hardly believe it…
-
morefun.mov Project: more_fun.zip I edited once in 2007 before saving it forgot to mentioned that
-
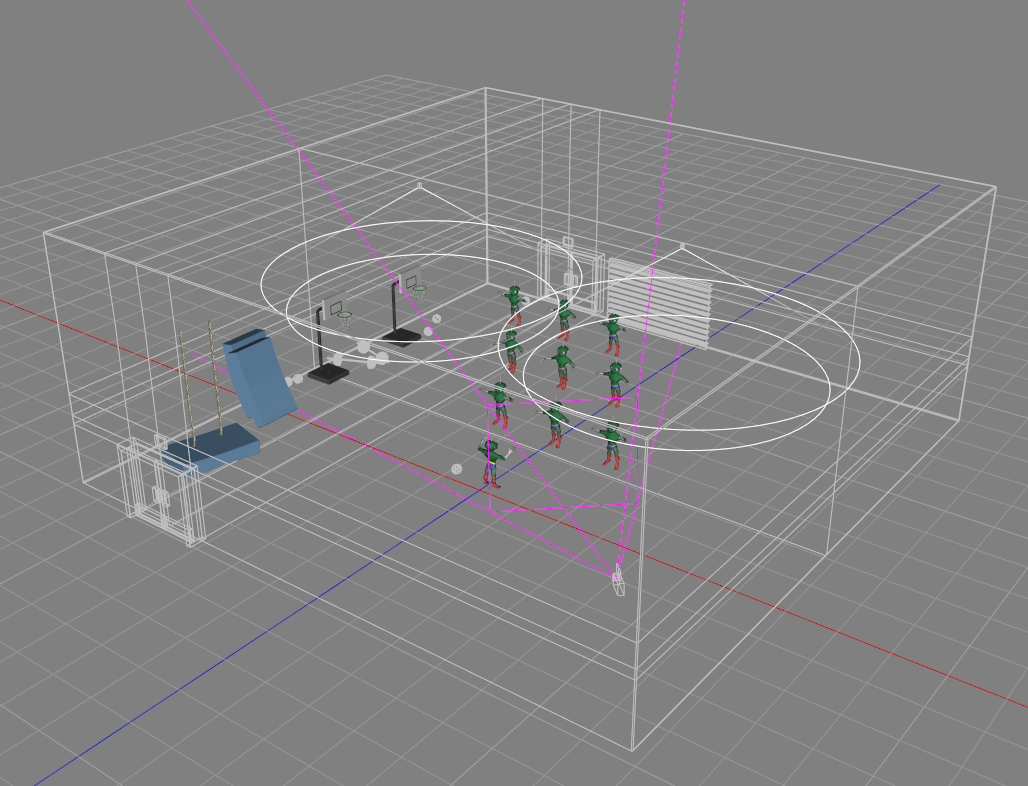
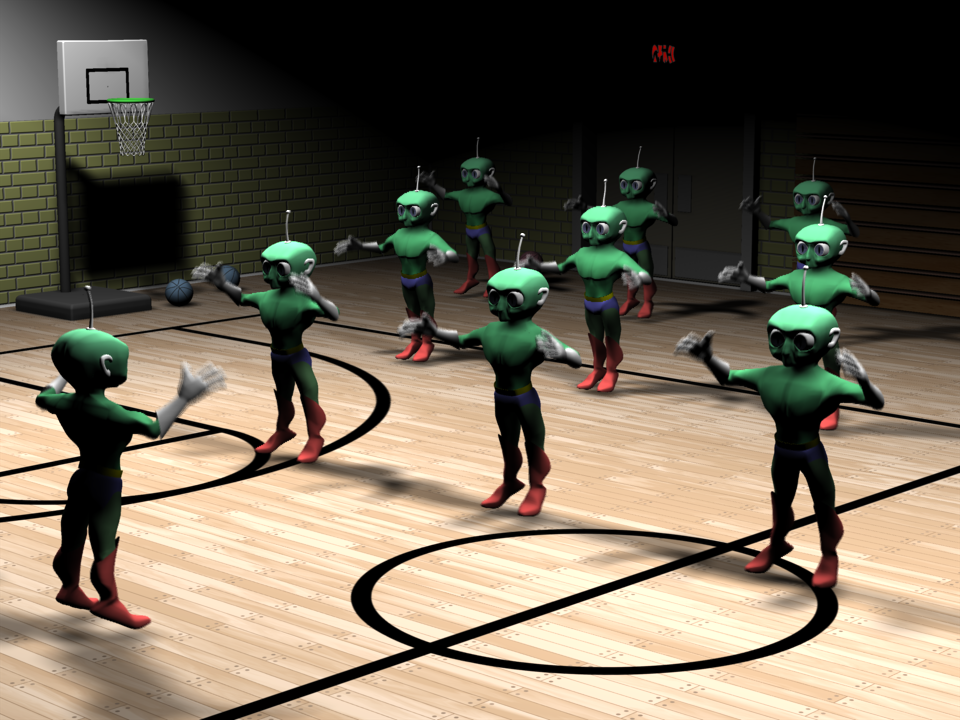
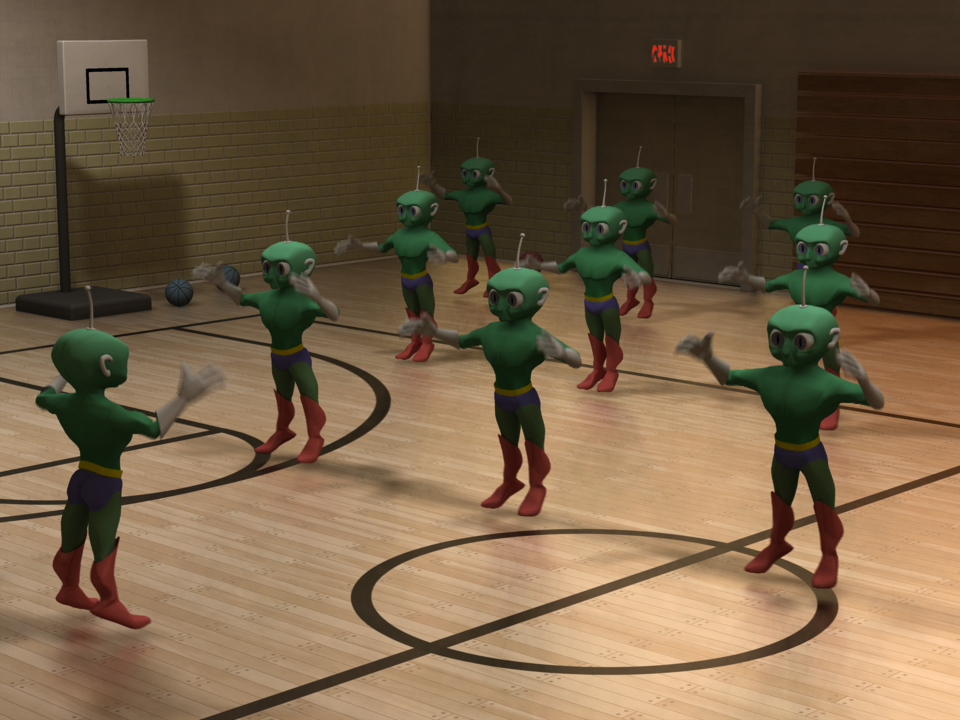
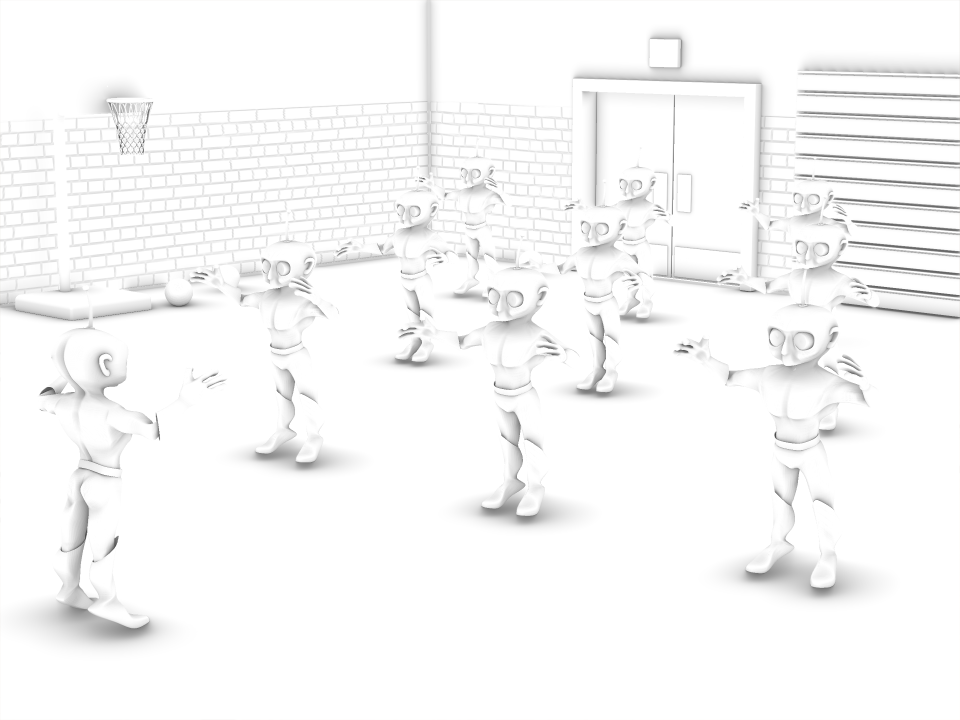
Here is another modern render of one of my old Animation Showdown animations. I added a school gymnasium set and rendered with radiosity. A birdseye view of the chor looks like this. The set is a completely enclosed box with two kleig lights in the ceiling... A conventional render with those two lights gets this... That is very severe. If I were going to use conventional lighting I would need add a number of fill lights in strategic places. Here is a radiosity render. The shadow areas are no longer pitch black and there is visible detail even where the lights do not directly shine. Overall, however, it is too dark for my taste. Increasing the Intensity of the lights so that the charcters were well illuminated caused the brightest spots on the floor to become overbright and clip. Instead I applied a gamma correction to the radiosity render. I''m liking this much better... Unfortunately, the shadowing that was indistinct in the raw render is now ever weaker. To give that some more bite i rendered a pass with ScreenSpace Ambient Occlusion (SSAO)... ... and composited that by "multiplying" it with the Radiosity. I did that in After Effects but an A:M "composite Project" can do the same operation. This PNG alternates "before" and "after"... SSAO has no anti-aliasing so I had to render those at 3x3 times the normal resolution to make smooth versions suitable for compositing. When A:M introduced Radiosity our computers weren't ready for it. Each render took so long that animation was unthinkable. But now with a modern CPU and NetRender it is within reach. My 640x480 test renders for this scene took only about 3 minutes per frame. After i got my settings decided and cranked up the quality, the full-frame final renders took only about 20 minutes each. Get started with Radiosity with Yves Poissant's Cornell Box Tutorial Learn more at Yves Poissant's Radiosity/Photon Mapping Pages
-
Robert thank you for putting this together. It was a great project
-
@Robcat Thanks for you input m8 - much appreciated. I guess you are right a lot of people get into 3D because they have ideas/concepts of their own that they want to run with which I did. I would say that only a tiny number ever achieve commercial success. The actor Roger Moore said 'Getting into acting is 99% luck 1% talent' sorta… Working on my Bella Bear project was a launch pad for me into a career as a 3D artist since that it what I have been doing since 2010 after doing the course at Animation Mentor which I know that you did too. And I have worked on a big film and a few shorts as well a a TV show and loved every minute - mostly I don't look at my project as the next 'Harry Potter' or 'Wallace & Gromit' but more just fun to get a bit or recognition for and entertain people. If you have ideas and are creative you want to create after all. I think I will just rework a few of the flicks I have done and bring them up to date which will be quite satisfying. I have already done a couple but outside of AM and reworked two of the characters. Wagons roll!
-
Hi Gary, it's great to see your familiar icon again! It sounds like you have already consulted more knowledgeable minds in the children's media world than us and gotten some clear "not interested" replies. It's hard to ignore that. The expectations for fit and finish in any media is very high these days, just to get anyone's attention. Mark Largent has gotten eyeballs and some fan notice for his "Stalled Trek" shows that he made all himself, but... he hasn't made money on them and no content distributor has expressed interest. Of course, he didn't expect serious interest either. After numerous ventures at the indie comic world he knew that entertainment is a very competitive field. I think we all got into 3D because we had a project in mind. I've been part of several other people's projects and it was fun to help out but not much came of them, ultimately. Today I do 3D because I enjoy the craft instead of having a career goal for it. I enjoy helping and answering A:M questions so if you should decide to pursue your project... because you enjoy it... I and other helpful minds will be standing by.
-
Good to hear you're back. I was on top of the world last October, getting ready to put my website together with my Android Project, my Hyperloop Intersection concept, and of course put the characters in somehow...Then I got steamrolled! 6-7 months of not having any contact with anything online, just a few relatives to call on the phone. Plus while I was away, it seems my briefcase was lost in a fire, so my 'almost ready to go' Android Project is gone, just gone. But I'm able to get my website up and running, even though it's not what I think it could be...and I'm looking forward to staying on my new mind stabilizing medication, so things like that don't happen again!
-
You can make them talk wuith the right image on a simple project


.gif.dedc85e834a0c5601da3cb4b1cf19e77.gif)