Search the Community
Showing results for 'project'.
-
I can't help with your project, but I like what I see so far. Are you going to tell what it's about, or do we have to wait and see? In any case, I'm looking forward to seeing more.
-
I was hoping to have progressed with this project by now but I seem to have hit a glitch with my rig. I found a couple of those yellow folders with the question mark in my bones folder and when I investigated found that they referred to duplicate bones with the same name. I checked to see which ones were linked in the hierarchy and then deleted the others. This seems to have recked my whole rig!!! Now every single bone in my rig has a queation mark on it's folder! Has anyone else seen this and do you know if this is something that I have caused or is it a bug? I am feeling very deflated right now. A:M 11.0r Going back to 11.0q
-
project file and decal I think chain link inside the framework of the fencing could easily be done this way fence.zip
-
So will your characters be toon rendered as your concept implies? I'm curious to see examples of the hair system with toon rendering. I like the concepts josema. Best with the project. Doug
-

CASH MONEY for DECALING/MODELING EXPERTS
Neeblesquibb replied to Neeblesquibb's topic in Work In Progress / Sweatbox
Okay............. how about SUGGESTIONS to other websites or Forums where I can find people willing to involve themselves in a start up project? -
all2c00l Posted on Sep 26 2004, 07:48 PM That really depends on how long you been modeling with splines. I been splining since v6. It took me 5 days, 6 hours a day. This is my third attempt at this model. The earlier one that I did was started in version 8.5L. I brought him into version 11 and edited what I had from 8,xxx patches to 7,xxx patches (don't remember the actual patch counts). I've never really constructed the splines the way they were ment to be. And I certainly didn't take into account that the way I was modeling might cause problems for rigging. But-- I learned the hard way and wasted 9 months on the old model. Not that the model isn't functional or modeled well, it just didn't have what I needed for my animation project. 3DArtZ Posted on Sep 26 2004, 07:58 PM Well, I had him in two halves. I hadn't CFA'd him yet, and I didn't know how to import a path in a chor, and time was running out. One half was just dragged in and the other... dragged in and changed; x-scale to -100%. Yes- and now that I have time to think about this I realised that I could have given one of them a constraint so it would orient like the other half and they would have moved together-- DUH! Next time I'll try that instead... but now I have him CFA'd... so I can drop the path--delete!!!
-
Stunning aerial footage of what looks like a giant Muppet rampaging through downtown Dullsville... at 11... I had a little fun with the SynthEyes demo project, and thought the results were worth sharing. My sources tell me there may also be footage from one of the fleeing onlookers... at least if I can spend the $350 bucks on SynthEyes. Enjoy! ShaggyAttack.mov
-
The face is kind of "flat" , it looks like from the view you are showing. Are the lips and cheeks and nose very close from the side view? If so I think you should exagerate the distance between them to get that look you are looking for. Did you see the Buz character in the toy's project yet? Maybe you could start with a look at that model. Edit: Too many neck rings in my opinion. you only need three.
-

CASH MONEY for DECALING/MODELING EXPERTS
KenH replied to Neeblesquibb's topic in Work In Progress / Sweatbox
A general outline of the project? Have you past experience of similar projects? -
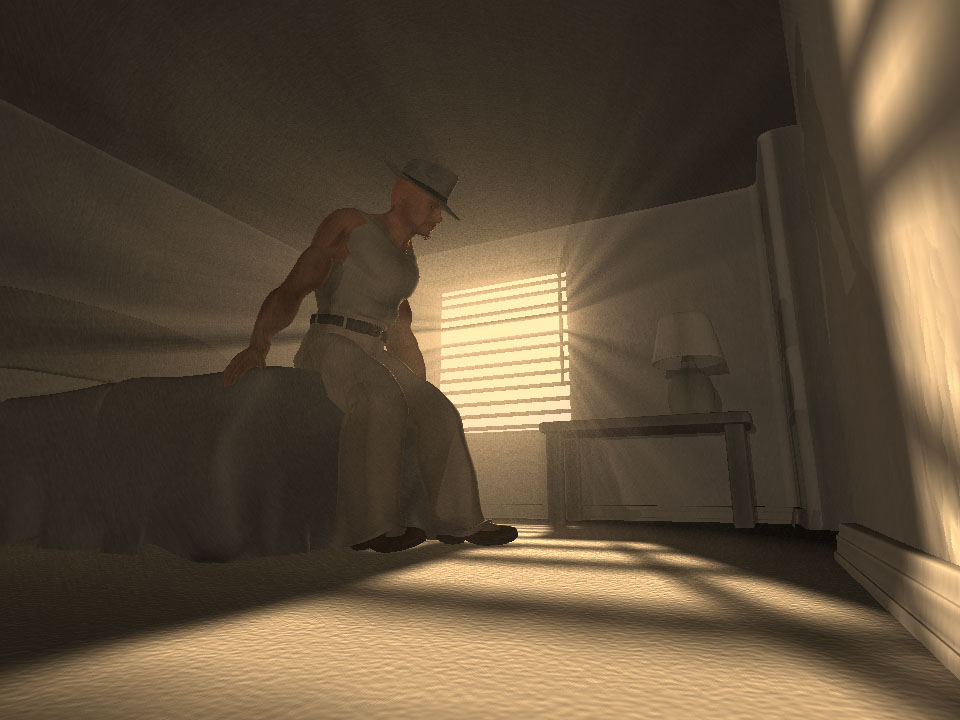
Hey Guys! This is my latest project, I was going for a real film-noir kind of look. Anything I could do to improve? C & C welcome and wanted!
-
Before I start my final rendering of this project I'm working on, I'd thought I'd see what some of you think about toon lines, with or without.... I've noticed that smaller resolutions yield not-so-great results while larger rez images or movies bring more precise results concerning the toon lines that is. This file contains my character with toon lines. (line bias set to 700.) with_lines.mov
-
Well done! Looks great! Though the illusion is broken a little when a few of the houses and things he tromps on don't turn to rubble under the weight of the mighty muppet but really well done none the less! I have had my eye on SynthEyes for some time now. Hmm maybe I should be looking for a project that will justify me buying it.
-
Amazing work as usual. What was the time frame for the project?
-
Here's the process, very quickly. Please get the project file from the link I mentioned in the first post and tear it apart. All of the elements are in that file. 1. In the modeling window, make the outlines for the interface and add type if you wish. 2. Add the nulls (modeling window), rename, resize, and position them in the proper places in the interface outlines. 3. Make a new On/Off pose and rename it Face Constraints. 4. In the relationship window (for the Face Constraint pose), click on a null and select New>constraint>translate limits. Set the "min" and "max" values which will restrict the x and y movement of the null. Repeat this process for each null. This completes the interface part. Now you need to make relationships for each null slider position. 4. In the PWS go to Model>Bones and select one of the nulls. Open its' properties tab and go to Translate X (or Y, depending on how your slider is going to work), and right-click, select New Relationship. 5. In the relationship window, make your pose slider window visible and set the relevent pose slider's values to zero (the sliders that will be affected by the null). Move the null to one of its' extreme positions and set the appropriate pose slider to 100%. Now, move the null to its' other extreme position, and change another pose sliders' value to 100%. For example, on the right side of a side-to-side null slider I put a wide mouth pose and on the left side I put the narrow mouth pose. Close the relationship window and repeat this process for each null sliders' x and y value you have. 6. Test the null slider in an action window. As you translate each null it should automatically control whatever pose sliders you attached to it. 7. Save, save, save.... repeat. Good luck!
-
Holy cow! I didn't think I'd ever see anything even close to that! I could certainly work around the bare spots with judicious camera positioning. Even if I couldn't get the right arm rigged, I might be able to fake it enough to complete the shots I can't manufacture in the game engine. Roughy, that's some really good work. How can I get that project from you? Many, many thanks, Sev
-
Yeah... I tried that demo/project. Either it's non-compatible with Mac, or my computer is just being fussy. It won't load or download properly for me.
-
i posted a project here http://www.hash.com/forums/index.php?showtopic=8416
-
Posting early since I'm going to Washington (Tacoma) for a con over the weekend. Upshot: Breakfast in Tacoma tomorrow (Thursday) morning! Down Shot: I fly out at 6 in the F***** morning. I am not a morning person.... Spent all of this week panicking getting stuff ready for the con and my docket cleared for sending stuff to my publisher. As such, I really haven't done anything on the short. Bad Smudge! No cookie! Did have the computer running on a render of a test for Artbox's Sky Caste lighting system. I had it rendering while I was busy doing other things. Good results straight off the bat, but need to run more testing to see if it's really something I can use (but not for this project). DesertRose_Strut_SkyDome01_small_.mpg
-
AND--- this is the updated turntable showing progress on the car WITH CrimeBomb in the hood (to be explained later) HOW DID I GET THE CAD GEOMETRY FOR THE CAR INTO A:M? The car geometry was generated by scanning an actual 2004 Ford Mustang. ..so to be fair it is NOT CAD DATA...Half the car is 'taped' into a grid and touched by the scanner at the intersections forming a mesh. The model was then finished in Maya and used by FoMoCo to sell cars in TV adverts. As a test, my friend who works on this project exported the body mesh from Maya as an .OBJ file. which I imported into A:M. Working on the car is very SLOW...A:M chuggs to keep up during opening, copy and pasting, and modelling. BUT on the other hand A:M does quite well with other aspects such as distorting, rigging, actions and render! The frames from the attached movie took an average of 1 min 30sec at D1 res, no multi-pass, not bad for an overnight render. If I turn-ON multipass to 4X4 it is 8.5 min per fr. Not bad for a weekend render. MsDsSTANG.mov
-

HELP! Can't figure out a few things.....
johnl3d replied to Neeblesquibb's topic in Work In Progress / Sweatbox
and here is the project less the decal called newlogo and the sprite that is on the cd you can skip the newlogo file when loading and find the sprite file on the cd when loading and you should be all set the sprites are the white things that get unloaded best I could do in about 20-30 minutes also go read the manual and view the tuts saucer.zip -
Okay people... here's my dilemma(s)..... 1) I can't grasp the whole "decal" thing at all. Just don't get it. Is there any straight forward tutorial that shows a complete idiot how to do it from scratch? 2) I would love to show you my recent work in the WIP room, but I am not sure of which format to use, nor am I sure how to save just the MODEL and not the whole project.... A;M doesnt seem to let me choose the .mdl ending. 3) Any ideas on how to bone a UFO Saucer style with the bottom that open straight down.... without swaying back or forth, as if it were connected to a piston in the center? This would be alot easier to show you if I knew how to upload images.... 4) And finally..... sprites... I need a tutorial on that, too. It's greek to me... and I even know a little latin, and I can't figure it out.
-
ddavis It depends on what tweaks you mean ...I've changed color and a few other properties under tweaks so I guess yes I have... but there are some that don't animate or at least not very well. Which tweaks on whcih materials? ps For the Mac users you can get great effects with little effort from regular combiners I posted a extremely weird (maybe) example of what you can do here THis should work on a MAC or PC http://johnl.inform.net/pages/effects.htm with the project but its V11 Q
-
Hi there, this is a project i am working on, it is for a little comercial, which should go into the local movie theathers. As you can see, the volumetric lightning is really out of controll, and till now, i dont have a clue, how to arcive the desired effect. Any suggestions on the volumetric settings? Thanks Heiner

-
John, The Green Canary is hilarious! I don't know where you get your material from, but you've got one heck of an imagination. I've attached another example, this time the tree was not animated at all...the only things which are moving are the animated decals...so, the movement is quite subtle. Best to save and loop in Quicktime. The Project file isn't really setup for the tree to be viewed at all angles, but perhaps I could work one up and make it available. Thank you for all the comments. Eugene TreeSwaying_003.mov
-
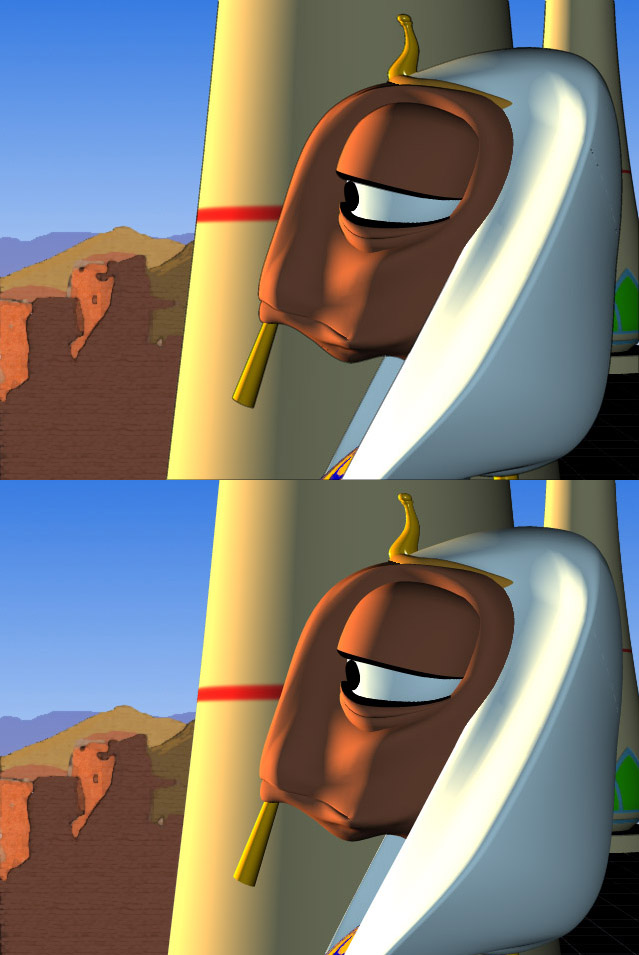
thanks everyone for taking the time out to reply... this project is built around the story of Moses in the book of Exodus, a kid's video of sorts with splashes of grown-up humor. I'm using ants as a break away from the traditional "people" look and to make it a bit more interesting for the kids. There's also the look of the background that has me concerned... my wife doesn't like it and I'm at the *50/50 rock either way* point. But it has to do with the water color feel of the buildings and distant mountains etc... She say's that it's like Picasso meets post modern contemorary. I think that it's okay for distant objects and/or props and the coloring look to be good as decals on closer objects. What are your thoughts?