


Caroline
-
Posts
1,248 -
Joined
-
Last visited
Content Type
Profiles
Forums
Events
Posts posted by Caroline
-
-
You can retrieve your entire manual in pdf form from:
http://www.hash.com/2007web/reference.htm
The lip poses are on p147 of TaoA:M.
And more pics:
http://www.3dlessons.com/tutorials/Preston...ries-54854.html
If you have Stop Staring by Jason Osipa, then he does lipsync differently - (I have read about it, but not done it).
Here's a sample chapter, not lipsync, but eyes, which I guess is part of lipsync too.
-
That's because "ibl" is too short to search for - try "image based lighting".
I recently discovered IBL because of Nancy's image, and I did these tutes:
from Xtaz:
http://www.hash.com/forums/index.php?s=&am...st&p=202702
from Stian:
http://www.hash.com/forums/index.php?showtopic=29457
Then because I was confused by the whole thing, I started a thread too, which may explain a few things:
http://www.hash.com/forums/index.php?showtopic=33030
So in Xtaz and Stian's tutorials they use the hdr image, which allows brightness, whereas my example was a jpeg image, which just changes colour. Creating a sphere is necessary if you want real world reflections.
-
It's a hard thing to understand until you actually need them.
What graphics program do you use?
There's an interesting thread here about what the alpha channel is:
http://www.hash.com/forums/index.php?showtopic=16922
But if you look at John's ice pentagram in that other thread, that is what an alpha channel is for - if he did not have an alpha channel describing the transparency, you would not see the grass through the pentagram.
-
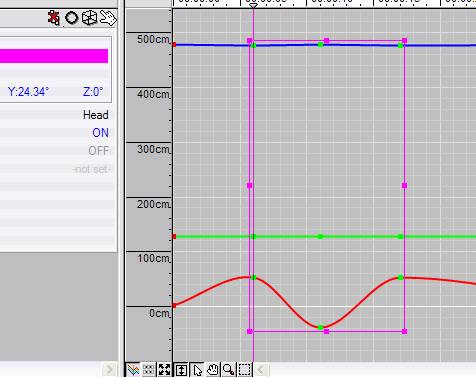
Is there a difference between the PWS- and the real timeline-window?
I think they are the same, Fuchur, just shaped different, so you can see more objects on the one on the PWS, so you can select more keyframes. I usually use the one at the bottom, but if I have dual monitors set up, I use the one on the PWS. The 1 key works on the PWS one too.
Ravager - to make a print screen, click Shift + Prt Scr (That key is part of a group of 3 that includes Scroll Lock, unless you are on a laptop or have a Dell, in which case I don't know where it is). Then go into your graphics program, and Paste (Ctrl V). I use Irfanview as my graphics program for printing screens, as it is quick to load. Then you can draw a box around the part you want to keep and crop it (Ctrl Y in Irfanview).
Did you try doing a TaoA:M exercise, like Ex 5 take a walk? That might get you started. If you just watch the video http://www.hash.com/2007web/vm.htm, that might help too.
-
copy ALL the keyframes from a range of time
I'm not understanding that one, as can't you can just highlight them by drawing a box around then move / copy:
 keyframe, not the channel-mode to move keyframes
Technical term "channel"? Do you mean the spline mode? Because you can move the keyframes there by holding the 1 key down while you drag sideways.

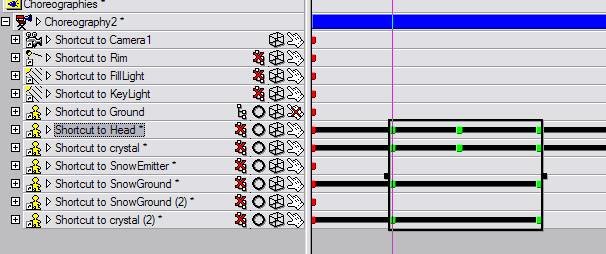
Ravager - are you in the chor? Do you have the timeline window open? There are 2 timeline windows, one that you can open View Menu > Timeline, and one to the right of the PWS - in the two above images, I have used both. I think we need a screen shot.
-
Hey, Joe - I came in and your name was at the bottom in italics, and now it's not - does that mean that whenever somebody's name is in italics that they are answering the post?
That would be a really nifty forum feature to know, so that if someone was already posting, just to wait a couple of minutes.
-
You need to have a decal with an alpha channel / transparency. I did this in Photoshop Elements with 2 png files - separate decals:
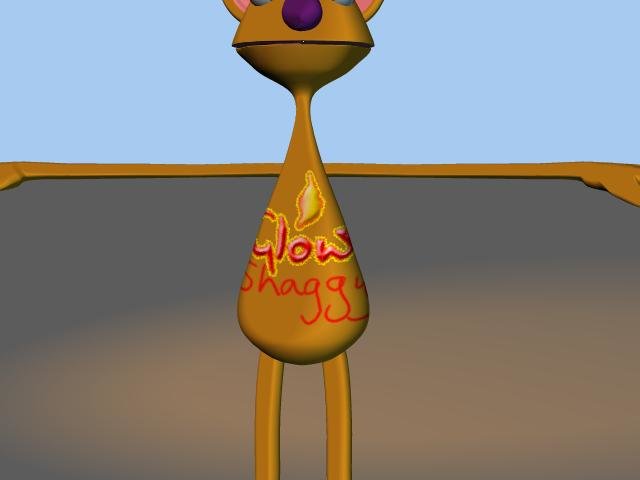
Here are the 2 pngs so you can see the transparency:


You need an editor that will create transparencies, like Photoshop, The Gimp, PS Elements, and I think the free Artweaver does pngs now (not sure).
Graphic formats that hold transparencies are:
.tga - in Photoshop Elements you define a selection, and save the selection, and then save to a 32 bit tga.
.png - in PSE you just paint on a transparent layer
I am not sure how you would get a 'glowing' effect - I did my glow in PSE with layer styles (hastily
 )
) -
Not quite sure if I understand what you mean. You do it the same way as copy/cuts and pastes in all other programs.
In the timeline, highlight by dragging a box around the keyframes. Then right click > copy and position the time to where you want the frames and right click > paste. Ctrl C and Ctrl V work too, and so does the Edit menu.
If you only want to move it a little way, you can also drag a box around the keyframes, then use the right and left arrow keys.
There is one tricky thing, to drag a single keyframe left or right with the mouse, you need to hold the 1 key down (not on the numpad, but above the Q), while you drag.
-
Wow - that was very emotional. Congratulations on your first movie. You must be very proud of it.
-
And the wonderful thing about learning animation, is that you are learning principles, not just 'how to use a particular software'. This means that there is ENDLESS stuff on the internet that you can look at.
I like this site:
http://www.rmit.edu.au/aim/a_notes/anim_contents.html
especially the Walk Cycle:
http://www.rmit.edu.au/aim/a_notes/04_walkcycle_project.html
Here's a couple of others among the millions out there:
http://www.idleworm.com/how/index.shtml
http://www.brianlemay.com/Pages/tip.html
However, don't spend too much time reading about it - just do it
That book "The Animator's Survival Kit" is one to buy if you can - it's quite cheap on Amazon.
-
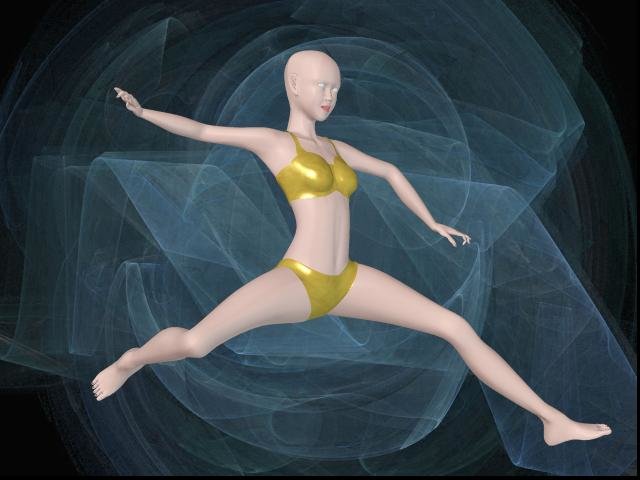
I think she's fabulous.
-
Did you check the normals?
That's good painting.
-
I have been tweaking this for days now - it's not perfect, but I think it's about as good as I can get with this mesh. I think the pelvic area, which is not very good, even with SmartSkin, needs more splines. However, as long as she's wearing clothes, and not doing too much gymnastics, it should hold up
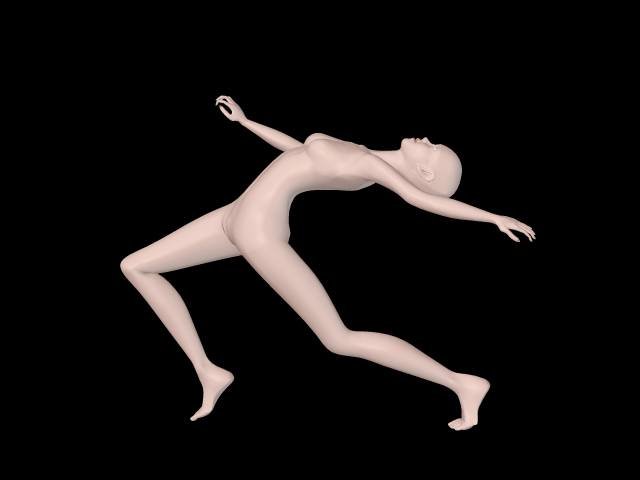
So unless anyone has suggestions, I will now document up to here without all my mistakes along the way.
-
And that great tutorial from brainmuffin is why you need full Photoshop and not Elements
-
I use Photoshop Elements 5 which is way cheaper. I don't miss the big guns, but probably other people would. The only thing I miss is not being able to organise my layers into folders. Other people might miss some of the brush abilities, but I do my painting in TwistedBrush or Dogwaffle.
I would suggest you download a 30 day trial of Photoshop Elements from Adobe, and see if that does for you, and then try a 30 day trial of Photoshop, and see what more it gives you. PS is much more expensive than PSE, so you could find out first whether you need to spend all that.
Whichever you get, there's a whole lot of learning to be done
-
Thanks for the explanation, Yves. I may eventually understand it.
IBL is just a mind-blowing feature, and so fast - 1 minute for that image. Amazing. My answer to all questions now will be "Have you tried IBL".
I am now experimenting using AO and IBL and lights in the OpenExr A:M Composite, so that I can see exactly what does what.
I am not sure why this:
if you use a jpeg, you won't have strong lighting spotsSo IBL is going off more than RGB? .hdr has a brightness setting too?
-
You can reset all A:M settings to the default:
Help Menu > Reset Settings then restart A:M. All menu and panel positions and colours will go back to how they were when you bought A:M. If you have specific colours that you use (I do), like grey background instead of blue, and black splines instead of white, first save them as a Scheme in Tools Menu > Customize > Appearance. Then after the reset it is easy to reload them.
-
-
Doesn't TWO set it up as an action, so if it changes, it changes in all the chors?
-
You need to have an action, chor or relationship window open
So that is a pre-requisite - I did not understand that. I will go back and edit my earlier MirrorConstraint post so it goes in the final documentation.
Thanks, Mark.
-
Steffen - thanks for fixing that other thing, I haven't tested it yet, but now I am having a weird problem with MirrorConstraints.
This is my model.
GalaDM_RigStage011BeforeMirrora.zip
I do this:
1. In modelling mode select Left Half Group.
2. Right click selected area and do MirrorBone
3. Right click away from model and do MirrorConstraints
4. Open up Relationships > User Property Relationships > Rig Setup Constraints Relationship, and right click Setup > Edit Relationship
The problem is under the Setup Constraints. The 50% constraints are now 100%. For example, right knee fan is now 100%.
However, if I revert to the saved model, and do step 4 first, and go back and do steps 1 to 3 while the Relationship window is open, the constraints stay at 50% and are mirrored correctly.
Do you get this result? It is driving me mad that sometimes my constraints all disappear!
Addition - if I leave an Action window open while I do steps 1 - 3 it also works, but if no other windows are open except for the modelling, then all constraints are set to 100%
-
Thanks, Jason - I am enjoying it, but it is true that 90% of the effort goes into the last 10%.
-
UAC = User Account Control
Everytime you do anything the least bit administrative, it comes up with - Do you really want to do this?
I don't know the exact error, because I went back to XP. You can turn it off, and then you get warnings that User Account Control is turned off
My kids like Vista better, though, and I do like Office 2007.
It's a bit of a turnaround that there weren't XP drivers, normally it's the no Vista drivers that is a problem.
-
you do not have permission to use this feature
I'd love to see that bigger image, but will you have to kill me afterwards?
Thanks for going through that, Nancy - I can't believe it's that easy. Why hasn't anyone told me about it before? Or did they, and I forgot
It's so often combined and confused with HDRI through the forum, and elsewhere, that I thought it was necessary to have special images. I guess then, that they are for reflections?


file to render problem
in New Users
Posted
I'm not on a Mac either, but you could try Help Menu > Reset Settings, and then restart A:M.