JohnArtbox
-
Posts
1,303 -
Joined
-
Last visited
Content Type
Profiles
Forums
Events
Everything posted by JohnArtbox
-
Hi guys thanks for the commments. Answers: Christina: Hash knows about the the displacement limitations. It's one of those catch 22's. I don't think fixing it has a high priority because not many users use displacement maps, and not many users use displacement maps because of the inherent difficulties and limitations. As a workaround I just make sure that the displacement map is painted 128 grey on the problem patches and the displacement map has no effect. John: I don't think they've changed displacement maps for a while. The trick, for me, is in realising that each patch is subdivided into a 4x4 grid. Don't add too much detail or it will muddy the displacement. Also if you add features with the grain of the mesh(ie parallel to the mesh splines) then you'll get a cleaner result. It's a 10.5 render. zacktaich: I don't know if the renders are much faster. Displacement and bump both slow things down a lot :o). But can you imagine how dense the mesh for this character would have to be otherwise? And what pain it would be to modify? It's almost like having a simple weightmover built in. Here are the maps. The colour map is just the displacement overlayed on a skin tone. Also the eyes should be dark to the edge of the patch which would add definition to the lids. If I take it further I'll add coloured lips etc. Clockwise from top left Colour, Displacement(used for specularity as well), Bump and displacement overlayed on mesh. I used the cylindrical application for the decal.

-
Hi, Been too busy enjoying the festive season to post much, but I spent a couple of hours trying out a different way to quickly create heads. I was after a carved puppet feel and I think it worked, especially given the time. Don't know how well it will animate. I had to try and avoid hooks, three point and five point patches, because they don't work with displacement maps, but I think you could just plan these in areas where the displacement is unnecessary. ciao
-
Hi Paul, I'd go for the v11 hair without a doubt. If you do want to stick with opacity mapped hair then you need to use more geometry to break out of the helmet mold. Skycast lighting (and other diffuse lighting models)reduces the impact of specular highlights. To reintroduce them add a specular only light. this is covered in the Skycast into AM video tutorial at [url="http://skycast.artboxanimation.com"]http://skycast.artboxanimation.com[/url]
-
Nice Tut Jim. Played flawlessly, Aren't videotuts great. :D Look forward to more
-
different...but interesting.. I like it
-
hi all, I'm in the middle of rebuilding facial controls using smartskin based morph targets. I figure that since a single smartskin can easily encompass 3 pose sliders using the x y and z dimension, then by using smartskins I can drastically reduce the complexity of my facial controls. At the moment I think I can reduce it so that three single bones control the eyebrows. jaw and mouth. with a couple of supplementary bones to add extra control. Is there something I'm missing or is this really as easy as it seems Anybody done this previously and have any recommendations? I have a vague recollection that Anzovin's did something similar at one point??
-
Very Cool Dagoos, my only comment is that sometimes the corners of the mouth pull up and down between poses and it distracts ffrom the flow of the dialogue. Having said that I'll be really happy if I get close on my tests . Superb
-
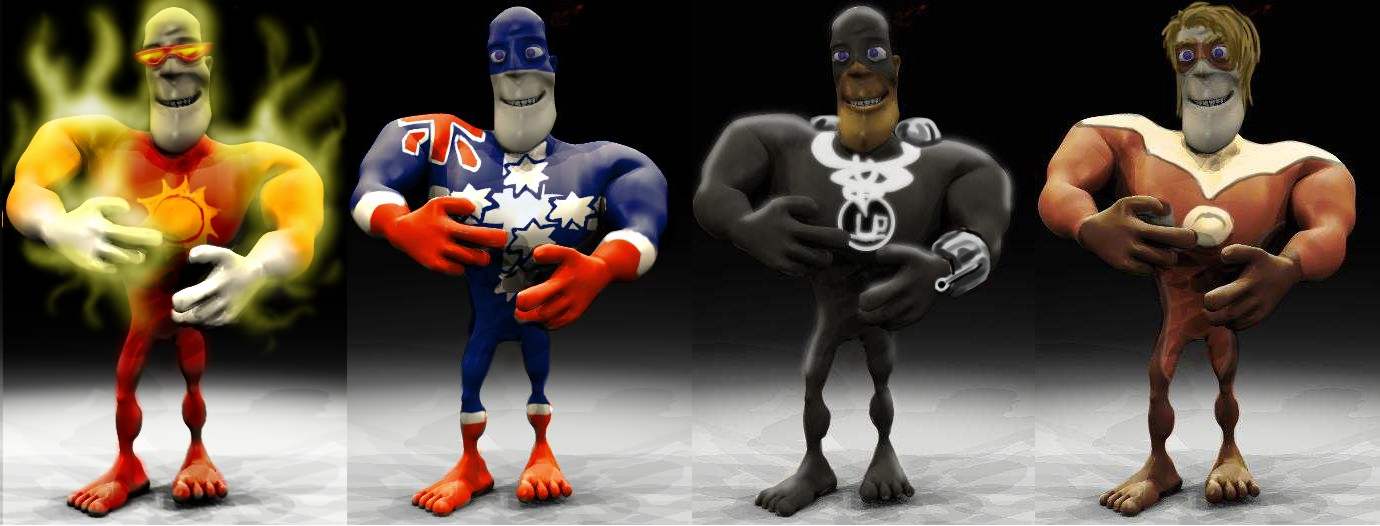
More superhero costumes and ideas. I'm filling out the universe a bit because I'm trying to to decide whether I remove some expression poses for the sake of making the characters simpler to animate. Joe Jacks: I leave specular highlights on all my characters until I'm sure I've finished modelling(including modelling poses). Specular highlights tend to show up patch problems, especially on 5 pointers. As you can see texturing is coming. CRToonMike: it got lost when we moved to a new ISP, and I haven't had a chance to search through the backups. If I can't find it, I'll do a new one with the texturing on this project, but it's time, time, time There's quite a few improvements as well. Obnomauk: Yeah , a solution. I did a quick search and there even seems to be an opensource PC emulator. Thanks David. Thanks Phil & Mega. I feel like the momentum is building again. Tentative names Nuclear Dude Southern Cross Captain Caffeinne(every animator's friend, just don't call him a short black) ??????? Off to animation test 1 now.
-
great sunrise Grubber. add some stars and dust clouds into the image and it would look fantastic. (and space junk...I love space junk). Did you lower the diffuse on the planet to give it a planetary scale light/dark division? It doesn't look like it be it's hard to be sure.
-
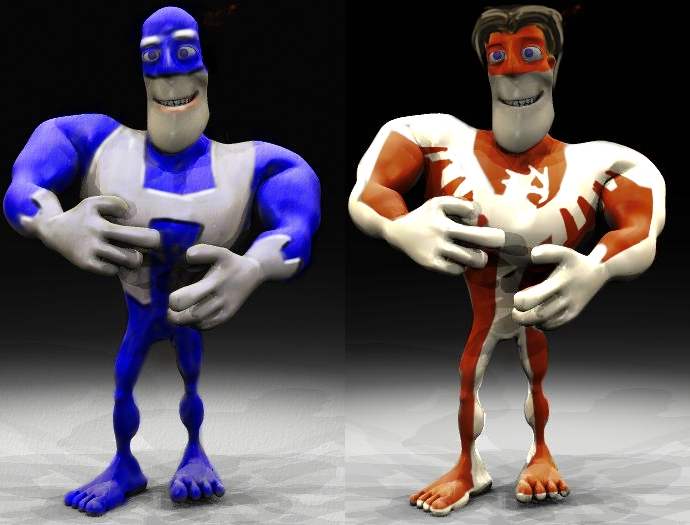
back into the swing, todays update is just a couple of quick costume designs. To mock up ideas like this I render the model and then take it into painter and use layers to quickly try out different colour schemes and ideas.
-
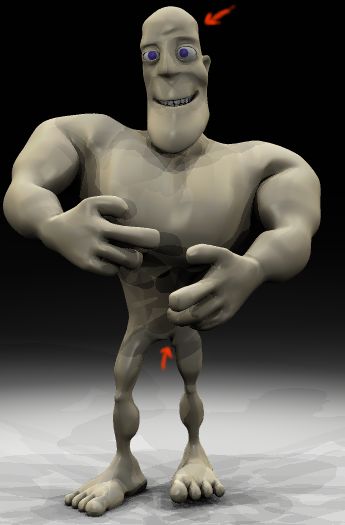
Hi All, he's back. Unfortunately between Skycast, the skycast website and paid work, there hasn't been an update for a while. There's been a fair bit of unseen progress in rigging him for animation, but I thought I'd pass on posting everytime I finished a new expression.I just finised putting hime throught the Seup Machine and it introduced some new issues like the creasing at the thigh. Also the crease above the eyes results from some combination of sliders, but "It's all good" I just recorded some(very bad) dialogue and last night I thought I'd check out the dopesheet functions. Decided it wasn't for me, I spent more time removing all the extra poses than I would have analysing the audio in the first place. The next update should be a new version of the audio done from scratch, and hopefully a test with the syntheyes matchmoving software(which is very, very cool). My Fault & Headless :unfortunately SkyCast isn't coded it's authored, so Ken's C++ wizardry would mean starting from scratch, I'm game if he is, but I thinks it's going to take too much of his time. Still thinking of a solution
-
use hooks to add some extra localised detail to the mesh where you need to join the fins. The 5 point patches normally look better than the sharp discontinuity of two seperate meshes.
-
Hi Sam this is a beautiful image, I really like the simple design and the separation of the depth of field. Looking forward to saeeing it animated. Paying projects are a curse aren't they ...I'm glad you're enjoying SkyCast, over the next couple of weeks I'll be adding some new rigs...then hopefully I'll get a chance to work on my own short if those pesky client types will just leave me alone for a while.
-
Lovely image Jim. The plugin looks like it combines a soften and bloom? One day I'd like to see your character's animated.
-
Hi Takahiro Superb work. Makes me nervous to comment on it. I don't know anything about baseball so if I'm way of base feel free to ignore me. Also it depends if he is supposed to be off balance(beginning to steal or run). These are the things I would probably try. The right arm would look more natural if the forearm was turned in. I put my arm in this position and it felt more comfortable when I rotated my hand about 45 degrees clockwise. the weight looks like its on the right hip but the left hip is higher, which contributes to the feeling of imbalance. And have you tried turning the left leg further out?
-
Direct x was originally for videogames, Opengl was for graphics. On my machines at least, Opengl is significantly better in appearance and performance.
-
The following have worked for me in the past: Update your video card drivers to the latest. switch from opengl to directx or vice versa.
-
Thanks for the process pics Nerrazzi. I might go back to my Merc E with new eyes now. Very cool car
-
Thanks Nates. Headless Bill- I'd like to see SkyCast for Mac users too, unfortunately I'm not smart enough to program it. What if we offered a service, access to sets of skycast scenes with the ability to upload your own images to be SkyCasted.You'd get access to SkyCast bonus site with lighting rigs, environment maps, seamless textures, tutorials and models(including those ffrom the parkland scene). Corndog:The Jaw opens and closes on a separate slider, I did it this way so that I can offset the jaw and mouth if need be. eg keep the mouth closed as I open the Jaw. The lower teeth are locked to the jawbone. I'll find out if it works when I get to animation.
-
And now for something completely different. Didn't get much done last week except for the SkyCast launch. skycast.artboxanimation.com This one's a bit of both. It's one of the outdoor sets, although the groundplane will be considerably more detailed (rocks, bins,grass & park benches) and there'll be an orphanage in the background. I may decide to create new trees and render in the Alpha(because of that wonderful new fur), but I'm leaving that decision for later. Production work is waiting to be done so updates will be a bit slower. Mirrorsplines was a godsend for mirroring the bones for my characters. I 'boned' one side and grouped it under a parent, then I copied all the bones and scaled them in x(visually) to create the other side. I assigned points and smartskinned one side and let mirrorbones assign the second side and correct any slight errors with the bones' scaling. Very cool. On the downside mirror smarkskin only copies the muscle smartskin, so I had to go in a mirror the bones in my smartskin by hand. I was going to do this as a poll, but for some reason the site won't let me setup a poll. So I'll just ask. Would you like me to continue this thread or am I being self-indulgent and I should finish the damn short before I waste any more of your time. Or should I move it to a personal site? I'm not going to be offended, it's an experiment and if interest is waning I can use the time elsewhere. ciao. Send me a message with your vote and I'll report the results. I don't want this thread to have 10-15 me too messages on it.
-
Looks great. for offsetting actions/ keys I tend to start with primary and secondary masses. Your primary masses are those that drive the action, while secondary masses are the bits of your body that just get dragged along, and hence lag behind to varying degrees. I this action I'd suggest the hands head and tail are secondary masses. Preston has already suggested this in his animation but you could possible push it further.
-
I have a brute force approach to getting rid of spline creasing. I obey all the hash guidlines - even the ones you can sometimes get around. The 5 point patches are fairly large and adjoining. If you add a four point patch between the 5 point patches a lot of the mesh will smooth out automatically.You can end the extra splines with hooks put in on a four point patch. If the hooks crease disconnect them and carry them a patch further to see if it makes a difference. Areas where this would make a difference on the shark are around the eyes, the mouth and at the connection of the fins. After that, depending on the look you're after, you might try porcelain. Good luck
-
Nice car, can we have a look at the mesh.? It looks like it would be very clean.
-
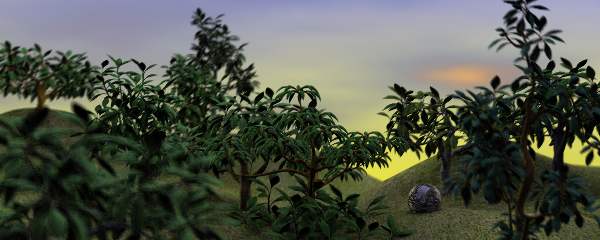
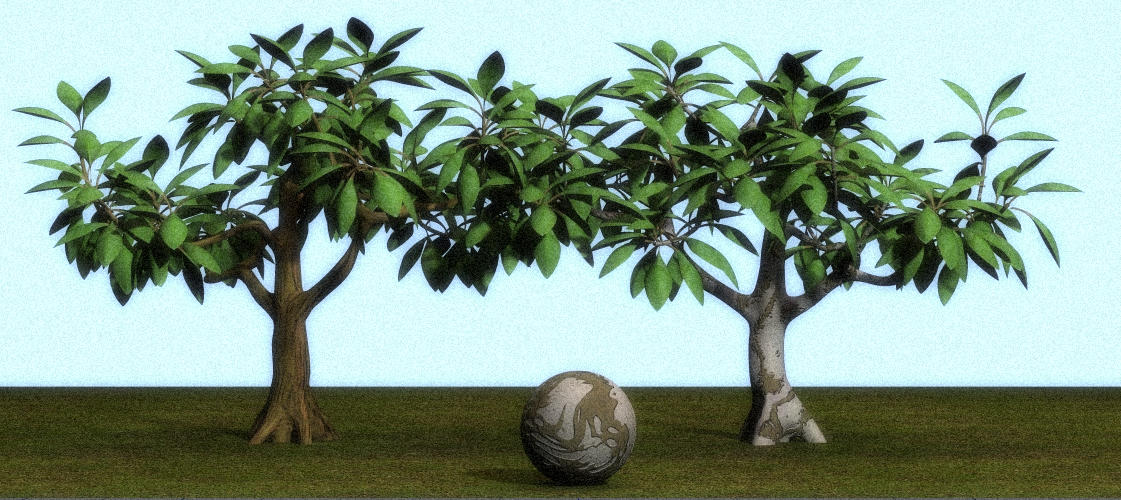
Hi all Just to illustrate the tree trunk material thread I rendered this. These are old 8.5 trees. They render really quickly but after playing with the AM11 fur for leaves their time is limited The models and textures are part of the bonus collection you get with Skycast
-
This is a cool little model. You posted the images a while ago , didn't you? One of the best car images I've seen in AM. Any chance of a mesh shot? being in the middle of a car model I'm curious as to how others get around the topography.