
robcat2075
-
Posts
27,754 -
Joined
-
Last visited
-
Days Won
341
Content Type
Profiles
Forums
Events
Posts posted by robcat2075
-
-
P.S. Robcat, could you give me an idea of the placement of one of the fan bones that is going to control one of the rear circle splines where the rear leg attaches to the body? Will that fan bone be all by itself, or should it be a child of another bone, like the body maybe? God, I hate to sound like such a NOOB!
suppose you're fan boneing teh elbow of a simple arm. You have the bicep bone and the forearm bone. You need a fan bone so the ring at the elbow is always turned halfway between the two bones.
the fan bone will be a child of the bicep bone, an placed at it's tip (which is also where the forearm bone happens to be.
assign the CP ring to the fan bone
right click>new pose>on/off
right click fan bone>new constraint>orientlike
click the offset button onthe top toolbar
then select the forearm bone as your "target"
in the properties for that cnstraint change the enforcement % to 50
test it out in an action, not in the pose window.
sometimes I have to save and reload a model before the constraint kicks in.
Typically, fan bones originate at the tip of the bone they are a child of and in the same place as the bone they will be constrained to. The idea is that by being some % constrained to a target they will mimic the target's motion but only partially.
simple example attached
-
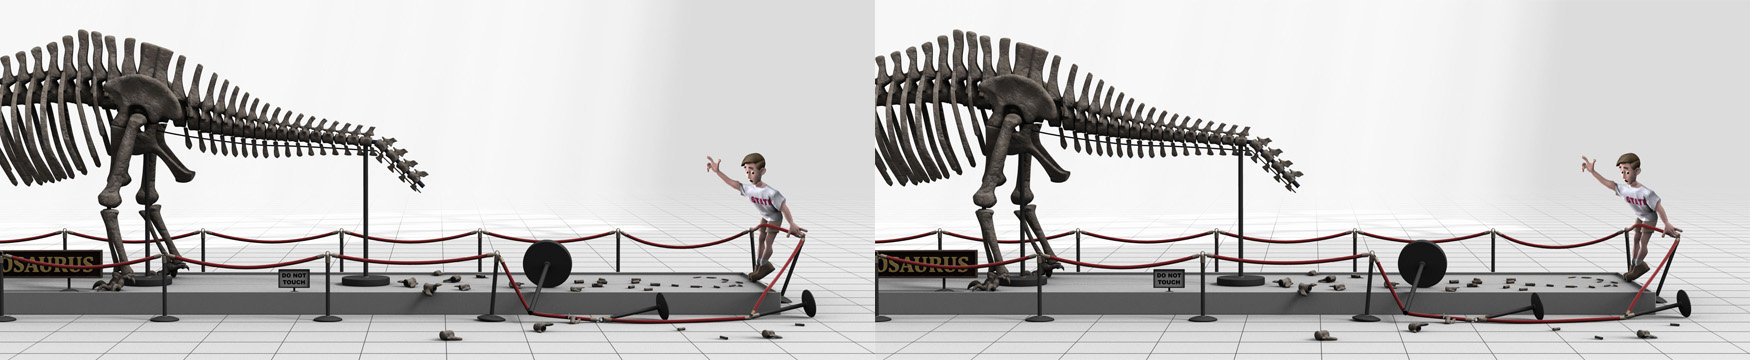
dont try dragging them like an IK chain (since they haven't been rigged yet), just rotate one bone at a time, and only use the Rotate manipulator.This is going from bad to worse. I tried adding fan bones to the joints and ran into trouble checking the results in an action window. When I move bones in the Action window, they squiggle and squirm all over the place and my T-rex looks like it melted in an inferno.
Don't run the rigger until you've finished your fan boning. But after you run teh Rigger, make sure the TSM constraints are turned "ON" in your action or the rig won't be in control.I read somewhere that I need to use the rigger in order to make it all work, so I did that. After it rigged the model, I tried opening another action window only to find that now my T-rex did not move at all as I manipulate the bones.
remember that needing to assigne CPs and create fanbones is something you'd have to do for any rigWait, let me correct myself - some of the bones move without the mesh coming along, and a few move the mesh. The result is a messy smooshed mesh, see pic.
I am almost ready to throw in the towel with TSM2
I hate it when that happens, rigging, and animation. I've spend so many hours working on this only to get the results below. Ok, now I'm crying for real, sob, sob, sob!
the bones you assigned CPs to have been made invisible. the bones you see in their place control them but do not have CPs assigned directly. And you need to turn on the TSM contraints for them to take effectAnother side note. I noticed that after I used the rigging wizard, all my tail bones turned black and lost all their cp assignments. This also happened to the pelvis, torso, and head bone. This off course explains why the bones in the action window don't move the mesh. The $100,000 question is: Why did this happen during the rigging process?
-
Just a thought; there are some 2D characters like Yosemite Sam and Pegleg Pete who have very short legs and large bodies that you might look to for inspiration on how they deal with that.
-
ok, you've got me curious. But don't give away the surprise ending.
-
I tend to use the body bone as a hip bone that moves/rotates the whole upper body in unison so it seems good to have ti originate from a spot that would be the hipsOk, gonna give this another shot. Questions: 1. Is the placement of the body bone just a matter of convention, or does it serve some other purpose to set it at the end of the spine?
no, but the origin does. that's where your head will appear to rotate from.2. Does the size of the head bone matter, and if so, why?
It moves the upper body without moving the IK feet. For example, when I'm animating a walk I'll animate the up/down motion of the body on the body bone instead of the pelvis which only moves the hip area.3. Is the body bone used mainly to pick the model and move it around? -
If you knew how little of this I've actually done, you'd think twice about taking my advice (i'm more theory than practice), but...

Actually, for your first experiments, I'd suggest using CP weighting (instead of adding fan bones) to average the effect of two bones on a set of CPS.
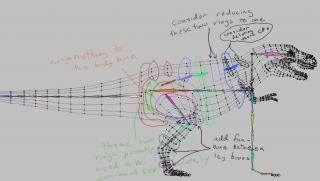
for example at the hip joint you might the make the ring I colored purple 25%thigh and 75% spine. Make the Orange ring 50-50. Try it, see how it works. You may find that one "ring" may need to be treated as several small groups , each with different ratios of influence.
Fan bones, CP weighting... they do about the same thing, but fan bones preserve the shape of rings at extreme angles, while CP weighted rings tend to squish.
For obvious joints like knees and ankles, it's probably safe to do a fan bone from the start. Fan bones are usually only practical on light meshes, but that's what A:M is all about.

-
A wonderful invention! You really ought to make a movie someday.
-
Wait a minute, aren't you the clever guy who made that cool Nautilus model?
Ok, I can't bear to see a grown man cry... about TSM2.
Well, a really good answer to your question would require some study of the skeleton of a real TRex and some theory of how their skin and muscles were attached to their bones.
It looks like you've gotten the legs and tail right. Next you start craning the spine bones into better positions. Use the manipulator buttons so when you move a bone, it's children follow. Don't just click and drag. Start with the spine bone at the base and move up. I've marked up your drawing with some approximate guesses for where they should go. I've also added some suggestions about simplifying the mesh.
Since the Trex walks on his hind legs, and his front legs are really more like arms I would consider choosing the "biped" option for the front legs on the quadruped tab. those will probably make more sense in this situation. You'll still have to crane them into position.
For the neck you might try the "short" option since TRex doesn't have much of a neck anyway. That will give you a one-bone neck.
Assigning CPs takes alot of trial and error no matter how you're rigging something. Assign some then creat an action for your character to test the motion out in. See what you get and then go back and make adjustments. You'll probably find the need for CP weighting or for fan-bones to handle CPs that lie at the junction of two body parts. Assigning the 100% to one skeleton bone will likely be too severe.
If you look at the Trex on the A:M (made before CP weighting) site you'll see they added a zillion fan bones to try to handle all the different ways the skin could slide as the trex moved about. It still has some tearing.
Hope this helps!
-
for superimposed logos you could make an image with an alpha channel and use it as a rotoscope in A:M.
Free.
Create credit text in a paint program as well and import them into A:M.
Not what you're trying to do?
-
I've been to Las Vegas; those fountains were a highlight.
Yes, there are many things that one might tweak, but it's a charming piece you've shared with us.
Thanks!
-
Welcome back! Nice looking stuff.
make sure you have the right key filter enabled and the "Animate" button ON.but i can't choriograph any new actions myself. . . the poses don't key. . . . -
Did you all know Robert Taylor was an animator on the original Pink Panther cartoons? And many other things.
Having struggled for so long to produce pretty much this same thing on other parts of the movie I gotta say I'm very impressed with how fast he was able to pull together such a unified conception of the opening of the movie. It's very deflating.

I really like his take on the personality of the doorman and his exchange with Woot.
I'm not in love with all of it. There are some elements from the original concept that I miss (like the descent down from the clouds).
The '70's blaxploitation movie soundtrack... no.
But I'm sure he's just using that as an indication of where music would be helpful.What is the thing that is happening at about 7:13, after a door opens?
The presentation of the backstory isn't radically different from what we have now. It's still a combination of talking in the throne room and voice-over flashback shots. Legimate, but I'm rooting for some sort of fantasy device like the magic tapestry.
But at 08:18, this is actually longer than Frank's animatic.
-
Hey I enjoyed watching that. I got a little lost in the middle, but it was clear again in the end.
-
Yes, you can do an arm swinging shot all in IK but it sure is painful sometimes.
And doing a grab-the-doorknob shot all in FK... double ouch.
I really love the ability to switch between IK and FK in the middle of a shot.
-
Wow! fabulous looking stuff!
-
When Tinman et al. first see the Loons...
These are the LOONS... and their various actions support this name... any suggestions on what these actions might be?
I'm storyboarding this sequence and I've come up with a few that will do for now. But perhaps some of you have some more ideas of silly things Loons might do.
They need to be rather simple, like quick sight gags, because each one will only be on screen for a few seconds. For example I have some Loons playing volleyball... with another Loon as the ball.
-
I agree that TWO would gain by being more amusing. Whatever we add/alter needs to serve the story rather than divert us from it. Not easy to do.
I think we may need to revisit our conception of some of the characters' personalities to enable the sort of conflicts that make for amusing situations.
-
The whole KuKlip sequence is about 5 minutes, i think one set is enough for that and my intention is stage it all in the one large room. Walking from room to room will be awkward and slow things down. The characters may never travers the whole length of the room. It's the visible size that is the cool thing about it. Think underground-WWII-secret-german-moon-rocket-factory huge.
To start , how about put together a low res version of that large room and then I can explore it to find good locations for specific events to happen?
-
It is so cool that you can take the same tools we're all using and come up with something so different.
Such great characters! Keep going!
-
I hate to negate your hard work on that ... Unfortunately, I dont' think the story will support something as elaborate as the layout in the fly through. We really need to get them into the work shop as soon as they are in the door.
There isn't a strong story reason to go thru so many rooms. It might tell us more about KuKlip, but he's out of the film after this sequence so it wouldn't help us (the viewer) later on.
For me, workshop=foundry=KuKlip's home. He's all about being a tinsmith, so they are all one and the same for him.
Concentrate on the big foundry room and make it ______ huge. LOTR huge. There could be lots of his inventions around, lots of tin gizmos. There could be some dark passages leading off to underground who knows where.
Thanks Vern, for taking this one on. I love Alain's sketch, as I examine it I realize it's more evocative than minutely detailed. As "Concept Art" should be. We don't need to rush this out in a week. we can take some time to strategeryize what will fill our needs.
-
I feel kinda bad about Shaggy getting shot in the back by a helicopter.

-
Those look real good. is there any reason we couldn't render as well in A:M?
I'm figuring the background would be rendered once with radiosity and the foreground elements done with a light rig, then composited over the background.
I dont think there's enough camera motion for there to be parallax problems with the background, but a little camera mapping could fix that.
I didn't think the bobbling of the muffin read well. I had to watch it over to figure out what they meant.
-
The workshhop/foundry is under the house. It's a surprise! You walk through the door of the tiny cottage and inside is this huge below-ground factory. but you don't need to make the interior and exterior the same model since they won't be inthe same shot. They really dont' need to "make sense" together.The one thing I was lacking is geographical locations... is the workshop in the front of the house? If so why would the characters go down the steps to thefoundry?
Yes there is some sort of sitting/entertaining spot in the workshop. not sure where it is except that they're not there yet when they are talking with cabinet head.So I imagined a smallerish workshop in the back of the foundry which is really mostly underground as it is so big... this would look fantastic and be very dramatic with a large space and the molten metal, furnace and sparks... then into the warmly lit "homey" space of a smaller workshop area.
I think the motorcycle was an attempt to accomodate the large size of Ku-Klip's Shop.But... then... does Ku-Klip need go go that whole distance to "get out"... should there be a second set of "back" steps that lead up to a living area/workshop... maybe a back entrance
A tinman and scarecrow don't make sense either but they're inthe movie anyway.... what about "customers"?Do they come into a large room with things for sale in the front room parlor? The windows are in the way of the sliding door indicated for the front... could this be a second door into thefoundry?Seems like too much thinking... but... if it doesn't make sense now... it won't make sense on the screen.

http://www.hash.com/forums/index.php?s=&sh...ndpost&p=132529
-
It's going to look like a doberman with horns until you put the "goatee" on him


Ku-klip's Workshop sets
in TWO: General Discussion
Posted
One thing I liked about Alain's concept was the camera angle that allowed us to see to the back of the workshop as we saw them descending the stairs. Almost as if the stairway was not against a wall but free on both sides.
How about if the stairway didn't start out going to the right and then turning toward the shop, but went straight out from the door, THEN curved to the right.
The camera could be at the center of that arc and as it followed them down the stairs the workshop would be revealed.
The "office" looks rather square and modern.