msfolly
-
Posts
145 -
Joined
-
Last visited
Content Type
Profiles
Forums
Events
Everything posted by msfolly
-
Heartbreaking. He was really looking good.
-
That is a really neat concept. Thanks for the wonderful post! 'Course us newbies would LOVE to have a step by step instruction on this! The way you staged those is really very evocative.
-
V11.d+ HAIR and Collision Detection
msfolly replied to John Bigboote's topic in Work In Progress / Sweatbox
Miracles happen every day... -
MM Give it a REST. Stop it. No more preaching.
-
I am not worthy to post to this thread. Unbelievable work. Intimidating, Inspiring. Gonna post anyway. I love the Vogue movie. Too funny for words
-
V11.d+ HAIR and Collision Detection
msfolly replied to John Bigboote's topic in Work In Progress / Sweatbox
Okay, after I get her rigged, (which may be some time) I will try all the different approaches above and report back! - John, GREAT web site. I am going to have to click on those little links under people's names more often! Loved the hair test! Also loved the moving, well, whatever. I need to use that effect on the earrings and the um, whatevers, on my model too! Your Stones video rocks! - Colin, "aiming it from the base" sounds interesting. I will try it. (with fear and trepidation - I THOUGHT I was finished with the hair. I find it hard to manage.) The hair on that cap is actually divided into 4 groups. Bangs, Top of head, In front of ear, and the back. There are actually 4 different hair materials, which allows me to control the material for each area separately. There is another patch over where the part is on the top of the head. That is what that extra thingy on top is. I had to separate out different hair lengths, sorta like a hairdresser does, and style it in sections. The hair that is going through the ear is not tucked behind it, the patchs that do that are not causing me any problems. That area has SHORT material that is pretty thick. Also, I had not gotten around to deleting the skull patches under the skull cap, so maybe the other areas are more protected? Perhaps I should try working on some sort of geometry for the back of the ear. Instead of making the ear sprout out of the head like a real ear, I will give it a sharp angle. The hair would hide it, I think, and the difference between the sphere and the square and pyramid on John's test is striking! Maybe I will just tweak the area that has problems, or just turn off collisions for that part only. Avoidance may be easer than a real fix. I KNEW trying to realistically style it was going to be a problem. For the record, msfolly stands for Melissa's mistake. Email names don't like apostrophes! Ah well, Ms. Folly is ALSO apt. "She could easily pass for 65 in the dark with the light behind her." Yeah, me, sorta; without the extra pounds from xmas and wrinkles from a well spent life. When I started, I did not know much about image maps. A un-intended virtual make over! M -
V11.d+ HAIR and Collision Detection
msfolly replied to John Bigboote's topic in Work In Progress / Sweatbox
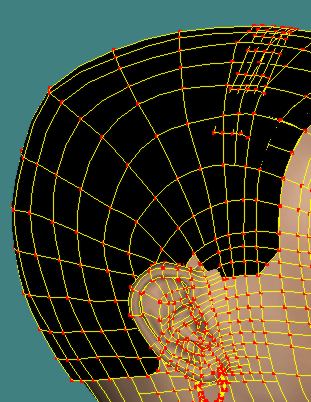
Actually, although it is a skull cap, it is OUTSIDE THE SKULL. I used Conform to keep it on top of the skull. The patches are pretty dense already around the ear, I will post a spline map.
-
V11.d+ HAIR and Collision Detection
msfolly replied to John Bigboote's topic in Work In Progress / Sweatbox
I'll have to try that. Thanks. -
V11.d+ HAIR and Collision Detection
msfolly replied to John Bigboote's topic in Work In Progress / Sweatbox
You are right, Nancy. Better on the other two shapes. Maybe I should give her pointy ears? -
V11.d+ HAIR and Collision Detection
msfolly replied to John Bigboote's topic in Work In Progress / Sweatbox
Oooops! Zipped them together. two_avi_files.zip -
V11.d+ HAIR and Collision Detection
msfolly replied to John Bigboote's topic in Work In Progress / Sweatbox
Hey there. I have attached two avi clips. - One has hair dynamics on, but collisions off. - The other one has collisions on, and if you look closely, the hair is going THROUGH her ear. Weird. You vid is interesting, and collisions are working fine for you. What do you think my problem is? -
A thread in New Users got me started on this. As usual, a lot harder than I thought. Let me know what you think. The quest was for a semi-realistic tire. I think it is semi-realistic. It will bear up at the distance I think you would normally view a tire from. The perspectives from pictures, combined with how to flatten a half torus without having to then a paint banana shaped, regular pattern drove me nuts. Also, the subdivisions need to be regular, you can see what I did in the action within the project. Whatever. If I hadn't had the wonderful tutorial from William Sutton at Zandoria, I would not even had know what to try. What a great tutorial. If you want to read it, it is here http://www.zandoria.com/uv.htm I ended up breaking it into quadrants, and uv mapping it. If there is an easer way, SOMEONE LET ME KNOW! I have attached a zip file, which assures me it is under 1 meg, so I hope it will post! It would be fun to add decals to the sidewalls - "msfolly tire company" came to mind, but I am tired and through with this for now. Feel free to use it. If you improve upon it, maybe you could send it back! If you want the cpt or psd file I used to paint the decals with, let me know... Melissa Tire.zip
-
Drawing on your face! Great idea! Your face is GREAT! Love it.
-
Gee, sure would like to see this, but I can't read it either!
-
That was a really nice series of links you posted. Thanks!
-
Pretty cool. Why does he only have arms on one side?
-
Do you have a link on that uv text editor desc by W. Sutton? I don't seem to be able to find that in a search... And THANK YOU for the help and guidance!
-
Thanks for the opinion - It happens to match that of my husband so he will be smug. (NO, no, I meant PLEASED!) Interesting info. Also, I think I will investigate that uv texture editor, mentioned above, whatever THAT may be. A new search. Oh Joy... Thanks, Melissa
-
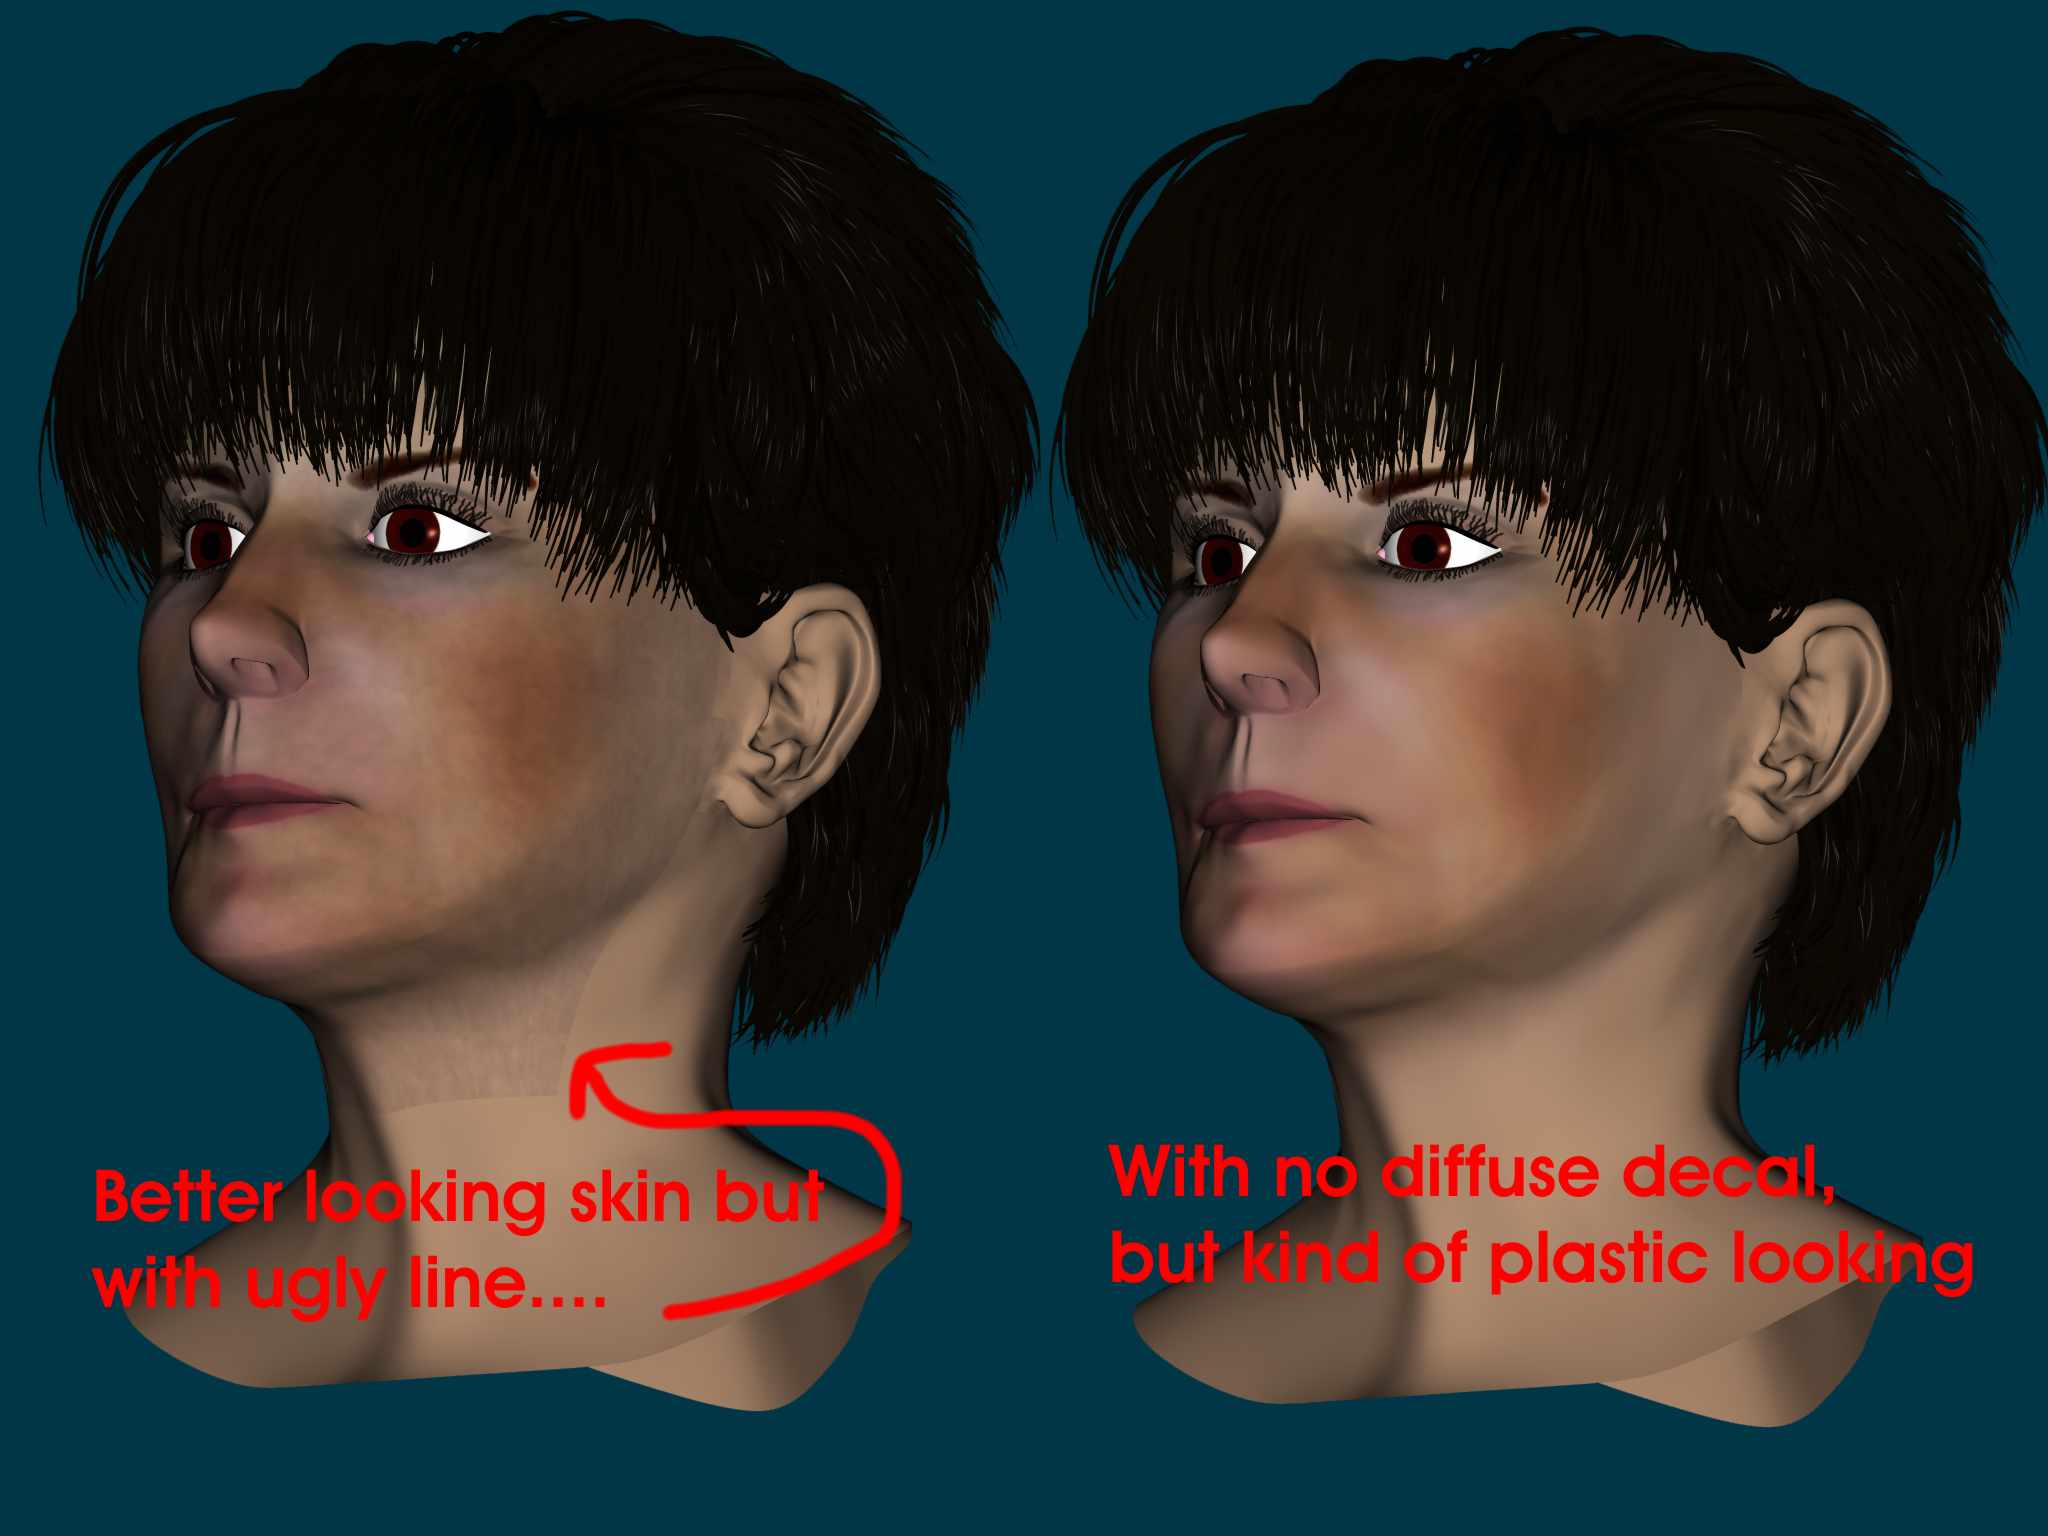
OMG!!!! Never mind. Yes, I AM AN IDIOT! Went back AGAIN, compared the two images, and the one with the mask included was darker. Goofy, indeed. Problem fixed, diffusion map blends nicely. One last question. A poll, if you will. If you look at the first two pics, and ignoring the line, do you like the skin better with or without the diffusion? Opinion is split here at home. Thanks, Melissa
-
Goofy is such a nicer way of putting it. Thanks for the replies, guys. I have attached one more image, just to show you that it IS a diffuse map. I have played with this until I am ready to york. I think perhaps putting the whole body in makeup, OR just trashing the diffuse map is the way I am heading. Yeah, I did say bump map. That's because that was the name of the image, and I was just changing its attributes. (Also because I am apparently feeble-minded) If I posted all three images, would you consider playing with it? Color map diffuse without an alpha channel diffuse with an alpha channel. Yours in confusion and goofiness still, Melissa PS Vernon - I LOVE your changing pictures. What a hoot.
-
Thanks for the suggestion... I did try fading a mask around the bump map, and it faded it nicely around the edges to the neck, BUT it turned the whole face BLACK - like she had been painted with oil or something. I then tried lessening the percentage of the decal , but then I lose all the nice blotching of the face color! I may just hang it up and take the darn thing off. FRUSTRATED! Any more suggestions?
-
Hey there. I am new... So, please excuse dumb questions. Here is my head model. The head on the left has a diffuse decal over the face, the other one does not. (See attached picture) Short of applying the diffuse map to the entire body, how do I smooth this transition? Just smooth the diffuse map out at the corners? What are shaders? Would that help? Any other general comments? This is my first try... I guess after this I a rig her? b pose her? c bone her? d attach to a body that is boned or not. Help - I would eventually like to animate her. Sorry for the newbie questions. Melissa