zandoriastudios
-
Posts
3,868 -
Joined
-
Last visited
-
Days Won
1
Content Type
Profiles
Forums
Events
Everything posted by zandoriastudios
-
Great job! great model!
-
I start with 50%gray and dodge and burn. I also use the blur tool. Sometimes I will start with the colormap or photographic textures, it all depends on the model nothing is set in stone
-
I'm thinking that you might apply a material to a model and export maps during export as .obj. I seem to remember that A:M will create maps of the material. It would be like that tiled image that Ken showed. If you could do that and paint to those coordinates in a 3d paint package and then import them back in, you could avoid the whole process of decaling... It seems like a process for painting directly onto your models is an ideal situation. But I don't think I will spend the money for z brush just for that... must be an easier,cheaper solution....
-
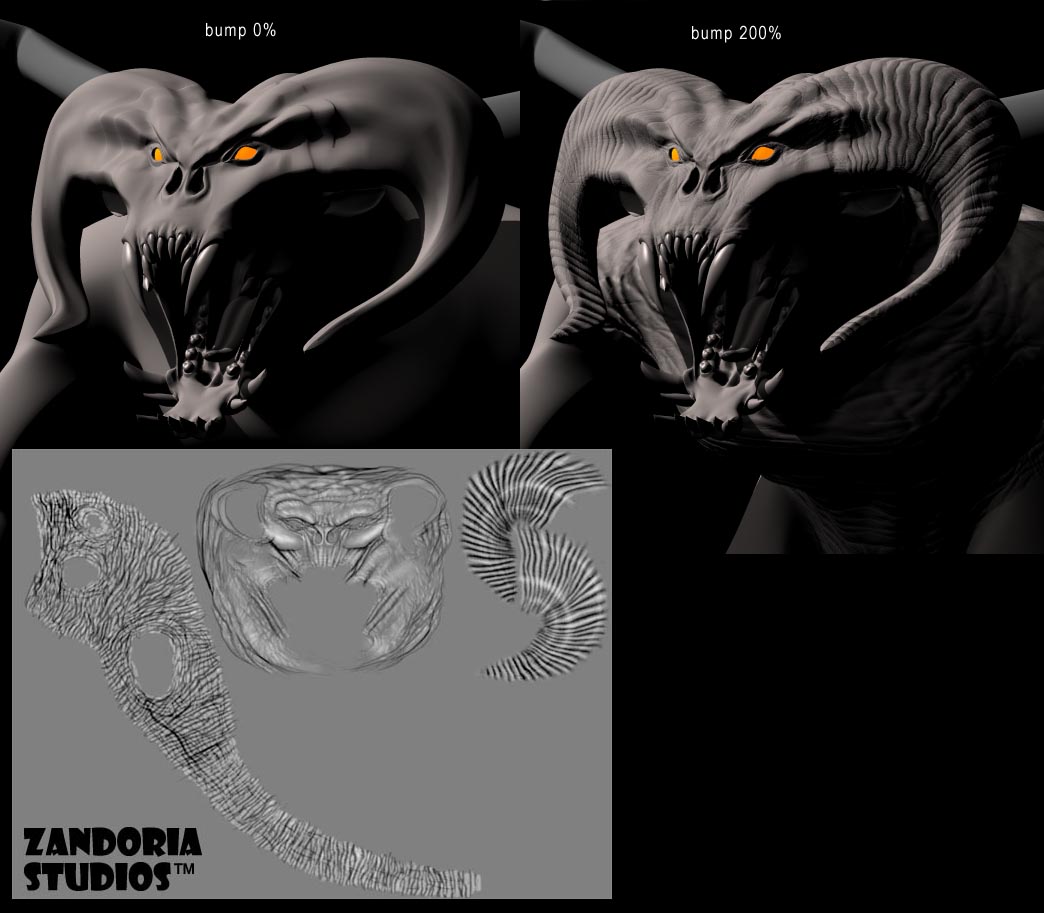
the maps are hand painted, using the trusty Wacom tablet. I tried some displacement, but the bumpmap seemed sufficient.
-
More bump mapping. Here is the before and after and a look at the map:

-
Can you post a screen capture of the mapping from z-brush? If I can see what that looks like, I think that I can help you. You don't have to lineup the decal with the patches, you just have to stamp it ANYWHERE on them. then you will go into the UV editor and manually realign those missing patches with the rest of the UV coordinates.
-
That looks awsome! Could you use the patchselect tool to select the 5point patches, and then hide everything else and stamp them with the decal. You could then open the UV editor and manually align each of those 5 pointers with the other coordinates.
-
Nice modeling--you have really come far this year, I'm impressed!
-
After a the brief time-out to write the UV tutorial, and another look at the extended edition DVD of "Fellowship of the Ring", I started painting the bump map.
-
New Tutorial!! OK, I updated my UV Tutorial to explain the new UV Editor in V11. I used the Balrog as my example, so I hope that as you read it, you will see the answer to your questions. http://www.zandoria.com/uv.htm I modeled the Balrog last year, and I'm just now getting back to it with some free time
-
took some screen captures along the way, so that I can update my UV tutorial. stay tuned
-
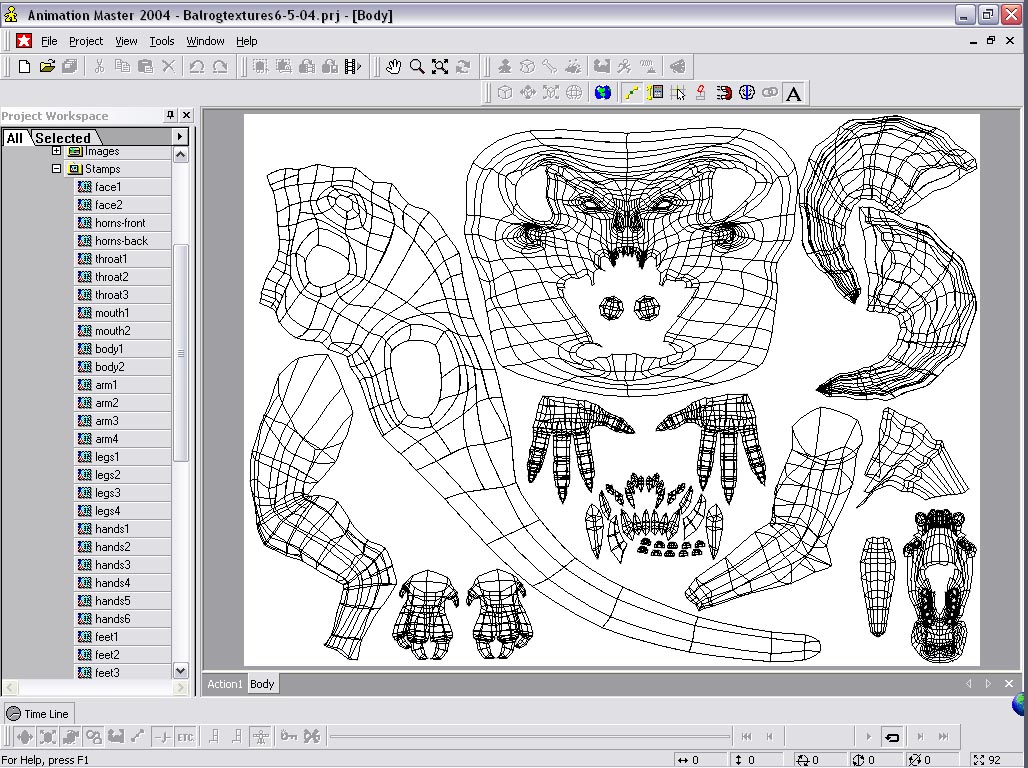
Finally have a chance to come back to this model. I started laying out my decals yesterday using the new UV editor.
-
One of the bizarre requests from my client... The car is modified from the "carcuda" from the free models page.
-
I use the Hash2001 rig as described in the Art of Animation Master book that comes with the software. I use pose sliders for the face, maybe someone else can offer you suggestions...
-
looks good
-
Feather duster
-
I sent it in to Support, but I went in and took the transparency and brightness keyframes out of the emitter, and just use the alpha channel of the hair image to control tranparency and that worked... Now I have another issue where I have this character riding in a car that has a reflective surface on the body. I crash every time I try to render to file. I can turn either the FuFu or the car inactive and either will render to file. but if both objects are active it crashes... I sent that project into support as well. hopefully my client will be understanding of why I can't finish his project... I stayed up till 4:00am trying everything I could think of.
-
OK...Here is a mystery! I've got the feathery hair tweaked the way I want it to look--in progressive render mode, but it looks all black in final mode!?? Why is it so different? what do I need to do to change it? has anyone else seen this?
-
The CP weights are amazing! eliminates the need for a lot of fan bones, or smartskin. I think smartskin is awsome too. but this crtainly does the bulk of the work, leaving smartskin for minor tweaks.
-
Here is the "feathery plume" that FuFus have on top of their head:
-
I was having trouble tweaking the body fur to have the look I wanted, so I may use the Simbiont "Plush" material on the body instead of fur...
-
That is explained in the A:M Technical Reference (see link in my signature). or online at: http://www.hash.com/am2004/Modeling/CP%20Weights/index.htm
-
That is for rendering for interlaced video.
-
is that with multi-pass? or just A-buffer? I would think that you would get a good blur with multipass, but I haven't done anything with toon yet.
-
New WIP. I finished rigging yesterday, I used the Hash2001 rig and the new CP Weight controls. I am totally blown-away by how easy the CP Weights are to set up! There is no smartskin or tweaking in the sholders and hips, the CP weights took care of it all! I do use an intermediate bone for the biceps and thigh. Parented to the shoulder and the pelvis, the intermediate is in the same location as the biceps and thigh and has an orient-like constraint--STORE ROLL OFF. The intermediate gets the controlpoints at the joint and that keeps them from getting twisted when the arm or leg twists.