


rusty
-
Posts
1,851 -
Joined
-
Last visited
-
Days Won
1
Content Type
Profiles
Forums
Events
Posts posted by rusty
-
-
Hi!
Thanks to each of you for getting back to me!
It was Steve Anzovin, Raf's father, that died on Christmas day a few years ago.The world is a sadder place without him that is for sure.
Amen to that. I never met Steve but so many emails passed between us that I felt like I knew him. He went out of his way to help me (and all others) so many many times. He'd actually write back to make sure things had worked out! That was so sad. My heart went out for Raf. I miss him.
I think it helps to not model the thumb onthe same plane as the fingers. I also think it's just a matter of making sure the thumb is boned correctly. The first bone starts almost at the wrist.Hmm... I prefer doing it the other way (I don't think it should matter either) and, I bone the thumb correctly (looks just like yours). Your images are of a 3 finger cartoon hand -- for a realistic human hand with 5 fingers, your second image looks 'so' wrong. But despite all that, I must admit that the third image looks right! I'll have to look at that some more (I have some of the TWO models which I think you did and that I use for reference all the time).
I'm not sure what you are fishing for here...and it's hard to see what you are doing with your hands as you type... but I too, have noticed there seems to be at least ONE control rotator missing in the thumb controls on TSM rigs...you need to be able to rotate the thumb's axis, and that control has been given over to the thumbs TSM flexor ability. Hope an answer arises for you... I fear the only one would be Mr. Raf Anzovin... who developed TSM/TSM2... and I think the words 'Animation:Master" are not even in his vocabulary these days...Fishing to see if anyone has done anything for this in the TSM2 rig -- Although I using the TSM2 rig I haven't been keeping up with the TSM2 posts and I don't like re-inventing the wheel. It's easy to envision a fix for this. Whether there's really is an easy fix is another story LOL. I think you have the same thumb bones but you attach the mesh to either 2 or 3 added bones -- just duplicates you create. These bones are tied to the original bones via a relationship that provides the twist. Maybe?
I think you're right about missing the ability to rotate the thumb.
Cheers,
Rusty
-
Hi!
If the thumb is level with the hand, the bottom of the thumb points at about a 45 degree angle down and toward the hand. If you move the thumb down, it rotates and at the lowest level it points toward the tip of the little finger. I can imagine several ways to accomplish this in the TSM2 rig however, has anyone else devised a way? Also, does anyone know if any of the other rigs account for this?
Thanks,
Rusty
-
Another goody ,I done exactly that the other day ,made a pose and added another pose by mistake ,trying to see how it moved ,Thank's again
Removing unwanted items in Relationships....
So I hope you drilled down into the relationship and removed the pose rather then redo it because that is real easy to do. Just select the pose in the relationship area of your model (in the PSW) and hit the splat key on your numeric key pad to completely expand it and everything is easy to see.
I swear that button wasn't there yesterday. Rusty - make a few more new buttons, pleaseLOL. I'd like to remove a couuple... like the Compensate Mode button... instead you just hold down the shift key when you click on the constraint target to NOT have compensate mode! I mean how many times do you NOT want to use Compensate Mode... almost never. Compensate should be the default.
Rusty
-
How to stop recording a Relationship...
When you are creating a Relationship (Relationships include Poses and Smart Skin) sometimes it is desirable to move something that you do not want in the Relationship. For instance you are making a pose called 'left nose down up' and you would like to make it similar go the 'right nose down up' which you've already created... its nice to move the 'right nose down up' pose up before you adjust the pose so you can see how it moves. However you do not want this pose movement to be 'recorded' in the pose you are making. By turning off the 'Record Relationship' tool (two interconnecting circles which, by default, is located between the 'Mirror Mode' and 'Animate Mode' tools) you can move poses, CPs and/or bones and this motion will not record in your Relationship. You must remember to turn the 'Record Relationship' tool back on before continuing though or you'll likely have to redo the creation of the Relationship.
Rusty
-
I don't think I explained myself very well Rodney I was TRYING to say when rotating a bone ,as in placing a rig .As in the 2008 rig when doing the feet bones you use the rotate manipulator to get them into position say xat 0 y at 90 and z at 0 ,but its hard to move it in one axes without moving the other,it must take me the longest part of the rigging process,probably its just me
Okay, if you select the bone and press the 'r' key you'll go into the advanced rotation manipulator mode and you'll see rings (an orb) around the bone, one for each of the x, y and z axes (color coordinated) and a white ring for rotating the bone in relation to the screen view. Grab it anywhere else in the orb and its 'free' rotation. Your cursor will change as you pass over these rings so you know your on it.
Rusty
Edit: you can also bring up the... er... whats it called... a see through input box that kind of follows your cursor which you can type values directly in. I don't have AM open darn it... hope you know what I mean.
-
Constraining the movement of a group of CPs or one CP.
(More then just 1, 2, 3)
If you select part of your mesh or just one CP and move it you can move it anywhere except directly toward you or away from you. If you hold down the “1”, “2”, or “3” keys while dragging, movement will be constrained to the x, y, or z-axis respectively.
For just a single CP there is more… the taoAM manual states on page 136:
= Hold down the “4” key while dragging a control point to constrain it to one of the splines that intersects it.
= Hold down the “5” key while dragging a control point to constrain it to the other spline that intersects it.
= Hold down the “6” key while dragging a control point to move it perpendicular to the surface.
However, in V14.0 anyway, it’s not quite that simple… while the “6” key seems to do exactly what it says, the “4” and “5” keys do not really constrain the movement to the splines but rather to the splines bias handle(s) (and an imaginary line which extends from them). At some point, I thought that it really did follow the splines and I’d really appreciate it if someone with other versions installed would let us know how this reacts in those versions.
Finally, if you select one of the splines when you select the control point (which you normally do unless you draw a box around the CP), that will be the spline which will influence the movement when you hold down the “4” key and the “3” key will act on the other spline.
Rusty
-
For a first try that's really nice! If you had any idea how difficult ears are to do you never would have gotten such good results!

Damn, you're right! No one told this guy how difficult this was supposed to be! Well Pixelgrabber, now that you know, next time your model won't come out so good!
-
-Yeah, that's way good! Show us your reference and some wireframes!
Don't you do it Pixilplucker... we'll tear you into little bitty pieces.
Just kidding.
If you plan to animate your head there 'are' good and bad ways to lay your splines out and you can definitely get help here that will save you down the road.
;-)
Rusty
-
That's your first human head?? That's extraordinary!
Rusty
-
Quick way to make icons for models in the AM libraries...
Have a model in the library that has no icon... all you see is yellow puddly boy? Open the model, make sure your model window is roughly a square and that the model fills it and is at a good angle for viewing. You can do a render lock to see what it will look like. Right click and select 'Make Icon' from the context menu. To see what it will look like open the model's properties and expand 'file info' for a preview. If your happy, save the model. You're in like Flin.
Rusty
Note: Your render options will affect this function.
-
Deleting half of a model without getting all those spline loops you have to kill.
Many times when modeling a symmetrical model you have need to delete half of it on the X axes (eventually you'll copy/flip/attach it). If you select half and hit delete you'll almost always get spline loops that have to be killed. A way around that is to select the half you want to keep and copy it, then select the entire model and delete it! Then you paste the half you copied! No pesky spline loops.
Rusty
-
Rodney,
That was cool. Thanks. So 'you' were lurking?!? That's sure changed. You are now a force in the community -- a good one -- and I guess you are not really Dr. Hash using the name of Rodney.
Perhaps Steve Sappington is a nice guy and just didn't like me or... maybe he was stressed out... I don't know. He sent me some pretty 'unique' support responses and, as a grumpy old man, I don't take much crap so I swatted back. He retaliated, things escalated, I threatened to turn all his 'unique' responses over to a big 3D magazine (I saved each one and they were official Hash support replies), many prominent users personally asked me not to as they thought it would hurt Hash (which I didn't want either but it was Steve hurting Hash) and so on and so on. Quite a shame. I think he was stressed and took every problem reported personally. Eventually we eKissed and made up (but I still have those replies).
This is where I'm suppose to ask about you right? So... what's your story?(Extra points if you include TaoA:M somewhere in it!)
Well, add this post to my previous one and you already have it all. I was in the IT Industry for 20 years (systems programmer, software architect, MIS) and also, evenings and weekends, while others were watching TV or surfing, my wife and I (a team for 38 years now) flipped houses long before it was called that. We both traded in all that for a portfolio and retired 7 years ago. All I do all day is work with AM and write my book. We have two wonderful children and two dogs. Now you have it all LOL. (Oh yeah, three cheers for TaoA:M!).
Sincerely happy to meet you Rodney.
Cheers,
Rusty
-
You speak as if you were the owner of Hash Inc. Rodney. ;-) Are you LOL?
I laugh but that joke must be older than I am Rusty.

I suppose others understand that but I'm afraid I'm clueless. :-(
I speak as someone who has seen the TaoA:M tutorials stay the same for coming up on ten years now.Ten years is a lot of time.
I guess I don't know too much about you Rodney... in fact I know nothing about you. The above, taken literally, 'says' 1999. Now I started with Hash and the old Hash mailing list in 2001 (or maybe 2000 hard to recall) and truthfully the first couple of years were rough ones regarding the relationship between Hash and myself... lets just say that Hash and myself were in marriage counseling the first few years LOL. Now when the forum was born (early to mid 2003 I think) I joined right away but after about two months I walked out on the 'counseling' sessions not to return for about ten months -- early to mid 2004 I guess. When I came back, 'Rodney' was everywhere however, before that I don't remember you being anywhere. So I've always assumed you entered the Hash world in 2003/2004. Tell me what I'm missing. That's honest curiosity -- nothing more. For all I know you're Martin's son or brother!!
Rusty
-
More
key stuff!! Select some of your model. Hit the 'H' key to hide the rest (shortcut keys ARE and immense time saver!!).
Select some more of your model. Hit the 'H' key, everything un-hides, hit it again, now you have what you want...
~or~
just hold down the
key while pressing the 'H' key and get what you want! This adds to the hidden! :-)
Rusty
-
I think for the most part the subjects in TAoA:M are solid choices for teaching a concept. They may not be new to us, but they are new to the new user, and if they are old to us that increases the chance someone here will be able to answer a new user problem.
We do need a full giraffe video. I'll try to make that in the moderate near future.
Absolutely!!
(Pssst! Do a volume check before you start and don't drop the mic. :-) )
-
Rodney,
I definitely appreciate the time you are taking to post these Rusty.There is still so much to learn.
Animation is an endless road... that's why we like it.
Shift + Lock (Note that you get the same results at this point)
Click the Lock Icon again
Everything is locked
I must confess I am not very far beyond the stage of 'Smartskin? What's that?'
But I am learning! One day at a time.

Yeah... Uh huh... right.
I should feel guilty for robbing you of your sleep.Can you forgive me if I don't?
Whoa! Nothing to forgive! I hate to tell you this but.. I don't do it for you (wish I did... sorry)! I like to help others when I can -- and so therefore... I really do it for myself. (Who said that?)
(Note the Topic Title change)That's what was needed... what I was looking for... almost did it myself (except... 'I' can't... hmmm...). The name change should really help draw attention and contributions!
Thanks!!
Rusty
PS: Any more of those 'shift' tricks 'Rodney'?
-
As much fun as it'd be to resync and refurbish these classic tutorials perhaps it'd be better to create new tutorials from time to time?
As long as the basic lessons from the tutorial are learned, that's our main goal right?
Rotoscopes, Splines, Lathing, Extrusion, Decaling... if the basic lessons can be learned with an airplane... why not a train, a boat or a spaceship. No matter the model if the student follows the tutorial close enough there is a very good chance the student's model will turn out just fine. They'll certainly have something to show for the effort and they'll have learned a whole lot about splines.
This need not be a lot of extra effort although good tutorials do take considerable time.
I'm convinced that if the average A:M User just recorded their onscreen efforts each day and shared the best of those efforts once in awhile, we'd have more tutorials here in the forum than we could watch in a lifetime. I'm sure more than a few would be worthy of prime time.
You speak as if you were the owner of Hash Inc. Rodney. ;-) Are you LOL? Anyway I'm not sure what change would inspire something that has not happened even once in the entire history of the company but I'm all for it! Until then, Hash has nodded -- I've already finished one and started on another.
Cheers,
Rusty
-
How to 'see' what Smart Skin is really doing...
If you go to the PWS and expand the Relationships portion of your model, you'll see all the bones that you have Smart Skined ('SS') or put another type of relationship on. If you expand one of these bones all the way (press '*' on the number pad to completely expand or completely collapse an element in the PWS) you will find each CP you moved when you created the smart skin and under each of these you'll find the SS key data.
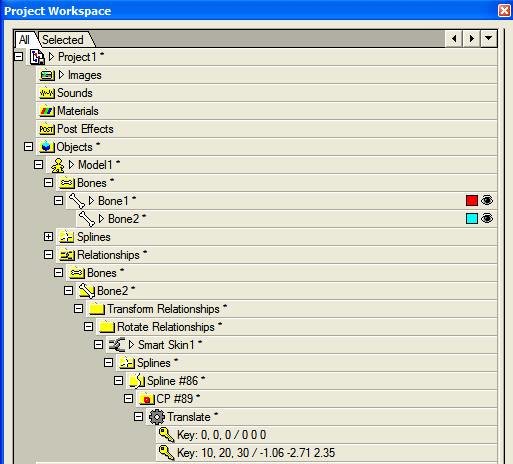
Under each CP, identified by its CP#, you'll see each SS key for the SS and beside each key is the SS key's value which is made up of 6 numbers. The first 3 are the x, y and z rotation of the bone. The second 3 values tells AM where the CP needs to be when the bone is at that rotation -- the x, y and z offsets for that CP -- that is to say, how far the CP moves from its original location.
How can this help you? I do not know of any way to directly change these numbers (if you know of one, please let me know!). However, they can tell you what influance the SS bone rotation has on the CP and, you can delete the key and using the rotation values you can go back and change the key.
Looking at it from the other end, if a CP is going someplace that you don't want, you can select that CP and right click on it and select 'Select CP'. In the properties panel you will find the CP's # plus data on its location. With this you can invoke one of my favorite AM features which I use all the time; the PWS filters. At the top right of the PWS click on the down arrow and select 'New Filter'. The Filter Editor will open and here you can name the filter (I'd call it 'work' cause I'll be using it for lots of different things), choose to save it with the project file and enter data on what you want to filter on. Enter the CP # in the 'Object names containing this text' and choose Okay (I rarely full with the Type tab). A new PWS tab will open which contains all instances of that CP # (careful, not all may refer to that CP). Now out of habit I then select the 'All' tab then re-select the new tab you just created -- this kind of resets things and refreshes the data on the filter tab. Now you can see all SSs and poses that influence that CP. Now you can expand the CP and see its SS keys and... now you'll also know what they mean.
Please let me know if these tidbits of AM wisdom are helpful... if no one is seeing them or, no one cares LOL I can go to bed at 2:00 AM instead of typing these things in!
Cheers,
Rusty
-
The 'fighter1' tut kept me going for until 2 in the morning and, sort of in the background, most of today! There must be a much easier way to do this.
A lot of times I've screen cammed something and had situation similar to yours where the sound gradually crept out of synch.
If I could judge how far off a track was running at the end* I'd load it into quicktime pro, export the audio and video into separate files , clip the lag amount off the end of the faster track and paste them back together.
You have to paste video into an audio track, not audio into a video track, to avoid distorting the sound.
then you export to a new .mov in some appropriate codec.
This was faster than resynching in AE, which I also tried.
*this is the tricky part
In the beginning they are in sync... they slowly go out of sync... so it seems in the one I've worked on. I think its more a matter of shrinking the audio down so it 'fits' again. This is not so hard. What's time consuming (besides rendering the adjusted sound with the video) is the volume problems. All of them could be a little louder (again no problem) however, in at least two so far you hear the sound of something dropping (like the mic LOL) and then the volume drops way down there. The only way I know to fix this is to pump the volume back up along with all the noise, hiss and static. You then use a variety of filters in a variety of tools to remove all this. Finally you have it cleaned up except for the sharp, very loud noise peaks, some very short that hurt your ears. I know of no way to remove these except by hand.
There is A LOT of material there (hats off to Steve!) -- part 1 of the FW190-fighter plane is an hour and there are 4 parts all about the same length. And this stuff is good and I believe has great value to beginners. Someone should clean it up.
Rusty
-
The 'fighter1' tut kept me going for until 2 in the morning and, sort of in the background, most of today! There must be a much easier way to do this. Last night most of my time was spent on increasing the volume of and then cleaning up the latter 75% of the audio which was too low to hear, once the volume was increased there as a lot of noise -- this was removed fairly easily with Audacity but removing the very loud peaks by hand took forever (this isn't my area of expertise). Then I put the volume back in Premiere and cut gaps out to synchronize it with the video. It is very large and I hit render to AVI same codec as original, 10fps before turning in.
I woke up to 'Unknown Error', changed a few things and tried again... 'Unknown Error'... and again. Now I'm almost done rendering to TGA just to see where the error is... but why???? Well so I could let Cleaner compress the TGAs with the audio.
There must be a much easier way... if it were a QT you can simply remove the audio track and replace it with a modified version and save (which re-renders it). I'm not sure if there is a way to do this with avi files.
Anyone know?
This is taking way too much time... I won't be able to keep this up. Any new people out there wanna help? Or, I'll invest the time and effort for all of them (yes! all of them that currently exist but no time constraints, I'll just continuously work until they are all done) for two upgraded AM licenses (this year and next... we're talking a lot of work!). (Our portfolio provides us retired people with $$$ and, not to put too fine a point on it, the stock market crash killed us). Someone get this proposal to Dr. Hash. The tuts are valuable but watching them (and you can't see shortcut keys) and then 5 seconds later hearing what's going on is very hard for someone just learning to follow.
Rusty
-
Well...
In 'Fighter 1', who every recorded it (and this person gets my thanks! really great job!!)... I think his mic fell off mid-way through as the volume drops off to almost nothing. My wife is doing these tuts and it will be one of the greatest joys in my life if she kept it up and started helping me in the studio! She has never done anything like this before, she really likes these tuts (again, great job to whoever did these) and therefore I'm going out of my way to make the road as easy as I can for her. This is why I have this tut in Premiere, extracting the audio and will use what tools I have along with the little expertise I have with audio to fix the volume fall off as well as the audio/video sync problems which get pretty bad in this one. I wish I knew how this could happen... I may reinstall tech-smith to see if that helps (grasping at straws). If I come up with something that's an improvement, I'll post it for anyone who'd like it... primarily for Hash to replace its on-line version.
Cheers,
Rusty
Edit: BTW, if anyone has any suggestions to help with this please speak up. I have Sonic Sound Forge, Premiere, Audacity and After Effects Production Bundle V6. The problem of course is that increasing volume increases noise. Audacity has one of the best noise reduction functions I know of, Premiere has good hiss removal... honestly I don't know if AE has anything to help.
-
I just watched "Move It" (web version) and it didn't seem to have a synch problem.
Is there a specific one you noticed?
Almost all of them but not right at the beginning... it gets real bad toward the end of the video. I don't remember 'move it' but definitely 'flowerpower 1/2' and 'fighter plane 1' and the 2 or 3 before those its bad. It can be hard to tell if you are not following the tut. In flowerpower2 at about 10:02 (this is the on-line stuff -- there is a time code in the lower right) you see him rename the bone and he is talking about it as he does it later at about 10:17. In fighter plane 1 at about 16:25 he moves the wing into the body of the plane... he talks about this while he does it later at about 16:35 (before 16:25 you can really see it as he group selects, messes up and tries again then talks about it later.
What a shame! These are so great. Also the person drops the mic in a couple of them and all sound is lost (well, its very low). Re the audio offset, I'm hoping that I need a different codec or something like that to make it right.
Thanks,
Rusty
PS: I might be able to align the voice in Premiere... the biggest problem is finding the time.
-
Hi,
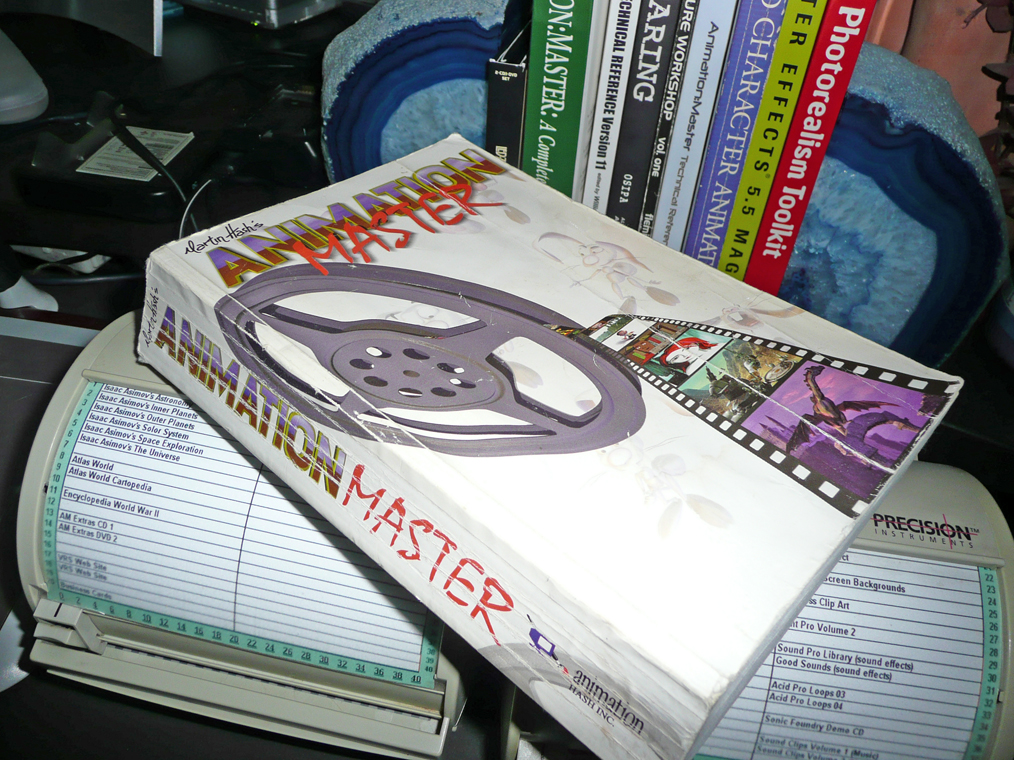
I didn't want to post this in the taoA:M 'cause everything looked so orgainized... I know zip about the forum or the video versions of the tuts -- I went through the tuts long before the videos existed using (get ready for a blast from the past... perhaps a collectors item by now):
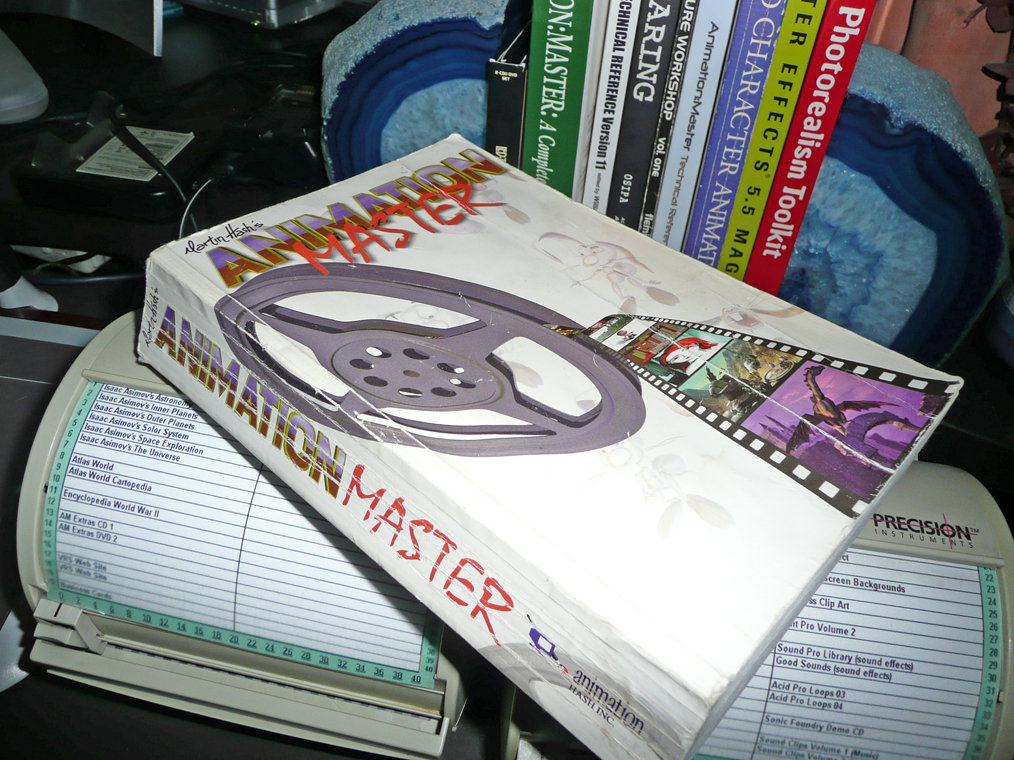
Anyway I noticed that the voice and the video are offset which is maddening for a person just learning. Seems to be this way with the online versions as well as the versions on the Siggraph 2006 Pro Series. Is there anyway to fix this?
Thanks!
Rusty
-
If, in a large model, you are moving around lots of groups, decals and especially bones or poses, close the modeling window and any other window that contains the model. Things will go much faster.
Rusty

The big problem I have with the TSM2 rig...
in TSM2 - Rig
Posted
Hi!
One of the bones I have had the most problems with, as far as proper placement goes, is the shoulder bone "1 right arm". Its placement determines where the shoulder bends from as well as the pivit of the shoulder when it is raised, lowered and moved forward and back. It determines if the arm will fall by the characters side correctly and how a shrug or a raised arm will look. I have worked very hard to get the placement of this bone correct.
However -- in the final TSM2 rig, all this careful placement is seemingly tossed out of the window!!! As far as I can tell, you can move the shoulder anywhere you want and the shoulder pivit is non-existent!!
Has anyone else noticed this? Am I doing something wrong or missing something?
Thanks,
Rusty