


rusty
-
Posts
1,851 -
Joined
-
Last visited
-
Days Won
1
Content Type
Profiles
Forums
Events
Posts posted by rusty
-
-
Me again, sorry.
I worked on this all day yesterday, changed settings, did every thing I could think of, even Reset AM to defaults.
I just cant figure out why my rendering looks like this.
Any Ideas?
This is what my finished animations look like or just Black. After it finished then AM crashes.
Have to go to work now just to clear my head. LOL
Wally
Dear Wally,
Hello from our cabin at Big Bear Lake where it it 5:45 and I'm baking Cinnamon rolls for breakfast.
First off... what you posted was a screen capture of A:M's rendering window... not what actually rendered. It says that the animation was rendered (100% complete) so what happens when you click on Untitled000.mov? Does you animation look okay? This is what really counts. What you sent is just a display glitch which is annoying but not really important in and of itself... if your animation rendered okay. It does mean that something is wrong however.
BTW, it is not really a good idea to leave the file name blank which it looks like you have done given the name Untitled000.mov. Lord knows what folder his was saved to. You might have to search your entire disk for Untitled000.mov.
You did not post what type of pc you have nor what version of AM you are using so I'll assume Windows Vista and AM V15.
I do not think that this has anything directly to do with render settings except that some may use more memory than others. My first guess is that you are running out of memory. I would try rendering 15 frames the way you are currently doing it to insure that you still see the same thing with 15 frames, then render 15 frames at the smallest size possible and see what that looks like. Or just render the entire thing at the smallest resolution (the 15 frames is just to make it faster to do) If it looks okay at the the smallest resolution then this implies that memory is the problem. If it still looks messed up this means that it could still be memory... but we just can prove it.
I would make sure nothing else is running when you render and also reboot just before you render (in case something is leaking memory). I would also make sure you have plenty of free disk space -- 10 Gigs or more. Assuming you are on a Window's pc I would increase memory cache to the maximum amount it says you can. Finally I'd render to a Targa (tga) sequence/uncompressed as this may use less memory (however, as I said, your rendered animation may be fine).
Hope this helps,
Rusty
-
I love it! I think you should disguise the birds a bit... make them more subtile... or maybe they just stood out because the rest was sketch. I guessed that it wasn't about birds before the end because the birds were so 'out there' but perhaps they won't be in the finished product. Or maybe my brain just looks for that kind of thing.
Really good no matter what... most short animations don't do as well.
Rusty
-
4 real i need help
Dear Code D,
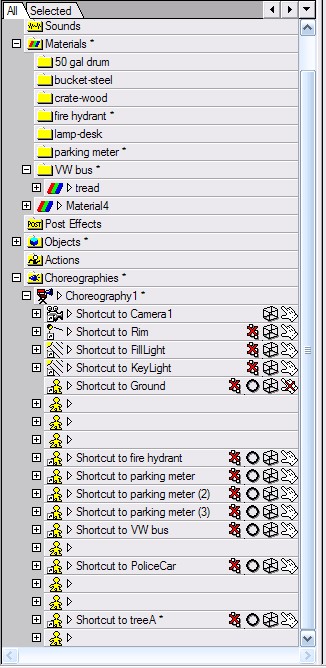
If you are 'really' looking for help you will have to put in a little more effort on your part. The project file you posted does not have enough data in it for us to see what's happening. As you can see only a few models and a couple of materials are embedded:
Plus, we did not get any of the images that are being used. You need to:
1. Right click on the project in the PWS (at the very top) and select 'Embed all'
2. Select Project->Consolidate. This will create a project folder structure containing all of the project parts (we'll get the images)
3. Compress this folder structure using zip
4. Post this zip file.
I need to know if you have rendered any frames, if so, can you post one. Please also tell us how long it took to render or, how you know that its taking too long to render.
We all face the problem of render time -- there are many tricks to reduce it. It's nothing to see 1 to 2 hours per frame but sometimes its nothing to cut this in half or more.
Cheers,
Rusty
-
Hello,
Well, I have to jump into this topic as it kind of mirrors an effort I have ongoing. With my 'virtual actor' approach (a character model can play many parts so is only a bald, untextured head... all else -- maps and hair -- is 'snap on' and, the neck down is wardrobe) one area of research is an attempt to come up with a flexible morph-able outfit. It would have a 'top' and a 'bottom' (arms or hands and, shoes or feet are add-ons to this). Both 'top' and 'bottom' would have flattening poses and could be textured as needed.
Where it gets interesting is... just how many 'kinds' of tops and bottoms are there? So... whether the 'top' is:
* a coat and tie or just a shirt;
* long or short sleeve;
* collar, or none and vneck or round neck or tank top;
* pockets or no pockets
will be pose controlled.
Whether the bottom is:
* long or shorts (and how short)
* jean type or creased
* number of pockets and pocket types
* belt/no belt
will also be... pose controlled.
Yes making parts invisible has problems (even if shadow, specularity and so on is considered) so morphing/hiding is the way I'm going now.
I'm convinced it will work -- perhaps it will be somewhat limited. I'd almost certainly have to have a male and female model and, I think female dresses and skirts will need to be left out of this. The problem of course is rigging and weighting but if this is kept limited enough that really shouldn't be a problem either.
With one exception I only need one outfit for my current project so this effort is a background effort right now but it looks real promising. Admittedly it takes me for-friggin-ever to rig and weight clothes. I laugh when I think of how I used to believe I'd have a nude model and be able to dress it in cloth simulated mesh!
Rusty
-
The only thing I remember about the 2001 rig was that you needed to do something somewhat strange to get it to work. It was a relationship that had to be dragged and dropped on the character before it would work. The name of the relationship was something like 'drag and drop to animate'.
Sorry I can't be more help.
Rusty
PS: I'm not in a place right now were I can dl the model and look at it.
-
Absolutely with Vern... I always watch the material (or hair or decals or particles or surface properties) in a window doing a progressive render while I adjust it... never any problems.
You definitely have a 'kick ass' system. Did you say which version of AM you are using? What about the type of video card?
In my experience crashes are usually caused by:
1. an older video driver or you've purchased a real high end card which simply does not work with AM (a problem I had)
2. the pc is squeezed in between stuff and is over heating (crashes occur after the pc has been running an hour or more)
3. you're low on disk space
4. defective memory (run one of the free memory checkers)
5. defective disk (run scan disk)
6. you have installed a current version of AM then installed a previous version and things have gotten messed up
7. you are going too fast and trying to do things before AM has finished the previous operation
8. you mesh is screwy or in some way corrupted (try a simple test on simple geometry)
If the PC is new (less then 4 months) you can scratch out much of the above. I've had cases where I've used materials created in older versions of AM which caused crashes.
I avoid materials... they kill render times and almost always you can use an image instead. We really need a small example of what you are doing... the material and your settings and what else, if anything, is being applied with the material.
I feel for you cause I've been there. Presently I crash about once ever 3 months.
Rusty
Edit: Thinking about this more, you should take the following steps:
1. The first thing to try is creating a single patch in a new project, applying the material and see if it renders
2. Next, in the same simple project file try tweaking the material and see if it crashes. Then save the simple model.
3. Back in your original project file, make a copy then completely remove that property and see if it renders
4. Next, using the project file from step 4, import the model from step 2, insure that the property imported correctly then, try to render.
This will tell you a lot about the problem and give you a starting point for troubleshooting.
-
What version of AM are you using?
-
I can only speak for myself, but I have never been offended by anything you've posted, Rusty.
Oh yeah... well how 'bout this!
8-0
Seriously I can't wait to see the tut you are working on. When that's done we need to tie you and robcat's hands behind your backs so you can't be tempted to tinker. :-)
The Squetch Rig was used in TWO...I don't know of any time that the rig was the cause of a slowdown. Proxy versions of the characters and sets were built to improve the speed of animating, but those proxies had the same rigs in them...although the muscle-based poses (for the characters that didn't have bone rigged faces) were not transferred.So then... tell me truly, not much has been added to the rig that was used back then in TWO? I last looked at the Squetch about a year ago I think and unless you started backing out features instead of adding more, a whole lot has been added. That does not mean that it will slow things down at all, but it is a legitimate concern given the number of features added. [[Edit: Actually it absolutely does mean that it will make things slower... but, will it be noticeable?]] I don't remember seeing a 'lite' version of the rig for low res proxies (that is not a feature request BTW, but that would be neat)?
I've always been excited about the Squetch rig (okay, and a little nervous too).
Cheers,
Rusty
-
Very cool
My firs reaction is why do I want to switch to this rig? So It would be nice if there was a button that lead me to a video that sells me on the rig, lets me know why I would take the time to learn this rig when I have invested time in TSM2. Dont get me wrong, my instinct says this rig has its advantages or you folks wouldn't have put all this time into it. It would just be nice if I could see a short infomercial style video illustrating why I want to learn this rig over the next. I know its a lot to ask for but those kinds of things get me excited about the product.
Jason,
I'll be interested in the reply. It could well be that what you seek is already available (unless it's been rendered outdated) and you'll be directed to the wiki ~or~ the reply might well be 'if you're happy with TSM2, stay with it'.
All of the people who contributed to put the Squetch rig together worked very very very hard to do so (a triple very!) and I guess their vision was to develop the ultimate rig (and maybe they have!). I do not wish to belittle their efforts or the Squetch rig in any way and I pray I do not get flamed for this message LOL! I believe that the following concerns are valid of any software and/or just my personal perks... okay? I talk of past problems I had with it, possible problems due to the escalating complexity I last saw and finally, the many good and great aspects of the Squetch rig.
Also, be advised that although I put half a year into attempting to migrate to the Squetch rig, that was a year ago and I am not 'up' on the current state of the rig.
That said...
Two reasons 'not' to switch (for myself anyway) 'used' to be that (1) the 'adjust compensates' part of the installation (over 100 multiple and complex steps) made the installation too much work (I'll get disagreement on this one from many) and, (2) that the rig was never stabilized at any point -- that is to say, there was no 'stable' version (like version 1.0) and, new/improved feature updates came out almost every week and there was usually no way to apply these short of a complete re-install (I did this for half a year never once completing an install before a new version I wanted came out and I was completely redoing the installs of eight characters).
Some more reasons ''''''might be'''''' (and this is in general of any software) that there are now too many features and, because of this, it takes up too much memory (i.e. can you put 8 characters in a scene and still be able to function in AM). Also, in many cases, due to the complexity and sheer number or features and the inability to adequately test everything... the level of stability is low (more bugs), the frequency of updates is high and the learning curve is steep plus the ability to keep documentation/tuts up to date goes beyond support resources. Again, possible situations for any software. I have no reason to believe that the Squetch rig suffers from any of these except that the number of features was approaching the 'all things for all people' level when I last looked.
I'm hoping that all these situations have been rectified and/or do not exist because... I would probably switch. Why?
Because there are 'many' valid reasons to consider switching... of the top of my head and in no particular order:
1. the rig is much more solid to work with then TSM2
2. it is a very advanced rig with lots of really helpful bells and whistles (i.e. the hand thing, better and more flexible squash and stretch, and more I can't remember right now)
3. it comes with a very advanced face rig (which I currently use with the TSM2 rig right now)
4. aside from the aforementioned 'adjust compensates' it has a very advanced and easy install process which, over all, would take about the same time as TSM2 (at least the way I use TSM2)
5. it has a seamless fk to ik transition
6. if aforementioned pitfalls have been avoided -- it is a far better rig than TSM2
7. it is the official rig of AM and it is the future
I hope this helps (and I pray does not offend anyone).
Rusty
-
multiple morph targets.
Do you really mean smartskin shapes?
Or are you rigging distortion boxes?
"morph targets" don't really exist in A:M.
Quite true but he's probably calling his pose slider positions morph targets -- the face is 'morphing' and doing so to the 'target' shape of the pose at 100%. I called them morph targets at first even though I knew that this was wrong -- I did it simply because in any other software and, in the book I got my shapes from, they were referred to that way and, morph targets sound's cool LOL. But you're absolutely right... its like calling a patch a polygon (yikes! sorry Martin!). I seem to remember you pointing this out to me as well many moons ago. :-)
Rusty
-
Superb animation Nancy! The layering is perfect and, as far a conveying 'weight', I've not seen anything better! Even if I tried I could not imitate your style. If you got a lot of your work 'out there', I'd be surprised if you went 'undiscovered' for long.
Rusty
-
OK i recently posted a post with a test of a helicopters main roter , now i have been testing some spin speeds and have gotten mixed results , apparently the blades need to spin The right way or every one dies. my questions is that in order to get some of the good spin speeds i have to rotate 4000+ degrees a second and that number is getting pretty big like 12000+ 8-9 minutes into the animation, i heard a while back there was a way to make a item rotate X amount of time by using some pose option but the only ones i could find where on of or 0-100% . any one know how to do this?
I saw a tut many years ago which showed how to rotate an object where you just entered the number of spins... as I recall the rotation handle was rotated instead of the bone. Unfortunately I own almost every tutorial cd/DVD made for A:M and I've not been able to find it again. Hopefully someone will know and answer you and we'll both find out.
Beyond that I'm not at all certain that actually spinning the rotor is the best way to go. I don' do cartoons, only realistic and personally I would create a disk with a decal with outline of the blades going all around it and an alpha channel making the rest invisible. Then I'd make the outline of 4 of the blades even spaced around the disk darker and then I'd rotate the disk slowly, a little faster when it goes faster and when it goes real fast I'd rotate it back wards slowly.
Just my 2 cents.
Rusty
-
http://www.virtualmediastudios.com/tuts/mapping/index.htm
This is where I would start.
It's from Rusty, one of the masters of AM.
I doubt you'll find a better road map than this.
Why thank you TNT! It's always nice to come across something like this. Jim Talbot also has a real nice tut on texturing the face -- nowhere as complex as mine and I think his is more for stylistic characters. However, in his tut he adds faint specels of red and green to the skin and I liked the effect so much that I've added it to my process and I would have added it to my tut if I'd known about it at the time. His tut is excelent and I recommend it along with mine. I think his tut presumes you know more about AM and Photoshop then my tut... mine is really good for someone who doesn't know AM and/or Photoshop too well.
Ye Ole 'Master of AM',
Rusty
-
Hi,
I don't know if this has anything to do with what your seeing (and to have time to write this, I had to skip reading all posts) but if this is the problem I fairly sure that nothing will resolve the problem. That is to say, my older system (which was fairly kick butt) experienced the same wait time as my current system when I purchased it and it was a significant upgrade (the BOXX 3200 was arguably the fastest non-over-clocked, single CPU system you could purchase at that time which was a while back -- it was pre-64 bit and I only have one video card, see signature for details). Anyway response time went through the roof on everything else but, not the patch count problem.
I can not find my documentation on the problem but there were forum posts on the issue. At certain patch counts, the wait time for certain operations would go way up. I mean you add one patch and 'Ka-Boom'. I'm guessing but this threshold was somewhere around 24,000 patches, then again around 35,000 patches and again around 55,000 patches. When you exceeded the 55,000 patch count (a guess but it was somewhere around that number) wait times for copy/paste patches, add 5pt patch and several other operations went to around 15 minutes or more!!! Other operations remained completely reasonable. Martin helped us out by telling us that the duplicator plug-in would do the copy/paste patches faster -- yeah, that was sure right! While copy/paste was taking 15+ minutes the duplicator wizard was instantaneous!
Its pretty easy to tell if you are seeing this problem (and in truth I have not tested the problem in V14, maybe its fixed). Being an old programmer I always suspected array limits were being reached.
Cheers,
Rusty
-
This is awesome! The number of characters, sets and rendered frames knocks me over... someone is working their butt off! Just the over all size of the project makes me shake my head in wonder! I like the look and feel. The lip sync is very good. Over all, the animation is good. The story I can't say because my wife is sleeping next to me and I watched it in silence.
I normally avoid constructive crits, especially if not asked, but your project is so impressive I have to point out the two things (and IMHO the only two things) that... well, drag it down a little so to speak (and I'm sure you are aware of these already). I think that to the average person (not us over critical animators) your production would be drop dead perfect (and I have only seen this from a very few people) if it weren't for the hands and a few of the walk cycles. The hands jump out at you as always frozen in the default position. I think you need more movement and micro gestures (or something). Also, some of the walks jump out at you as being unnatural and/or too slow. Even if both these items were animated perfectly to real life or done with motion capture, they look off in the context of the media. If you've saved each scene which I'm sure you have (you could not have produced this if you were not organized) it would be well worth the effort to go back and tweak these items. You wouldn't have to fix and re-render everything, just a few shots or areas here and there.
I (and I'm sure other animation people) could point to other things but I believe none of them matter to the average viewer.
Or you could just leave it as is and it flys just fine! Despite my two constructive crits, I am totally impressed!
Rusty
-
Can anyone help me? I am trying to rig a face but all i can get is the jaws to rotate. I am trying to make an action where someone is talking since my phenomes and dope sheets aren't working. plz respond ASAP
Jeff,
I've been sitting here looking at your post torn between clicking on the
button and making no response or... or what? That's the problem... I have no idea how to respond to you without writing a book that's already been written many times before. I've easily spent a hundred hours reading or watching tuts on rigging the face. All the info you need is on this forum or the hash site or the manual if you search. First off, the phonemes and dope sheets have always worked for me. Not too many people are going to know how to respond to your post -- many (probably most) will move on without replying because of this. Far better would be to ask where there is a tut on rigging a face (I don't know off hand and you can search as well as I can) or, post screen captures of your face and your rig (bones) and describe what its doing or not doing. Even better, post images of where the built in lip sync fails you and get help on that.
There is a tut on the built-in lip sync in the manual and a video version on the hash site -- my wife just went through it and it worked just fine.
It makes me crazy when I need answers and no one replies so even though I don't know how to help I can at least explain to you that your question is too broad to answer -- its just short of "help, how do I use AM?" LOL. Make it a little more specific and provide more info so we can help you.
rusty
-
Jirard,
You have a unique style that is very cool and enough characters to launch a TV series. What would you call it?
Rusty
-
Hi,
Oh yes... its possible. Search the forum -- use 'material effectors' and/or john3d -- John shows you exactly how to do it. If fact I'm sue John will spot this and direct you when he checks in.
Rusty
-
You can also post comments on the page, lett the world know what you think of it!

Gilles
Is the TWO movie available anywhere for download (other then Your Tube)?
Rusty
-
How to learn as you go and add tips to this thread...
As my final tip (for a while anyway, I'm at the end of my list but will likely think of more) I'll just say that every time you open a menu in AM, scan that menu and if you see, as you very often will, a menu item you've never used and don't know what it does... figure it out then add a post to this thread and tell everyone else.
Rusty
-
The art or selecting CPs and splines...
I'm lucky in that I believe that I have every tutorial made for AM. In at least 3 tuts that I can think of, the person doing the tut does something kind of strange and so I have to offer this tip. What happens is he/she carefully selects a bunch of patches on the right side of the model and names the group. Now the same patches need to be selected on the left side and what happens is... they carefully select the patches on the left side and name the group. There's a far easier way: period, period, left click for the menu and select 'Mirror Selection'. The period, period inverts the selection then inverts it again so that the same patches are selected but in the PWS your no longer have the right side group selected, you have a new temporary group for the left side.
Rusty
-
Alright I'm dying here. I do not know how to turn my model into a Jpeg I have read thru the tutorials book and I must be missing it. I have searched the newbie forum just can't find it. I am sure once you tell me I will dislocate my leg kicking my self but any help would be very much appriciated. Thanks in advance, Helo.
Hi Helojammer,
Get your model positioned just the way you want it then click on 'render to file'. Make sure the advanced options is checked then select the file type of jpg. Then enter where you want the file to go (desktop is easy) and enter a file name. Now there's a lot of render options but if you are in the modeling window you can probably just click on 'okay' or 'render' or what ever the button says and in a short time you will have a jpg image of your model.
Hope that helps,
Rusty
-
First, make sure you attached your mesh to the geometry bones that Builder and Flipper made, not the control bones that Rigger creates, and that any fan bones you added are attached to the geometry bones that Builder and Flipper made, not the control bones that Rigger creates.
Oh my God! That made me laugh! But I guess you don't know how well I know the rig and must assume the lowest level. I've been using TSM since TSM1 first came out. I know the rig pretty well.
yes, you can drag the arm control bones ANYWHERE, but the geometry bones stay attached to each other and won't travel any farther than they can reach.Well, despite my years of working with the rig, perhaps I 'am' doing something wrong because my mesh is assigned/weighted/SS to the proper geometry bones (mainly "1 right arm" and "1 right upper arm 1" and "1 right shoulder fan") and all tests done just moving the geometry bones, they are constrained properly by the "1 right arm" rotation but, after the control bones are installed the shoulder can go beyond where they were limited to.
The shoulder bone is hidden and follows the base of the upper arm bone. You translate the upper arm, and the shoulder follows. YOu control your shoulder position by animating the position of the arm. This saves you from haveing to animate the shoulder bone separately. It's like an IK shoulder.Right.
The real joint at the upperarm/shoulder will only move in a radius at the end of that invisible shoulder bone. Unless the mesh is attached to the wrong bones; then anything could happen.Don't think so (and by saying that it will work next time I have the control bones in place!).
Post a crazy pic if you are still wondering.In bed with flu today... probably have assorted fixes done and do the rigger tomorrow evening. Will let you know.
Thanks dude!
Rusty
-
Compensate should be the default.
It IS the default in ver 15
You're kidding! Well let me pull my foot out of my mouth so I can eat my words! Hey, I made that request in V9.5 I think. Well the jokes on me. Here's a tip Rusty: Don't shoot off your mouth if you're a version behind!
new model
in Work In Progress / Sweatbox
Posted
Nice work! I think you will still need more splines in the forehead and eyebrow areas -- one or two (unless this is for a Botox commercial LOL).
Rusty