Meowx
-
Posts
406 -
Joined
-
Last visited
Content Type
Profiles
Forums
Events
Everything posted by Meowx
-

-
Alright, I submitted a report. Rob, check out the left side of that image. Nancy, yeah unfortunately I am using the blue button (the Q key) and getting those screenshots. Legacy bump and displacement maps seem to be completely free of this bug. Thanks for all the help so far guys!!
-
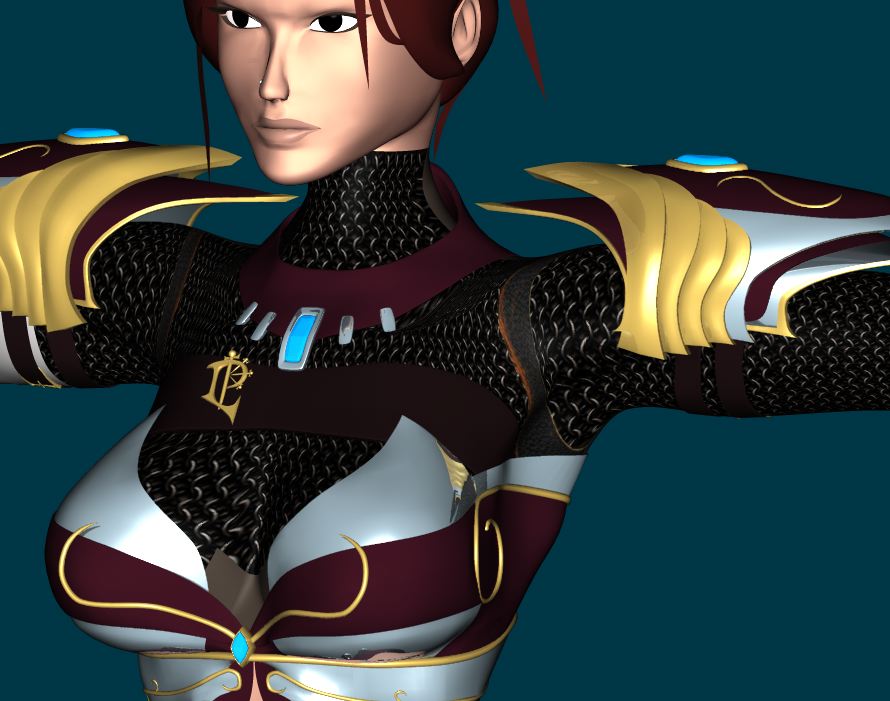
Yeah, I'm looking into proper normal maps now and it's pretty cool stuff. And after further testing, the bump map STILL does the same thing - just at certain angles:
-
Using it as a bump map produces the exact same result, tho... edit: orr.... not. Hm, that's odd; when it happened before it would do the exact same glitch with bump or normal, but not with displacement.
-
Yeah, this is how I solved the problem before - the displacement map doesn't seem to share the problem. How much more processor intense is it to render with a bunch of displacement maps, tho?
-
Sure thing! sash.zip
-
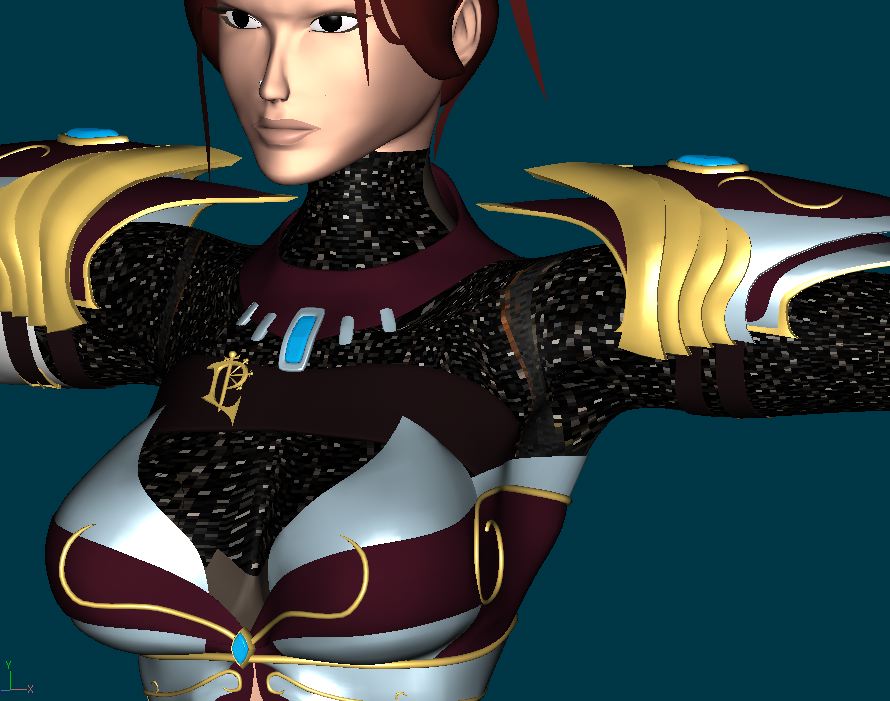
Alright, I've had this pop up a couple times now. Bump maps (and normal maps) change DRASTICALLY from patch to patch. Anyone know what causes this? Normals are all facing the same direction.
-
Spiral bindings are one of humanity's greatest inventions, back when I did consultant work for this architect he had a binder and I used it all the time for this kind of stuff.
-
Alright, it looks like it's working properly now! Thanks a ton, you are the master of rigging.
-
Alright, that seemed to help quite a bit! I had to go find the Mac plugin on the site (I guess .hxt isn't universal), but once i got that the mirror worked just fine. It doesn't want to let the legs fully extend, now - it starts in a very slight squat with the legs pointed a bit inwards. But I'm assuming a bone isn't quite long enough or something, so I'll play around with it here.
-
Oh, quick question - am I supposed to delete the left thigh orient and foot target bones first?
-
Cool, I'll give that a shot tomorrow and let you know. Thanks for your help!
-
Ehhh, yes and no. It was to begin with, but it's deviated from perfect symmetry.
-
Done and done. Thanks for taking a look! invis_rig.mdl
-
holy crap, I love you
-
Sure, here you go! I based the IK legs on the ones in your 2008 rig with the thigh orient targets. mx_rig_2.mdl
-
Yes, I'm not using the 2001/2008 (whatever it is) rig; this is one I made myself.
-
Alright, the first one is an old friend that I had problems with before and thought I had... well, not fixed, but minimized. When the legs are fully extended, they "snap" pretty noticeably in the first few inches of movement. Before it had been suggested that perhaps the hinge bone was not aligned exactly with the top of the thigh bone and bottom of the calf bone, and when I did that it made the effect quite a bit less noticeable. The legs also end up pointing in slightly different directions, but I suspect this is because they're not 100% perfectly symmetrical on the body. Animation_MasterScreenSnapz002.mov However, as you can see from the movie, it's become very prominent once more. I'm not using The Rig and for this I apologize, I probably wouldn't be having this problem if I were. I don't really like using something where I don't totally understand 100% what everything is and how it all works, and firsthand experience building all the stuff guarantees it. Here's the bone hierarchy and IK setup: The other problem I've been having is a bit more serious. I *THINK* this has only been happening since I updated to 15.0g; it is a recent development. Basically, sometimes (and only sometimes) the thigh just doesn't... work. Animation_MasterScreenSnapz003.mov This will happen in only one leg and has happened to me in another model as well. That model was relatively fresh, so I fixed the problem by deleting the thigh bone and making a new one. This model, however, has a lot of time invested in CP weighting and Smartskinning. Any thoughts on what's causing this? The leg bones are copies of each other. Thanks a bunch!!! Oh, and this model itself is nearing completion. Texture on armor and hair needs to be completed and that's about it.
-
First off, use Euler Limits, not Spherical ones. Spherical constraints will not animate properly for what you're doing. Now, go to Skeletal Mode. Right Click > New > Pose > On/Off. From within that pose, find each bone you'd like to add constraints to. Right Click > New Constraint > Euler Limits. Enter the values you want, some experimentation will probably be needed. Rinse and repeat for each bone you'd like to have constraints. When you're done, click on your model in the project workspace. Look at the properties tab, you should see "User Properties." Click your new pose, hit F2 to rename it something like "Constraints." You can also have it turn on by default here, click the "-not set-" next to it so it says "On." You can still turn it off if you want, but now every time you put the model in an action or choreography, it will have the constraints turned on. See attachment for an example of the User Properties tab with a series of poses. edit: I see homeslice answered your question too, lol
-
Cool, good to know. Thanks!
-
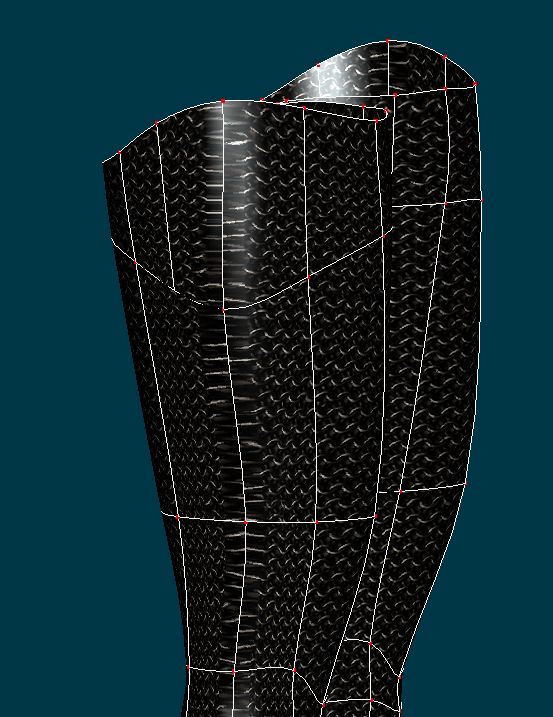
This is a problem I've always had and was wondering if it was normal. The edge of the patch where the decal ends is always distorted. Decals are applied to the flattened surface as planar and extend beyond the edge of the patch. The "seam" you see in the screenshot is the product of the edges of two decals (front and back). I fix it by just covering up the seam with another decal, but this complicates bump maps. Is this normal or is there a way around this?
-
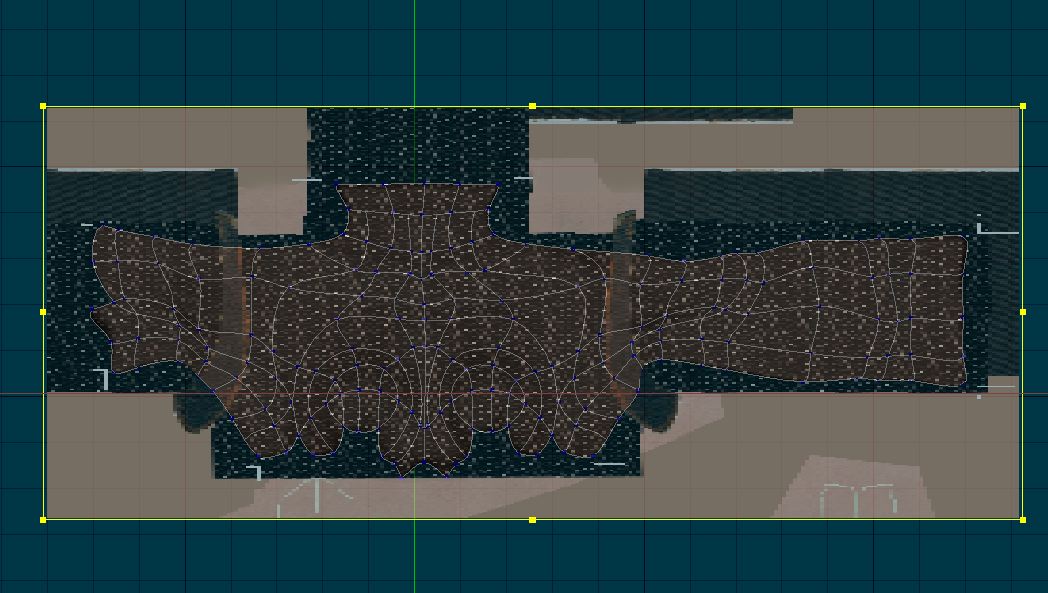
Hmm, ok, thanks. Sorry I wasn't very clear on that - I'm looking for a way to view the textures in high res, not turn them off altogether. And ja, the progressive render works fine on Mac too. I was wondering because I had never run into this before - when applying and viewing decals in real time, they had always appeared at full resolution. I've never really used decals this large before, however. Thought maybe it just didn't like the really big ones. Is "clear cache" not working just me, then? Maybe a Mac thing. Edit: tried the resolution thing, also didn't change for me. I DID find a bit of a workaround, but it's not really practical. 1) Close all windows. 2) Close the project. 3) Open the project. 4) In the PWS, dig into the model until you get to the decal and then double click the decal's STAMP. The stamp will open up in a window at full resolution. 5) Now you can go into any window you want and the decal will display at full resolution in real time. Doing certain things, however, seem to make it drop back down to low res. (Doing a Q or shift-Q render, for example.) The nice thing about viewing it full res in real time is that I can go into the stamp and adjust patches so there's no stretching in the decal: AnimationMasterScreenSnapz001.mov
-
As I'm starting to add texture, I'm finding it very difficult to preview stuff in real time because the textures are just ridiculously low-res. The texture itself is pretty big, the upper body texture in the screenshots is about 2000x1000. It's kinda hard to even apply a decal, it shows up in low res there too (3rd pic). Is it just because the texture is too big? Also, "Clear Cache" doesn't seem to do anything. If I edit a texture, I have to reload the project to get it to update. I'm on a Mac, dunno if these are Mac problems or A:M problems.
-
I had it happen twice, but haven't seen it again since I posted and have been working in Hash pretty much all night. Seems to be more rare than I first thought.
-
I just started using 15.0g about a week ago, and from time to time when I go from a model into an action - to, say, test out some rigging - and then close the action and go back to the model... the modeling toolbars won't come back. It just stays with the animation ones. Closing and reopening the model doesn't work, not even closing the entire project! Fiddling with toolbar settings doesn't work either - the modeling toolbar will show up when I'm in the customization menu but then go away as soon as I close it. I have to save and reboot A:M to get the toolbars back. Anyone else having this issue?