


StormedFX
-
Posts
190 -
Joined
-
Last visited
Content Type
Profiles
Forums
Events
Posts posted by StormedFX
-
-
Yossi, Stormed - It's probably that your playrange (in the timeline) is set to less than the length of the chor
In my example, length of chor is 24 frames - but the playrange is set to only play frames 0-10
Right click on the top bar of timeline and set your range, or drag the ends of the playrange with your cursor (start and end)
Perfect! It works now. Thank you for your help, Nancy.

CHEERS!
-
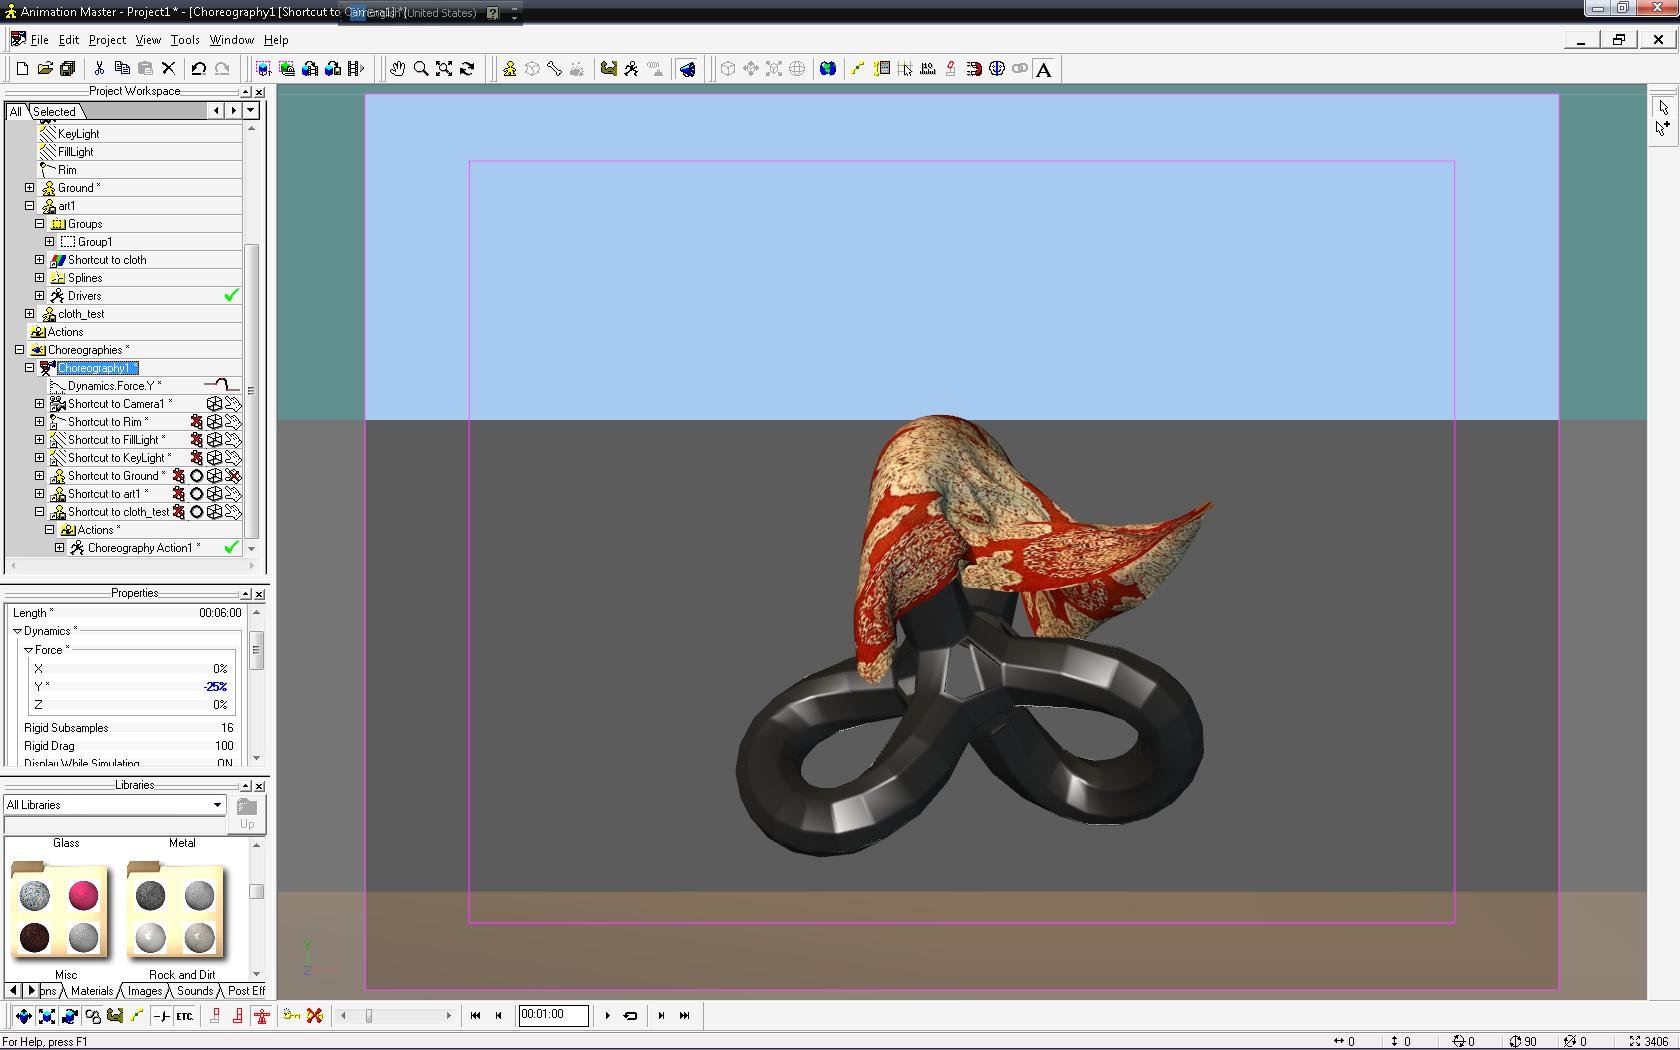
I seems to have the same problem when I have to test the SimCloth system. I could have wrong setup... I set 6sec in the chor and run the SimCloth which it works fine. The system simulate 6sec, but when I hit the play button it always stop at 1 second. Not sure what's wrong. As you can see in the picture, the chor length is set to 6 seconds.
CHEERS!
-
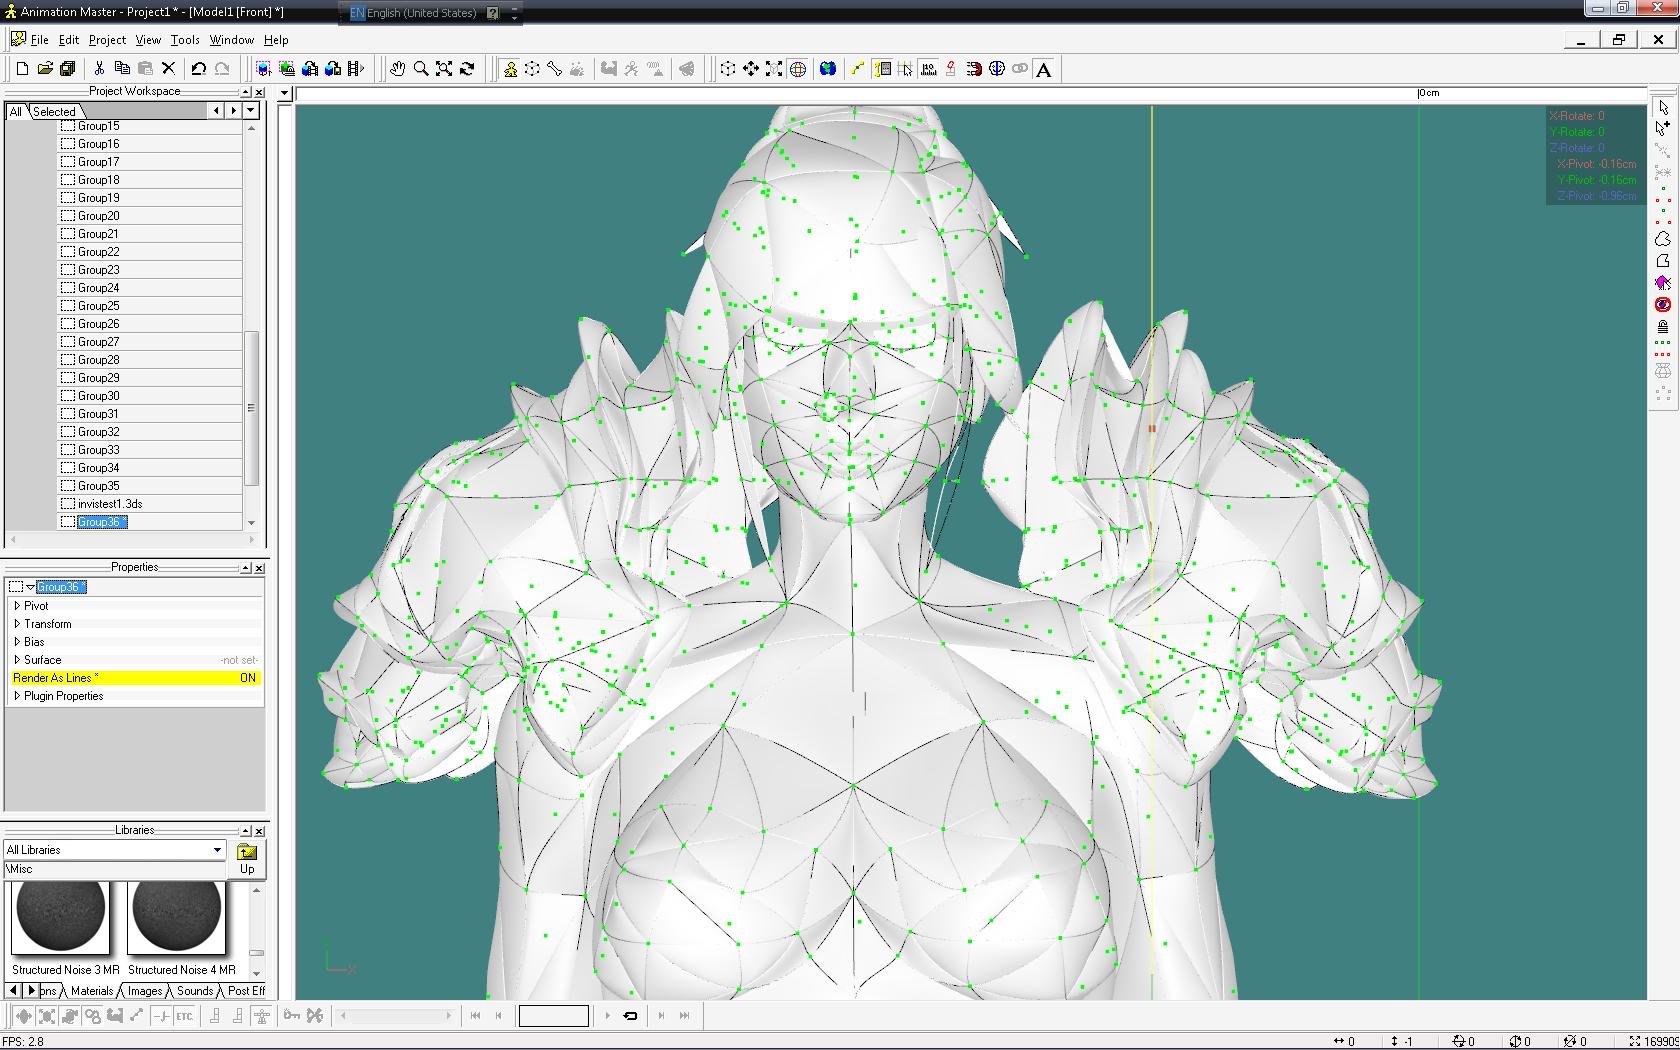
Sure thing! Here's the raw .3ds, unmodified.
It looks like a game model which you can tell by those tri patches which is either modeled or you have tried to modified in"Metasequoia", but I could be wrong. I think you are better off start from scratch as Ken suggested. Here is what I get when I imported it into AM which is not easy to clean up.
CHEERS!
-
Well!!!! Looks like you have lots of clean up to do as Ken already have mentioned... too many dead end splines and too many tri patches.
CHEERS!
-
Wow! What a great model?
CHEERS!
-
It is great but too sad for me.

-
Not sure whi IE doesnt work. Thank you for sharing, cheers!
-
Does not work for me neither.
CHEERS!
-
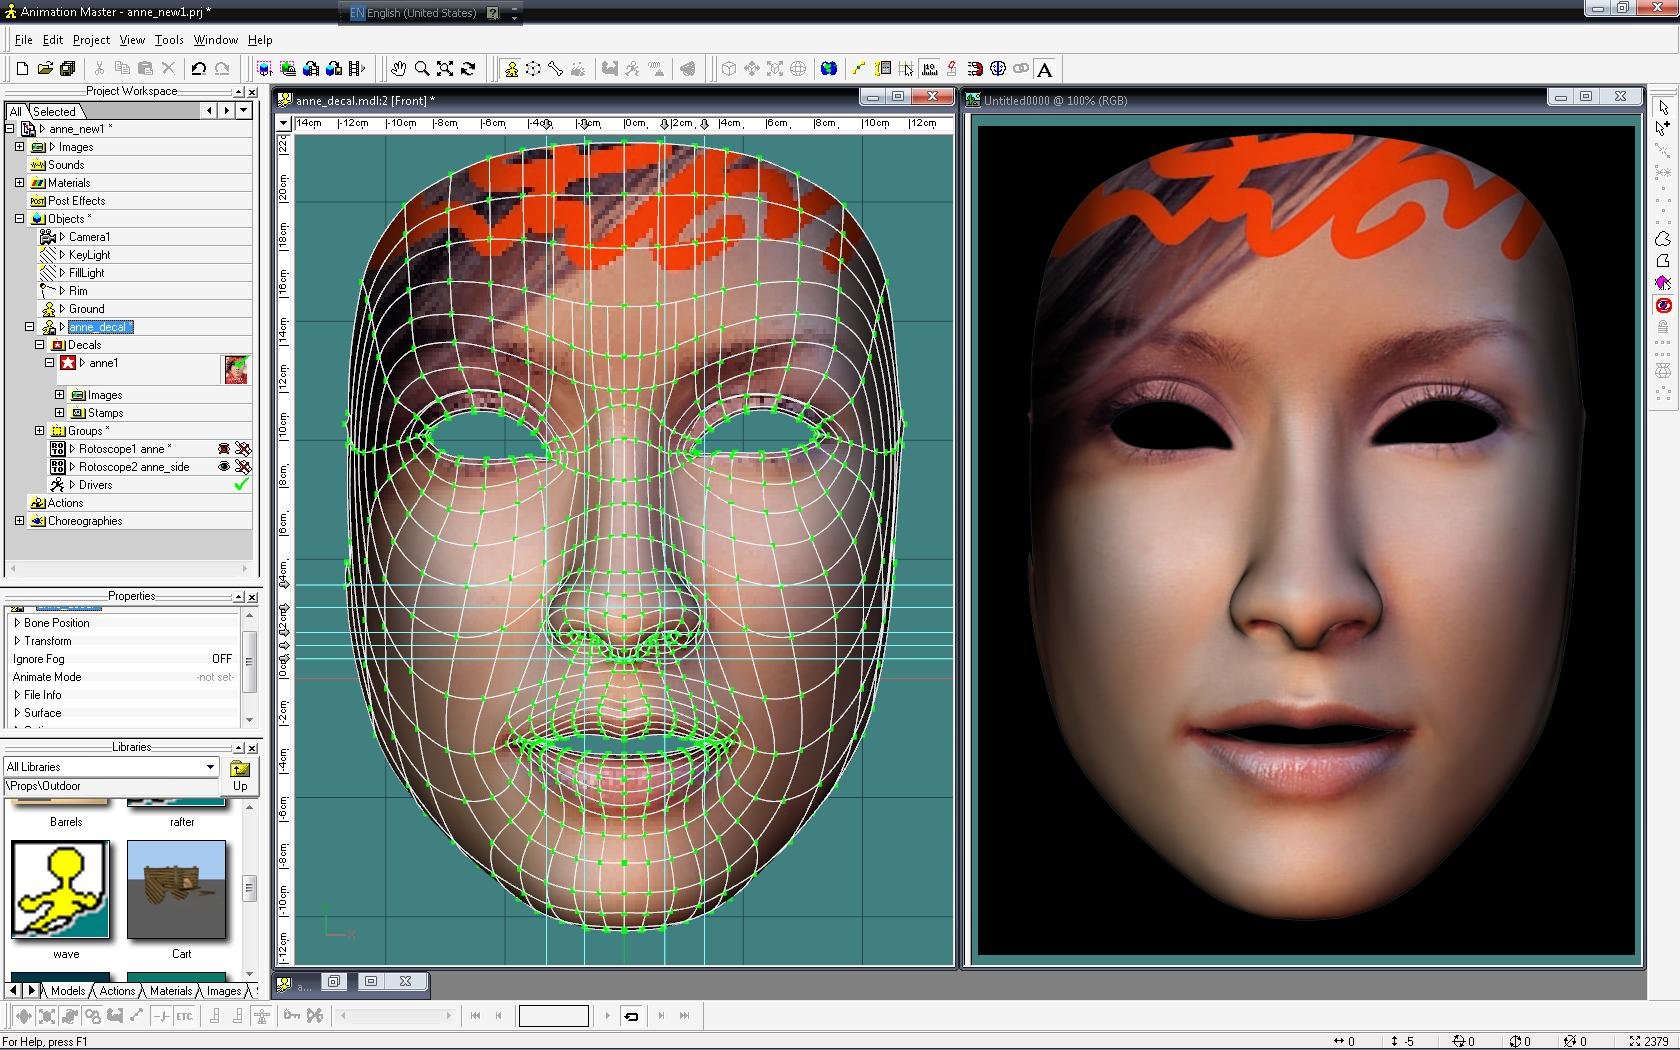
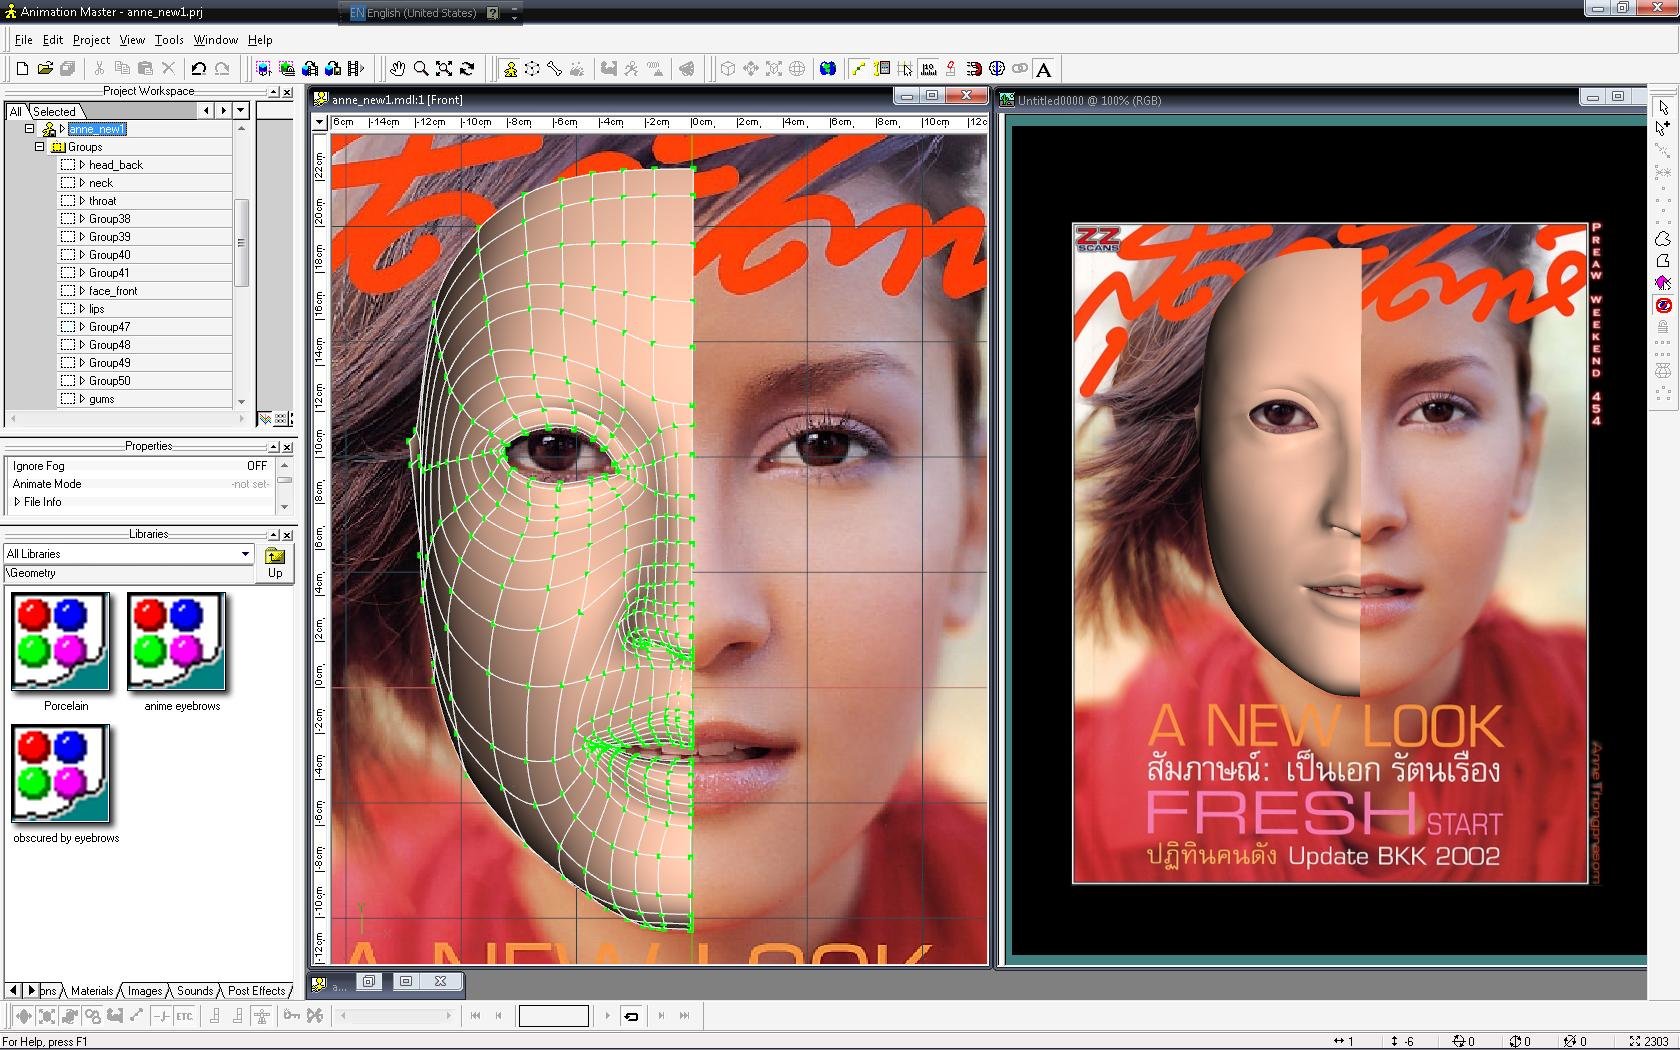
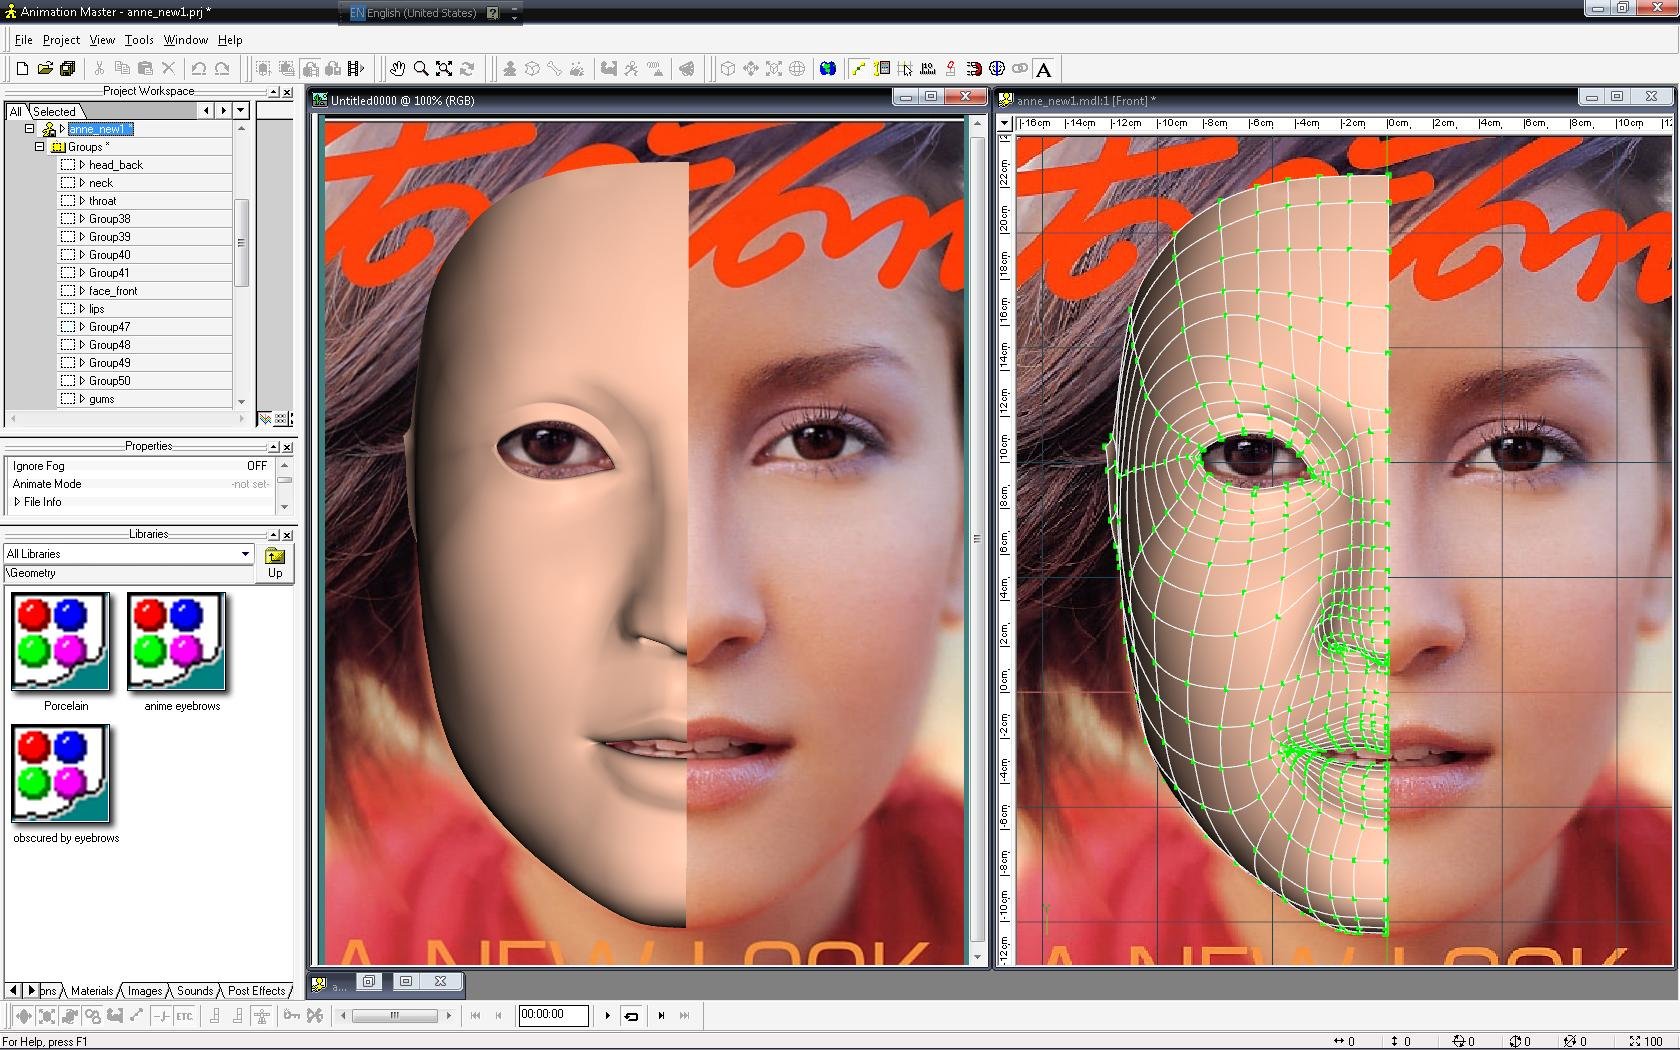
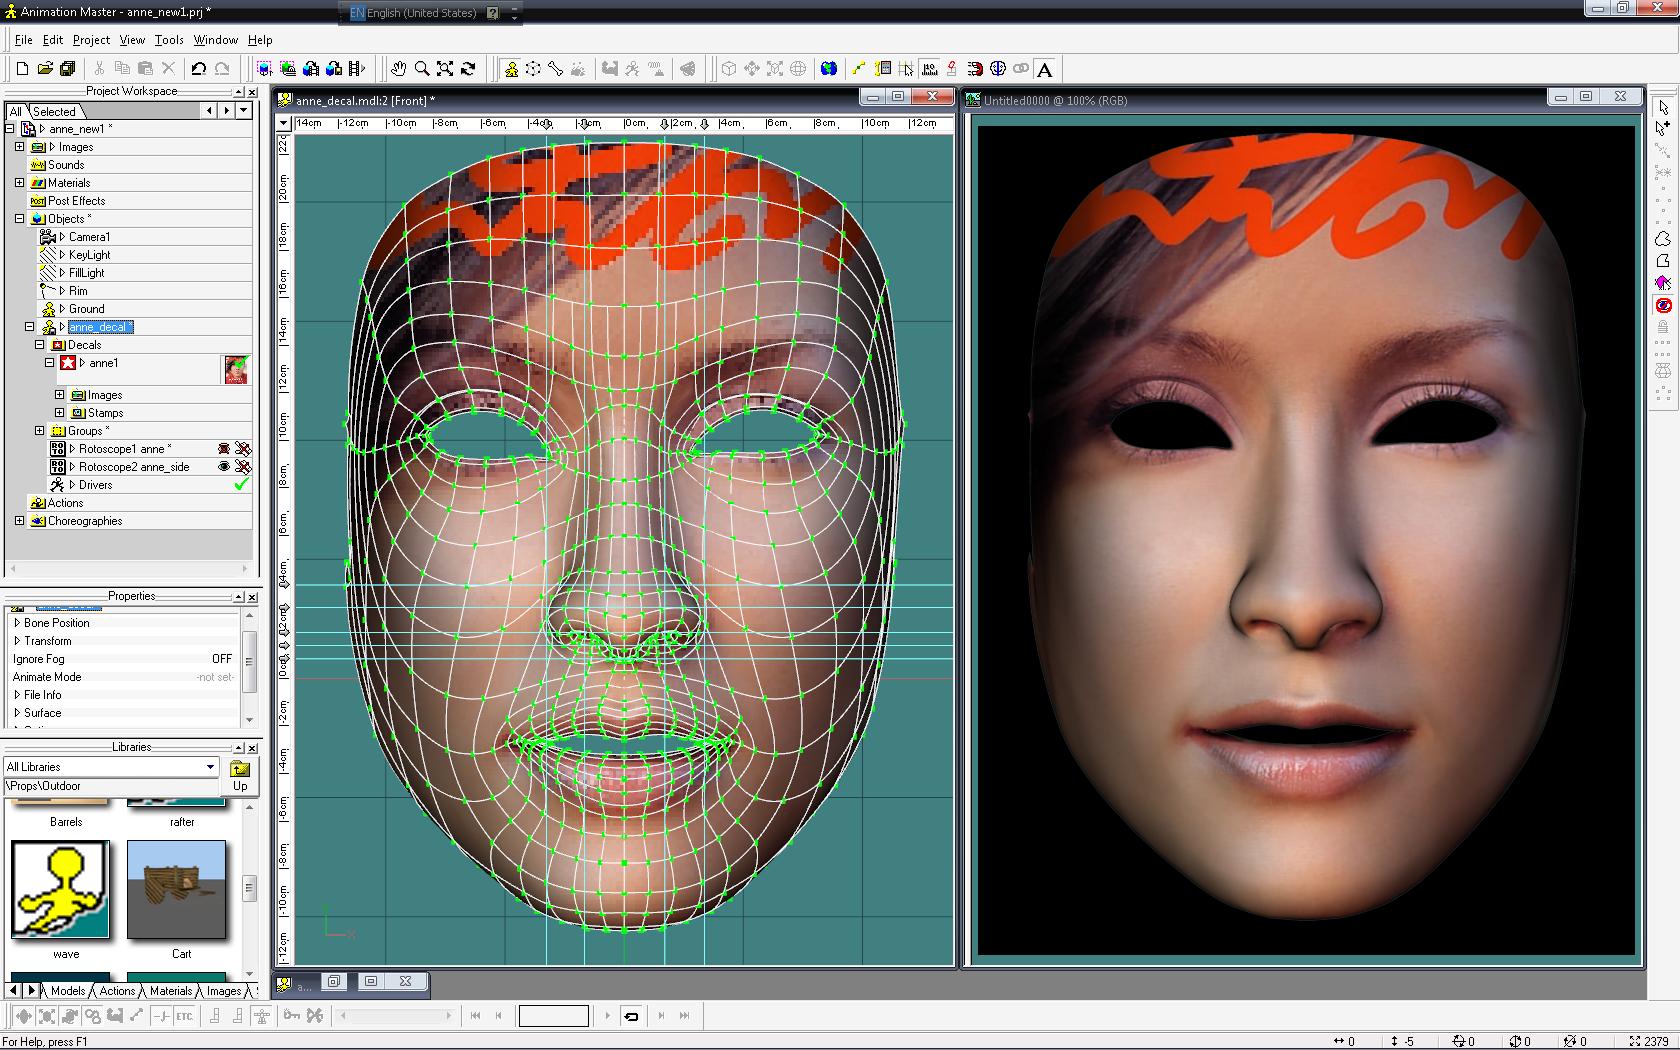
Can we see a 3/4 profile render? You did not make any eyes, did you? It looks like you applied the decal on top of the model in the same position of the rotoscope. What does it look like without the rotoscope?
No, I have not yet make her eyes. What you see is just from the rotoscope from the background. I still might have to move those splines around in the area of her cheek bone in order for me to control the contour and shape.
CHEERS!

-
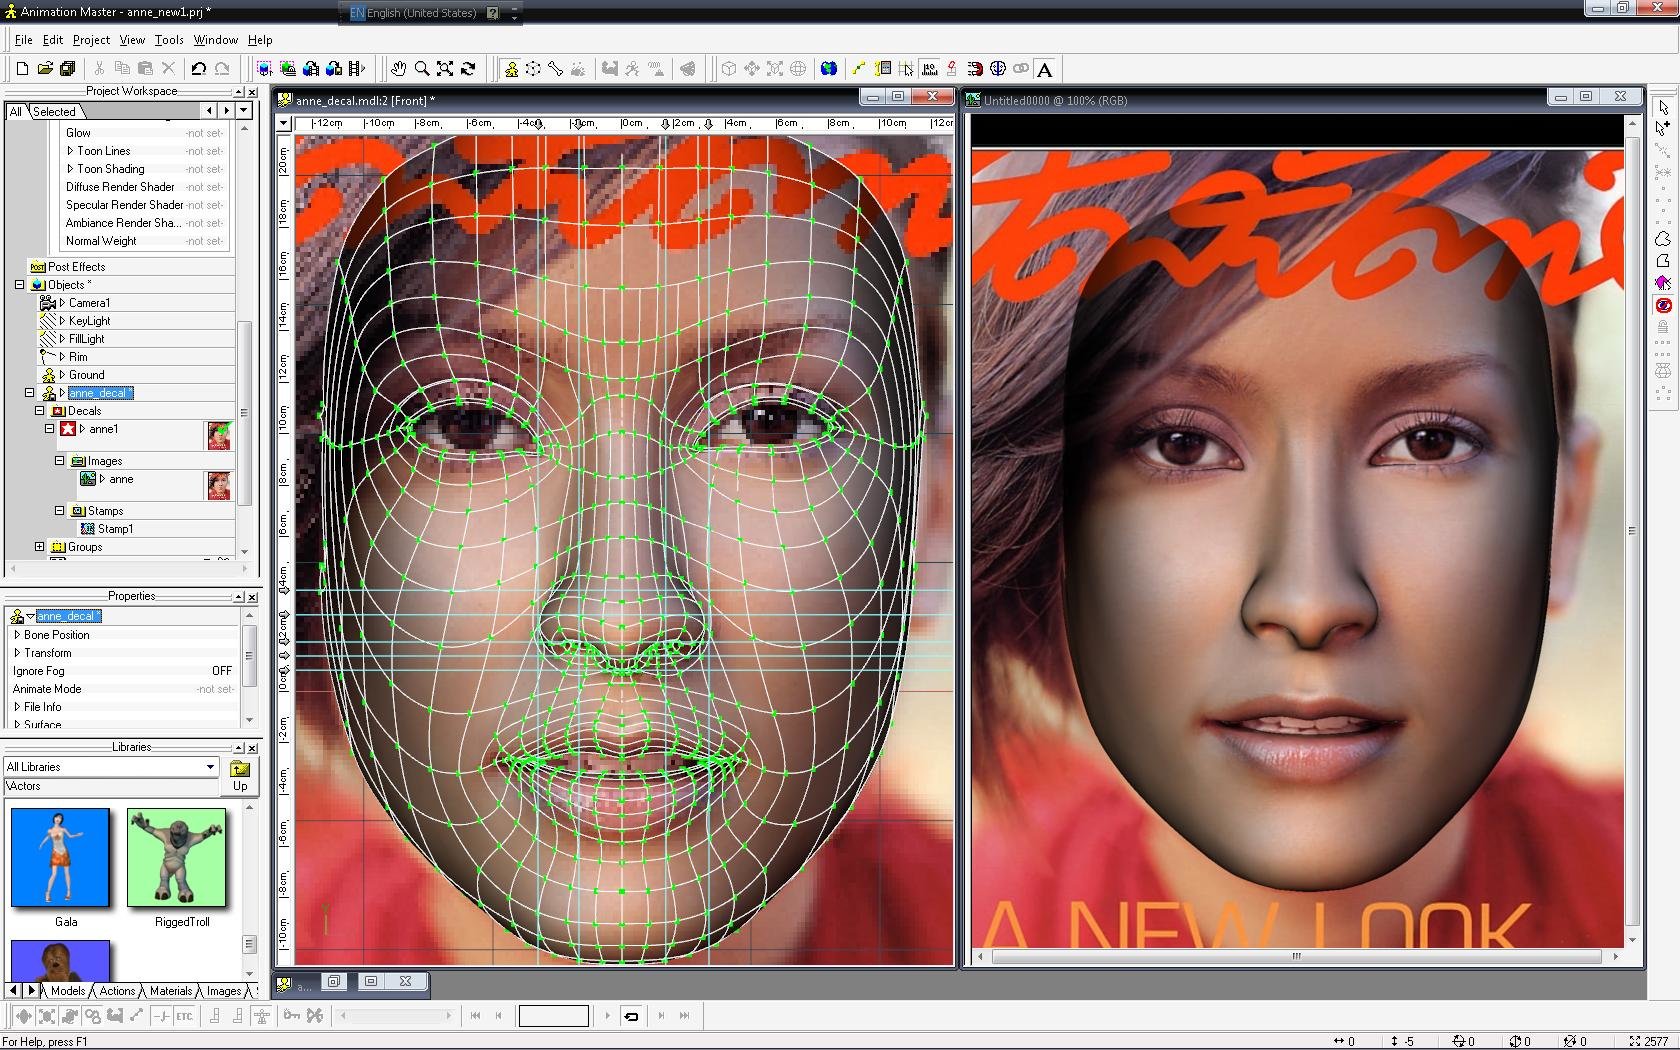
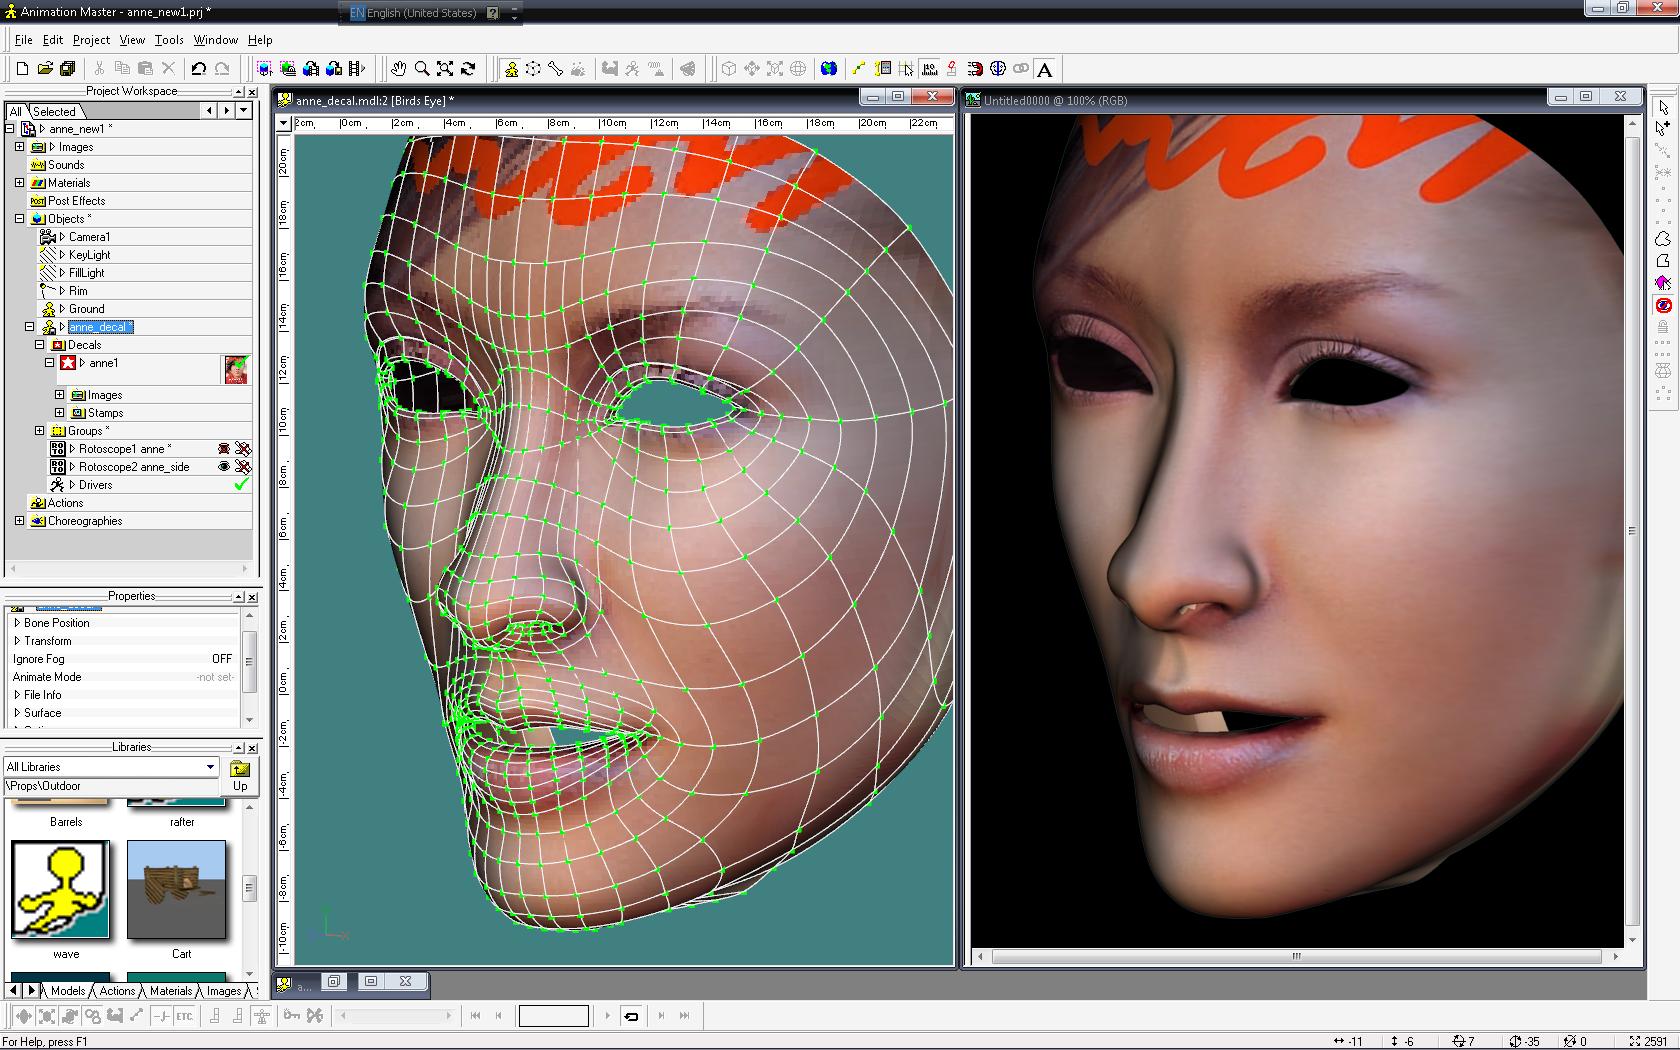
Well!!! This is not good as I want, but this is the final version with a test decal. I will have to turn this into a long-term WIP, because there are lots of things I would like to improve with this model. The model has lost some details in certain area which are not what I would like to see, but I have tried my best to get as close as possible. I will have to say that I have learned alot from this WIP when it comes to modeling from a realistic photo, and there is no doubt that AM does handle it pretty well for me. This is still a everyday learning process for me which I am really enjoy. Comments and suggestions will be really apprecisted. There is one question though,
How can I make the image after the decal look brighter or lighter, because it looks too dark to me?
CHEERS!
-
COOL! Thank you for sharing... Looking forward to your animation.
CHEERS!
-
I like your model, and these should be an interesting animation. I have tried to render mine just like your second picture(SSS, I guess) but coannot get it to work. Any recommendation? I would love to see your animation.
CHEERS!
-
You can download from the link below,
ftp://ftp.hash.com/pub/misc/Data.zip
or go this link.
http://www.hash.com/forums/index.php?showt...379&hl=data
CHEERS!
-
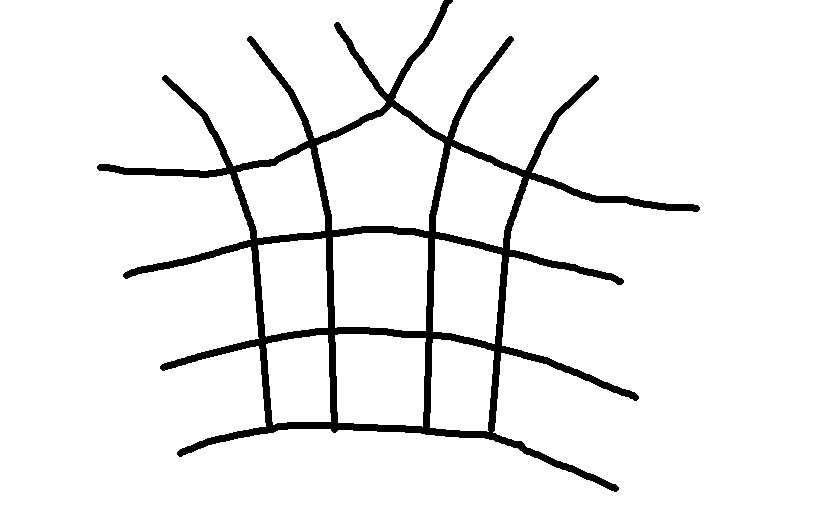
the loops that go from her nose, across the cheek bones, around the eyes and then across the forhead can be reduced.
the model still looks great!
Ahhhh!!! Thank you for your help... I am looking into it and notice that the spline loop causing the nose looks like a dent to me.
CHEERS!
-
Glad that helps! That looks much better to me! Nince model you have here.
CHEERS!
-
I'd recommend you make a sphere the size of the eyeball as a guide. Then conform the eyelid to the curvature of the eyeball. Notice that the outer corners of the eyelids pull into the eye socket a bit more, especially on the upper side where the flesh from the crease up to the brow overhangs. The tear duct lets the inner corner pull out farther from the eyeball. That you can do by pulling in the splines closer to the curvature of the eyeball on the outer corner. That might fix most of the problem.
BTW, this is some nice splinage!
I will try as you have recommended to see if that helps, and I might have to check the model again to see if the contour around her eye is in the shape that I thought it was. Thank you for your commend and your help.
I have not gone that far yet, almost got her teeth done. I start little bit here and there to get a rough spline layout and to group them, since I now have learned that "Never start modelling without planning your splines layout". That ear and that thread will be really helpful. To me, ear is the hardest to model, especially with spline. You made a really nice ear model. Will keep update my progress.
Would you mind if I will use it to attatch to her face?
CHEERS!
-
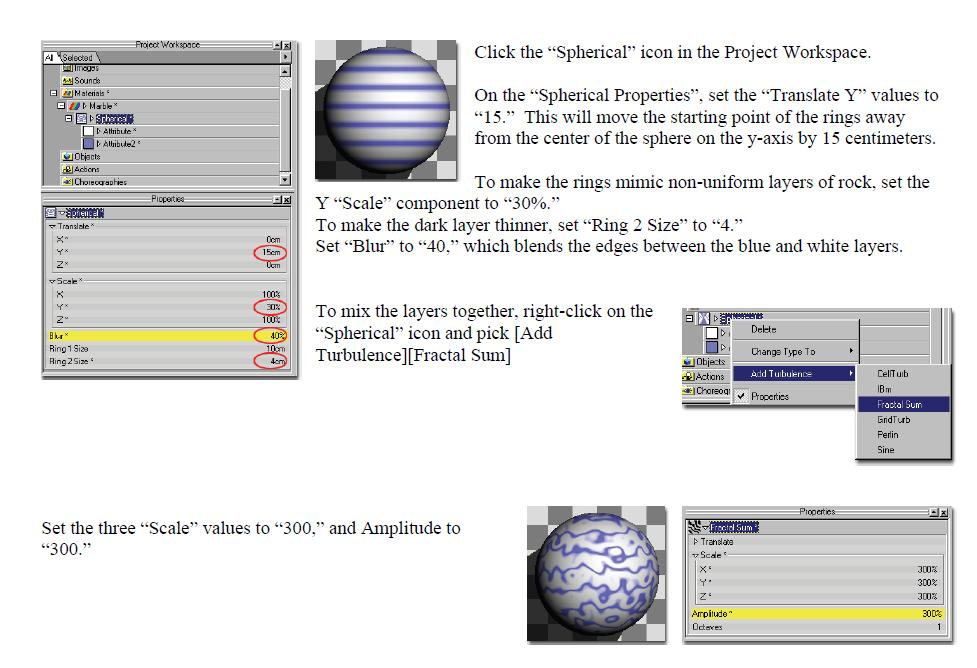
Have you tried to finish the TAOAM? There is an exercise to create your own marble material. Is this a material you created your own? If so, you migh want to check out that exercise. You need to add turbulence and choose "Fractal Sum" to get the swirling effect.
CHEERS!

-
If anyone knows an A:M User from Tailand... that's where Klum is from.
Besides the tutorials and assistance we can get here...there's really nothing like having someone local.
Anyone else from Tailand besides Klum around here?
Hehehe!!! I am Thai but live in US... That was why I asked about the word "KRUB", because that means "YES" in Thai, and also this word is always used by men at the end of a sentence to show a respect for others which depends the meaning of that sentence. Welcome to world of AM! Klum....
CHEERS!
-
Try the following links. They are great tutorials. Just a curiosity! What is "KRUB? Are you Thai?
http://www.colins-loft.net/FaceTexture.html
http://www.virtualmediastudios.com/tuts/mapping/Preface.html
CHEERS!
-
WELL! The bias does not help me fix the flat around her eye. I am really having a hard time in the eye area, and this will be my final splines reducting. How do you normally handle the eye area? Any tricks of trade?
CHEERS!
-
This is the best I can do to reduce those splines, but as you can see I already lost details around her eyes which looks too flat to me. I hope this can be fixed by using the bias, but if not, I might have to add one more ring back.
CHEERS!
-
I have been using the same as Vern mentioned and combine that with short key "4", "5" or "6", but the most important is that you have to get splines flown continuously in the first place. I then use bias to adjust the contour of a spline between two CPs which can only be adjusted by using the bias, because by adjusting one CP will effect those that connected to the one you adjust. These are what I have learned so far from my last two WIPs.
CHEERS!
-
Excellent works! I love the way you add those details.
CHEERS!
-
If you need to preserve the number of splines you could use hooks further down.
-vern
This will do the trick where I still have ways to control detail inside. Thank you and cheers!


Fluid simulation
in New Users
Posted
I have been trying to play with fluid simulation but got stuck, but still it's just not quite clear to me. As far as for the Newton physics and the SimCloth, you can just right click on the chor and simulate them, but there is no such option for the fluid. I guess my questions is
How can I simulate the fluid?
CHEERS!