someawfulbridge
-
Posts
103 -
Joined
-
Last visited
Content Type
Profiles
Forums
Events
Everything posted by someawfulbridge
-

Star Wars Characters WIP
someawfulbridge replied to LeeAnderson's topic in Work In Progress / Sweatbox
These are looking great--especially the texturing. Do we have a Bossk in our future? Mark -
When a sweeper idea turns out different than plan
someawfulbridge replied to johnl3d's topic in Work In Progress / Sweatbox
This looks like some of the stuff that Meats Meier is doing. He does his by masking parts of his wireframes, scaling up and/or down, and then inflating the geometry of the wires to make these ornate, layered sculptures (he also makes extensive use of zbrush). I wonder if using sweeper on some preexisting, not wiry wireframes would result in something similar? Mark -
Computer illustration I did
someawfulbridge replied to someawfulbridge's topic in Work In Progress / Sweatbox
Thanks for the com(pli)ments. I'll have to check out the Star Wars stuff! I know this is straying OT, but there's a great interview with Mark Mothersbaugh of Devo seeking the same freedom in corporate life, talking about the subliminal messages Mutato Muzika inserts in their commercial work: http://www.avclub.com/content/node/24924/1/1 Thanks for the belly-laugh. That is AWESOME! Reminds me of the "Art of Star Wars" exhibit they had here in San Francisco several years ago. There were several matte paintings from the first trilogy there, and I always loved looking at the little "artistic expressions" in them. Like the stormtrooper with a huge smiley-face head standing in the back of the crowd scene. Or the one whose feet were pointing backwards. Or the little tiny bumper sticker on the back of the Millenium Falcon model that read "How's My Driving..." I've often put little messages on billboards and such and put them in CG scenes...too small to be resolved on the broadcast, but I know they are there. (Though more recently I've had to be careful with that, with more shows being done in HD ) Anyway, great job, man! Cheers, John -
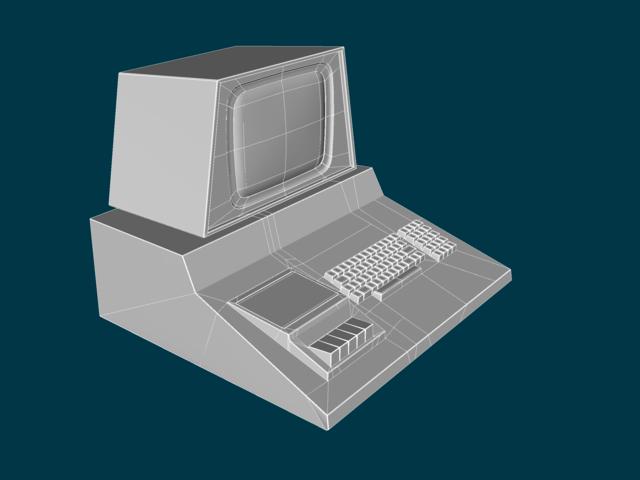
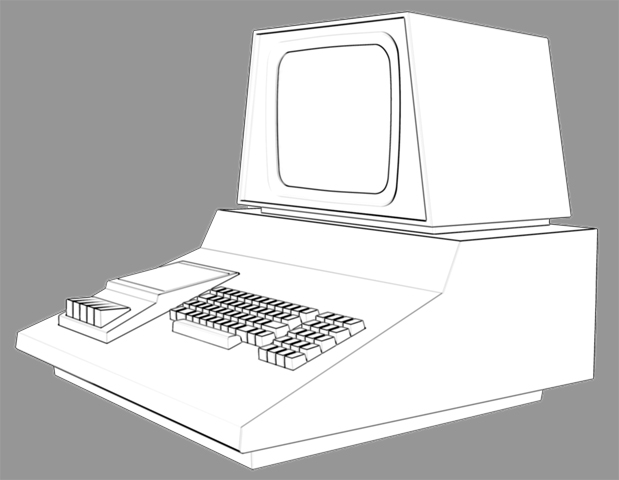
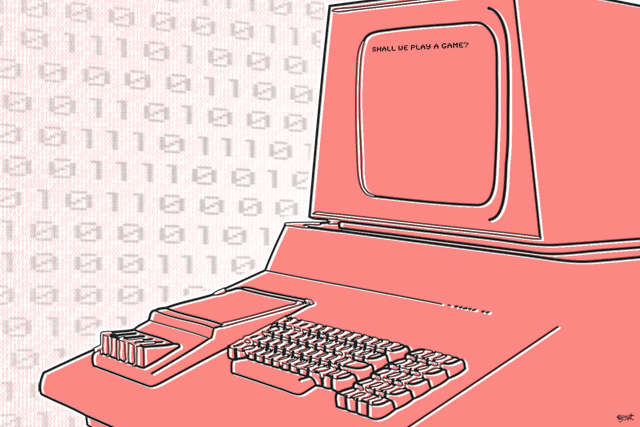
So I had to recently do an illustration of an old computer for dayjob's corporate newsletter. For looks' sake, after hunting around for reference pics, I went with a Commodore PET (but with a CBM's keyboard--I wanted the Selectric-type keys). Modeling time was around 8ish hours (even though I might never use the model again, just in case, and for learning purposes, I modeled all the recesses for the holes in which the keys and tape drive are placed--I stopped short of modeling the back, however). This is what I came up with: Next, I played with various camera angles and rotations until I found the angle I was looking for. Since this was going to end up as an illustration, I did a toon render of the beast. I took that into Illustrator, did a LivePaint/LiveTrace conversion of the toon render, took that into Photoshop, colored, offset the red color from the black lines (to set the lines apart, and give it a distressed, poorly offset look), and added some binary code as a background. Oh, and to further go with the obvious (this is not at all visionary, mainly a tech exercise (techsercise?) for me), I threw the only line computers-who-aren't-HAL should be allowed to say on the screen. This is the final result. Incidentally, the 0s and 1s are a binary translation of an astoundingly vile and pornographic excerpt from Georges Bataille's Story of the Eye. In corporate life you have to find your subversive fun where you can (such as making the woman who stole your parking place exactly 5% fatter and 5% uglier in her newsletter pic). So that's my unsolicited sharing for the day: how I went far out of my way on a project, and invested 3-4x the time, to toy with A:M. Much more enjoyable, all around. Cheers-- Mark

-
I've actually been doing periodic searches of this post ever since the first character models were posted, just to see what was up with the project. Glad to see it's going well, and is as beautiful as ever. This has got to be some of the most incredible stuff I've seen with A:M. Since I'm still getting my head around modeling, I have to say that those look like remarkably efficient spline layouts. Low patch counts for such ornate characters. Cheers-- Mark
-
Splines showing up in final renders - Argh!
someawfulbridge replied to someawfulbridge's topic in New Users
You, sir, are a god among men. Those groups appeared while I was perusing various surfacing options, and having not intentionally created them, I didn't think to look for them. Now I know, and knowing is half the battle. Thanks! -
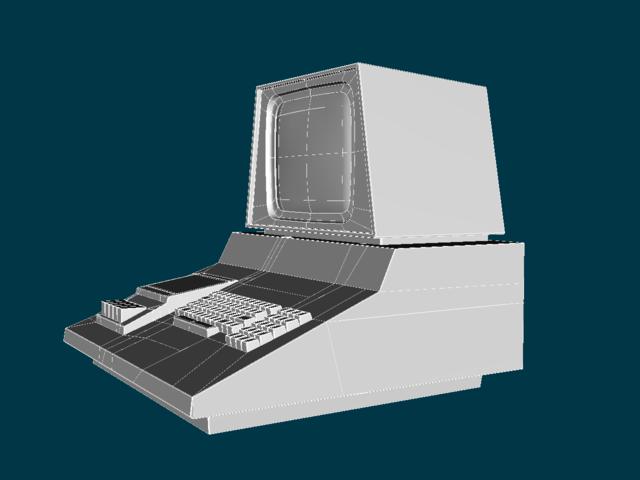
I saw that this has been addressed a few times in forums, but I never found an actual answer! I have finished the modeling part (not texturing/surfacing, and there is no decaling) of a computer. At some point during me setting up my test renders, the splines started showing on the surface at all times, even in the final renders. "Render as lines" is set to off, I'm using final-quality render settings (no shaded/wireframe), and all the obvious stuff I can think of checks out. I just pushed the wrong button somewhere. How do I make this stop?!? Here is the pic, and in case it'll help, I'm also attaching the project file. Thanks! commodore.prj.zip
-
Unnervingly frumious. Mark
-
you really mean holding shift while you click on a spline while in add mode , right ? just pressing shift-a couldn't possibly know where to put the new CP. D'oh! You're right. This is what happens when I try to act all smart and stuff and things.
-
Something I learned from the beautiful, beautiful David Rogers book: Shift-A adds a control point to the preexisting spline WITHOUT reshaping the preexisting spline. As far as adding to the preexisting spline, that's going to depend on which spline is selected when you add a control point. If you're welding to a CP in the middle of a spline, you're continuing your new spline and just "passing through" the CP. If you're welding to an endpoint, chances are you'll be adding the new spline to the old. Make sense? I know, I know, I'm just a neophyte, but discovering the wonders of Shift-A was a wonderful thing. Mark
-
Here are a couple of tests for the rigging on my pocket Bataille cutout guy-thing. I had been struggling to get a little bend in the paper cutout of his body and failed--the tape "holding" the wire to the paper kept slipping. In one experiment I had a bit of success by having one bone connected to the cps I wanted moved, but having another bone--an FK parent of the cp bone--do the motion. But, upon trying that I realized that the paper needs to be pretty rigid anyway, and that its motion would be better conveyed through y-axis rotation than actual folding/bending. These are rough, just tests. Oh, and for the record, in the first one that is sort of a salute into a wave, not a sieg heil, which it kinda ended up resembling. The second one is a head movement test. I'd love to hear rigging thoughts. Still have to texture him and figure out what he's going to do. Right now he's a man without a mission, but he needs to be a bullet with a gun. [attachmentid=21755] And here's the head test. [attachmentid=21756] testjump.mov testhead2.mov
-
Yeah, after extensive wrasslin' with the issue, I found it. I was trying to delete stuff under the model's shortcut rather than the model itself. User error. Thanks!
-
I've posted a similar question before, and seen others post it, as well, but I am wanting to now how to delete and/or reorder the pose SLIDERS in Choreographies. I know how to delete the actual poses--that's easy enough--but what I want is to delete 1 and 2 to get them out of the way of remaining poses 3 and 5. Thanks!
-
My own private Georges Bataille
someawfulbridge replied to someawfulbridge's topic in Work In Progress / Sweatbox
I had actually snuck a new post about this dilemma in the rigging section, but this is still an unresolved issue. I love the ideo of unibody-ing the tape and cutout (and, probably, the wires) and will definitely give that a go. Thanks! -
My own private Georges Bataille
someawfulbridge replied to someawfulbridge's topic in Work In Progress / Sweatbox
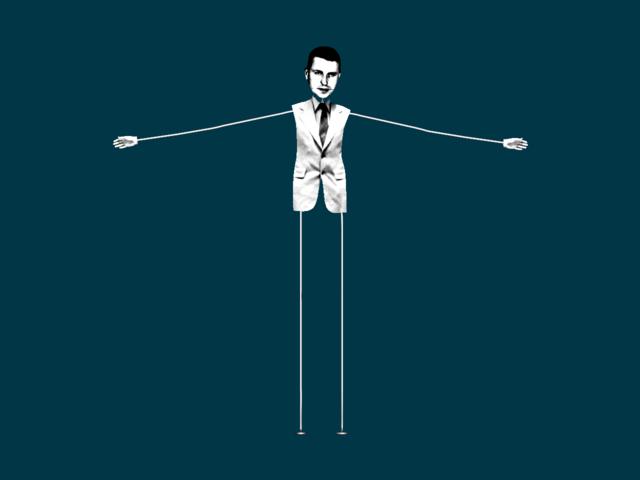
Alright. I've moved on to rigging, and have problems with the "paper" of the body. If I try to get the upper, taped parts of the wire limbs to move, and have the paper (and, by extension, tape) follow, the tape deforms at a different rate than the paper, and tends to go through the body, rather than follow along nicely. I've tried various mesh rearrangements, bone assignments, &c., to no avail. (You can see from the visible skeleton pic that I've tried to different leg riggings--one with one long thigh, the other with an upper thigh where the paper is and a lower thigh for the wire leg beyond the paper body.) Any recommendations? I was successful in my initial attempt, where the body didn't bend at all, but stayed rigid, and any limb movement happened outside of the confines of the paper body, but that just didn't look natural (ha ha). Will this require (god forbid) digging into smartskin and muscle poses, to force the tape to do my bidding at a micromanagement level? [attachmentid=20953] [attachmentid=20954] [attachmentid=20955] I figure it's only fitting that my attempt to learn all this with a "simple" idea is presenting its own complications. I have a hunch that this will be the case with EVERY project. Cheers-- Mark
-
My own private Georges Bataille
someawfulbridge replied to someawfulbridge's topic in Work In Progress / Sweatbox
Thanks for the feedback. Actually, Lurker, I love the idea of the cloth limbs and will definitely give that try down the line, but I need to get intimate with rigging, dynamics, and cloth before I even begin to tinker with anything that complex! Anyone looking to know more about Bataille (whose birthday I actually share) should read "Story of the Eye." It's his most famous. Do not, however, count this as a recommendation. The book is extemely disturbing and totally nihilistic (and one of my favorites). Count this more as a warning, as I wouldn't want to be held liable for anyone reading it. He also wrote some great books on postmodern philosophy, especially "Erotism." Also, as far as Giacometti--a guy named Sam Chen recently completed a CG short called "Eternal Gaze" inspired by Giacometti's last days. The movie is worth watching, especially the story of its making (which is much longer than the film itself). Finally, gschumsky: anyone who goes out of their way to make a dig at Scientology is definitely a friend of mine. I would have my own personal jihad against them, except they're not a religion--they're a pyramid scheme. Also, I've been looking for the forever-out-of-print Twice upon a Time for years, and don't want to pay the outlandish eBay prices, so I can't wait to check it out on YouTube! Thanks! Mark -
While I'm putting along on Captain Splines in the David Rogers book, I've undertaken my own learning experience model. Here is the first round of modeling. I'm aiming for an end result that will look as much stop motion as computer animated, animating virtual maquettes with the software. This particular model is a Svankmajer/Giacometti/Bellmer beastie: a virtual paper cutout of Georges Bataille's face, torso, and hands, scotch-taped to wire limbs. (Man: modeling scotch tape over bent wires is not easy, at least to this neophyte!) Here are some renders and a turntable. One criticism I invite is what do I need to do to make my turntable more "industry standard," or at least more revealing. Still to do: obviously, texturing. The body parts paper; the limbs wire (probably copper, so it's not quite so monochromatic as if the wire were silver); and the colored swatches will be scotch tape, made translucent through a transparency map, and with the jagged edges where it was cut by the dispenser's teeth done either with a cookie cutter map or a transparency map (advice invited! The tape is actually 3-d, just almost infinitely thin). I'll have it rigged and bending before too long. [attachmentid=20321] [attachmentid=20323] [attachmentid=20320] Thanks! Mark batailleturntable.mov
-
I was reading some tutorials about normal mapping, and all I could find is that normal maps were a quicker approximation of bump maps for use in realtime (game) rendering. So, in image/animation projects like those created in A:M, what is the difference between the two? Why use one over the other, and if one is outstandingly preferable, why have both?
-
I wasn't familiar with Sam Kieth--been outta the comics loop for awhile, excepting a few artists whom I follow--so I looked him up. Very cool stuff. My vote has always been for the brown costume. Primary colors just don't seem appropriate for the boy. At any rate, great model! It looks like you're getting a lot of mileage out of little splineage. I'm going to be studying this a bit. Mark
-
For what it's worth, I think that looks pretty incredible. Technically beautiful, and I love that it's a very original take on an oft-tried idea. If you tried a version of all of Alice in Wonderland (although I'm not sure if that was the inspiration here), I'd definitely give it a look. Cheers! Mark
-
If the splines are okay, it sounds like you might have just changed the view mode to "shaded" (9 on the upper number pad/row, or right click in the viewport and change there) rather than "shaded wireframe" (0) or "wireframe" (7).
-
If I'm not mistaken, the default offset for extrusions is -10 along the Y axis, meaning that when you hit E (or the extrude button), the extruded cps will appear 10 units below the originals. An easy way to get them where you want them is to simply translate them 10 units up in the properties field and relocate them from there. If you want to change the extrusion offset default (I just keep mine at 0, because that's the way I think), go to Tools-->Options-->Units and change them there. For modeling it's best to keep the view as orthographic in most cases--the cockeyed-ness you're seeing is perspective mode, where the view imposes a vanishing point and displays things accordingly. Mark --> QUOTE(Sruli B @ Aug 20 2006, 09:32 PM) 192999[/snapback] I'm following the modeling tutorials in the new David Rogers book, and I'm trying to extrude a cube. Easy, right? Well, when I'm in the front view and I try and extrude the four cps, instead of extruding them outwards, it just makes another square right beneath. When I change to the perspective view the square gets extruded, but it's all cockeyed. Any help or pointers out there? Thanks Sruli
-
Actually, I had the same problem with a model I was working on yesterday, and futzed with it until I had an easier fix than modding the code. Every time I opened it there was this one spline intersection that went batty--the two splines' cps were unconnected with one suddenly being translated far from where it should have been. It was easy enough to weld it in place where it was supposed to be, but even if I did further model refinement the problem (same cp, same splines) exhibited the same problems when I reopened the model. Eventually I deleted the two splines around the suspicious intersection--didn't even have to remove the cps, just disconnected them--and reconnected the cps, making two new splines, and it worked fine. There was apparently just a spline- or cp-level problem that, upon essentially replacing old splines with new, disappeared. However, I should note that these errors never resulted in A:M crashing, but I restarted between re-openings out of habit, anyway. So you know the CP, hm? First: Make a copy of your prj-file as a savety when something wents wrong... Second: Use Notepad and open the prj-file in it... do a search for 1318 and look if you can locate the spline and the anchor... Delete them both out of the file and save the prj-file (BE SURE YOU HAVE A BACKUP OF THE FILE!) Try to load the new file into A:M... Second possibility, but I am sure hash can help you there better than I can... There is a "auto-repair"-feature of A:M, which has to be activated manual in the registery... maybe you should ask one of the Hashers about that... it could help you too... *Fuchur*
-
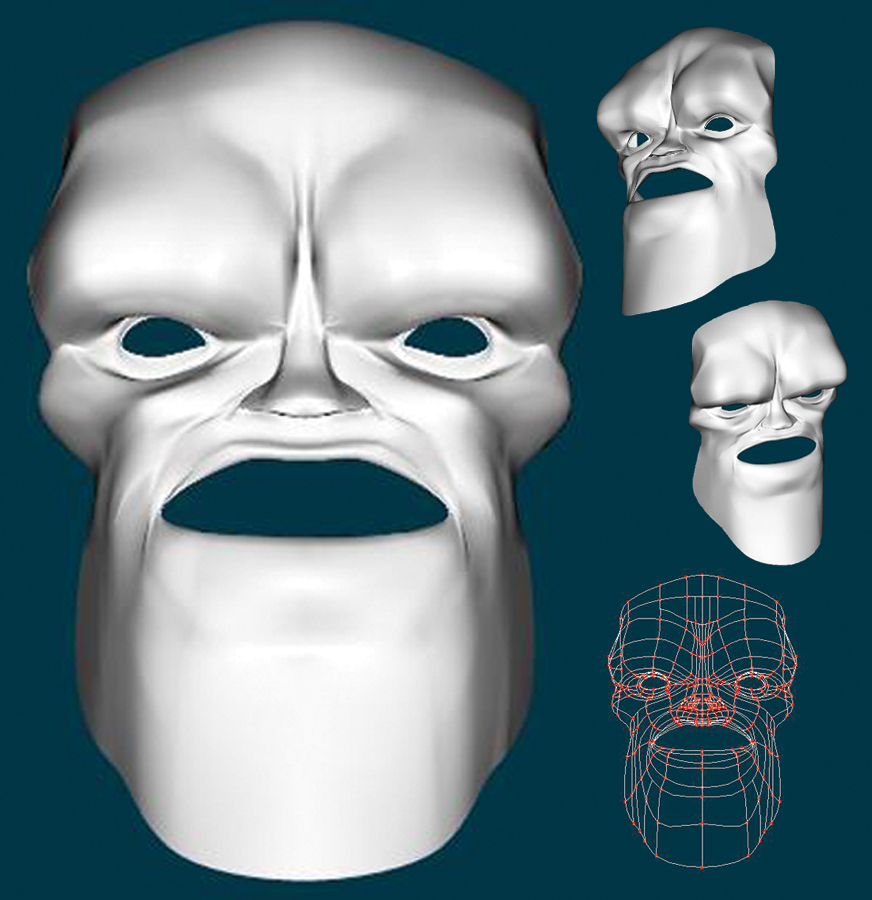
I did some tweaking after all. I've reduced the number of hooks and 5-pt patches used, and reduced some spline density, esp. around the eyes. Any feedback on wrong techniques is welcome and encouraged! Mark [attachmentid=18860] [attachmentid=18861] Playface.mdl.zip
-
Allrighty--here goes-- After doing tutorial after tutorial after tutorial, I decided that nothing original will ever get done unless I, well, start doing something original. So, based on many modeling tuts, I decided to try my hand at modeling a face. The face itself was done "freehand"--without rotoscopes, just pushing the mesh as I went. It's basically a 3d version of one of my standard margin doodles. Probably nothing further will ever come of this face--I just thought the exaggerated features would give me a chance to play and learn as I went--hopefully preempting future mistakes. The main thing I would like is criticisms/advice(/praise? hahaha) on spline layout. I'm not worried about the actual design of my guy, just the build, as I figure the same principles will be applicable to future, different-looking models. Have I made too liberal a use of five-point patches? Are there better/more efficient ways to handle the areas to the sides of the nostrils and between the inside corners of the eyes and bridge of the nose? [attachmentid=18802] Thanks-- Mark [attachmentid=18803] Playface.mdl.zip