Jin-Kazama
-
Posts
218 -
Joined
-
Last visited
Content Type
Profiles
Forums
Events
Everything posted by Jin-Kazama
-
hey,,,i'm trying to get msn....the flash file is ok.....i donno why u can't play it..i think u have to save as the file to your hard drive first.......i'm happy someone like what i do....i feel proud..thanx every one.....what's the next step should i take???? i posted this in another car modeling post...maybe would help I got across 4 car models before....and i learnt some few things that i wanted to share it with my Hash family (( u r a member of them )) 1- i should prepare my rotoscope (( very important )) this would help u for mesuring matters 2- i have to decide where to start (( was very hard at the begining )) cuz some ppl starting from the wheels area, some from the front pumper...depends on you 3- as we know, cars are seprated peices, there’s an edge between each peice, it’s good to draw a spline line around those edges for all the car parts, you will be able to define the parts easly (( what i mean by drawing splines around those parts edges is placing them in their right posation according to your rotoscope. 4- Don’t use much CPs...splines are very flixable and can have a good curve with 3 or 4 CPs for the windshild for eg. 5- Don’t forget the bias handler...this is how you fix your strange spline curves...without adding more CPs. 6- You can just start a head and draw the full car body then just choose the patches for each part and manage them in another modeling window. 7- In max and maya...they add a depth to thier surface after cutting each part...in AM. You can just bevel the body edges (( copy/paste the edged splines and move them a littel below or inward your body part then connect them to the body patches )) you will need to fix the curve flow with BIAS handler 8- After deattaching each body part...you can work on details for that part (( add more CPs )) As u know. I’m still a beginner in modeling...but those points were helping me alot to model my cars....if anyone else have other concepts better than mine,. Please let us know...we like to learn new stuff Aaaah....another thing....it’s enough to model one half of the car (( sure it will look ugly when u view it in your modeling window but u may copy/paste what u do in another modeling window and copy attache it then check the results in a chore )) Also if u want to adjust a body part that is already mirrored....hide all other parts and work on it usng mirror mode...then go and regroup the body part CPs again...it may be a bug in my version. But some CPs go out of my group after working in mirror mode. http://www.geocities.com/jin_kazama00110011/Untitled-1.swf I hope those points be helpfull for you
-
dear all as an exchange for all our skills which may help some other ppl, i made this flash movie showing a wireframe model of my car...this is how i start modeling my cars.....drawing around the body parts edges..i always come up with a shape flexable and smooth....also i start from that shape and build the entire body... if someone has another way...please post it so we can realy exchange the knowledge, and as we all know....no body was perfect from the begining.... regards jin kazama http://www.geocities.com/jin_kazama00110011/wire.swf note...i think u may display the movie after saving it to your HDD...save as target...
-
hi again...seems that this post was cold a bit during last days....no body posted anything anyway.....i made a small flash movie demo to show you the basic car body i made http://www.geocities.com/jin_kazama00110011/Untitled-1.swf i hope u like it and be useful to u jin kazama
-
thanksalot rodney.... i feel prod well....hope to cooperate ith some forum memebrs to do a big tut about car modeling in AM.....what do u think? mechanical modeling is a challenge in AM....no polys here....manual splining and smoothing...... well work more on my skyline.....tata
-
eeeeeh....i'm at home now....was a hard day err!! well..your modeling is good...the good means that you are good at all AM concepts for modeling....as i said. I got across 4 car models before....and i learnt some few things that i wanted to share it with my Hash family (( u r a member of them )) 1- i should prepare my rotoscope (( very important )) this would help u for mesuring matters 2- i have to decide where to start (( was very hard at the begining )) cuz some ppl starting from the wheels area, some from the front pumper...depends on you 3- as we know, cars are seprated peices, there’s an edge between each peice, it’s good to draw a spline line around those edges for all the car parts, you will be able to define the parts easly (( what i mean by drawing splines around those parts edges is placing them in their right posation according to your rotoscope. 4- Don’t use much CPs...splines are very flixable and can have a good curve with 3 or 4 CPs for the windshild for eg. 5- Don’t forget the bias handler...this is how you fix your strange spline curves...without adding more CPs. 6- You can just start a head and draw the full car body then just choose the patches for each part and manage them in another modeling window. 7- In max and maya...they add a depth to thier surface after cutting each part...in AM. You can just bevel the body edges (( copy/paste the edged splines and move them a littel below or inward your body part then connect them to the body patches )) you will need to fix the curve flow with BIAS handler 8- After deattaching each body part...you can work on details for that part (( add more CPs )) As u know. I’m still a beginner in modeling...but those points were helping me alot to model my cars....if anyone else have other concepts better than mine,. Please let us know...we like to learn new stuff Aaaah....another thing....it’s enough to model one half of the car (( sure it will look ugly when u view it in your modeling window but u may copy/paste what u do in another modeling window and copy attache it then check the results in a chore )) Also if u want to adjust a body part that is already mirrored....hide all other parts and work on it usng mirror mode...then go and regroup the body part CPs again...it may be a bug in my version. But some CPs go out of my group after working in mirror mode. I hope those points be helpfull for you Keep us posted... Jin kazama

-
hi...for some reason i can see u r using much spline to achive your shape look....simplify the geomitry then add points if u realy need them...i made a front bumper like this for my nissan skyline car but didn't use all that amount of patches.....using a refrence image or a rotoscope for your model will hell you alot....as far as i know... if you need any help/////just ask./////i did 4 cars models before (( and got mad heheheh ))
-
as u may see here, i didn't finish the back of the car yet.....some adjustments should be made here if u have any ideas or suggestions please let me know
-
i think i fixed that ...i re assambled some body parts...here is some images sure i will face lots of problems.....i need ur support..... one more thing....for the front light glass....how can i create those bumpy lines to show like real car light glass?
-
very happy to cya roberto........thanx trajcedrv, sure i will like i did with my pourshe car before, i'm trying so hard to achive the same results for rendering realstic image, close to reality using AM y i do that? i donno.....maybe i don't wanna leave this software....it stucked inside my heart lol.
-
yeah i noticed that...i'm fixing it now....here is a wireframe image for agep
-
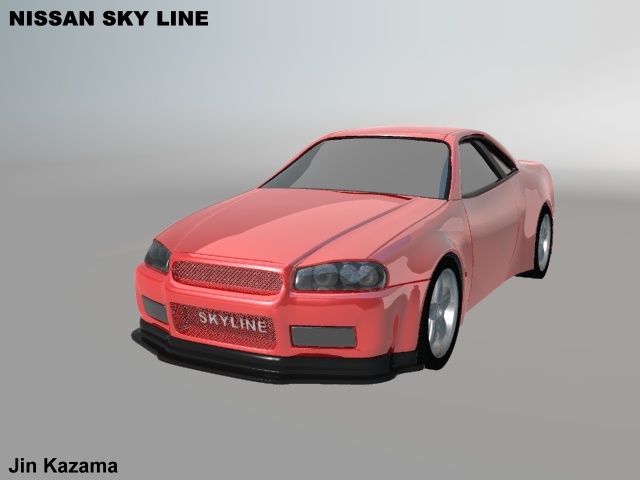
hi there, i'm working on a nissan skyline car and wanted to share the proccess gere is what i got right now
-
hi eric.........nice start man.....i realy like the modeling itself...better than mine thou i couldn't get close enough to real look for my car, i've tried many methods to have reflection on the car's body...AM doesn't have a render blugin like brazil or V ray, so u have to figure out a solution to get the same result depending on how brazil works...here's my crap
-
hi there.... is there anyone can tell me where to find a good source for human roor skitchs thans alot jin
-
hi brother and sisters jakerupert: hashburg seems to be very good idea....as i think..a disict of the big city is very good idea...we can connect it with a highway road...this city must be done...and must be done 100% as perfect as it could be....i'm about to finish the map of the distrect...and give the mesurments to you so you canstart creating your won buildings...i'm very happy that my idea got all this care...on friday the map will be uploaded and we all will start it....i will create a site for this city...will have buildings download section...fore each part and also screen shots...let's do some good work....and i'm sorry again cuz i couldn't do the map quickly cuz the transfaring f my job distroyded my time.... thanks hashers
-
Zaryin, for the heavy spline...sure it will....but i won't do the hall city in one chore...only distrects of it....and i'm not planing to have interor modeling...only buildings thanks for the coffee shop....i have some miss all round my life cuz this new branch....next week i will start making the city and before that i will upload the first distrect map so each of u can take a part of it...also the style..mesurements ...so all buildings have the same hight and style....thans for your support guys
-
i was trying to plan something.....can someone add more stuff to this image???
-
hio again....look at the wireframe of my stadium..sorry to not beeing writting for some days cuz i was preparing my self in the new branch of the company i'm working in....it's near my house
-
thanx guys for your replies....infact....this stadium has a very very very low patch counts...it is not as it looks...chairs....lots of patchs....hehhehe...those chairs are decaled cockie cut maps only....tomorow ( after 10 hours from now ) i will post u the wireframe image and everything about how i made this one....thanx again...and..hwwwwwom.....i can't open my eyes..... (sleeping on the keyboard )
-
hi there still working on this stadium....i hope it would look great when finish...
-
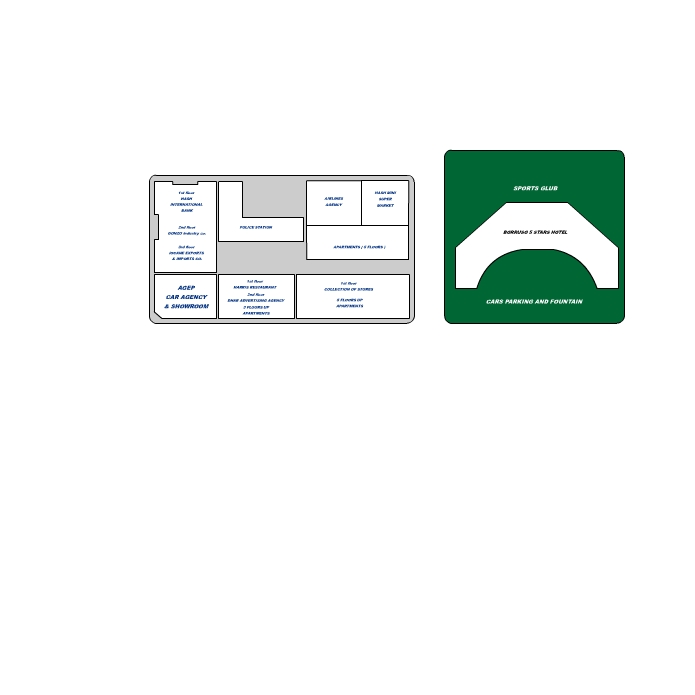
yes ruscular, please...ask him for a distrect diagram first....it's a start up to c how we would manage modeling and decaling...if it was ok...we will move on with the rest of the project... Rodney: i'm more than happy cuz u read my thread....a big honor...i was thinking about preparing a package of the buildings used for this distrect...and actions which will arrange them in the chore making it easier for users to setup the buildings without any problems...i'm modeling hash stadium now...maybe tonight i can post something...your support at HASH is what i need...thanx alot and please except me as a loyal user ( after i escaped once ) your brother...jin kazama
-
thax everyone: ddustin: i'm sure that we have to check the patch counts..in this case...game modeling method is the solution, however. sme buildings must have at less window extrueded holes for the shape..maybe would increase the patch count a littel... Sevenar: all what u said is good...u may start doing your model from now...even i think we must do the mesurment for everything to come up with hight valuse for each floor of our buildings...refering to real mesurments...i don't have good resource for this...also...i would ask someone who knows those ppl who do cities desings to do us one map like the image here. ..the city shouldn't be very big...we can devide the city into distrects...so later we can attache each one to the other..this in case of if we think to do a game...but those who would use the city for some animation...a distrect would be enough...also we will need to gether all images available for some streets and some buildings..as far as i know..buildings usually have stores and shops in the ground floor...then a normal building with windows...the style of those buildings is very important..we can't use one bulding for more than 2 places even if we change the decaling image..maybe the last one would work a bit...the details should be in those gorund floor stuff..where the camera will move around...but for building ...maybe a decaled image will do the requested look...we must first come with the drawing of the city or at less one distrect as a begingin and go on...if the idea will work..we can move on with the rest of the city those who think they're not good with modelig...please...would u try it first...we are all here to support you...we will learn together...and will push up our skills together...everyone would give the help...and this way we all will improve our selves...remeber one thing...even me....i'm just a newbi... this project is very huge...means it need a real ppl who will go on with it till end....i promise to go on till the end....
-
thanx for your replies...i was happy to know that you would like to join the project...now...lets talk about some easy way to model the front face of our buildings..infact..it's not a trick sence it's known from version 8.5 when the font wizard was found..i read a tutorial about it nut i don't remeber now who wrote it ( i should give the guy a credit )...which u can creat any shape by drawing the outlines using the pen tool in corel draw i guess or illistrator...so....as long as FLASH MX can export its draw into illistrator file format...y not trying there???! a question : what do u mean by drawing in flash and how would the shape and count of CPs would be in AM?? EASYYYYY...baiscly u should know that when u draw an oval shape inside flash then u click on the white arrow beside the selection arrow tool ( the black on in the top ) u will see an oval line with points on it...so those points would be the CPs and the oval line will be the spline which's connecting every 2 CPs...also...if u make 2 lines crossing each others...the point where they meet will be a connected CP connects the 2 crossed lines.....enough? first of all...i use the ruler to define the hight and width of a singal window...then draw a box..scale its hight...then convert it into a graphic symbol then make the guide lines which will define where to put every window and the distance between each window from every side...u can do this in may ways...my way isn't the only way...maybe u can just start with guide lines and define windows and distance guide lines then start drawing one them ( cuz the line will be snapped to the guide line ) and in the end u will get something like in the pic. below -------------------- as u get here...take a look at what u drew..all are squares...if u exporet this into AM u will get no holes...cuz u will note that all the hor and ver lines are crossed which will make 4 points patches...to solve this...u add a horizintal line in the middel of each window then go to the line inisde the window and delet it...do this for all windows...in this case...u will got holes... ----------------------- after that u can draw a big box and scale it so all windows are inside...the lines of the windows must cross the lines of this box to get a connected shape...( i know i'm using stupid english but forgive me...maybe pix and source files would help me to explain what i'm talking about ) one more thing...the drawn box should not have fill color at all...only lines... when u go to AM...import your file then just choose the holes ot the windows and do extrude..that's all for the holes...what about the windows...infact...there's no windows...it's only a decal image made from the same squares i did in flash...i go back to flash and fill those window holes with a color then select them all and cop them...make a new layer and do a paste in place...using the ink bottle tool u make the outlines for each fill then delet the fill and save your work...now delet the layer contains our first outlines to leave only our new layer and export it as illistrator file...when done...do a redo to get back our deleted layer...if u don't do that..everything will be exported...this for the patch of the windows...decaling is made with the same layer...choose one of the symboles and edit it...draw the window inside the outlines..and use a texture fill like wood or metal...leaving the glass area in white color....why?????? cuz after decaling this image u will add the same image to the same decal but as a reflection map and reduce the value to about 30%..that's all..i will advice to use the decal as a rotoscope...an option can be found in the decal properties box to match the window patchs with our decal....aaaah....tired of writing...is there any point i missed to explain????!!!
-
dear\all many of my friends adviced me to start a new thread for this topic and not leaving it inside my porsche thread..so here i go... i decided to start a project called (HASH CITY)..hash city is a 3d vertual city where everyone on our commnuity is able to have his own building or shop or car agency...the idea came to me while i was modeling a small street to be as an environment for my porsche car...later on...i had a chance to play GTA vice city...and was amazed about the huge city of this game...so i was thinking...what if we can model a city like this...not big but fair enough...and has all kinds of building types...streets...just as any real city...the idea get larger as i thought it would be nice to share many users in this project...this project can help anyone who's looking for a city environment to make an animation or anything else...also....after i bought 3d game studio....i thought about modeling this city to create a car racing and adventure game...so if anyone is intersted about sharing this project...i will be more than happy.. to get things in the right order...i was thinking to devide this project into steps: 1- drawing the city map which will help us defining where every building would be placed and what type of building it would be..a police office..hospital...company..restaurant...and so on... 2- start to model each of those buildings depending on our imagination and some refrence images 3- when finishing all buildings..we will start to model the city accessories like street lights, signs..gardens...etc depending on our city map 4- then start placing these models in one big chor...and makings light setup and other weather environments the method to model all these models is to use the game modeling way...simple textured blocks..we can also make detailed buildings facees using flash mx to draw the outlines of our building then import it into AM as ai file format..this would speed the process as i tried it my self and it works very very fine...for those who wish to know how to...i will post the method i used in detail..if someone asked.. if anyone would like to start working as a team...please join us... jin
-
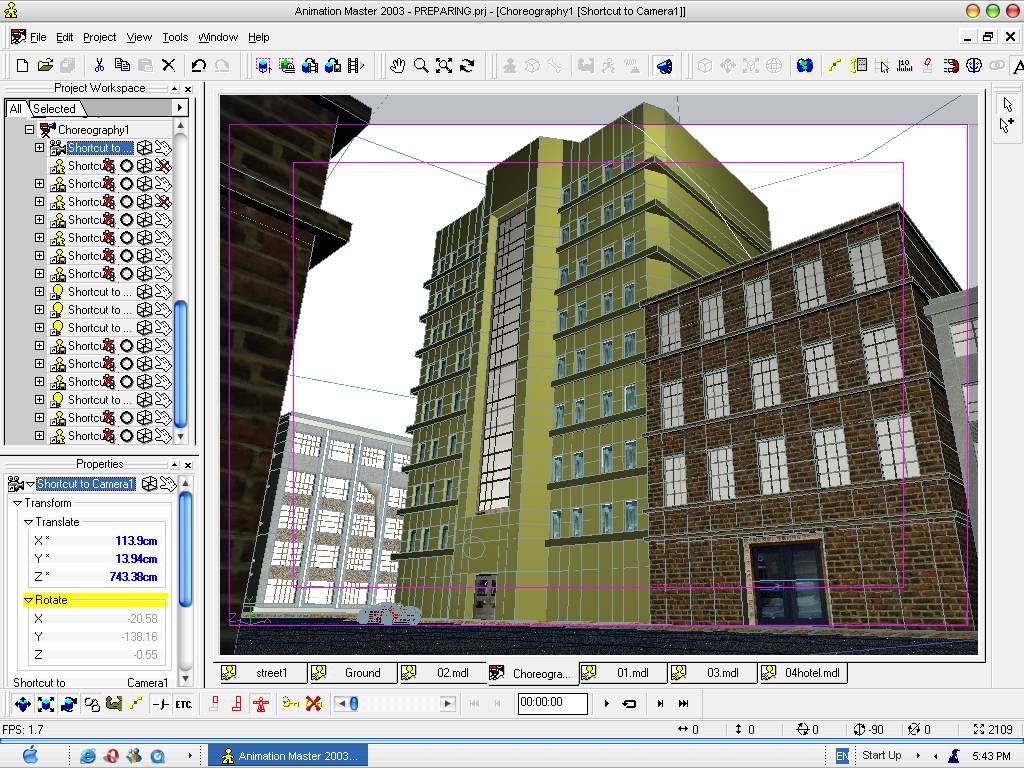
hi.........a print screen for my city
-
hi there, as i said before, today i will continue my city modeling...today i will build up some stuff for my friends...very close ones... dark limits: will have a fish restaurnat agep: will have a big car agency showroom under his name dennis: will have a frog hotel and i donno what my other friends wish to have in my city....so if some one would like to model his own building...or as for a special one...please let me know....i hope to have the most support for this city as i have some future plans - very near future - and i hope that this city is become the comunity city..who knows...maybe it gets into a game one day cuz i'm using a modeling method similar to a games models with vry low patch counts... jin