


williamgaylord
-
Posts
907 -
Joined
-
Last visited
Content Type
Profiles
Forums
Events
Posts posted by williamgaylord
-
-
If you have a good family phone plan, how about recording an interview of the phone? This would have the advantage of a live interview, but I suppose the phone bill could add up after a while.
-
I agree that your best bet might be a USB headset. This would have the added advantage that as they speak they can get some feedback in the headphone to help them control their level of speech natrally, like speaking on a telephone, which most people are used to doing. The USB microphone also has the D/A converter built into it, so it is far less likely to pick up hum.
USB 1.0 (as old as can be) has plenty of bandwidth for recording audio, so, aside from problems finding USB 1.0 compatible drivers, any computer with USB should be usable.
-
I like it!
Looks like a miniature set I once had the opportunity (and money--at the time) to buy. It was a 2.5"x2.5" board and beautifully made little chess pieces to match! I held off buying it and when I returned to the game shop it was already sold. Never saw one like it since.
Nice work!
-
Gorgeous!
-
If you use a noise cancelling headset or microphone, the cancellation is accomplished by the proximity of two microphones, or two (or more) ports and one diaphram. Sound originating close to the front of the microphone will create a significant sound pressure difference, so there is a net pickup. Sound from farther away will produce much less of a difference. That is how it reduces background noise.
A noise gate is later in the chain, so it won't affect the noise cancelling microphone performance.
If it's not a live performance, like a radio broadcast, I prefer not to use automated audio processors like "duckers" or noise gates, since they take a finite amount of time to react and can affect the leading and trailing edge of what you are trying to record. I prefer to record it "dry" and edit it.
-
It's amazing how much noise you don't notice until your hear it through the microphone. Human binaural hearing allows you to ignore an amazing amount of sound due to your perception of the direction of sound--the cocktail party effect. Listen to your recording environment through the microphone.
If you record each voice actor individually with the mic up close to their mouth so that the level of speech is well above your background noise it might be fine. You can use a noise gate to null out the noise or simply edit it out. (I prefer to edit out the noise, since a noise gate takes a finite time to turn of and on. Editing is more work, but it can be more accurate.) The key is to have the background noise low enough that the quietest speach elements can still mask it.
If you get your mouth too close to the microphone you get into the "near field" of the microphone which can also color the sound. However, in guerrilla recording that is usually much less of a problem compared to background noise.
-
Here are some binaural recordings I made with a dummy head binaural microphone I made (listen to these with stereo headphones or at least earbuds):
The "Dogz" recording was made with a Sony Minidisc recorder.
The "Train" recording was made using an Akai DPS-16 multitrack recorder. Sadly this workhorse is on it's last legs! (Had the best pre-amp stage of any portable multitrack.)
The rest were recorded using an M-Audio Microtrack 24/96. Your new Zoom H4 will likely outperform this, though it might be hard to tell.

-
Thanks for the book recommnedation. Is the author Hal Leonard? Amazon show Karl Coryat...
Oops...yes it is Karl Coryat. (Hal Leonard--a publishing company named after Harold "Hal" Edstrom and his brother Everett "Leonard" Edstrom--if you want to learn to play guitar, piano, etc...not sure how I got the two mixed up...how embarrassing!)

-
If the background noise is low enough to be masked by dialog, you can edit it out between dialog elements. A bit of work, but can be done. However, if the background noise is perceptible in the quieter elements of dialog sound, then you are out of luck.
Don't forget about room acoustics, though. Even if your background noise is non-existant, the resonant characteristics of small rooms can still color the sound of dialog through flutter echo and comb filtering. (This is why a bathroom or closet makes a poor sound booth.) However, this is easy enough to deal with if the room is a normal size (say 13x15): use a pop shield and keep your microphone close to the person's mouth--within a foot or so--they don't have to eat it. The M3 is a small diaphram condenser mic, but it has plenty of dynamic range. (I love Rode microphones!)
There are some pretty decent noise cancelling microphones/headsets at fairly reasonable prices, though. They use a pair of microphones. Up close to the pair of microphones the sound field does not cancel (much), but sound originating farther away cancels quite effectively.
The H4 is a really nice recorder! I use an M-Audio Microtrack 24/96, but if it had been available at the time I would have opted for the Zoom H4. It's more rugged, and has a quieter front end.
Check out Hal Leonard's "Guerrilla Home Recording: How to Get Great Sound from Any Studio (No Matter How Weird or Cheap Your Gear Is)". This is an excellent book on practical recording technique. Well worth the $14 or so if bought new.
-
Nice to see your Nautilus in motion!
-
Riveting! (Sorry, I've been working on taxes, so I'm not right in the head at this moment...)
Looking gorgeous! I can see where placing all those rivets accurately could be maddening. I'm guessing you at least take advantage of symmetry across the center plane to save yourself work--at least for the decaling.
So are you still toying with the idea of building a physical model? Or will this current project cure you of that?
Amazing work!
-
Good to hear from you after such a long stretch "off the grid". Interesting "birds" in every sense of the word!

Actually I like the new slightly "cartoony" look.
-
Yep! One of my favorites and definitely part of my library!
It's such a shame that the Superconducting Super Collider got cancelled. We would have been smashing particles together at 40 TeV over a decade ago--about three times the 14 TeV the Large Hadron Collider has only recently achieved. Imagine how different the last decade of particle physics might have been!
I'll have to pull the book off the shelf and give it another read. Definitely one worth reading more than once.
-
"Feed Me!...Feeeeed Meeee!!"
Looking very interesting. Reddi-Whip?
-
Kind of on a pyro binge lately. First smoke, now fire. ;-)
This looks great!
-
I'm pleased with how well simple streaks work for this. It also appears that a long standing problem with A:M particles has been fixed. In the past particles were all born in clumps at the project frame rate. A fast moving emitter would leave puffs behind it rather than a smooth stream. But now they seem to be spaced appropriately between frames.
I used both streaks and sprites and got the same "spotty" results with a moving emitter. Never quite worked out how best to used forces to get a more natural slow "turbulence" look to it.
You've done a great job here. I'd like to get your smoke together with my smoking character. This will be the first of a series (I hope) called "The Marshmallow Safety Films". (Each episode features marshmallow characters experiencing some sort of "accident"...The possibilities for hilarity are endless!) The first episode will be called "Smoking Can Be Hazardous To Your Health"
Overall thread: Marshmallow Safety Films
Characters of episode 1: Smoking Can Be Hazardous to Your Health
I did a "screen test" animated to Hannibal Lecter's last line in "The Silence of the Lambs". This test wound up in four film festivals--all 20 glorious seconds worth. ;-)
Anyway, with this smoke effect of yours working so well, it's time to wind up this project and get it rolling again! The dialog will be in French with English subtitles. Al Desrochers translated the dialog into French for me and I have to say it's even funnier in French, thanks to Al's great work on the translation.
-
That is what I've been hoping for for a long time now. It looks real enough to work well in my project "Smoking Can Be Hazardous to Your Health". I'll need something like this that works with a moving cigarette in the hand of a character. Have you tried a moving emitter?
I'll be very interested how you got it to disperse so nicely.
Here is the best one I've managed with a moving cigarette: Moving Cigarette
-
The buck stops here! And chats a while...the things he could tell you about Benjamin Franklin!!
I love it! I imagine he would have a lot to say, given the many places he's been over the years...like what it's like to be inserted into a vending machine...unusual things you can actually get for a dollar..."Why is it called 'inflation' when I get smaller!"...
BTW, if you have to lose your shirt in a bet, do it like this:

-
Boy, you'll have used up quite a few drill bits by the time you are done. I did re-roof my own house (nailing by hand), but that was only about 20,000 nails.
I think Disney just glued M&Ms onto the original and painted over them.
That is a tremendous amount of detail, but what a beautiful model. Perhaps you should use it to create a virtual tour. You could charge admission, or maybe sell it on an interactive DVD.
Nice work!
-
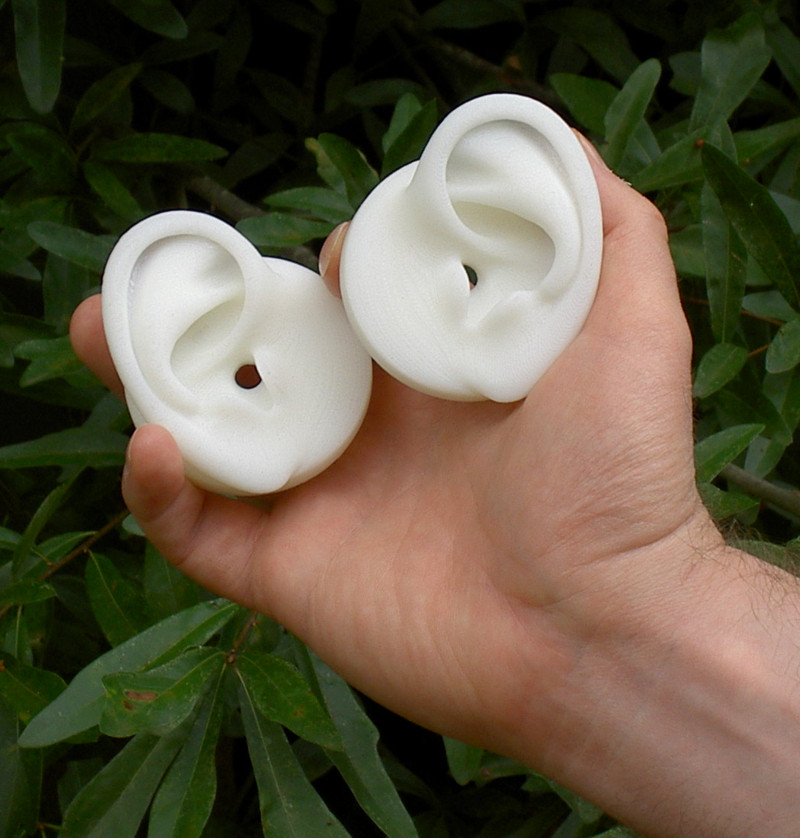
When I had the ears made it was $50 per cubic inch, so a 4' long Nautilus might be a tad expensive. Their 3D printer has a size limit of 1 square foot--anything that will fit in a cube 1' on a side, they can make. They use ABS plastic, which makes for a very durable prototype.
-
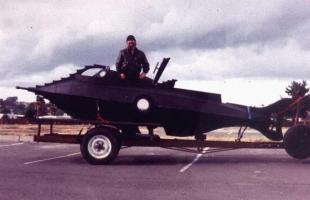
Eric, I happened upon this web site that might interest you: The SubCommittee
I was looking for pictures of this 18' "manned" model of the Nautilus: Pat Regan's Nautilus
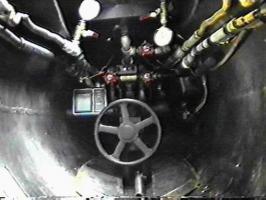
Not as authentic a replica of the Disney Nautilus as your model, though (the pasta bit is missing). And the interior is not what I would call "lavish".
I'll be really interested in how you fabricate the brass model when you do.
-
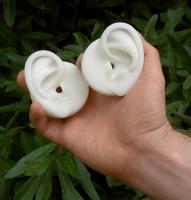
I've had ear models made of tough ABS plastic using a 3D printing service by a company called Design Research & Development Corp: DRD
Here is the thread: Ear Rapid Prototyping
You might remember this thread, Eric, since we talked about your Nautilus model.
William Sutton used a service called "3D Art-To-Part": 3D Art-To-Part
Here is a photo of the ears I had made:
-
Yeah, about that, since I basically know nothing about rigging, I find it very hard to model for rigging. The solution for those joints may be bad, I don't know, but it is to late to change it now
I'd say you did a great job at modeling and rigging. Looks very natural...if you can say that about a disembodied hand.
-
Interesting to examine the splinage of your work. Interesting how you intersected two loops at some of the joints. Judging from the renders it works well. Thanks for showing the splines!


Sound
in Sound Editing, Scoring and Audio Effects
Posted
Sounds like you have a decent situation for recording your voice actors. I don't think and open plan office space is likely to be much of a problem as long as it's off hours so there is no other activity going on to create background noise to pick up. If your office floor plan is wide and you record in an open area, with no walls right near by, your main "early" reflections will be off the floor and ceiling. If you give them a comfortable stool to sit on so the mic is at about standing height (or about mid way from ceiling to floor) it should sound pretty decent if your voice actors are speaking within a foot of the mic.
In sound recording and mixing, you have two types of dynamic range. One is the dynamic range of your equipment. I usually call this "processing dynamic range". The other is the range of sound level of the recorded or mixed sound, from the quietest element to the loudest element of the sound content. This I usually call the "program dynamic range".
Your "program" dynamic range in recording will most likely be constrained by the clipping level of you recorder and the background noise of your environment. I guarantee your equipment is not likely to be the limiting factor for the low end, unless you are picking up hum on your mic cable or you are using a cheap mic with a relatively high electronic noise level.
Your recording level meters should tell you if you are approaching clipping. In digital recording, clipping is more severe than in analog recording--it's an absolute limit--so make sure you have enough headroom to cover the loudest sound you want to record. With a digital recorder you have an huge amount of processing dynamic range, so assuming you have a quite microphone, you can give yourself plenty of headroom. 16-bit recording gives you 96dB of dynamic range. At 24 bits you have 144dB of dynamic range. The pre-amp stage of your recorder is probably more restricted than that though--I can't find specs on the pre-amp of the Zoom H4. Your Rode M3 has a self noise level of 20dBA and a sensitivity that gives it a 73dB signal to noise ratio, which is pretty good. So I think background noise is your main limiting factor and that scales with your input gain so, go ahead and give yourself as much as 24dB of headroom.
BTW, level meters are designed for detecting overload conditions and setting gain, but are very poor at measuring relative "loudness". "Loudness" is a measure related to subjective experience, and is actually difficult to measure objectively. You deal with "loudness" when you get to the point of mixing your sound, where you have to balance the relative loudness of all your sound elements. This is best done by ear, especially when judging the loudness of speach. In the case of speech, most people will agree to withing 1dB, which is really amazing! In the case of non-speech sounds, people will at times disagree by as much as 12dB, which is a little more than a factor or 2 in terms of the perception of loudness. So...use level meters to avoid overload conditions, but don't use them to try to judge "loudness". Use your ear to judge loudness. And when you mix your sound, start with the dialog and get that aligned, then mix your other sound in once the dialog has been adjusted.
So how do you set dialog to a target level for production? If you can't afford a Dolby LM100 loudness meter, you can use a reference sample of recorded dialog that is at a known level. Since I have access to an LM100, I can make you a reference recording.
In the digital world we use "dBFS" which is the level relative to a full scale sine wave (a sine wave just shy of clipping). "Loudness" measurement is done per a new ITU-R standard, BS-1770, which I won't bother to describe other than to say it processes the sound to approximate how the human hearing perception responds to sound. It uses a unit of measure "dB LKFS" which can easily be related to dBFS when you mix your sound. In your case, I can make a reference dialog recording at a standard loudness level which you can use as a "reference by ear". You would load that into your sound editor and use it as a comparison for setting the level of your recorded dialog by ear. Once you have your dialog level adjusted properly throughout your program, you can mix in your other sound elements "by ear" and "to taste". Dialog should be kept to a fairly consistent loudness level. That goes for "whispers" as well--they should be "stage whispers". Trust your judgment--if you can clearly follow the conversation without having to adjust the volume, then the dialog level is pretty consistent. Speech has to be fairly consistent in level so that the conversation is intelligible. It's variations in speech level that most often causes people to reach for the volume control. With other sounds, you have more freedom for loudness variation, especially for artistic effect.
And remember what Louie Armstrong said: "If it sounds good, it is good!"
Hope this helps.