


John Bigboote
-
Posts
6,560 -
Joined
-
Last visited
-
Days Won
55
Content Type
Profiles
Forums
Events
Posts posted by John Bigboote
-
-
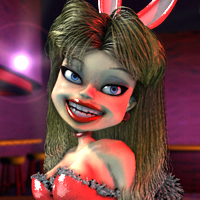
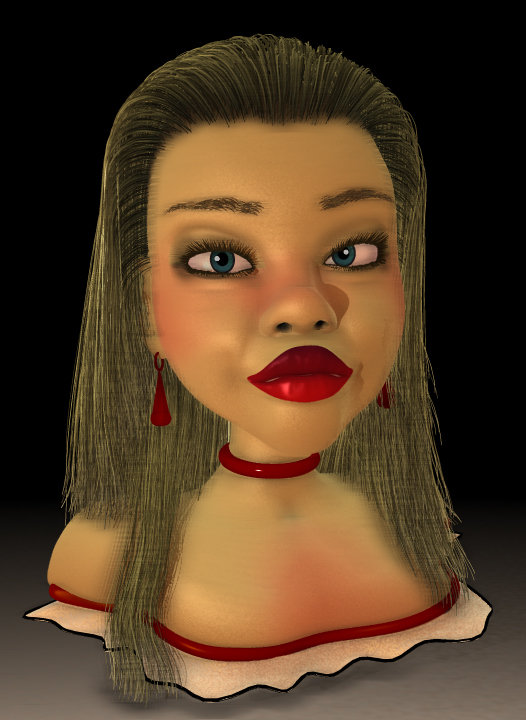
You get a good look when you half-mix a regular (default lighting with SSS skin) and a IBL in After Effects. Here I am using 'pin-light' transfer mode at 50%.

-
 1
1
-
-
That one is cool, John! I always wanted a lawn where I could put a stake in the center, tie the self-propelled mower to the stake and let it go...
How come we don't have radio controlled mowers yet?
-
Is amplitude working in latest V19? I tried it and got unusable results... is it picky about the .wav or .mp3 specs?
-
Thanks, Rob!
-
I noticed... she had lost her 'widows peak' somewhere along the lines... turns-out- setting the 'culling' setting anything less than 50%(default) makes you decal-driven 'density' go away and hair will populate on the entire hair group.
-
Right, as Gerald says- they make the POV right for each setting, look at someone else's and it will look pretty funny. Very cool gimmick! They probably do it before each course and jack-up the prices. The restaurant needs to be relatively dark, and 1 (or paired up 2 for additional brightness) projectors would be dead-overhead table-center projecting all 4 seats at once. There is most-likely a registration template for when the busser is setting the table of exactly where to place the plates and anything else that needs to be there. I love doing this kind of stuff, the depth effect is all in the shadows...
-
Jirard- yep, that is my method too... fixing them 2 by two.
Mack- yeah- LOTS of settings, many seem redundant... and I haven't even TOUCHED the grooming tools on this... which are pretty nice in A:M. (I have a force connected to the model found in the bones folder.) that is always 'pushing' the hair back, then gravity does the rest.
-
SO THEN I'm getting a last render ready to go over the weekend when BAM! All my(Jirard's) 5 point patch's go away! Crap! Which brings the added joy of having to re-apply all decals that were on those patches in any way...grrr!
And some of them just don't want to close no matter what you do... and I see Jirard has a habit of 'hooking' to 5-pointers... which further complicates things.
-
More experimenting, shaded low-res render... no baked hair, so the hair calculates at render time(fast)- with the force pose ON and the mesh ON too- but shaded transparent so the hair recognizes it but the renderer does not.
EDIT- updated rendered gif. I guess I still recommend baking the hair- it really helps for CD.

-
1
-
-
I should note to anyone who DL's the folder that my latest .prj was AManda_MC_PRJ3... sorry- somewhere along the way I backed-up a version...
-
Okay- I am done toying with A:M hair- it is what it is...(snip)
Were the solutions that you came up to address your earlier problems practical ones or do they seem to be more trouble than they are worth?
Hi Mack- well, no. I have been 'toying' with A:M hair for 16+(YIKES!) years now... trying for something big. I was a little disappointed in this test seeing the hair 'sink thru' the shoulders toward the end. It was way before its time once(the A:M hair feature) and is still timely. Even watching a Blender hair tutorial I see a guru lamenting after his failed demo that 'you just have to eventually 'live with' the hair penetration that will inevitably occur. https://youtu.be/2YCQLZMuvkE skip to 10min15secs to see the hair fail. Other programs have great looking hair, but don't really work whence animated.
Ultimately, I would like to see hair that reacts realisticly under animated conditions, yet will not sink thru geometry when collision-detection conditions occur.
My solutions were more scientific than anything... the 'mesh' approach is a reaction to the hair particle needing a dense geometry to react to (theory) so I hide a dense mesh within the character and have a pose that expands it out OVER the skin area while the hair simulation is happening... once simulated, the pose can be de-activated for render. I make the dense mesh by copying the CPs where I expect collision to occur, like the neck and shoulders(and cheekbones) and paste them into a MESH group. Then, I use the Plug-In/Wizards/Push CP's feature to expand the patches along their normal and make a new pose for the result... I then make that new pose a +100/-100 range and in the -100 I shrink the CPs to be out-of-sight gone.
There are other theories I chase as well. For instance- there are 2 places where the hair's density can be set in the material: One, in the 'Hair System' and the other, in the 'Hair Emitter'. One of those is for how dense the 'mimickers' or 'populators' should be, and the other for how dense the 'hair guides' should be. The hair-guides I believe are the ones that actually react to grooming and collision-detection while the 'populators' merely mimic the nearby hair guide and even if the hair guide is properly not passing thru geometry, it's populators will because they are just 'offsets' and the offset may place it thru the mesh.
Then- there is the hair's 'Control Points' value which can make a strand stiff like a piece of uncooked spaghetti or limp like a piece of cooked spaghetti (hey! this value should be called 'al-dente'!) I would have to consider those points along the hair's length are used by the collision-detection as well.
Then- there is the basic dynamic targeting modes, Constraint, Spring or none. Then, there is bounce and friction... I honestly can not say what these effect and have tried values from default...zero, 10,000 with no discernable differences.
And THEN- there mis the mysterious 'Cull'... seems to hold some big powers- but how, what...?
There is much to explore and many hours to be frittered, warning!
Thanks for your interest - let me know what you learn.
-
Okay- I am done toying with A:M hair- it is what it is... here is the zipped assets if anyone is interested in seeing settings or learning about long hair in A:M... or just wants a cool model! I borrowed some VO from Scarlett JoHanssen in the movie 'Her'. There is a longer clip in there- I may try some more lip-synch with.
I've found that it is not necessary but for Collision-Detection (CD) it helps to bake the hair... the resulting pai and par files I have omitted from the folder because they were 60mb+... so you would need to perform a 'bake' which for this 10 second clip takes about 30 minutes. ALSO- to help the CD, I have a thicker mesh that expands out over the face and shoulders that should be set to (PUSH MESH POSE 100%) and the force that keeps the hair off the face has a pose that can be activated/deactivated as well.
You can use any image in the chor settings to light the scene... I will attach the image I used if needed... have fun- hope someone gets something out of this someday... I will return to add a rigged body to AManda someday, maybe.


-
Could'nt the extra feature of a scaling leg be added easily enough by the end user? In a new percentage pose- Scale the upper leg bone in its Z direction and all bones below it in the chain will scale as well, and then offset the ones you don't want scaled by scaling them back to the approximate size they were... or am I missing something... (I bet I am...!)
-
-
Can you port a mac version? (kidding!) that is pretty cool Rob! Reminds me of 1979 Waterford Mott High School Computer Lab when we were learning to do a similar simple task in BASIC language... I could not grasp the code, and would not 'cheat' like everyone else so I failed. The foresighted teacher told me, 'If you can not learn to code, then the farthest you will ever go in computers- will be as a punchcard machine operator!" I outdid him with my fortune telling... 'I don't need computers, I am going to go into animation!" What little did we know!
Meanwhile, have you seen the amazing coding that Greg Rostrami is doing with less than 1mb of code??? He is in a group of programmers that are using 'ray marching' or 'sphere tracing' techniques... mumbo-jumbo to me- claims they use 4096kilobytes MAX, which is less file size than a 37X37 pixel image to contain all programming, textures, lighting, music and renderability. (filesize of executable is 4k) Here are some samps from his peers, his are quite amazing as well:
https://youtu.be/roZ-Cgxe9bU
https://youtu.be/ISkIB4w6v6I
https://youtu.be/0w_xEUoK79o -
I shall test that, then. I sort of got the look I was after (moving ibl lights) by using an image and keyframing it's 'azimuth' setting in the chor dialogue.
Another 'forget about it' feature when using IBL lighting... Sub-surface scattering (SSS) even if you have minimal IBL amount and plenty of scene lights.
-
I've noticed... the IBL feature does not seem to support an imported image sequence.
-
Rodney, no... just 1 light in that scene... renders quick at just under 3min per frame @1280X720.... an inverse(negative) white light would render as eminating darkness... I suppose a red light would be green in inverse-land. Negative lights are a powerful feature I stumbled on by chance!
Here is an animation! Hit Cntrl_L in quicktime to make it loop.
-
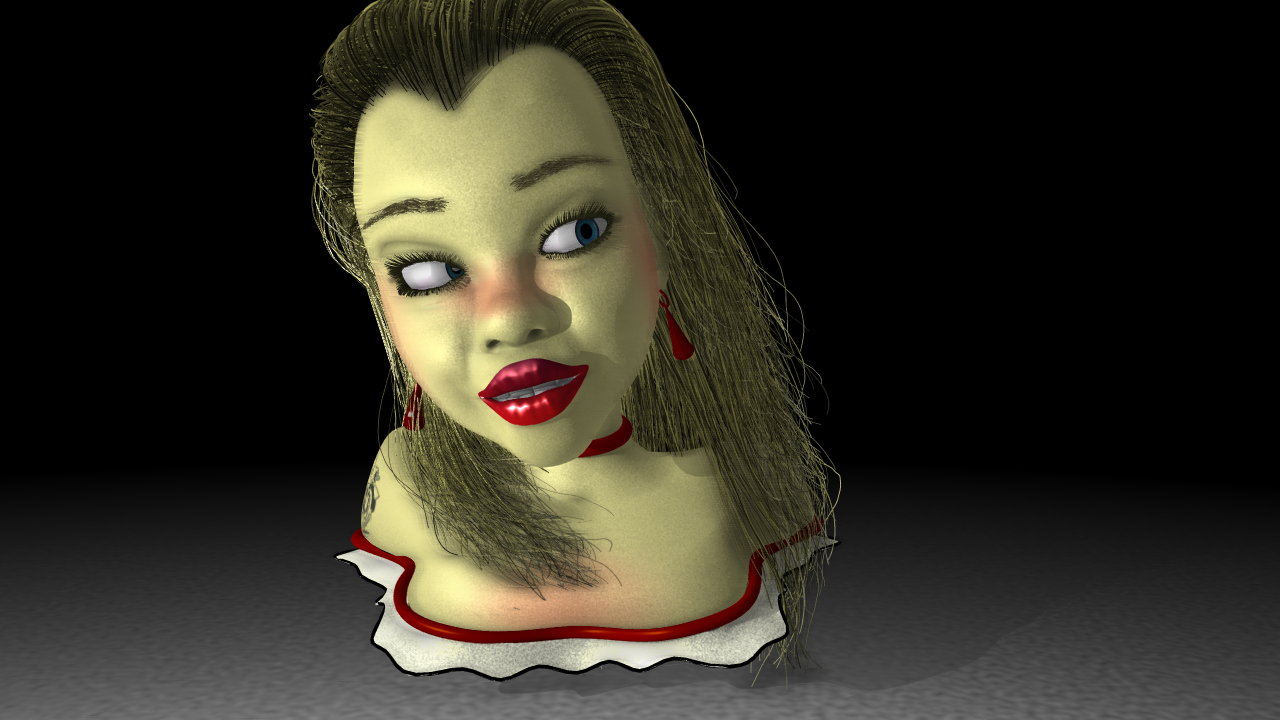
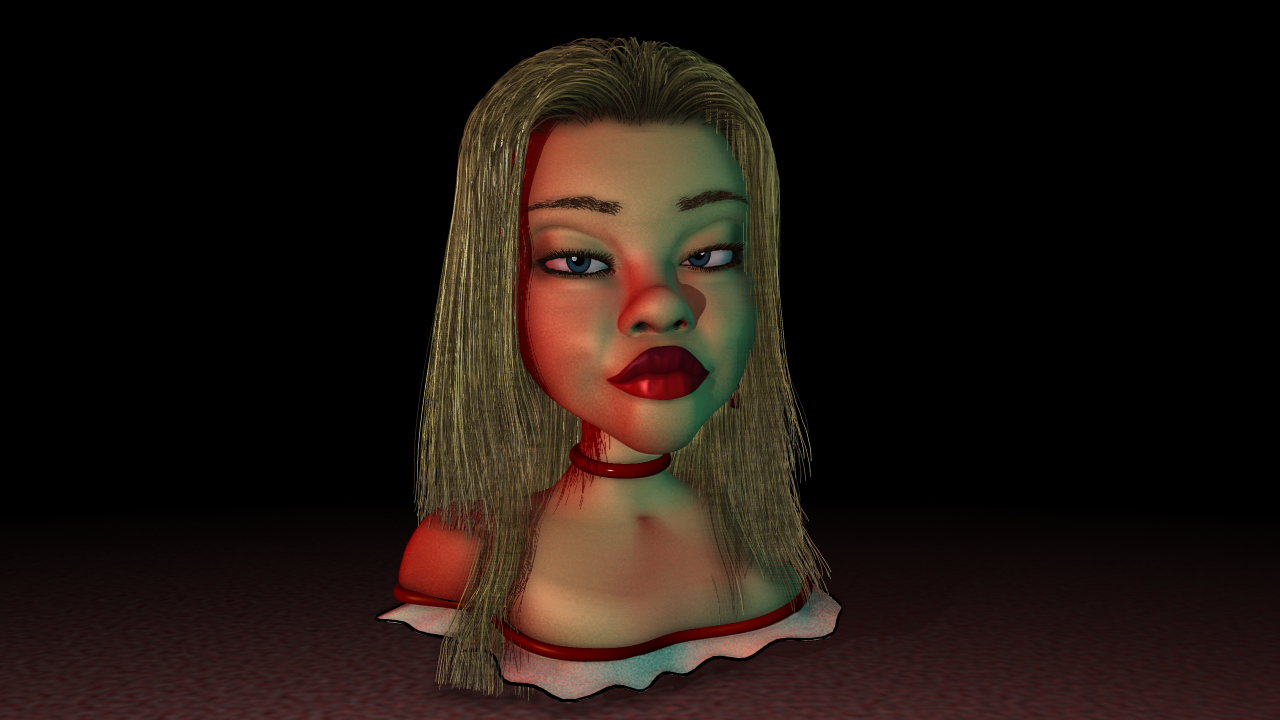
More toying with IBL renders... the 1st image uses the image I posted as the lighting source, the 2nd has the image used as fog is lighting the scene, both have 1 additional light near the camera with shadows and specularity on. I do not know where the green fill is coming from on the 1st image...

-
1
-
-
The ground is the standard ground plane with roughness and size added... the background is fog with camera color set to black. AManda has ignore fog set to ON.
I intend to upload the mdl and prj to the AManda forum whence I finally am satisfied with an animation render loop.
You have me wondering about the ibl/ao relationship... i might need to do some tests to see if it really works as you mentioned, and then to see if I can somehow speed-up the render. If I was only doing a still image I wouldnt care, but I need to chugg-out 300 frames (or more) overnight (using 8 NetRender cores) and cant abide by more than 5min per frame @1280X720
-
Global Ambience, whether one "global color" or "image based", is the illumination that AO (Ambient occlusion) is occluding.
You need both.
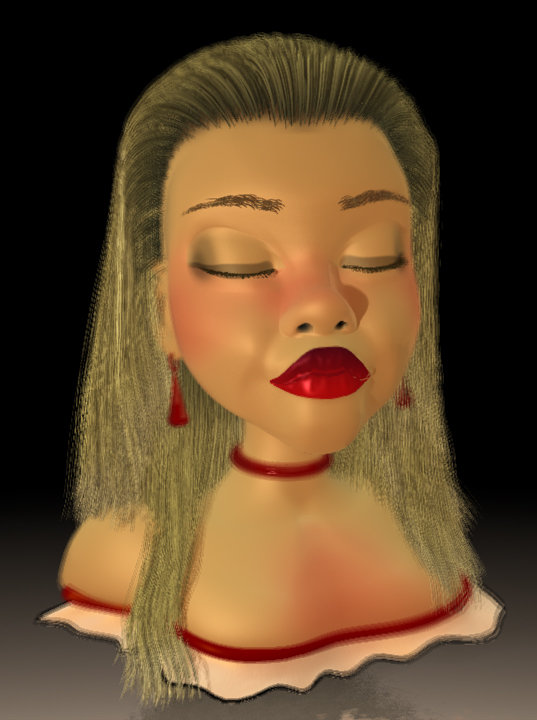
Not so sure... I have it working without A:M's AO feature... which is SOOOO render costly. Here is a sample frame from AManda, rendering quite swiftly... I have the IBL set at 80% and a light off near camera at 20% and adding shadows and specularity. I am using the SSAO feature, but I don't think it needs it for the IBL to light the scene. Learning a LOT, I like IBL!
The 1st image (eyes closed) Has no AO of any variety, yet the IBL still lights it up nicely... and you can see what the SSAO brings to the table, defines details like the hair nicely. (I was also playing with DOF in the 1st image, 5 passes- the 2nd image is the standard non-multipass renderer, much quicker.)
-
I continue to struggle with the feedback on A:M's IBL feature, I find it best to make changes and then save and reopen the project. Also, there is an 'exposure' setting that helps to push-up a little bit... default is zero, but somewhere around 1 to 2 pumps-up the image's lighting value.
-
I have a longhair grey cat with high intelligence named Sylvia, a short haired 'sylvester' tuxedo'd girl with severe asthma named Busby(after Busby Berkeley, choreographer) and am currently house-sitting a POS jack-russell terrior that wants to kill the cats, is old and deaf and shits whenever and wherever he wants and I really-really want to euthanize him to do his owner (brother in law) a favor... grrr!
-
Wow! GO BLENDER! Those are some great 3D drawing tools. Grease Pencil, ay... I may just need to start saving-up enough $ to buy Blender! (
 )
)


Community Model- AManda
in Work In Progress / Sweatbox
Posted
Reduced lip-size a little, added freckles and a wisp of hair in front... this is a combination of a full IBL lit shot and a standard default lighting setup halfmixed in After Effects... lens-flare by VideoCoPilot. I am finally mostly happy with the hair's collision-detection and interaction with the shoulders. I made a pose that I only turn-ON for the hair-bake-simulation, which brings the dense mesh out into position and tucks away things that could get in the way like the ears and earrings- then I turn the pose OFF for rendering.
AManda_talking (2).mp4