
John Bigboote
-
Posts
6,560 -
Joined
-
Last visited
-
Days Won
55
Content Type
Profiles
Forums
Events
Posts posted by John Bigboote
-
-
Here are some samples of some of my camera trackings, for Belle Tire. These may at easy glance look like a simple track- but look closely you see the 'swim' I mention which is generated from multiple human hands controlling camera POV, zoom, and dolly position on the shoot. These shoots were fun, a crew of about 40-50 including talent and a big-time Detroit director named Dan Hackett calling the shots. After he would get the whole scene lit and choreographed and was ready to roll- he would call in his animation TD (me!) to agree all was fine and make changes as needed.
-
I have used an old copy of Synth-Eyes in the past... I have it on a CD and run it whenever I need to camera-track. SE has an A:M exporter which is pretty cool in that it makes an A:M project(or was it a chor...?) that you open and see a camera is animated and scene detail(tracking points) are represented as nulls (hundreds of them.) The 'not-so-great' part is that the orientation and scale of this camera/null setup is at some convoluted angle and size... but by taking A:M out of animate mode you can upscale and rotate to something that makes sense... and then as you populate the scene with your A:M models and apply the tracked footage as rotoscope you can see that it is working and adjust as needed, and having the cameras motion as keyframes is nice for tweeking/editing/deleting errant frames or 'off-tracks'.
This IS a feature that modern, more supported softwares like C4D or modo are including nowadays, and even Adobe CC After Effects offers 2 effective solutions, AE's camera tracker and mocha is included too- tho neither will export to A:M. People I work with swear mocha is fantastic as a planar tracker, but I haven't had need for it yet beyond AE's tracker. A lot of the recent scenes I've had to do were dolly shots where a camera is on a track and manually moved east to west as a cameraman aims the camera interactively. This creates a mild 'swimming' action. I will animate the character with an approximate camera angle in A:M and then use AE's camera-tracker data to place it in the scene... and then roto and composite/color-correct as needed... and this has worked pretty well for me. I can post some samples of this workflow...
-
Very cool... we used to call these kind of things a 'kukalora' when I was doing things on a stage... (kookoo-laura) As I remember- we had lots of fun with that word. You could similarly do it the way we would do it back then... animated a sequence in AE or A:M with an alpha channel- place it in front of a klieg light as a layer... out of view of the camera. Then you could play with the kliegs settings for how 'in-focus' you want your effect. For underwater waves... I would go into After-Effects and use the turbulent noise effect- altho what Rob has going looks pretty danged good!
-
That would be a good series for Mr. Bones to explore... the 'Contortionist moves'.
-
You would have to have ONE HELL of a rig!
-
I'd like to add, that you do not NEED to use the bake function before exporting (I do not like it, because the automatic / baked decaling is a bit too chaotic to me, and there are seams along the patch edges...).
Instead, you can alternatively make your own, more convenient UVs on your model, and then export the OBJ. The rest of the workflow stays the same.
EDIT: This Video by William Sutton shows exatly what I'm talking about:
That video is way long... can you pinpoint at about what time the UVing in A:M happens?
-
Is there an image?
-
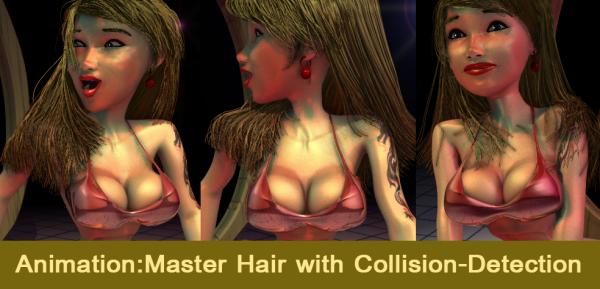
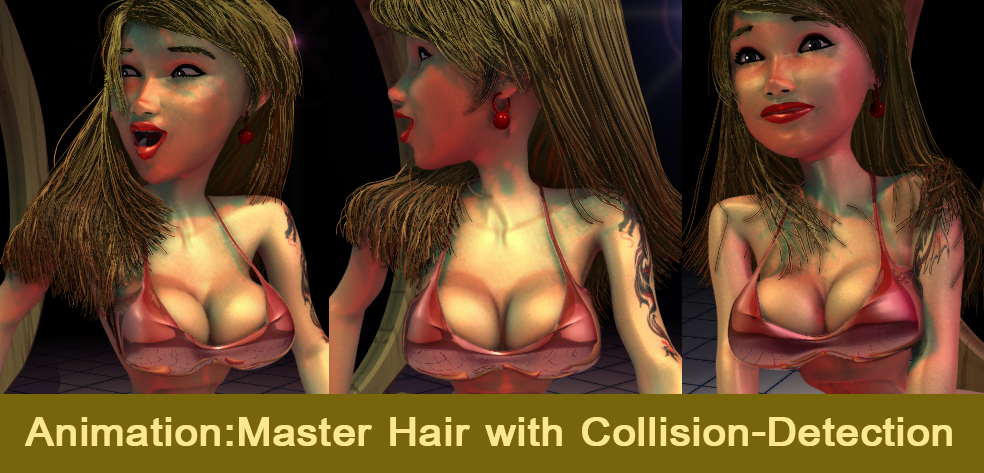
One thing I'd like to know looking at that example: Are you using the muh hair shader in that rendering?
Hi Elm--- I had stopped using the MuHair shader... altho it gives a nice specular and 'pantene' shampoo-commercial look(and a nice rim lite.), sometimes it can be too much. Also- I found that when you activate Muhair or Kayija-Kay shaders, you lose the ability to set the 'BOW' setting in the Hair Emitter dialogue. My findings are that with a BOW of 0 (zero) I get a better collision-detection reaction. I go about getting specualrity the old fashioned way, crank it up in the Hair's surface dialogue, and it can be keyframed along the length of the hair this way... so less specular at the roots and ends... more in the body.
-
 1
1
-
-
Man- your my hero! I have been stumped by UV's especially as I begin using A:M with other programs... if you are 100% working in A:M from start to render, decals are just fine. I appreciate any and ALL input on UVing and A:M.
-
WOW! Those are GREAT! 21 entries? Fantastic!
-
I'd love to see how it plays with a long-hair character!
-
Yee-Haw! I have my Thank-You email(s) Great work Jason!
-
I like it! Yeah, the hair is cool- you need to tell us how you did it!
-
1
-
-
thank you, I worked on the contest a little late. I did not even think to get there. I am very happy to participate in the contest.it is with the baketexture option that I could work with 3d coat.
I would be interested in your workflow- if you could elaborate. Pretty cool!
-
Wow! Very 'Pixar-esque' effect! RSMB is a paid plug-in for AE, right?
EDIT_ Looks like it is $90 for basic or $150 for PRO V5... http://revisionfx.com/products/rsmb/after-effects/
-
very cool!
-
You may need to get sneaky for this...
I would... copy the sword into its own model with a 0,0,0 axis... then constrain it in the choreography so it moves and angles like the real sword... set the proxy sword to 'Newton dynamic objects' and the colliding objects as well. Run the sim until you get reactions you like, then OFF the proxie sword...
This could be done for the characters legs as well if, for example- you were hitting beach balls in a small room and they bounced off the walls and needed to interact(bounce off) with the character... you would make a proxie 'tube shape', constrain to the character's legs (one by one) run the sim and get the dynamics you want and then turn OFF the things you don't- come render time. Sneaky!
-
Hmm! I like it!
-
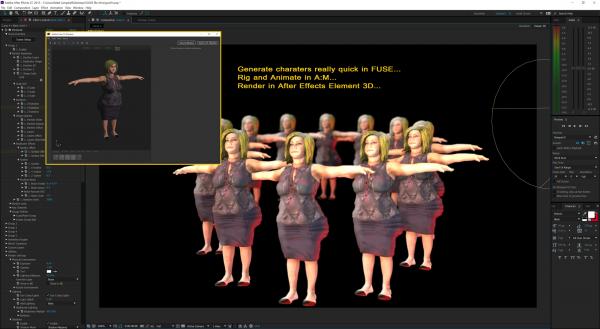
Toyed with generating character in Fuse... import to A:M for rigging, export to Element 3D within After Effects as OBJ seq for rendering... might be something to it... VERY fast GPU render, this has AO, SSS, AE lighting, DOF, FOG, mograph style duplicator... and renders about 3 frames per second on the AE timeline.
I discovered that by saving the textures out of FUSE on a V1 character then saving out of A:M as a V2 cgharacter, then in E3D you need to import both characters and apply the textures from V1 to V2 because A:M messes-up the UV mapping... so this puts it back right...
-
Hmmm. yeah- will take some investigating...
-
ENJOYED!
-
THANKS for the demo Rob--- Looks a lot like Newton does- settings wise. I noticed you had no need to set the floor object as a collidor body as you would with other dynamics engines. I am very interested in that 'Bullet Joint' setting... that should be cool! MIGHT be the key to being able to do 'ragdoll-physics'... where you could animate a character to a pose at (for example) a top of a staircase and then let the physics do the falling actions... for some bizarre reason- I would LOVE to do that!
For a quick test- what happens if you click 'YES' on that- do more options open up?
-
Don't know if it is related or not... I had success in the past with applying a bump matte that's power was controlled by the rotation of a bone... via a smartskin or relationship. SO- if it was a shirtsleeve that went over the elbow... the wrinkles would appear more as the arm bone was rotated. It was a nifty effect.
-
Sorry- I've been away... I never had success in my searching for A:M models and animations to FBX file format.
-
1
-

trying new software artscope
in Open Forum
Posted
"It's like Walt Disney threw-up!" (quote from an old Woody Allen movie.)