itsjustme
-
Posts
5,772 -
Joined
-
Last visited
-
Days Won
54
Content Type
Profiles
Forums
Events
Posts posted by itsjustme
-
-
Looks great, Robert!
-
Great stuff, Rodger!
-
I found a few things that needed adjusting in Squetchy Sam, so I uploaded an update version here.
-
I found a few things that needed adjusting in Squetchy Sam, so here is another update.
----------------
EDIT
----------------
Next version of Squetchy Sam is here.
-
I just uploaded an updated Squetchy Sam here.
-
Here is an update to Squetchy Sam.
____________________________________
EDIT
____________________________________
This version has been deleted, an update is in the next post.
-
Looks fantastic, Rodger!
-
5 hours ago, robcat2075 said:
I meant the lens of the character's eyes. The eyes appear to be not just spheres.
Oh, no they are not just spheres. They are built like the eyes in my eye modeling tutorial....the publicly available Squetchy Sam has the same eyes. The cornea is a disk that is added to the front of the eye...here are a couple of images and the settings for the cornea.


-
8 hours ago, robcat2075 said:
He looks good, David!
How are you doing the bulge of the lens?
I didn't do anything special with the lens. If I remember correctly, it's a 70mm...maybe there's a little distortion because of how close he is to the camera. It would probably flatten it out if I used a 50mm.
-
Still a lot to do, but I liked the render.
-
 1
1
-
-
It's the same Choreography...the back-lit image has two lights, the video is one of those lights spun around Sam and the lit one is the two back lights with an additional front key light. They aren't the best lighting setups to get a beauty render, but they were useful for setting the SSS and overall checking of things. Once I get the wrinkles in I'll see if I can do a better job of lighting.
-
Congrats!
-
 1
1
-
-
The only material on this version of Sam is the basic cell turbulence displacement, SSS is 2.6, 1.7, 1.12, specularity is controlled by two decals (Spec size and Spec intensity) and all skin color is a decal which comes from a painted Krita image file where the layers can be adjusted or exported individually (each layer painted in 3DPainter, then adjusted in Krita). The backlit image is two back lights, the lit image is the same two back lights with an additional key light (not the best lighting...needs adjustment) and the animation is a single light spun around Sam over two seconds. I still need to add the wrinkles (maybe eyelashes), but I thought it wasn't a bad set of test renders.


-
1
-
-
Looks great, Myron!
-
I never had much luck with displacement or bump maps using OpenEXR (not sure if it's a bug or not), I've been using TGA's. I think they work correctly...although I have been wrong before.
-
I was aware that that is the case for quick renders, but I haven't seen it in a full render. I also haven't checked earlier versions for quite a while.
Here are some quotes from Yves from this post.
QuoteSSS does not currently wok in Quick render or Progressive (Render-Lock) mode. This is more a user interface issue and I need to implement something similar to "calculate radiosity" in the choreography context menu.
QuoteIndeed, setting the SSS properties on a material is not designed to work and will be disabled in future releases.
I'm not sure if anything changed following that post.
Considering the skin texture would be different on the lips, decals for the actual texture and one Group for the surface settings (SSS, etc) would be the way to go.
I got some (what I think are) improvements by dinking with a few things. Here are some settings I've tried:
Specular size: 3000
Specular intensity: 30
SSS: 3.9, 2.55, 1.68 (Skin1 settings multiplied by 3)
I'm currently doing some flattening in order to paint the textures (I've been messing with 3DPaint and Krita along with a drawing tablet) and I've made the eyebrows sub-dermal. Hopefully, I'll have an improved render in a day or two.
-
Here's another test...the displacement is set to 100 and I added some more specular. I moved the lights to get a better view of the SSS as well. Currently, the material covers all of the skin, but I'll have to do some experiments with some Groups to have it different on the lips. Might have to paint it for that. I'll have to play with the color to warm it up a bit...I'll also look into painting a few areas. I'll try another one tomorrow.
The hair is the hair material applied to Sam's brows...it does use MuhHair. However, I think it's picking up some of the changes to the underlying geometry as well. I might have to move the eyebrows to a sub-dermal layer to prevent that.
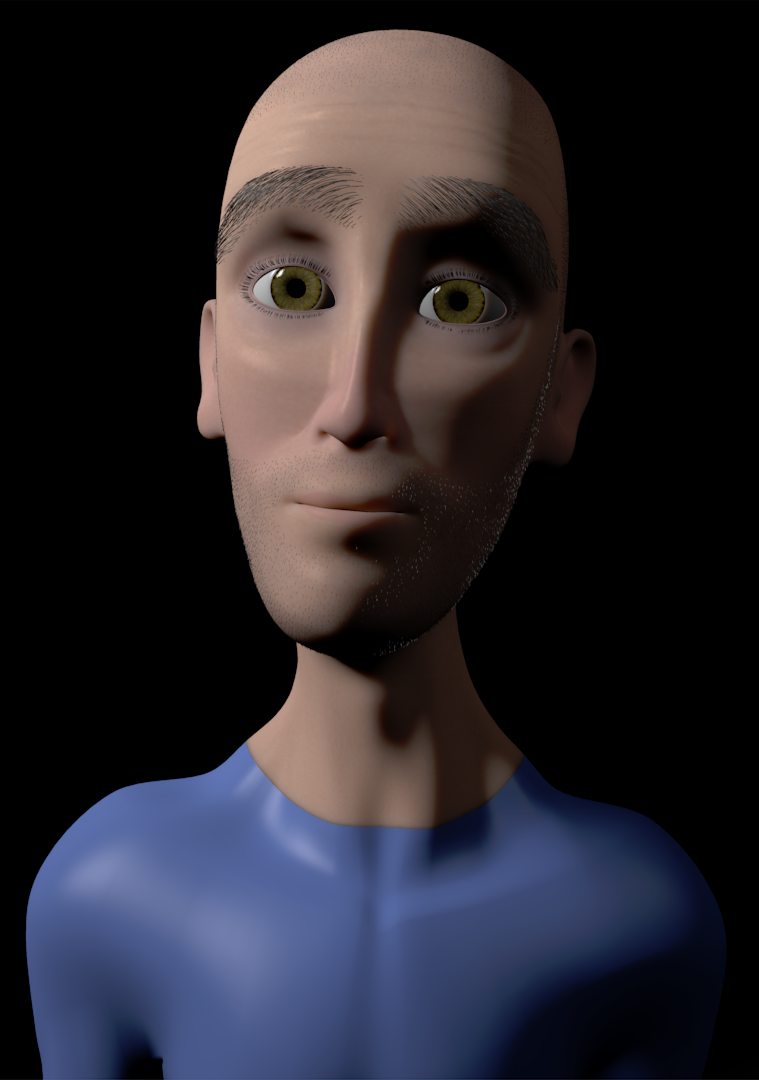
Nice tests, Robert! I think the SSS is a bit too high on them, but the SSS settings I'm using might be a bit too low as well. For this image I went with the "Skin2" setting (1.3, .85, .56).
--------------------
EDIT
--------------------
It was actually "Skin1" settings (1.3, .85, .56)...same settings but wrong name initially.

-
I'll have to do more testing, but here is a composite of two of the images I rendered. The first image had no SSS and a displacement material, the second was identical except it had SSS. SSS requires a lot more displacement than I had time to mess with tonight, I had it set at 30 percent and didn't see anything...so, for tonight, I just combined the two images. So, there is a little SSS and some displacement. It's hard to see in a browser, you will get a better view in a paint program so that you can zoom in close.
Of course, to do a decent job of it would require some color maps and I would prefer to use a bump material or map.

-
There is a Blender tutorial that I thought could be duplicated in A:M here...the issue I ran into was that currently bump maps and materials don't work with SSS (it has been reported). Displacement maps and materials work with SSS, but the render times would be higher and, depending on percentages, could noticeably bloat the character. Although for testing purposes, a similar material to the one in the tutorial with a 1 percent displacement should give you a good idea...or you could go the compositing route.
I'll try to render an example tomorrow.
-
Incredible, as usual, Rodger!
-
I just posted an updated Squetch Rig, Squetch Rig Installation Tutorials and Squetchy Sam here...it's also in my signature.
If you have any problems or questions, let me know.
-
1
-
-
Here is an updated Squetch Rig, Squetch Rig Installation Tutorial and Squetchy Sam.
If you find an issue, let me know.
Squetch Rig_Installation_Tutorial_Part_1_08092021.zip Squetch_Rig_Installation_Tutorial_Part_2_08092021.zip Squetch_Rig_Installation_Tutorial_Part_3_08092021.zip
-
1
-
1
-
-
-
Very cool!
in case you were not informed
in Open Forum
Posted
Happy Birthday, Robert!