


c-wheeler
-
Posts
855 -
Joined
-
Last visited
Content Type
Profiles
Forums
Events
Posts posted by c-wheeler
-
-
-
-
Perhaps posting a screenshot would help.
Chris
-
You could try something like sounddogs, or there are lots of links
Just do a search
Chris
-
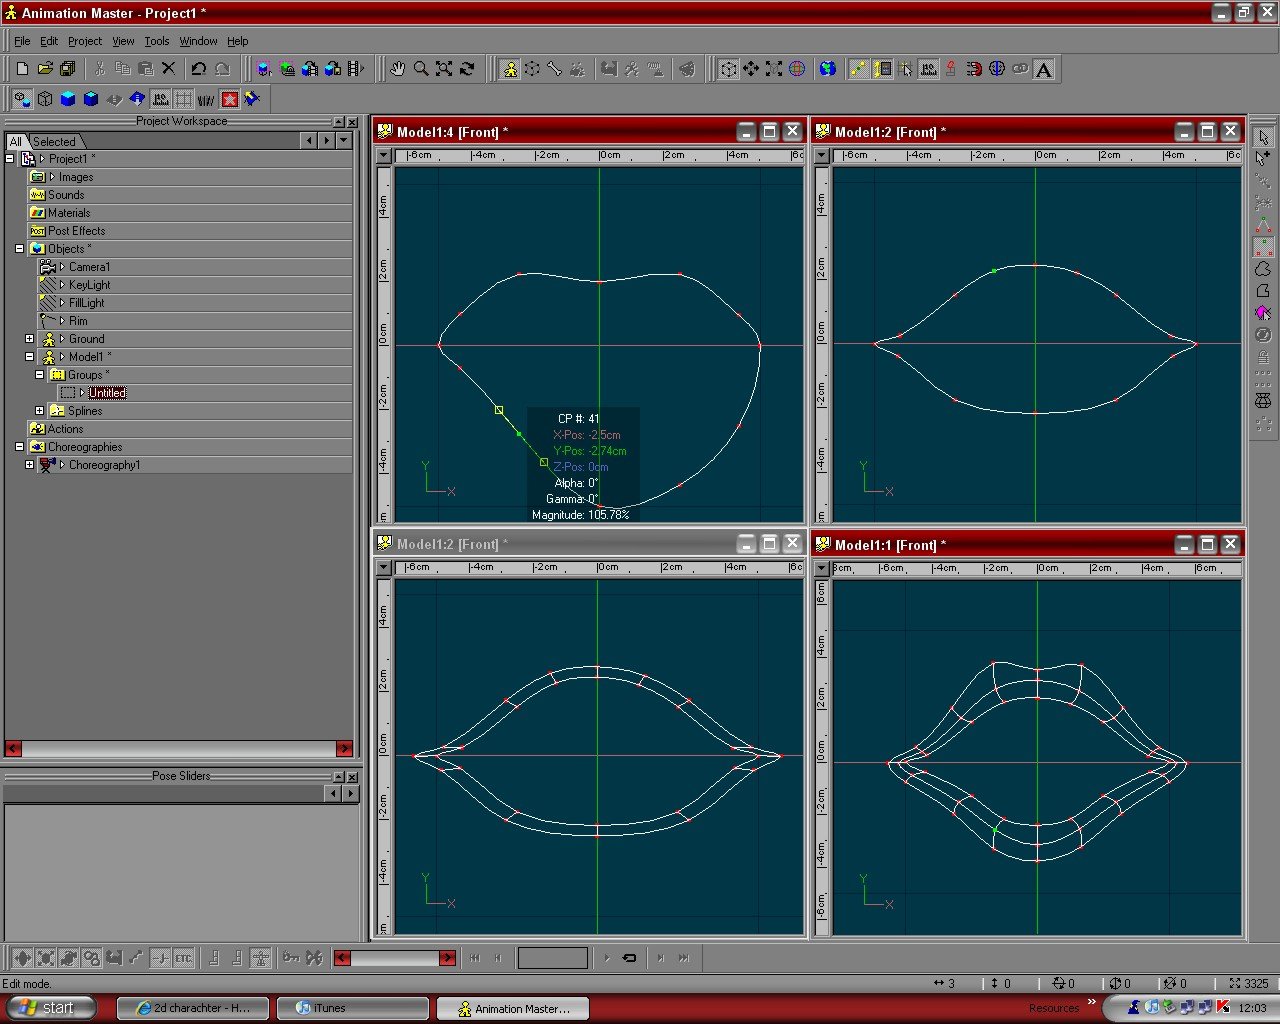
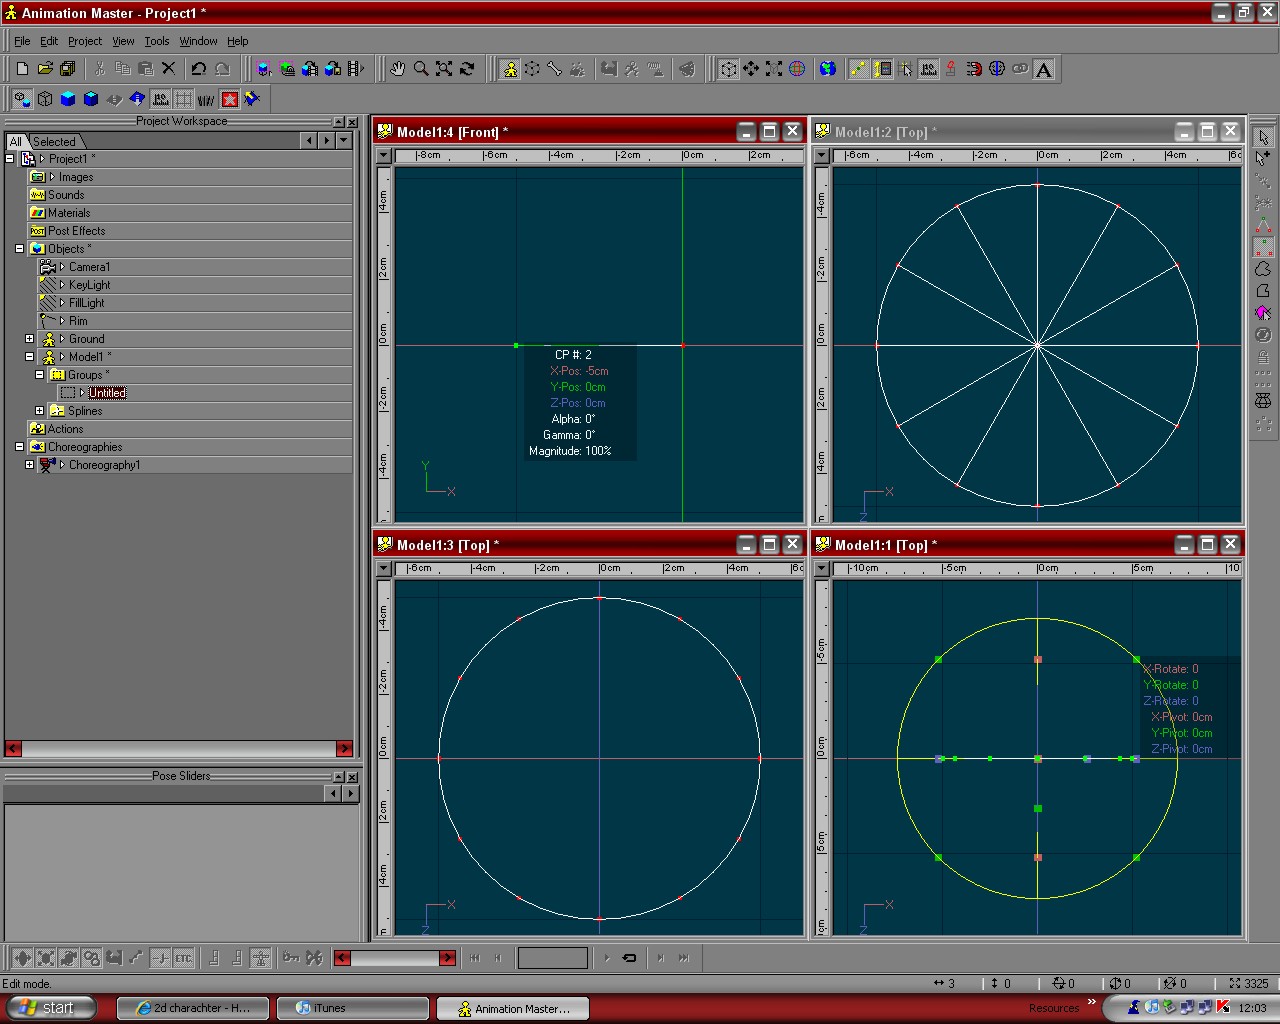
Heres my 2cs worth. I'me sure theres many ways of doing this, but here's one.Apologies if its too simplistic
Step 1.
View from above.Start with a 2 pt spline. Position 1 cp at x=0,y=0,z=0(Use "show manipulator properties" in the toolbar.Put the other about 5cm on the x axis.
Step 2
Open tools/options/modeling. Set Lathe cross sections to 12. Lathe the spline
Step 3
Delete the center
Step 4
select the spline, press "r" for rotate, rotate 90 degrees in the x axis.
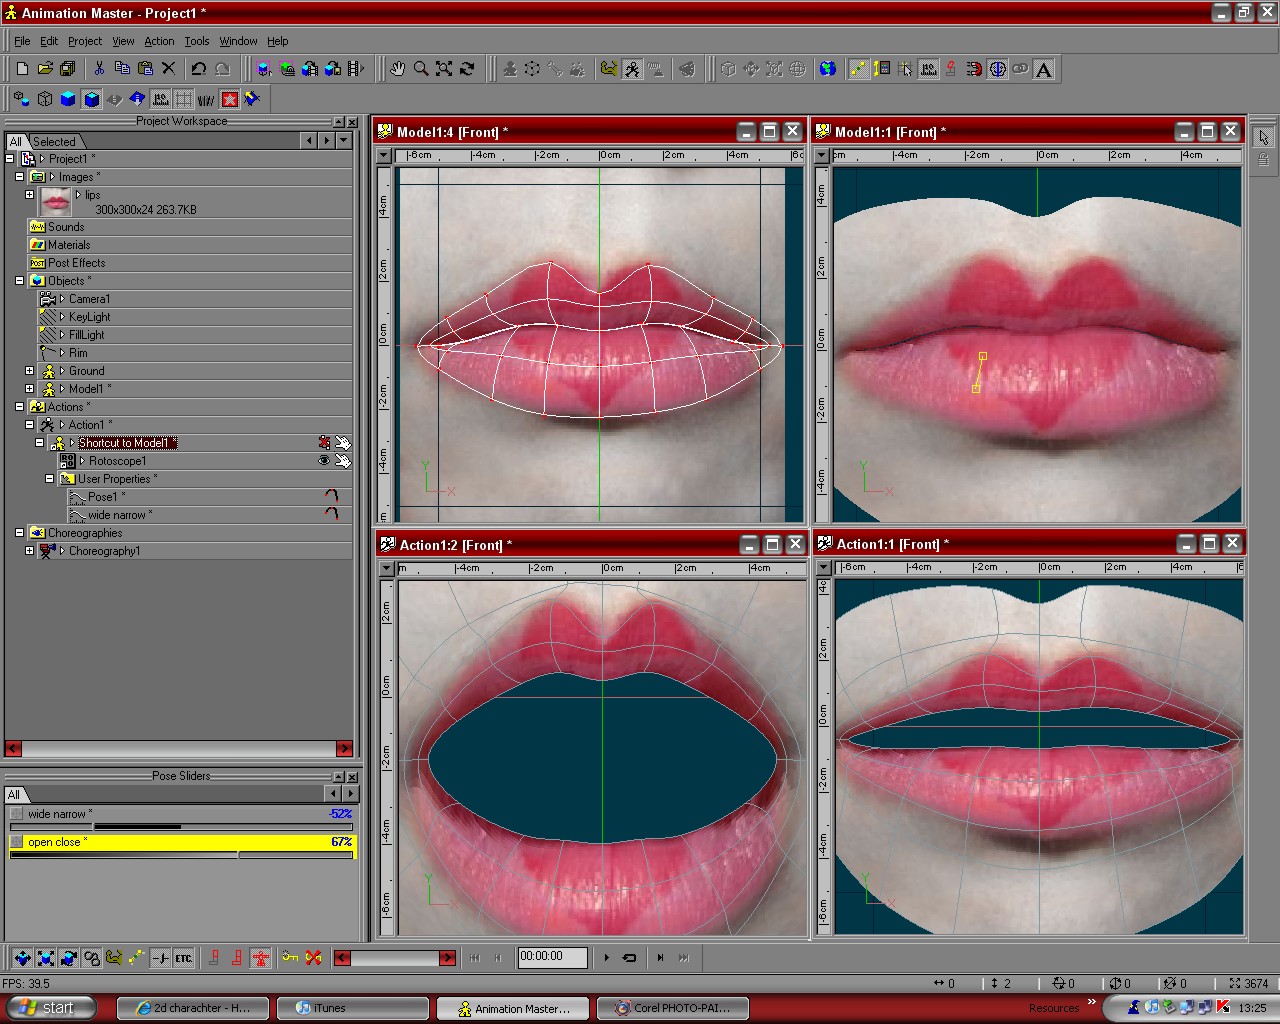
Step 5 View from the front.Hit "mirror mode" and work on one side of the mouth.Constrain cps to "y" axis by pressing shortcut key "2"("1" is x, "3" is z) and push up or down cps to achieve a nice shape.If I wanted a 3d mouth I would also use "3" and view from the top.
Step 7
Hit "mirror mode" again to turn it OFF.Select the spline and extrude. Hit lock, then select spline.In the PWS, select the untitled group in your model and scale in the x/y axis seperately using transform/scale.Hit "mirror mode" once again to turn it ON.Again push the cps to a nice shape.
Step 8
I added two extra rows of splines in the top lip and 2 in the bottom.Select the top lip and make a group. Do the same for the bottom lip to help with poses later.
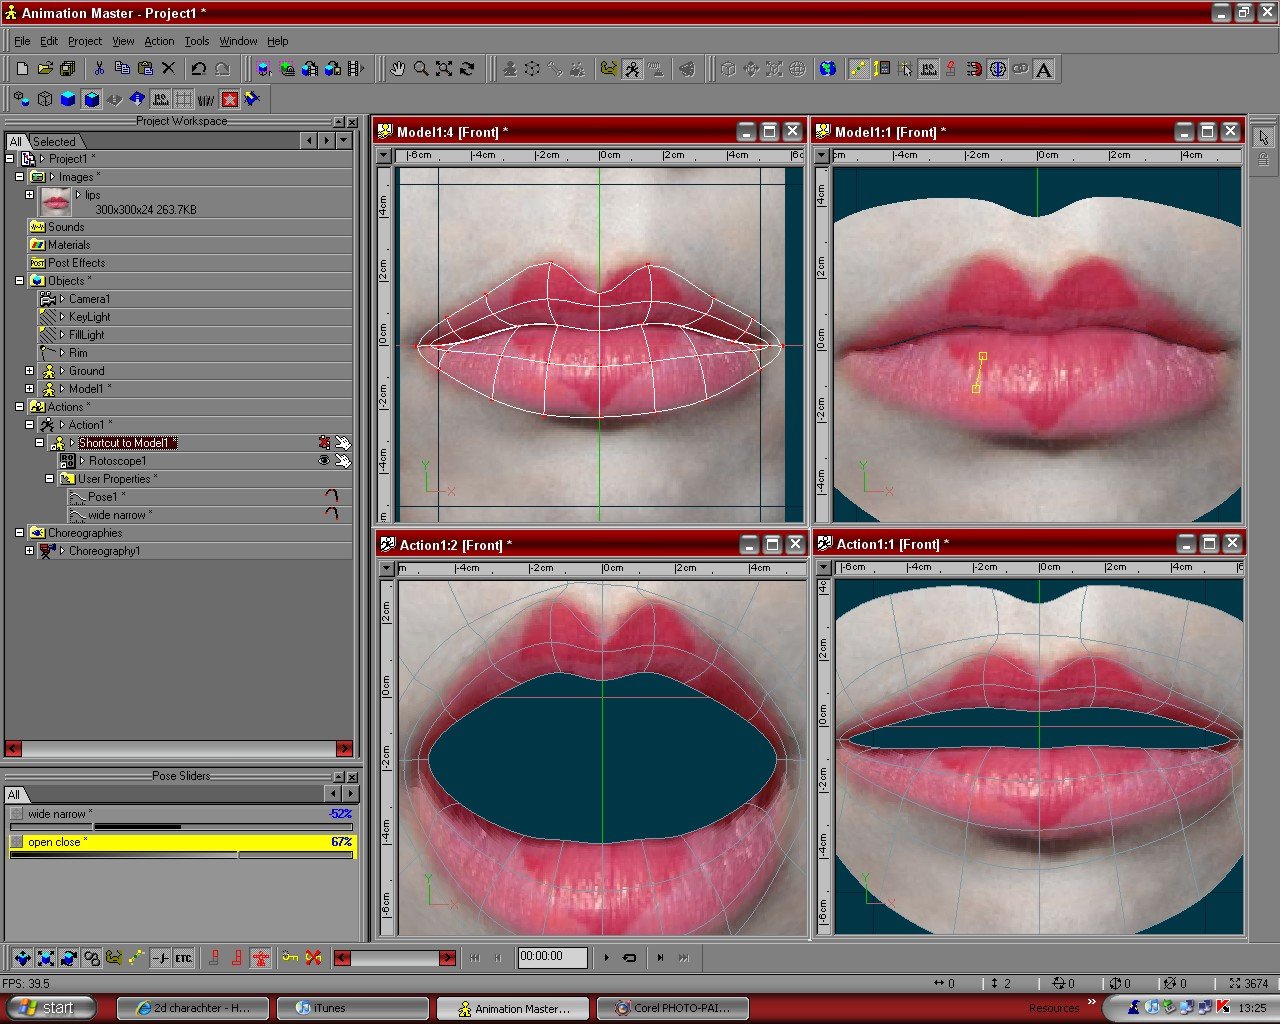
Step 9 and 10
If you have a rotoscope, I would use it to help position the splines in their final "bored'" closed mouth position(Dont wait till now - use it before is better).Here I found one one the internet and used it as a lip decal as well.
Step11 and 12
You can create poses now. I made one for open/close and wide/narrow as a quick test, but you can make any of the Preson Phenomes
I've included the prooject file
Chris

-
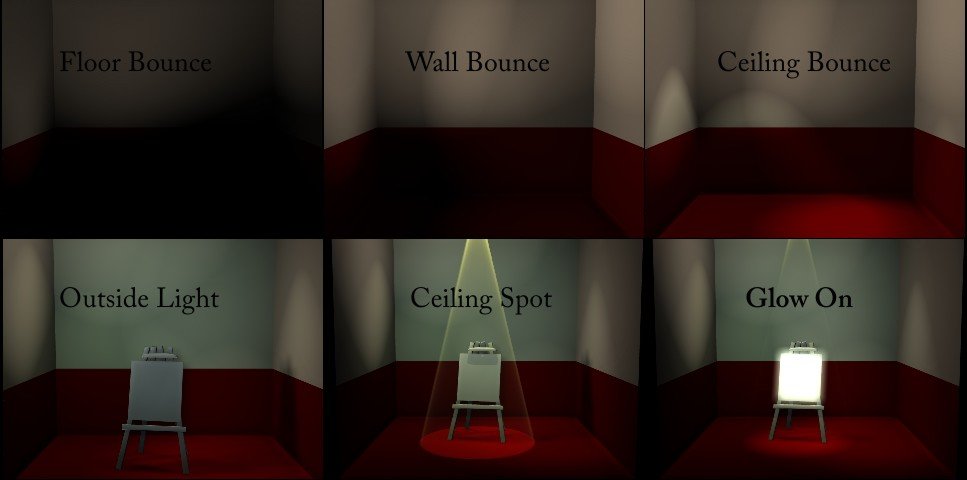
This is just my opinion,and only offered for adice, and as a base to work from, not a solution:-
Eric2575 mentioned bounce lights,
I would:-
In Objects,make a new Klieg light, wide angle -about 120degrees,low intensity,say 30%, white colour with 50%fall off.Crank up the width softness to 95%.Turn z-buffered shadows to ON.Set map resolution to 1024x1024. Use this as the base reflective light.
Add 2 of these to the cho, just above floor level,pointing at the ceiling. Ensure that the fall off reaches the ceiling.Then add one or two for left wall, and for the right wall. Make these very slightly red and turn cast shadows OFF.
Add some for the ceiling, pointed at the floor. Make these the same colour as the ceiling, only much whiter, just a tint.Point these down.
Unlike me, try not to get any hard light rings on the walls, floor or ceiling.Just play around till your happy.
I aded one more of the bounce lights from the camera side. I tinted this one slightly blue, as if the light was coming in from the outside.
A single spot from the ceiling with volumetrics ON. I set this to a Yellow colour(light temperature and all that)
I set the glow ON for the canvas
Render time was 14 secs
-
What kind of feedback are you looking for, aesthetic or technical?
Both, thanks, I just want to know what people think about it.
Do you mean the ones on the cheek?They are there to tie in the ears, which at time of posting, looked cr*ppy, so I left them(the ears) out. Do you think they will cause problems with posing?
Chris
-
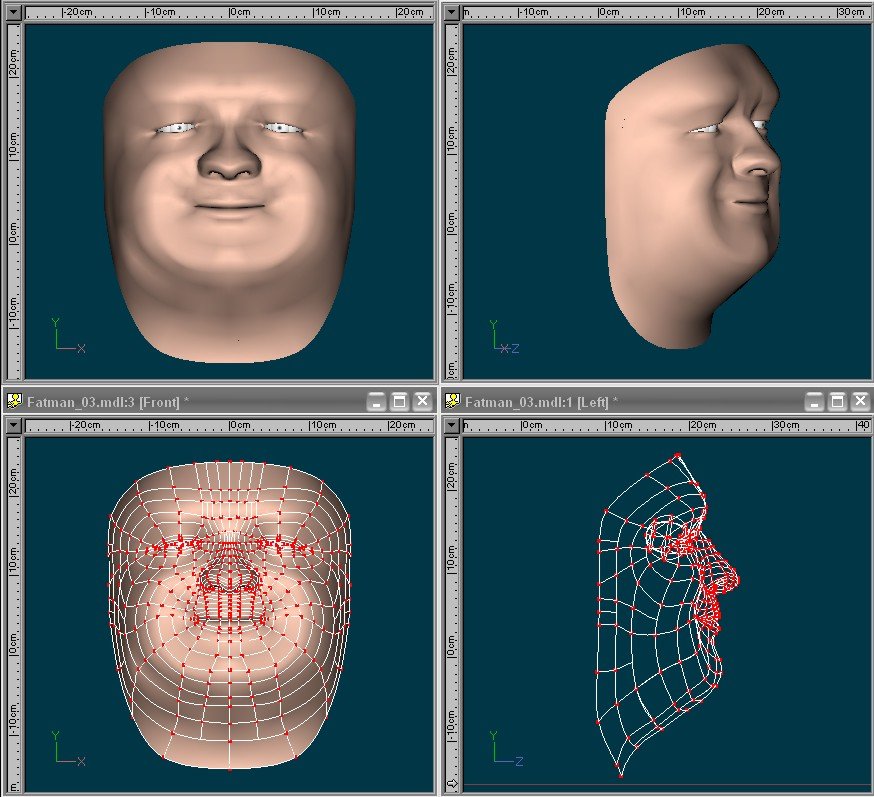
I started this model-no rotoscopes/drawings or pictures by demonstrating to a friend how to construct an eye, then it sort of got fleshed out when I had nothing better to do. Now I cant help but feel I got something a bit wrong, but I may be too involved in his face. He seems to resemble me a lot as well.
-
Double layer the table or a coaster under the cup. I would think that would cure it.
Chris
-
Just a thought..........I find the problem is either one of scale, or often one object passing through the other, just being slightly deflected.To avoid this,make the cup double layered so the dynamic object wont pass through it.
Then,for throwing a ball in a cup,I would
Set up the shot in a new .cho file - you probably dont need all the props in this scene for the shot.When your happy, place the object thats being thrown in its starting position. Then advance the time slider to frame 5 and place the object nearer its target
This establishes a starting trajectory and velocity. You may need to mess around with these positions once youve run the first test(You dont need the second key frame if the object is just falling, or if theres another force acting on it)
Select the Ball object in the PWS, and expand Plugin Properties/Newton Dynamics/Use in simulation = ON.
Then Use as DynamicSphereobject.If you are using more than on sphere, set them the same
Select the cup object in the PWS, and expand Plugin Properties/Newton Dynamics/Use in simulation = ON.Then Use as Static Object
Save the project, because then you can reload it and change the initial velocities when you find they are wrong.
Then r click in the cho window and simulate
Hope this helps,
Chris
-
Have you turned decals "off"?
Maybe as simple as that. Press ctrl D and check
Chris
-
I saw a video tutorial on here last night about making rain using particles and finaly figured out what c-wheeler was explaning to me a few pages back to make rain.
No, I wasn't thinking about rain, just the sky. But I like the idea of your rain. If you could combine it good lightning,the stormy sky and lightning I think it would be very pleasing. Heres a project and clip about what I did meant though.
I found a stock clip .mov from fotosearch and imported it into AM as "a series of images".
I created a model-flat plane,but you could use a dome or a cube to use as a sky, then decaled it with the mov file.
I created a model corridor with glass panels in the roof for windows.
I dropped them both in the cho , and lit the corridor. Then I added another light for the sky, and lit only that model with the new light using a light list.
-
Completed: Exercise 15
I Used the manual for the dust and for the The prison I'm suprized what you can get off of the internet for refrance.
I learned about lighting,scale and chor. Thanks alot to cwheeler, caroline, and the other guys who helped me out with the prison.
I'm still working on the Pit Bull, about got him done hes going to be in another project with the prison on youtube.
Its very hard to read this as an exercise. I get what your trying to achive, but I can't see if its working or not. How about a short clip of just the walk? It looks like the feet arnt actually touching the floor.
Chris
-
Thats a great looking place,Yves.
Really seems to have a lot of "age" to it -as though its been there a long time- nothing to do with textures, just the architecture seems to fit. Apart from the letter box having no hole and the drain pipe not going to a drain, I cant think of anything to change, I am looking forward to seeing a textured render.
Chris
-
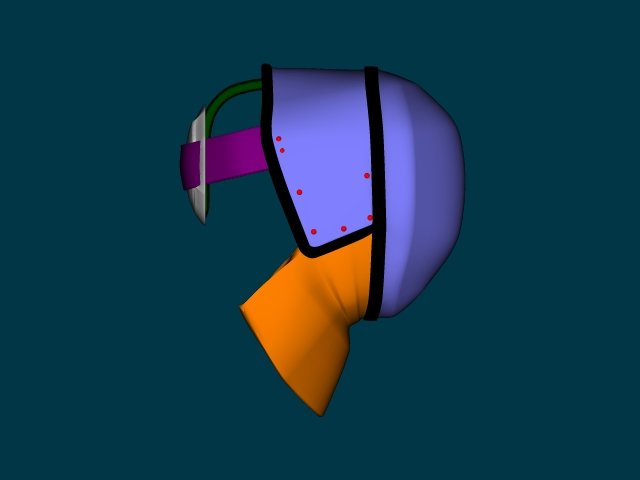
How detailed do you want it to be?And what sort of mask,Epee or Sabre?Visor mask?
It is possible to get a very accurate representation by modeling, then using materials and decals
Here's a lo-res model epee mask to check out. It's undecaled and has no materials, but the shape is kind of generic to this style of mask. I have several other types, more detailed, if you let me know what age/type I may be able to help you.Similar with swords/clothing if you need that
Also heres a mesh material from a different model. I model the mesh part flat, then apply the material to it, using a pose to bend it to its final shape
Chris Wheeler
-
For a 4-quadrant arrangement you'll have to move and size the windows manually
Umm, no.3/4/28 windows,it doesnt matter. Just click tile vertically or horizontally and it will arrange them for you. I work in M*y* quite a lot these days and much prefer the single window aproach. With the short cut keys 2,4,8,6,5,7 of AM its easy to switch.
-
I think you might have a number of problems there.
First off, when you come to rigging, it is easier to rig a symmetrical body. If you think of it like that, you only need to model one half (the left or right, not front or back
 )So I would model the half nearest the front, because you can see it all. Once that was done you can copy/flip attach the other half, and hey presto.....a dog.
The spline-age isn't to bad, but the head needs to be modeled from side on - you might find it easier to get another pic, or draw your own.
Another problem area is the sharp edges. Select a spline where you have a sharp crease - such as a cross section of the legs and adjust using the bias handles. Also try not to have splines coming to a sudden end where they will be visible, such as on the rump.
Chris
-
-
Thanks for the reply guys.
"You should have a talk to Hash on this... We cant help you much there"
Don't do the Forum down -I've found that no matter how bizarre the request is, someone always offers help or advice!(or at least points a finger and laughs)
This is in no way a criticism of HASH support, but being in the UK means your a working day (time wise) out of synch.I am fairly desperate for a solution and would welcome any help.
Chris
-
Hi all,
I wonder if anyone can advise me. I recently set the system clock forward to next year by accident, then reset it to the correct time and date.
Now AM 15b closes on start-up with the error code "system clock has been set back (-40)". This is a bit of a nusance, as I can now not run AM at all unless I go back to 13. I have tried re-instaling, bu to no avail.
Chris
-
Thank you everybody, I really didnt expect to win. And I'm glad it seemed to tell a story,Nancy, that's just what I wanted.
Chris
-
I'm no authority myself, so take anything I say with a pinch of salt as I am still learning.And if I say anything wrong I am sure someone will correct me

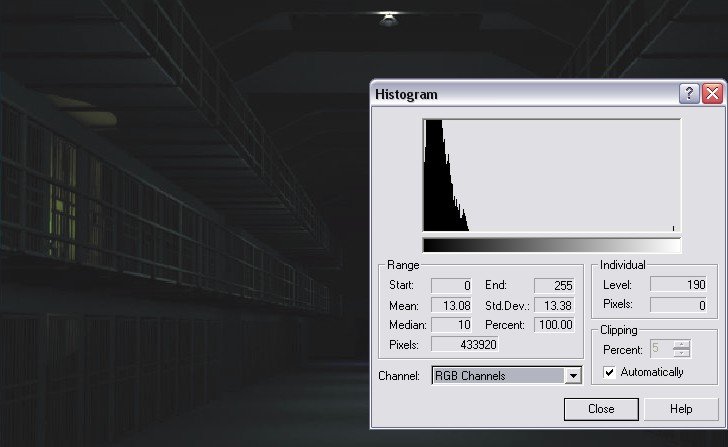
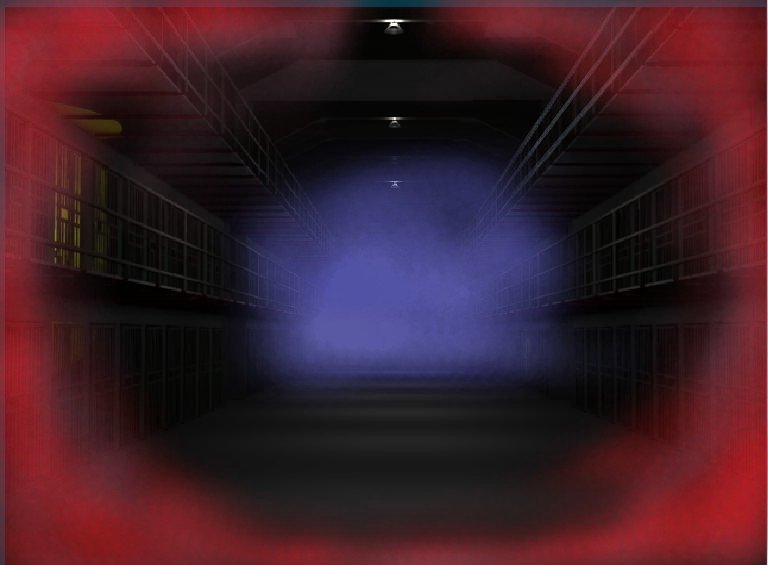
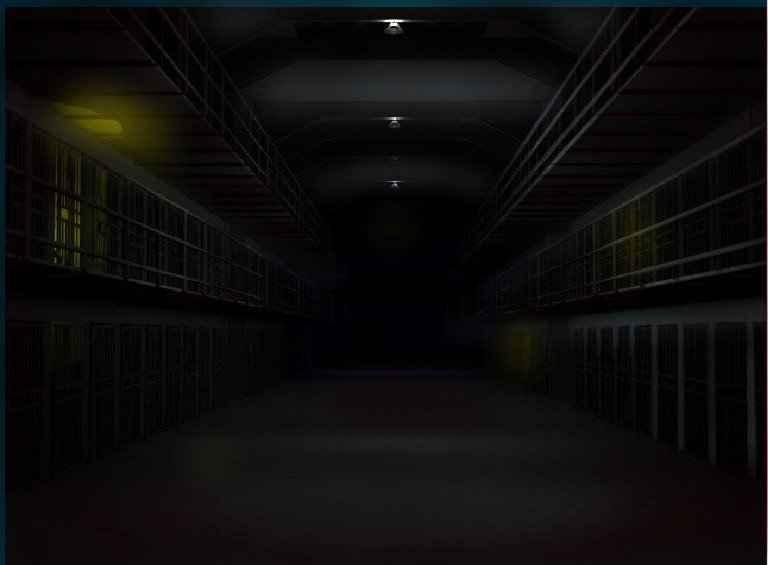
Once I generate a working image in AM, I like to run a histogram in a paint program which shows the balance between light and dark. The graph on this one is well over to the left, which is way to dark(like taking an underexposed photograph).If the graph was all on the right the image would be all washed out and to light(overexposed). A graph that is a mixure of dark shadows and light highlights would be well spread across the middle. There are no good or bad histograms though, its just a guide.
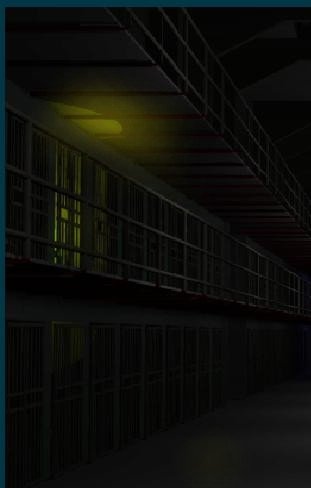
I like the idea of having yellow lights in the cell, but if you check the roof outside the cell, it seems like there's a hard light edge-a real spotlight effect- on the ceiling.Again in the paint program I can add another layer and spray some yellow to do a quick check on the effect I'me after, then back in AM I can try playing with the width softness and make it more blurry if I like it. Also the light seems to shine through the roof of the cell below as though there is no floor in the way.
In the ceiling we can see 3 lights, yet on the floor we can see five pools of lights, which kind of grates for me.Again I can quickly paint over them to see how it would look. I also added a red blue layer to see how that would effect the mood. If you select the way in wich the layers are mixed, you can choose to multiply the colours. This means that instead of just adding the red or blue, it makes those more intense. I think the effect may be to subtle in the resulting jpg but it would indicate to me weather I was going in the right direction.
I think you could consider highlighting some of the bars, or roof floor areas as well.
As I said at the start - use plenty of salt, this is just how I do it.
-
Check out some of the quad models - I think there was a dog freebie somewhere.
You could adapt the horse rig -just by draging the bones into your mesh, and then the relationships. Course you would have to adjust compensates and bone positionsa(not in that order) as well.
I would love a squetch dog rig - Is there one?
I would say the bones you suggest are the minimum you need.
Chris
-
You can use the newton dynamis on am to do that.
Check this thread out


First Animation
in SO:Animating
Posted
Wow Ken, he's up and walking!
I would be inclined to throw the stump out even further so that it comes down where the heel would hit on the walk cycle. Also i would shift his weight even further onto his left leg/stump - really exaggerate it
I think there may be something up with the weighting on the chest - the top three buttons all seem to move together with the shoulders. I think it should be a little more gradual than that.
Course thats just my 2e worth - feel free to ignore it.
Chris