

noober
-
Posts
224 -
Joined
-
Last visited
Content Type
Profiles
Forums
Events
Posts posted by noober
-
-
First here is the error im getting.

This is the settings dialog for the cloth.

Heres the settings for the chor.

-
I love the toon rendering! *thumbs up*... What job do you do if it involves stuff like that?
I'm curently working as the lead modeler for a small media production studio. And were working on a full length feature film.
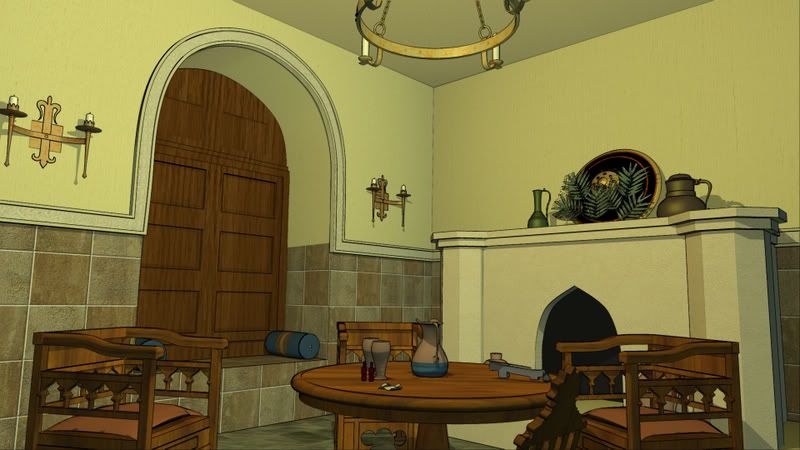
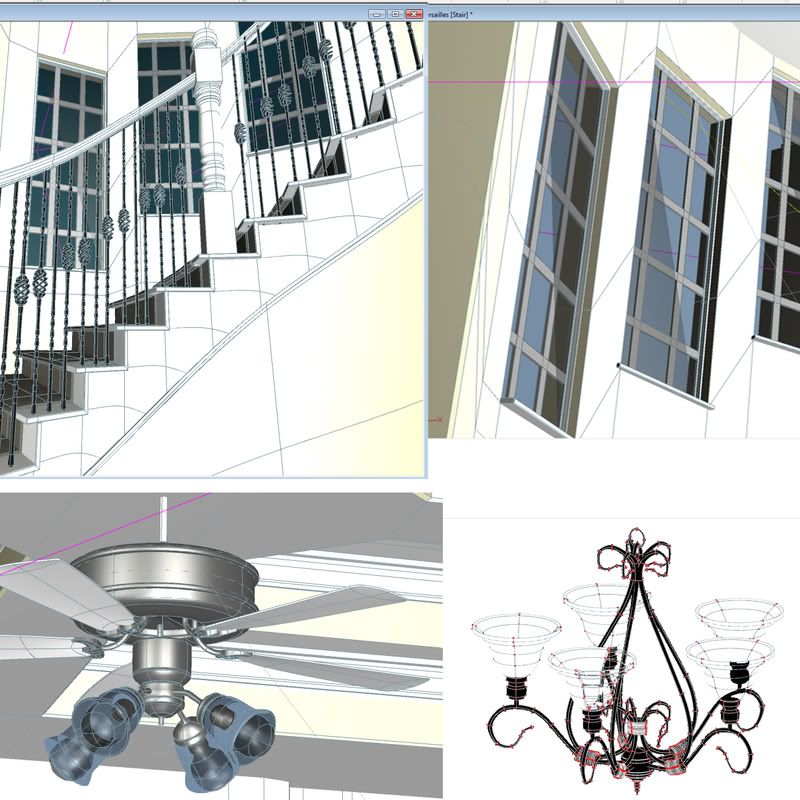
Very nice indeed! What kind of light setup do you use?I think it had 3 lights at the chandelier. The chandelier was a separate model its shadow projection turned off. Receive turned on. Multi pass of 4.
Beautiful render and modeling as always. Give us some details please.I hope the above is what you were looking for. If you guys have any more questions, fire away.
Thanks to all the comments... I'll keep working hard.
-
Once again here is another shot I had to make for my job. Hope you guys enjoy...
-
nevermind, i found the issue... it was a problem with the direction map.
-
I solved the toon line problem, thank God. Now I realized its not saving any of the grooming that I'm doing. Someone please help me. I just wasted almost 3 hours grooming, just to realize that its not even saving the grooming I'm Doing.
-
Ok, I have ran into another hitch. The model I'm rendering is rendered with toon. Problem is the hair is rendering lines around each hair. I am going to experiment with changing the toon lines in the different places that allow control for them. If I'm missing something please let me know. I do wish that hair had an option to just turn the lines
-
Thanks, I found that software about an hour after my post. I figured it out very quick and I must say, that is one amazing software. I would really like to thank him. I'm using it now at work and it helped a ton.
-
I need a copy of the image used for controlling hair direction. I remember how to use the "properties driven", but need the image.
-
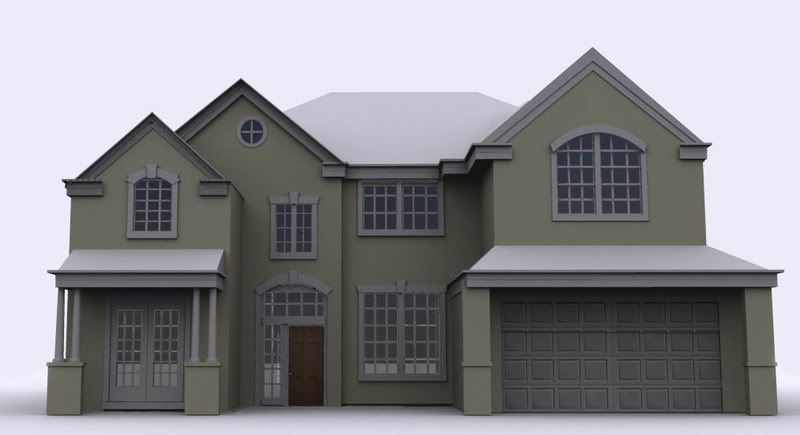
Wow! I really like the exterior!
Thanks man, that means a lot coming from you.
-
Looking good... You keep working, Ill keep watching from the shadows.
-
Once again... another update. Heres the front shot. The model is still in progress... but I'm getting there.
-
Are you using IK? It would stop the feet from sliding.
-
Update...
-
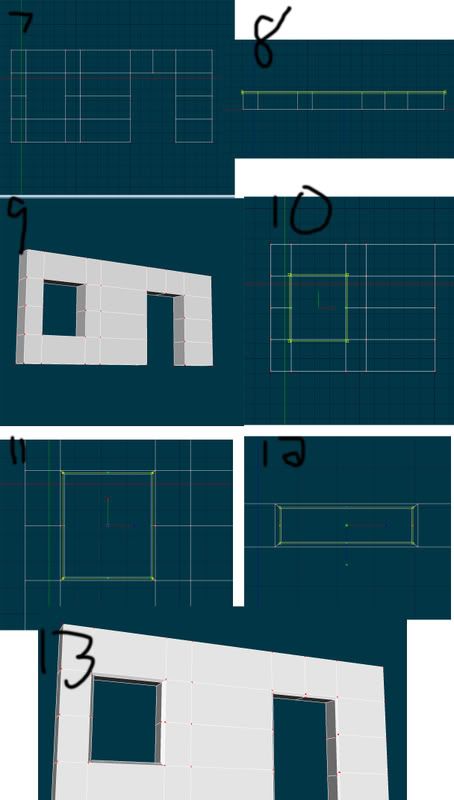
1. Start with a 2 point spline.
2. Extrude it down four times.
3. Extrude across 3 times.
4. Scale the center 2 splines outward.
5. Extrude the right side out 4 more times.
6. Select the pline i have highlighted and press "k" to break the spline.
7. Do the same to the door space.
8. In top view select it all then extrude.
9. This is what you should have so far.
10. Select the inside of the window. Extrude it 1 time. Then position it on top of the original selected points.
11. With out releasing the selection. Scale it inwards like shown. Remember to scale in all 3 axis.
12. This is a top shot of the window now.
13. After using this technique on the door you should have the pic shown.

-
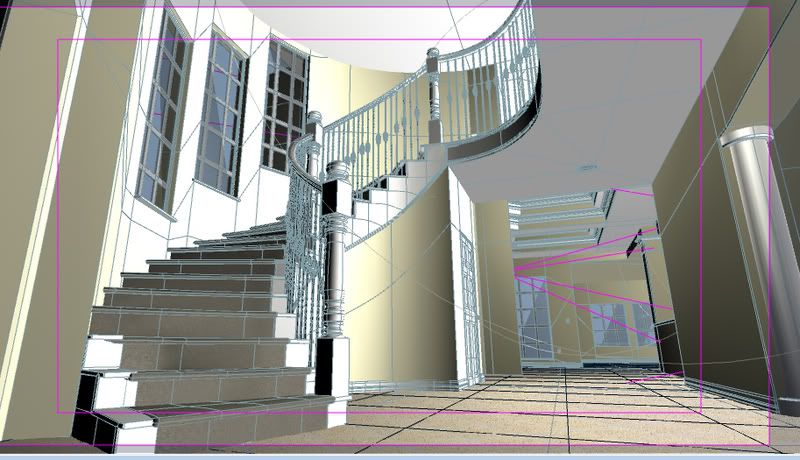
Heres another update. I think the more i finish, the more i notice it needs. Still need to start decorating after i finish the models. Here is a closer look at the window. And your right, I have a way to create walls so no matter what I need, doors or windows, the are just a click away. If your interested I'll show you how.
-
I believe there is an option under the hair properties called "object collision". Someone may have some idea about that, but it may work.
Try that first.
If that is not an option, you could add more control points and groom it, like it was flattened by the helmet. I would also suggest adding thickness to your helmet.
-
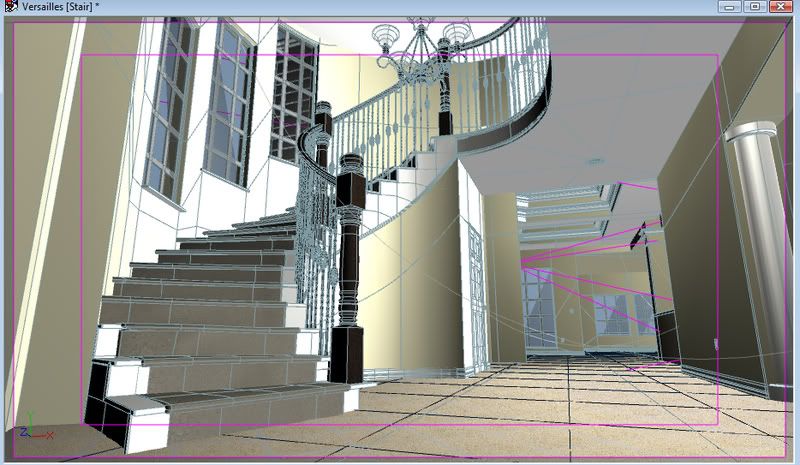
Heres a shaded wire frame of the stairs. In the background is the living room.
-
Very nice. This model is just begging for the HAMR treatment! Using WebHAMR, you could have a real-time walkthrough.
I think when its done we are doing a walk through. For now its for selecting different wood grains, marbles and trim choices.
-
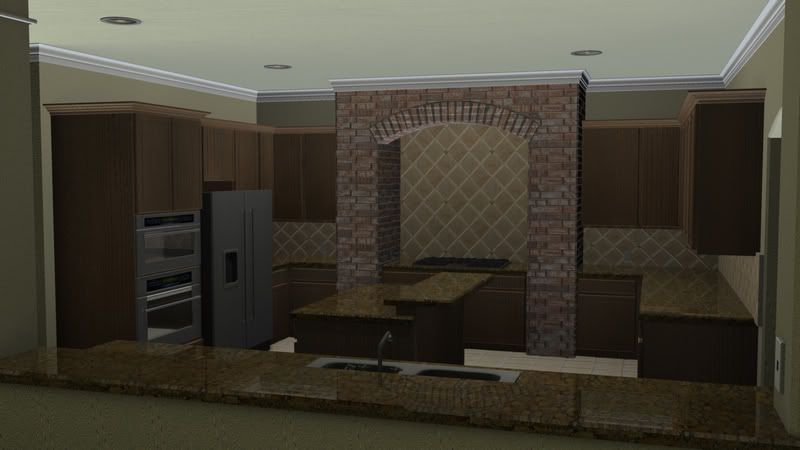
Heres an update... as you can see im still fighting with the AO. I also have some things that need tuning that i saw in this render... anyway, I'm tired, its late... enjoy.
-
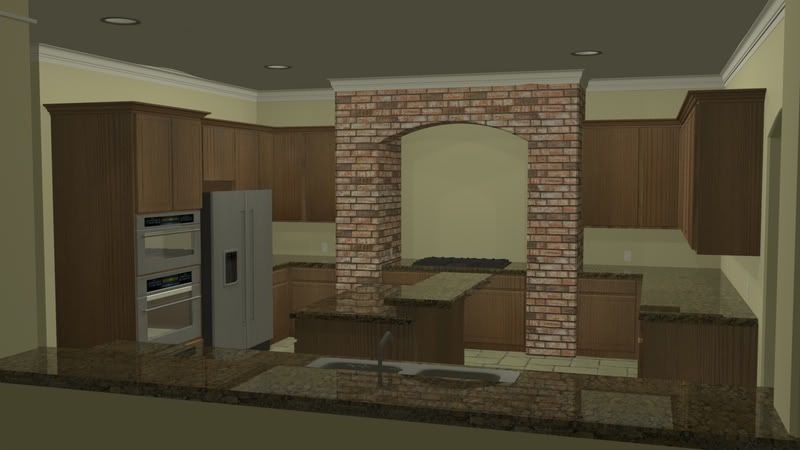
Heres one of the first render test now that its almost done being surfaced. Enjoy.
-
Very cool!
 I really like that song. What's it called? But that took 150 hours!?
The son is from Daft Punk and its called "around the world, better faster stronger". And yeas the 1, 360 of the car with AO took 150 hours. I just looped it in post.
-
I could be wrong here, but seems some entries weren't rendered using the toon render.
-
I'm interested in this too as I have never experimented with it... It seems that everyone uses it to just show uncolored stills, never colored animations. Is there a reason why not?
I have used it for a short 5 sec animation of my ferrari spinning a 360. 5 sec took at 1 hour a frame, took 150 hours to render. Thats why it left out of most animations. But for stills its perfect.
http://hostileninja.cgsociety.org/gallery/ here is a link to my portfolio... It will open the render i was talking about. The AO render took 150 hours, the wire took 50 min. I then keyed out the wire background so that the AO shadows could still be under it.
-
Hi everyone,
I've noticed some of the renderings people are use are soft and almost gradient like. The rendering setting that I always use is just final, which looks sort of like plastic. Does anyone know how to get a softer rendering?
Masna
Try using Ambient Oclusion. I bet is what your looking for.
Cloth problems...
in Work In Progress / Sweatbox
Posted
I found the problem, it was the object collision was turned way to high. Now my problem is some of the points aren't moving with the rest of the cloth. The shirt moves but a few points never move. Could this be a hook issue?