TNT
-
Posts
333 -
Joined
-
Last visited
Content Type
Profiles
Forums
Events
Everything posted by TNT
-
This should be on the forum somewhere but I could not find a link that worked. I hope it's what you are looking for. CooperTutorial.zip
-
It looks like using "ease" makes the bone orient like the spline where it sets on it. I tried to use "compensate" which makes the bones position ok but it orients as thouth it is still on the end of the spline. Your way is what I need. Thanks,
-
Yes - when you select the spline (which is part of a model) to be used as a path - I believe you will have to use a shift click with the eyedropper, or something like that. The spline path can be animated thanks Nancy
-
Is it possible to constrain a bone to a spline in a character and have it stay on the spline as the spline is animated? What I am thinking is, can a spline path be used to control the relationship of bones for a spine?
-
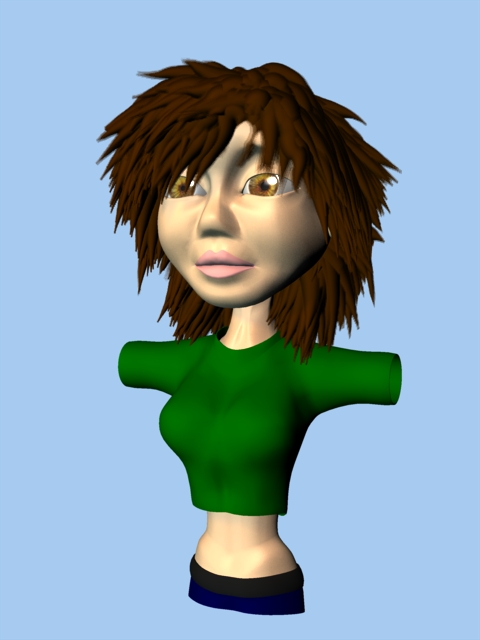
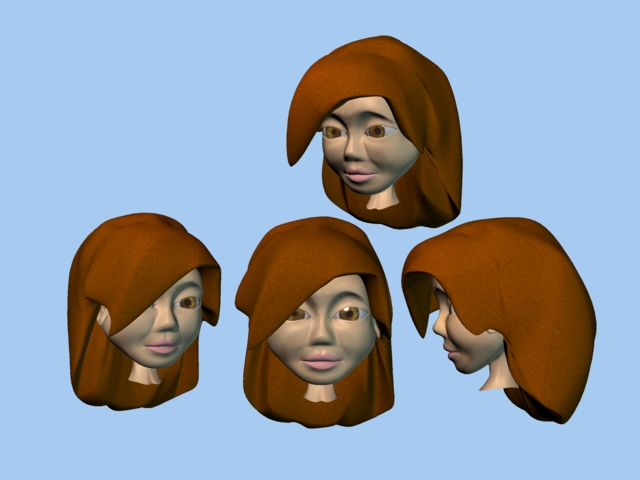
I think I have the eye lashes, face decal, and hair done finally. I appreciate all the suggestions for different ways to create these features. This forum is great! I still have the inner mouth and a few details but I think she is getting close.

-
Hi! Do you mean you would create each lash as a mesh? Low splines like (3) four point circles for each end and the middle? Yuuuup! Copy Paste Copy Paste. Then use the distortion tool to 'shape' it to the eye...copy paste/flip for the other eye... then attach all that to the eyelid bone. This way you can get EXACTLY what you had in mind. HEY TIM- Could I get your email address, gotta nuther private 'Q' re FM... (matt@campbellanimation.com) thanks
-
OK, I got to ask. You seem to really understand a LOT about lighting, reflections, radiosity, specularity, an on and etc. Where did you learn it? I mean was it a class you took, books, photography???? Just really curious because you show a real great grasp of the whole topic, where as I don't even know what questions to ask most of the time. Your work is spectacular!
-
Thanks for the reply. It's not the normals, they are all correct. The hairs are growing our the correct side of the patch but are all lined up along one edge (spline). Three chose the inner edge and one chose the outer. I played with some of the randomizing settings and the density in the emitter and that helped some.
-
Hi! Do you mean you would create each lash as a mesh? Low splines like (3) four point circles for each end and the middle?
-
I am trying to make the eye lashes on my model. I have selected the narrow row of patches that make the edge of her lids. The problem (if you look closely) is that there is one row of hairs on each lid. On the right upper lid the hairs grow from the front edge of the patches. The hairs on the other three lids all grow from the inner edge of the patches. Is there a way to get them to all grow from teh front edge? Thanks is advance,
-
They are in the works. Also some eyeliner which is giving me a fit. Now I can empathize with the wife when she is struggling to get it right.
-
Here is a quick pic with the face decal on. It could still use some tweaks.
-
Yes they are. I tried Robert's suggestion of including more patches beyond them and that looks like it fixed the problem. I'm working to clean up the decal now. I'll post an update in the WIP area when I get something. Thanks,
-
Thanks Robert, I'm using GIMP (Photoshop is too expensive for my playing). I did try it as a TARGA and that gave the proper alpha channel. The only remaining problem is the (2) patches in above her nose that have holes thru her eye brows. That is still there. Any ideas on that problem????
-
I thought it did. When I go to LAYERS>TRANSPARENCY there is an option to REMOVE ALPHA CHANNEL but the ADD ALPHA CHANNEL is greyed out. Is there a way to further check? Do I need an alpha channel on each layer? I am really green at this part so assume I know nothing.
-
Hi all, This is my first attempt at flattening a model and applying a decal. I have created a PNG file with an alpha channel in GIMP2 and applied it to the flattened face in AM. Two five point patches at the center above the eye brows have holes in them and the background of the PNG is white and not transparent. I have included the PNG and a screen capture of AM showing the problems. I don't know what I am doing wrong. Any help will really be appreciated. Thanks, Flatten_Face.zip
-
Not sure where I should put this. There used to be a tut on Dynamic Constraints (I think it may have been a tech talk) that had several examples. I know it contained THE HUNTRESS as part of the examples with her ear rings and such. I can't locate it any more on the forum. Does anyone know where to find this and the other tech talk downloads please. Thanks, EDIT: As usual, look for a half hour and can't find it. Make a post and find it two minutes later. Thansk anyway.
-
Here is the latest update. I altered the hair thickness like Mark suggested. I haven't had time to try the decal for texturing it. I did give her some legs and a pair of hot pink converse. First shoes I ever tried to model. Not to sure they can animate well though. I may need to simplify them a bit. Next is the dreaded hand!
-
It hair material set to 8 at teh base amd 0.5 at the tip. I need to learn to style better it I use it.
-
I played with the hair options a bit and started on her body. Here is where she is so far. I think I may go back to the original style hair.
-
Hi Robert, I know you have been thru Animation Mentor and are familiar with the stock characters used in many of the exercises. I am sure the results have a lot to do with the training but you also need characters that will move and not break. Without divulging any Animation Mentor secrets, can you give any advice for trying to create that degree of flexability in a chracter? If you have the time and are willing to impart some wisdom on this I would greatly appreciate it. Thanks for all your support on this forum,
-
Thanks everyone. I'll try to keep posting as I get more done.
-
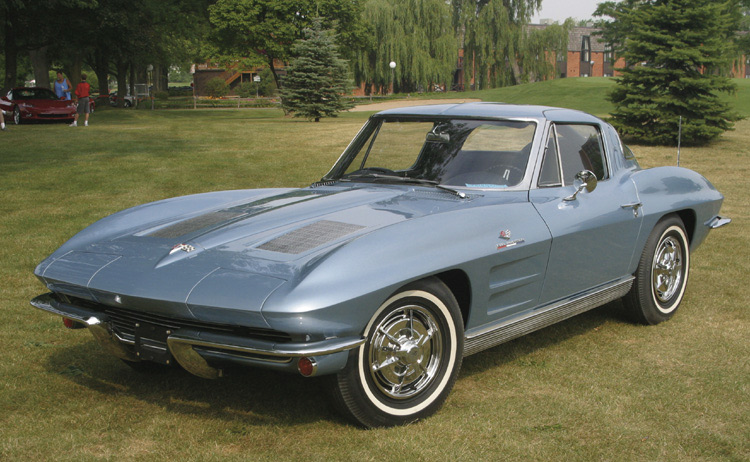
Actually yes. It was called Silver Blue but it was pretty close to baby blue. Thanks for all the encouragement from everyone. I love AM.
-
Here is the vette as far as I have taken it. I added some trim and basic interior. No engine and such.
-
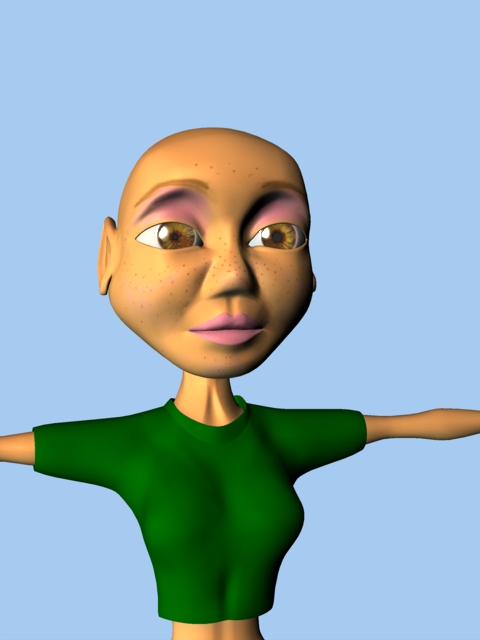
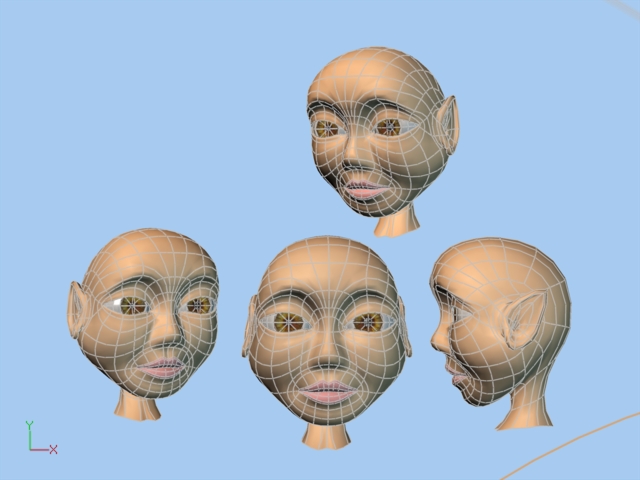
Well I'm on vacation until January 4th so I decided to start a new character. I want to have a simple-to-animate character that can have a wide range of expression. Kind of like the standard Animation Mentor characters. My ambitious intention is to build a rig for her and use her to get better at the animation side of things. I did add ears and some hair which may be more than needed but here's what I did so far. I'm having a little trouble smoothing the cheeks. It seems anytime there is a five point patch I get a slight crease from some angle. I don't want to use the porcelain material to fix it. I'd rather figure out how to do it with the splines. Right now all the bias settings are 0,0,100,100. Let me know what you think.