Kelley
-
Posts
768 -
Joined
-
Last visited
Content Type
Profiles
Forums
Events
Everything posted by Kelley
-
'Got some time to dig into the armored car problems. You hit the nail squarely... I think the problem is that when I select, or marquee, an area/object, A:M creates a new object in 'Groups' called "untitled", and these pile up. I had seven [!] mufflers on one of the exhaust pipes. Thanks again for all the help.
-
Thank you all for your patience and advice. I'm going to be away from the project for a few days, but I've got everything printed out and will do some serious trouble-shooting in a bit.
-
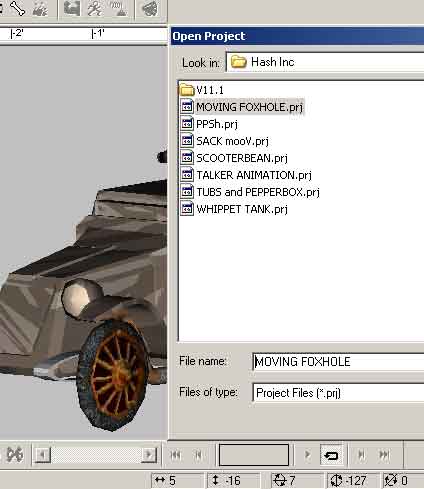
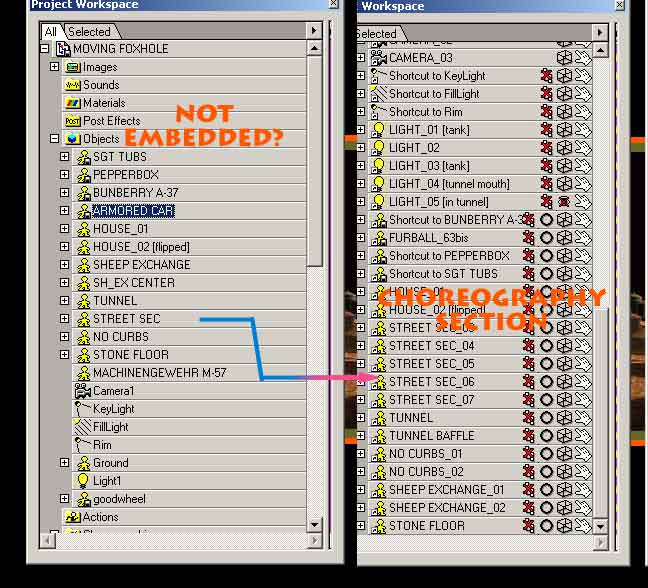
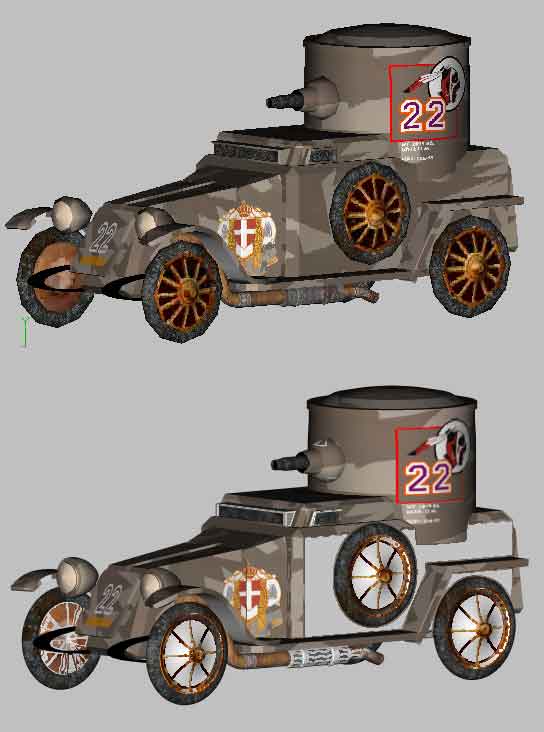
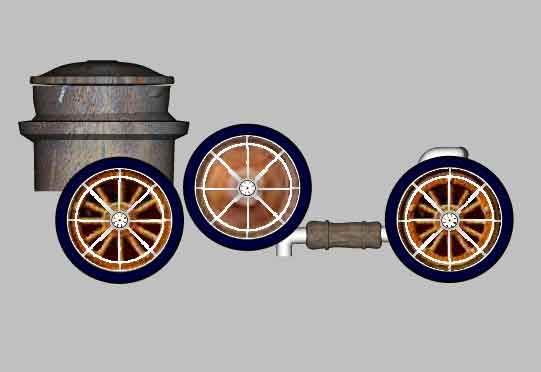
I'm hazy on what constitutes 'Embedded' or 'Not Embedded'. It hasn't been an issue until now, and I had other terminology to tangle with. Looking at the screen caps., I'm assuming that the models under 'Objects' are Embedded. I then pull as many copies as needed into the Choreography. Thus, the others, under Project>New...are Not Embedded [?] I am drawn to this logic because the three models that did not lose their decals in the street scene were Tubs, Pepperbox and the Tank...and only they exist outside the Project. I don't think [?] my images are embedded. I keep a file called Texture Vault on the hard drive into which all my .tga images go. Within that, when working up a specific project, [like 'Moving Foxhole'] I make a another folder with the Project Name, and put all relevant images in there. Then I make seperate folders in my Images Library for 'Tank', 'Armored Car', 'House', etc., and use Windows Explorer to transfer the images over. When applying decals, I drag from the library to the model, it prompts me to choose 'Decal' / 'Rotoscope', and I do. Is this the way to go, or have I invented some bad habits? I'm also attaching another pic. of the Armored Car. Note that there are still white lines. [Wheels look great, though!!] I've looked at the wire-frame, expanded it as far as possile [just one CP on the screen] and I can't see any sign of a second object there. If you folks haven't deleted the .zip of the car, could you take another look to see if I've missed the obvious? Thanks. I really appreciate all the help. [attachmentid=13649][attachmentid=13650][attachmentid=13651]

-
Wonder Woman indeed! That was a slick bit of sleuthin'. Allow me to pose two more questions: [1] Since something was duped twice, and one model is exactly sitting on top of the other, how did you see there were two? And...[2] Where did the rest of the decals on the car [and the street] get to?
-
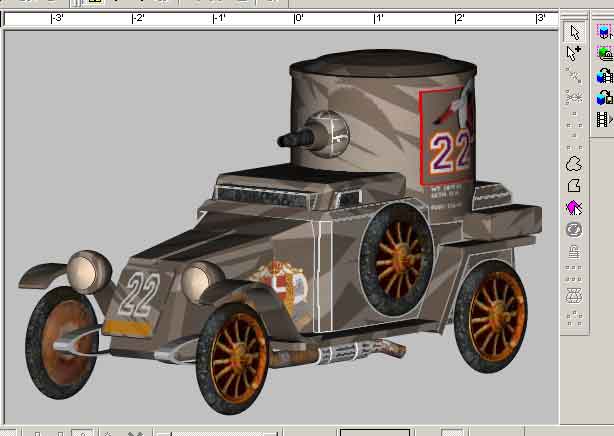
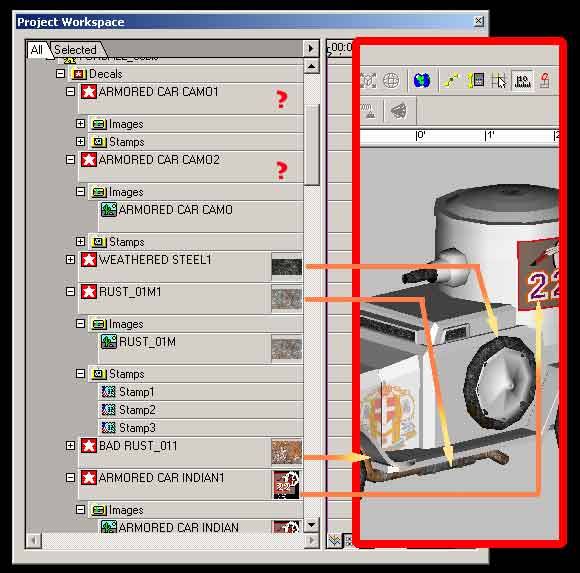
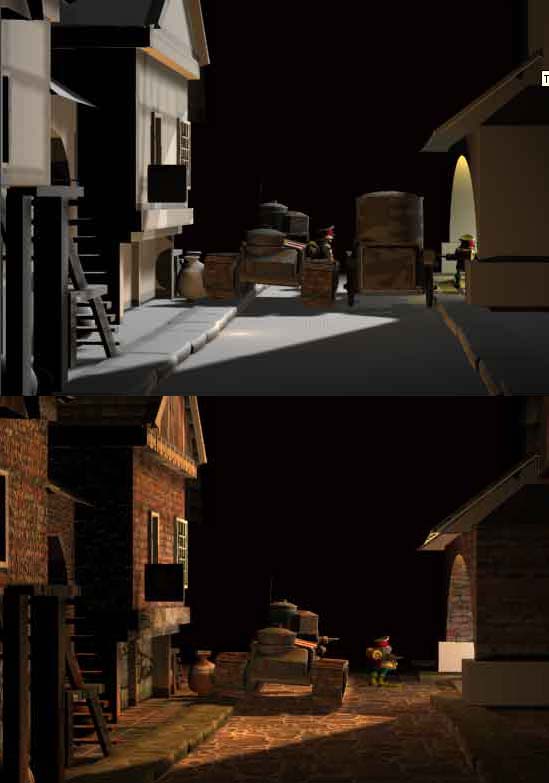
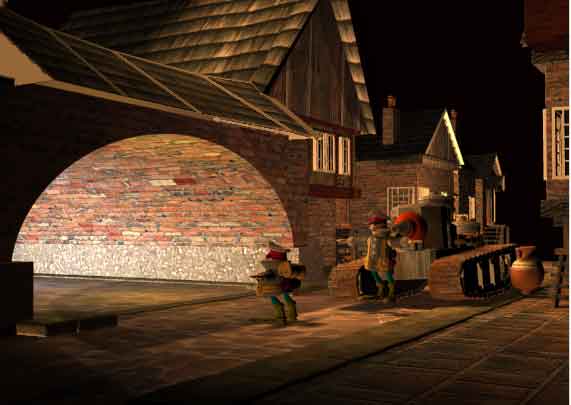
Nancy: Thanks for jumping in here. Things just keep getting weirder. First, I'm sorry about all those fish. That's another project entirely. I copied the "Moving Foxhole.prj" file in it's entirety, without looking in it. Looking at the Objects in PWS right now, there are none of the fish models. I'm at a loss as to how they got included. So...here's another .zip file with the Armored Car only. [the tank is fine. It and the two troopers are the only objects to retain their decaling...though the troops are mainly patch colored.] Yesterday, after discovering that the decals were gone from the street scene, I decaled the armored car anyway. By day's end, the decals were corrupting [as per my last post yesterday] Today, I did a "Render To File" as Vern suggested. The street was the same, and the Armored Car looked very odd. I rendered the .mdl only and it's almost completely bare. So the problem seems to be progressive. You've already looked at the pertinent .tga files for the car. True, the wheels are small. They were copped from images on the internet, at 72dpi. But they scaled up OK in Photoshop. They're pixelated on the car, but the car will only be seen breifly, in motion, at mid-range, and in low light. [check street scene] The 'green wheel' does have an alpha channel, but that wheel image was not used. Note the House of Savoy crest on the door-side, the Indian head/22 unit mark on the turret, and the white 22/orange bar on the radiator. Those all had alpha channels, and they're OK. I opened up the PWS Decal folder for you. I hope I'm showing the section you want to see. If not, I'll do another. Good luck. ARMORED_CAR.zip
-
Vern: Thanks for checking in. I'm posting two .zip files. The first is a sampling of the .tga images I've used. [The full file was too large to load, even zipped. But these are images that have gone bad] The second is the project itself. And...the latest development of today. I finished the armored car. Had to re-build the wheels to take the images and all seemed well until close to the end, when the problem started all over again. On a hunch, I installed the armored car in the Choreography window to see if the render would be any better there. Not only was it the same, but most all the decaling on the other models is gone. Went back and opened up the individual models to see if the images were still there. The Image container still had placeholders, [ the white star on red field and Name of Image] but the icon of the decal was gone. I rendered one or two, and sure enough, the models are all pale grey. I did try to do a 'Render To File'...but it indicated that it was going to make an .avi [for one frame?] so I clicked out of it. I'll try it again, but I don't think that's my problem. Down deep, I suspect that my computer is the culprit. A:M develops problems that don't persist. They go away [sometimes come back] but it's on-again, off-again. I'm wondering if I should get a new machine and dedicate it to A:M and Photoshop? Have to think about that. In the meantime, good luck on looking at the files. [attachmentid=13605][attachmentid=13606][attachmentid=13607][attachmentid=13614] MOV._FOX._PROJECT.zip TARGA_SAMPLER.zip
-
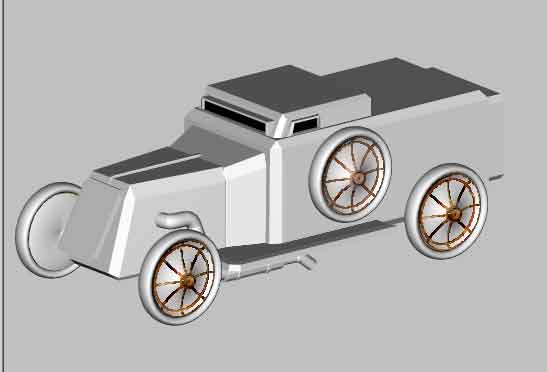
Thanks again. Now I think I've got it fixed in my mind where to go to set Key Color. In this case, howe're, it was not the problem. My Key Color is now bright pink throughout. Here's another thing to consider: on the back sides of the wheel disc [on one side of the car] the black color fragments. But not on the other side. On the tires, which were made at the same time and colored in the same way, it doesn't render at all! [ I assigned color by hiding everything except the whole tire, or, the back face only of the wheel disc, select all points, and pick a Diffuse Color from the Properties] The front of the wheel discs are decals applied by hiding everything except the disc, going to Front View, and dragging a decal from the Library to the Modeling window, and resizing>applying. On one side of the car, the decal fragments like the black inside of the wheel disc. On the other side of the car, the decal is rendering only where there are splines. Go figure. [attachmentid=13551] For what it's worth...here's the finished car. I tremble at the prospect of decaling, after today's debacle.
-
Nancy, thanks. Check my response to KenH for the decals/materials. Where is the Key Color found? I know I saw it months ago, but can't remember where. [somewhere in Properties, as I recall] The pictures I attached are renders [top icon in the Render Tools], then a screen capture>paste into Photoshop>Save for Web. I'm using 11.1 on a PC {HP Pavilion 762n/ 2.2Ghz/ 512Mz RAM. What part of the Properties are you interested in? If I open all the little arrows, it won't fit on the screen.
-
The 'F' key didn't do anything...for good or ill. Seems like it should have cured the problem if it were the problem, or, made things worse if it were not. But nothing happened at all. The lines which were white over the decal have now become 'decal-colored' lines over the default patch color. But only one one side of the car. Check out the other outer side! Then, on the inside, the color applied from the Properties [a solid black] is fine on one side, and multi-splintered on the other. Is it a bad idea to have 'patch color' and 'decal' on one object? And...I pressed the PageUp key right before the render. Didn't seem to make a difference.
-
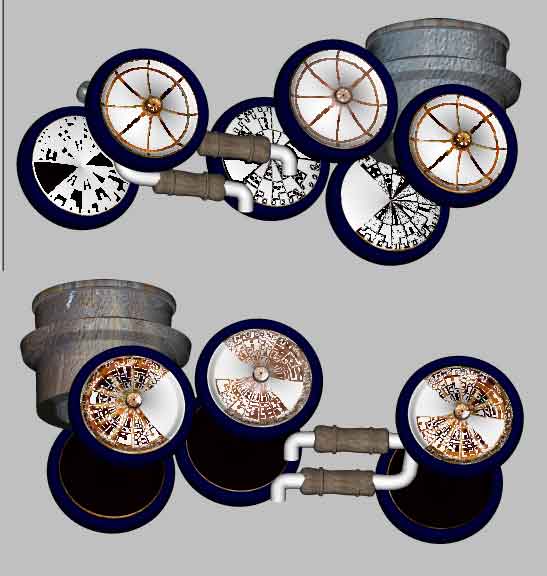
Thanks Ken...it would have been a simple and elegant solution. But it proved not so. 'Render As Lines' is OFF. The nature of the beast seems to have changed a bit in these last renders. I'm attaching a front/back pic. The inner surfaces of the wheel disc were colored by assigning color [black] in the Properties. At least the white lines went away! [attachmentid=13520]
-
Just as I solved my video card problem with fresh drivers, and entered into [hopefully] A:M heaven...I start getting white spline lines showing through the decals. 'Happened last night with lines on a roof. Now again with the wheels of this armored car. [it's not happening with the other objects because they are older bits brought over from the tank model.][attachmentid=13517]
-
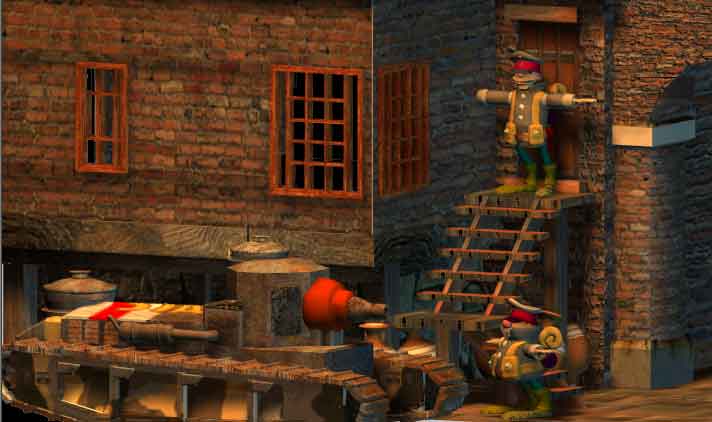
In the end, it seems to have resolved itself with the mere additions of fresh, updated drivers. All systems are a 'go'. I'm appending a pic of the project I'm using to test my abilities to install bones and make characters walk and talk. [lots of modeling experience, but this is the Big One!][attachmentid=13500][attachmentid=13501]
-
While I just got A:M v11.1, I see that v12 is out. I've searched the Hash, Inc. site but can't find a description of it. Can't anyone tell me what's new? Also, is it true that v.13 is in beta? Then too, I see that there is an A:M 200X Complete Guide [ 'hope I got the title right] coming. The Hash Minute Movie contest is promising one as a prize, so I pre-ordered a copy on Amazon.com, but they didn't give a release date. Anyone know when it's due out?
-
Thank you very much. Now...if the video card problem gets fixed today, there'll be more.
-
Since I got such a fullsome response to my question here, I thought I'd clock in and let everyone know: IT WAS THE GRAPHICS CARD! Last night the image/workspace part of the screen went haywire [green & purple static zig-zag lines] and then it seemed to recover. Then I got a dialog box saying: "VPU has re-set your graphics accelerator as it was not responding to graphic driver commands." I clicked through, and all seemed well for about ten minutes and it did it again. This time it had me restart the machine. I did, but when I came back to A:M the workspace image was super-grainy and distorted. And I couldn't open any menus with the cursor. A:M was frozen. But only A:M. I quit for the night. This morning it seemed OK for a few minutes and then it started all over. However, my other 3D programs, and Photoshop, work fine. I called my Tech people, who suggested that the glitch had corrupted A:M. Uninstall and do a fresh install. I uninstalled, but cannot re-install. The "Install Wizard Screen" comes up for a brief second and disappears. The Tech people will be here tomorrow. I'll post the results, but the culprit is almost certainly the Radeon 9600. [i'm attaching a pic. of the project I was working on.][attachmentid=13369]
-
While things are starting to settle down, and the learning curve isn't quite as steep as it was a while back, I'd kill to get my hands on a good Tech Manual. I got the A:M 2000, and the A:M 2002 and Sutton's A:M Tech Reference. The problem is, the first two are somewhat out of date, and Sutton has reams of good information on what A:M is capable of, but thin on how to do it. [as in, where do you click next?] I'd love to see a blending of Sutton and the manual that comes with A:M.
-
A few more details: I notice in your tutorial that you applied a color map, then changed it to a bump map. Let's assume I want both. In previous apps., I've prepared a b/w image as the bump map. Should I do the same in A:M, or simply install the color map twice and make the change to 'bump' on one? Also, in the Properties, there's a place to enter a percentage for how much 'bump'. What are the ranges supported by A:M? 0-100? More? I know what you mean by the 'riding a bicycle' quip. Things that had me chewing the carpet two weeks ago are but a mouse-click away today. I do love this app. [and thanks for all your help.]
-
Do you have the shotgun shell selected? Which is to say, are all the CP's lit up green? If so, in my limited experience, when that happens, the image is applied to every patch. Also, if I correctly recall advice that I got, when you do a cylindrical wrap of your texture, the object shold be centered on the vertical Y-axis. If not, the image distorts. I tailor images by doing a screen capture of the model, take it into Photoshop and build the decal over model image. That way it has to fit.
-
Well, y' can't get much clearer than that. Thanks. Now, I see my problem. I got so frustrated with going NEW>DECAL>Etc., [ I could never see the image] that I started storing Targa images in a file on my HD [Texture Vault] and using Windows Explorer to put them into another file in my Images Library. Now, when I need an image, I drag it from the Library [it having been built over a screen capture of the model] and drop it into the Modeling Window. I then get the regular box asking if this is a Decal or Rotoscope and go from there. Rarely do I get a yellow bounding box, but I can usually see the image. However, this method does not make a hierarchy as I see in your tutorial. I just get a list of Images with stars. I'm going to have to re-work my methods. Thanks very much for everyone's help and patience. [attachmentid=13266] Feeling very much like the dumb kid here, but I just twigged to the fact that you open the star icon...and there it all was. It's getting late! [ LOL ]
-
Yes...but how did you get there? I've tried clicking and right-clicking on just about everything in the decal list, and I don't arrive at that place in the Properties. As I said before, there's a small, but vital, step that I'm just not getting.
-
Thanks Eric, but something still isn't happening right. When I select the proper decal and bring up the Properties, mine looks different than yours. [see attached] There is another variation: when I right click on a decal in the top section of Images, I get a Properties with 'Key Color'. If I open that, there are the three RGB color sliders. I'm missing a step somewhere.[attachmentid=13252]
-
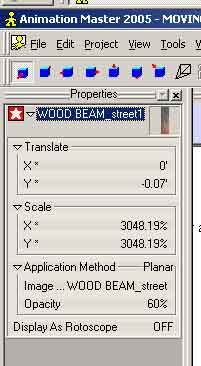
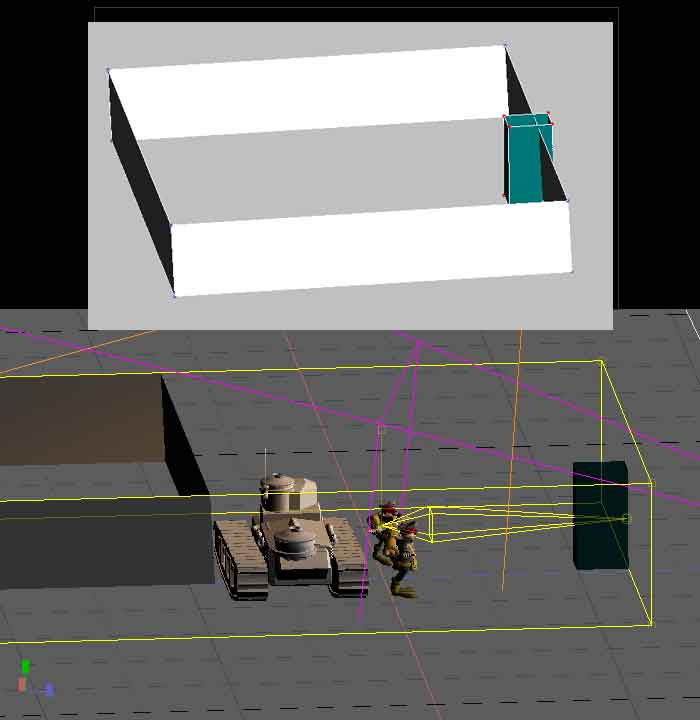
I'm building a house with a stone foundation. My texture map isn't long enough so I'm duping it and hiding the seam with a wooden beam. The top image is the Modeling Window. But in the Choreography, it jumps forward. Any ideas as to why?[attachmentid=13247]
-
One of the most rustrating things about learning a new app., is remembering where the tools live. I know I managed this once before, but for the life of me, I cannot remember where to go to specify a image as a Bump Map.
-
Thanks Eric. I'll always go with a thorough analysis of the problem. Every time. You've given me some things to think about before I rush out and get a new card. Fact of the matter is, I'm pretty sloppy about computer housekeeping. [i tend to figure they run by magic] I'll start on your list.
-
Yeah, I agree that the Quicktime problem couldn't be laid at A:M's door. The films played just fine when I started logging on to the Hash site a few months ago. I tossed that into the mix because of the 'on-again/off-again' nature of my mixed bag of problems. In any event, I'll check out new video cards.