


williamgaylord
-
Posts
907 -
Joined
-
Last visited
Content Type
Profiles
Forums
Events
Posts posted by williamgaylord
-
-
Thanks! I look forward to this. Have you tried animating hair, as in making it "grow". For my tree growth animation I need the leaves to sprout and grow with the control being a pose slider. I suppose that can be done, but guess you can't see the "hair" until you render it?
Thanks again!
Bill Gaylord
-
I added the "Technical_Reference.htm" to Favorites in my web browser. That works, but it would be nice to access it from the "help" item in AM.
Thanks,
Bill Gaylord
-
I like the cookie cut decal idea. I've actually done something similar with a decal and alpha channel. But how would you get a single patch to curl or bend? With four patches it's easy.
If "hair" can give me a nice dense coverage of leaves without the patch count, memory, and/or processing penalties of modeling the leaves individually that would be fantastic. I do need to be able to animate the growth of the leaves, though. Can you animate hair growth? With a pose slider (even though, as I understand it, the hair appears during rendering, not in wireframe mode)?
Thanks!
Bill Gaylord
-
OK, I've just loaded AM 11a, so I'm ready to learn about hair. I'm specifically interested in creating foliage with "hair". I assume there is a way to perhaps do so with sprites instead of just splines.
Can anybody point me to some examples or perhaps even a tutorial to get me started?
Thanks!
Bill Gaylord
-
I never remember just how to do this. I'd like to open the V11a online manual (which I've downloaded) from inside AM. I've just installed V11a and will be experimenting with "hair" to see if I can make my tree animations more efficient. Need help learning (re-learning) how to access the manual. Can someone help me, please?
Thanks!
Bill Gaylord
-
The patch count is mostly in the leaves. Only 250 patches go into the 7 "sticks" that make up each branch group. The leaves and their stems add up the 2600 or so patches. I guess it is pretty clear where I need to try to minimize patch count.
At only 4 patches per leaf, the savings to be had are in the stems for each leaf.
Perhaps version 11 "hair" might be the way to go, if it is less computationally costly.
This will take some more thought...
Thanks!
Bill Gaylord
-
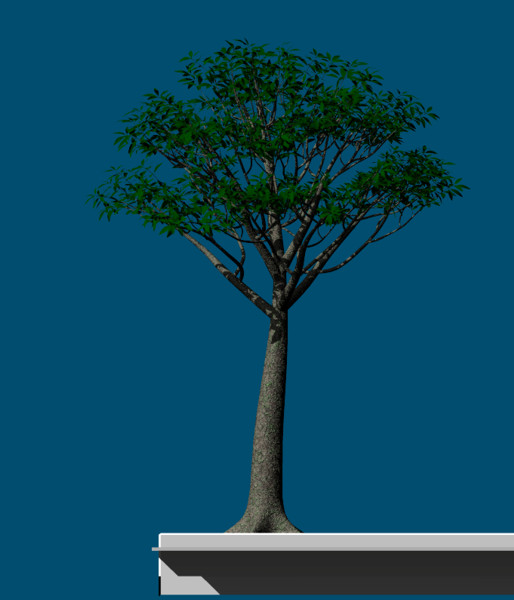
I am working on a tree-growth animation project some of you have probably seen some of (WIP, "Tree growth animation..."). In this project I have developed a model for the trees that lets you animate the tree's growth from sprout to full size in a way that is true to the way a tree actually grows (aside from its seasonal cyclic nature). It also makes the assembly of a tree manageable (assuming it isn't automated later).
However, I am running into a patch count problem rather quickly--something I was a bit worried about in the first place. Trees have a rather simple structure, but a lot of it! The problem "stems" (
 ) from the fact that the number of objects that make up a tree grows exponentially as you go from trunk to outermost leaves.
Each branch group of my model has about 2800 patches, and a typical tree medium to large tree will have as many as a 100 or so branches. That leads to 280,000 patches just for one tree! And I need 9 of them! So you see the problem.
My poor little Dell Inspiron 8100 laptop is not quite up to the task.
The leaves are the main problem. Even though each leaf has only 4 patches, there are an enormous number of them.
Any suggestions! Will using "hair" for the leaves likely help deal with this issue? If so, how easy is it to animate "hair" growth? I need very natural looking leaves that cast shadows well and that allows me to adjust translucency. Am I asking for too much? I am definitely trying to push the limits of AM's capability and I believe it will be a great showcase piece (even if it lacks human drama and a story line).
Thanks!
Bill Gaylord
-
Thanks, guys! I can hardly wait to see the trees in this light ("Tree growth animation WIP" thread in WIP).
Love that SkyCast! One thing I may not be setting right is the motion blur. I've set the motion blur to "100%" and the action cycle length to 1 frame, but it doesn't look like I'm getting any motion blurring of the SkyCast lighting. Still looks marvelous though. Any idea what might be causing this? The lights for the SkyCast model are set to "sun".
I've checked out www.1000skies.com. Those are some gorgeous skies! Well worth the fees if your project warrants it. For the time being I was looking for something free of charge. The link I refered to is such a site.
Thanks!
Bill Gaylord
-
Purchased SkyCast recently. Here is a test render using my brownstone apartment model. I'm realy pleased with the results. Look forward to seeing the trees in this light!
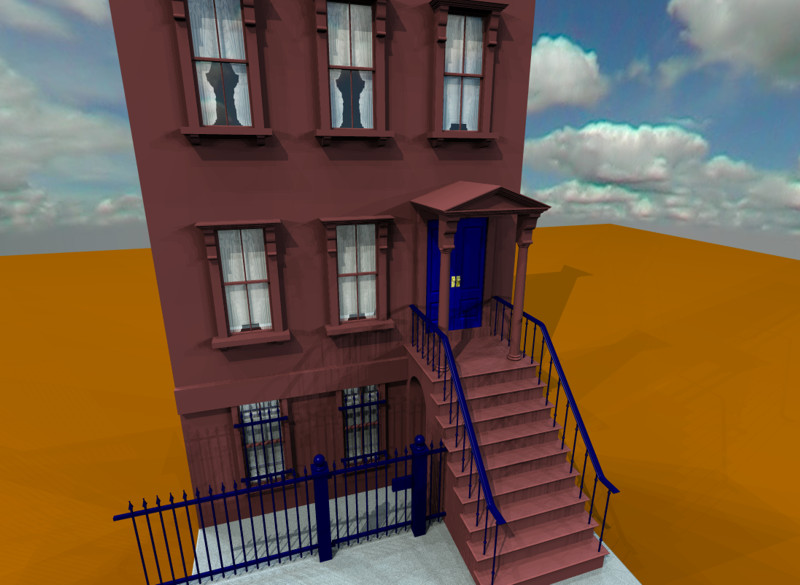
Thanks to all who've helped so far!
Bill Gaylord
-
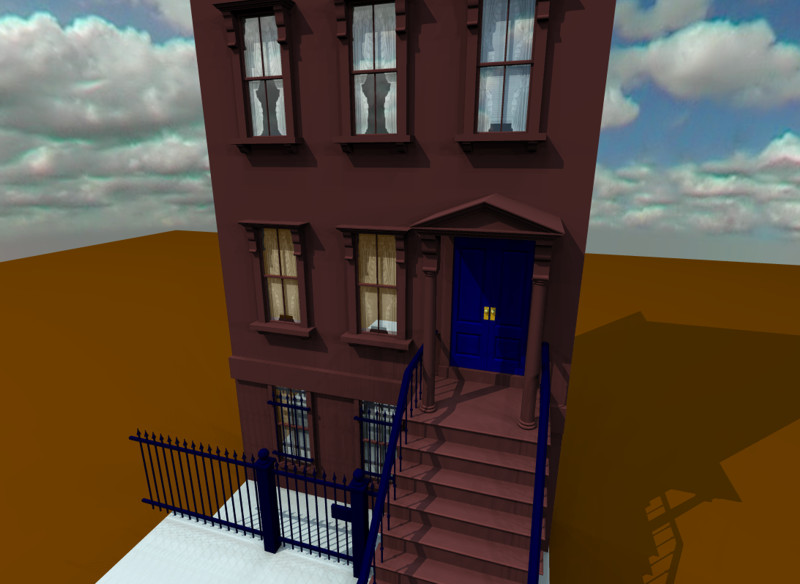
Here's another render with a few tweaks. Now I need to get back to assembling trees to animate.
Bill Gaylord
-
Here is a try with my brownstone appartment model. Not bad for a first try. A bit of tweaking and it will look fantastic.
Thanks, Mike. I'll check to make sure, but I thought I did turn off the "cast shadows" for the sphere. I had a feeling the "sun" lights had a fundamentally different arrangement.
Bill Gaylord
-
Here is my first trial of SkyCast based on the tutorial project. Next I'll try one of my brownstone appartment models and later, a add a tree.
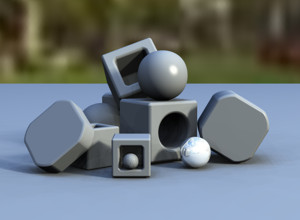
Very handy tool!
Bill Gaylord
-
The "spherical" option maps the images much more accurately. Thanks! My assumptions about how the rectilinear mapping were wrong (in reference to the images from the source I mentioned earlier).
Bill Gaylord
-
Thanks! Any ideas about the "sun" type light issue I'm having here?
Bill Gaylord
-
Very entertaining! Like the choice for the music, too. Great little parody of the iPod commercials! I like yours better in fact.
Great work!
Bill Gaylord
-
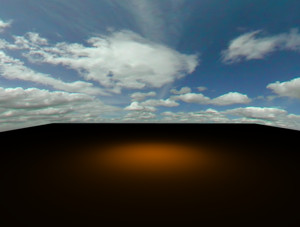
Figured out how to do it. Make sure "cylindrical" is check on the decal's context menu. Then adjust the height and position of the decal to match the height of the sphere. Click apply and AM seems to figure out the rest for you! Cool!
Now I have a problem getting "sun" lights to work inside my sky sphere. Other lights seem to work as you can see in this image, but not the sun type of light. Any ideas as to what I might be doing wrong. Or are "sun" lights not compatible with using an opaque sphere as a sky dome no matter where you put the lights' bone. Any advice would be highly appreciated.
Thanks!
Bill Gaylord
-
Found a nice collection of sky dome photos for free: http://www.philohome.com/skycollec/skycollec.htm . Check out his Lego panoramic photography rig!
Bill Gaylord
-
I just received my copy of SkyCast and am eager to give it a whirl. What I need is a little help on how to accurately apply images to a dome or sphere for the scene background. I see that typically the image is mapped to a rectangular JPEG image with a geometry that should work projecting off a cylinder onto a sphere.
Can someone explain, or point me to a tutorial explaining how to apply such an image accurately to a dome or sphere in AM. I assume I would lathe an accurate dome or sphere and apply the image as a decal using a cylindrical projection...? Just need some help getting through the specifics.
Also, any good sources for such images, in particular ones made with cityscapes?
Thanks!
Bill Gaylord
-
Wow! I need to add that to the plane in my "Pseudopod 2" (My Webpage). I'd like to re-shoot the sequence from the pilot's perspective, and this just might inspire me to try it out.
Interesting test. You can see the aliasing you would expect as you exceed the frame rate of the "camera". I can imagine things like blur calculations could be adversely affected by the aliasing, but it seems to work quite well! I haven't followed the thread, so I would be interested in the gist of it.
Bill Gaylord
-
That is a very odd, but fascinating result.
 Reminds me of how molten glass behaves. A "failure" that could lead to something far more interesting!
Bill Gaylord
-
Here is an update. I'm now assembling in earnest. Building the trees along the street. This is about 40 minutes work, though I expect I'll be able to assemble each tree in about an hour a piece by the time I get to the other end of the street. In hindsight I would have put more leaves on each branch, but it was hard to judge early on in the development.
It will be interesting to see how long it takes to render 9 trees and 9 brownstone appartments. I put a lot of detail into the appartment model. This is not an excercise in work flow efficiency. It is certainly "breaking new ground" (pun very much intended
 ).
).Although it looks complicated, the tree model is actually rather surprisingly simple in terms of its basic elements. Its just that there are so many of them. It should be fairly straightforward to automate. (Hint, hint, Marcel...or anyone else who might be interested.)
Wish me luck! And any suggestions are very welcome.
Sincerely,
Bill Gaylord
-
Love how effectively you animated the eyes. It's amazing how much drama can be concentrated in those tiny orbs! Great example for inspiration.
When I get back to character animation, I'm going to try out the proxy idea. Too bad my current project doesn't lend itself to proxies (animating trees growing magically along a city street).
Great work! Look forward to seeing more.
Bill Gaylord
-
These are not award winning items to showcase, but they are interesting examples of how Animation Master allows you to do some none traditional "character" animation: Bill's Experiments These originated with "The Mother of All Blobbies", my first experiment animating a character whose "limbs" were more like the pseudopods of an ameoba than arms and legs. This was done by manipulating CPs with the various tools of AM. I then created a "pseudopod" test model basically made of a tube with each spline ring along its length assigned a bone. The bones were then constrained to each other in a hierarchy so that I could stretch or squash the "tenticle" simply by manipulating a bone at the very end. "Pseudopod" was the result. The next experiment was "Roundhouse Slap", an application of the model inspired by Paul Hogan's detective character from his variety show. I then changed the model slightly so I could scale each spline ring separately, while using a single control bone to stretch and bend the "pseudopod". I gave it teeth and created "Pseudopod 2". I was then inspired to create a similar model to animate a tree growing magically from a sprout to a full grown tree. In this modeling technique I constrain the bones of the tube to a guiding spline which determines the shape of the branch. I can construct a complete tree with such branches. I am now creating an short film for a non-profit organization based on the tree model that "grew" from these experiments. "Toobs" is a simple experiment showing how tubes can be guided by splines. I call them my "flying cheese doodles".
Although Animation Master is designed for more traditional character animation, it is also amazingly adaptible for much less traditional "characters". Hope these inspire some of you to try even more interesting character innovations. Many thanks to the folks who helped me in these explorations. AM ROCKS!!!
Bill Gaylord
-
Regardless of whether you go cheap or not so cheap, your recording environment will usually be a major factor in the quality of the recording. If you are recording next to your PC, you will likely get a lot of fan noise in your recording. The camcorder in the cloths closet is a great idea for getting started. Recording in a typical room in a home or appartment, the room resonates with reflected sound which mixes with the direct sound, giving it that typical sound quality of home videos (a somewhat hollow/remote sound). Setting the microphone close to your mouth helps the direct sound dominate the reflected/resonant sound, giving it a cleaner sound. You can make your own "pop" shield with a coat hanger and some discarded panty hose (bend the wire into a loop about 4 inches across and stretch the hose over it). Put the pop shield in front of the mic to soften "explosive" sounds like "p" or "t". (Duct tape comes in handy for attaching it to a mic stand
 ).
).You also want to carefully adjust the microphone recording level so that it is as high as possible with only a small amount distortion at the loudest levels you plan to record. How do you tell without a level meter? Do some experimental recordings. If the loud sound has sort of "scratchy" sound to it, you are overdriving the system (clipping). Lower the level until it sounds "clean" and "crisp" at normal levels and only just noticeably "scratchy" at the highest levels.
As far as buying a "cheap" microphone that sound decent, I would highly recomend a PZM ("pressure zone microphone"). It's an odd looking microphone...a metal plate usually about 4 inches on a size with a small condenser microphone mounted so that it is facing the place with only a small air gap like this:
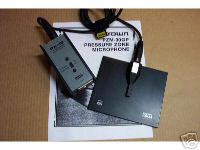
Radio Shack had one for about $50-$60, but doesn't seem to sell it any more. It has a battery pack and pre-amp built into the cord, which would be ideal in your case. You can find a bunch of PZM microphones for sale on Ebay for about $50 or so. Find one with the pre-amp/battery pack attached for your case. The advantage of a PZM microphone is that it is naturally much less sensitive to the reflected/resonant sound, so it sound more natural, even if you aren't right up close to it. Crown is a good brand to look for, but the Radio Shack version is just fine if you can find one. That will probably give you the best sounding recording for the price range.
Good luck!
Bill Gaylord
Creating leaves with hair?
in (2003-2004)
Posted
BTW, how does hair compare in terms of memory/processing/rendering time? Is it more efficient for things like leaves?
Bill Gaylord