


jirard
-
Posts
401 -
Joined
-
Last visited
-
Days Won
3
Content Type
Profiles
Forums
Events
Posts posted by jirard
-
-
Looks very interesting, keep up the nice work!
Thanks
I will post progress of this one. Fully rigged and posed this time...............I hope
-
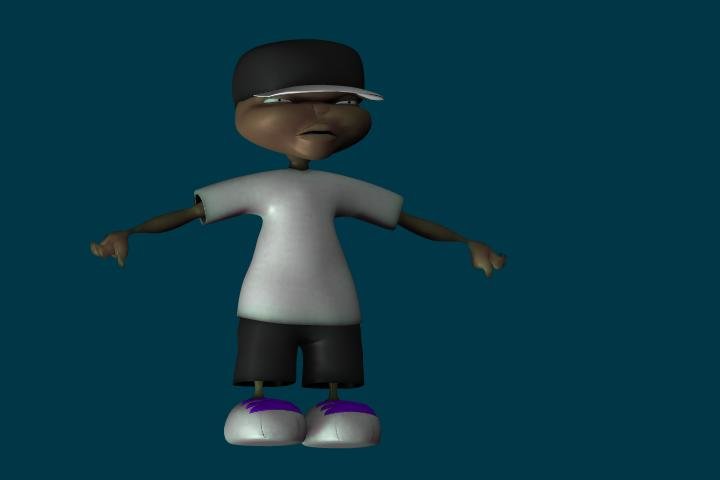
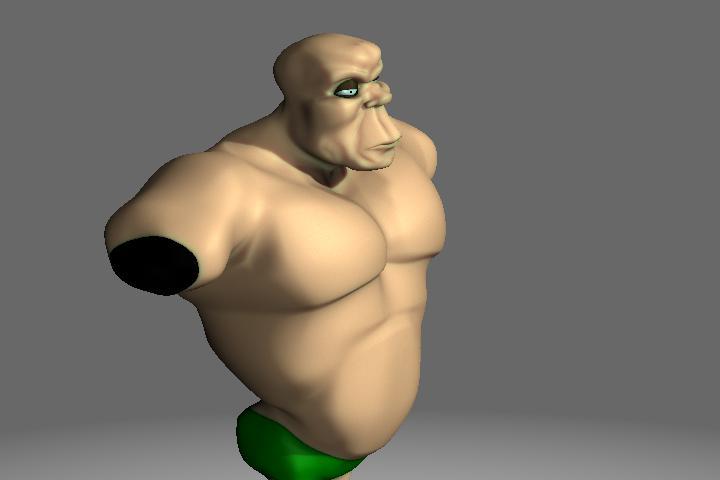
Having fun with this guy Crits welcom

-
You are SAVING multiple versions aren't you?
Oh yes, I learned that years ago with my Photoshop designs. I always start with something like "Name1", and then work my way through the alphabet until I think it deserves to go to the next number. There are dozens of versions leading up to "Project3d".
... You dont have to keep using copy flip attach when testing to see how a model looks. The reason being is that you will have to continuously keep breaking the splines when you delete the other half of the model cuz u dont like the way its turning out.Makes perfect sense. Your characters are great BTW.
Thanks
Here is the model if you want to check it out.
-
That is a good idea, Jirard, and I will give that a go next model.
The way I do C/F/A, I don't have to break splines - if you copy the left half, then delete the whole model, then paste the copied bit, there's no breaking needed. However, my method is not possible if you have any rigging or weighting done.
(This is what I do:
1. In Front view, click the central spline.
2. Press the comma , key to select the whole spline.
3. On the top toolbar, click on Show Manipulator Properties.
4. Click the Scale manipulator.
5. Change the X scale to 0% - this aligns along the x axis.
6. Select the left half of the model up to and including the central spline.
7. Press Ctrl C to copy.
8. Press Ctrl A to select all
9. Press Delete to delete all.
10. Press Ctrl V to paste.
11. Shift click the middle spline.
12. Right click and Copy/Flip/Attach.)
I've been doing it the hard way haha
Thanks
-
Thanks for that link Caroline. I always just used the one on the c.d.
-
There are a couple in the Hash data folder. I dont think you will get a much smoother sphere than those.
-
Great modeling. I dont know if you remember me asking about this project last year in a p.m. but thanks for letting us check it out.
-
I would like to add something
You dont have to keep using copy flip attach when testing to see how a model looks. The reason being is that you will have to continuously keep breaking the splines when you delete the other half of the model cuz u dont like the way its turning out.
If you left click and drag over the half of the model u want to check and copy and paste then right click and flip along the x axis then position you will see what adjustments need to be made. I dont use the copy flip attach to much unless I think the model is almost done.
-
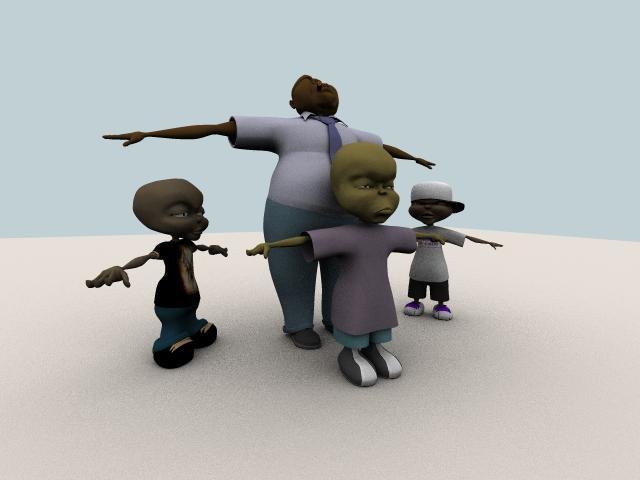
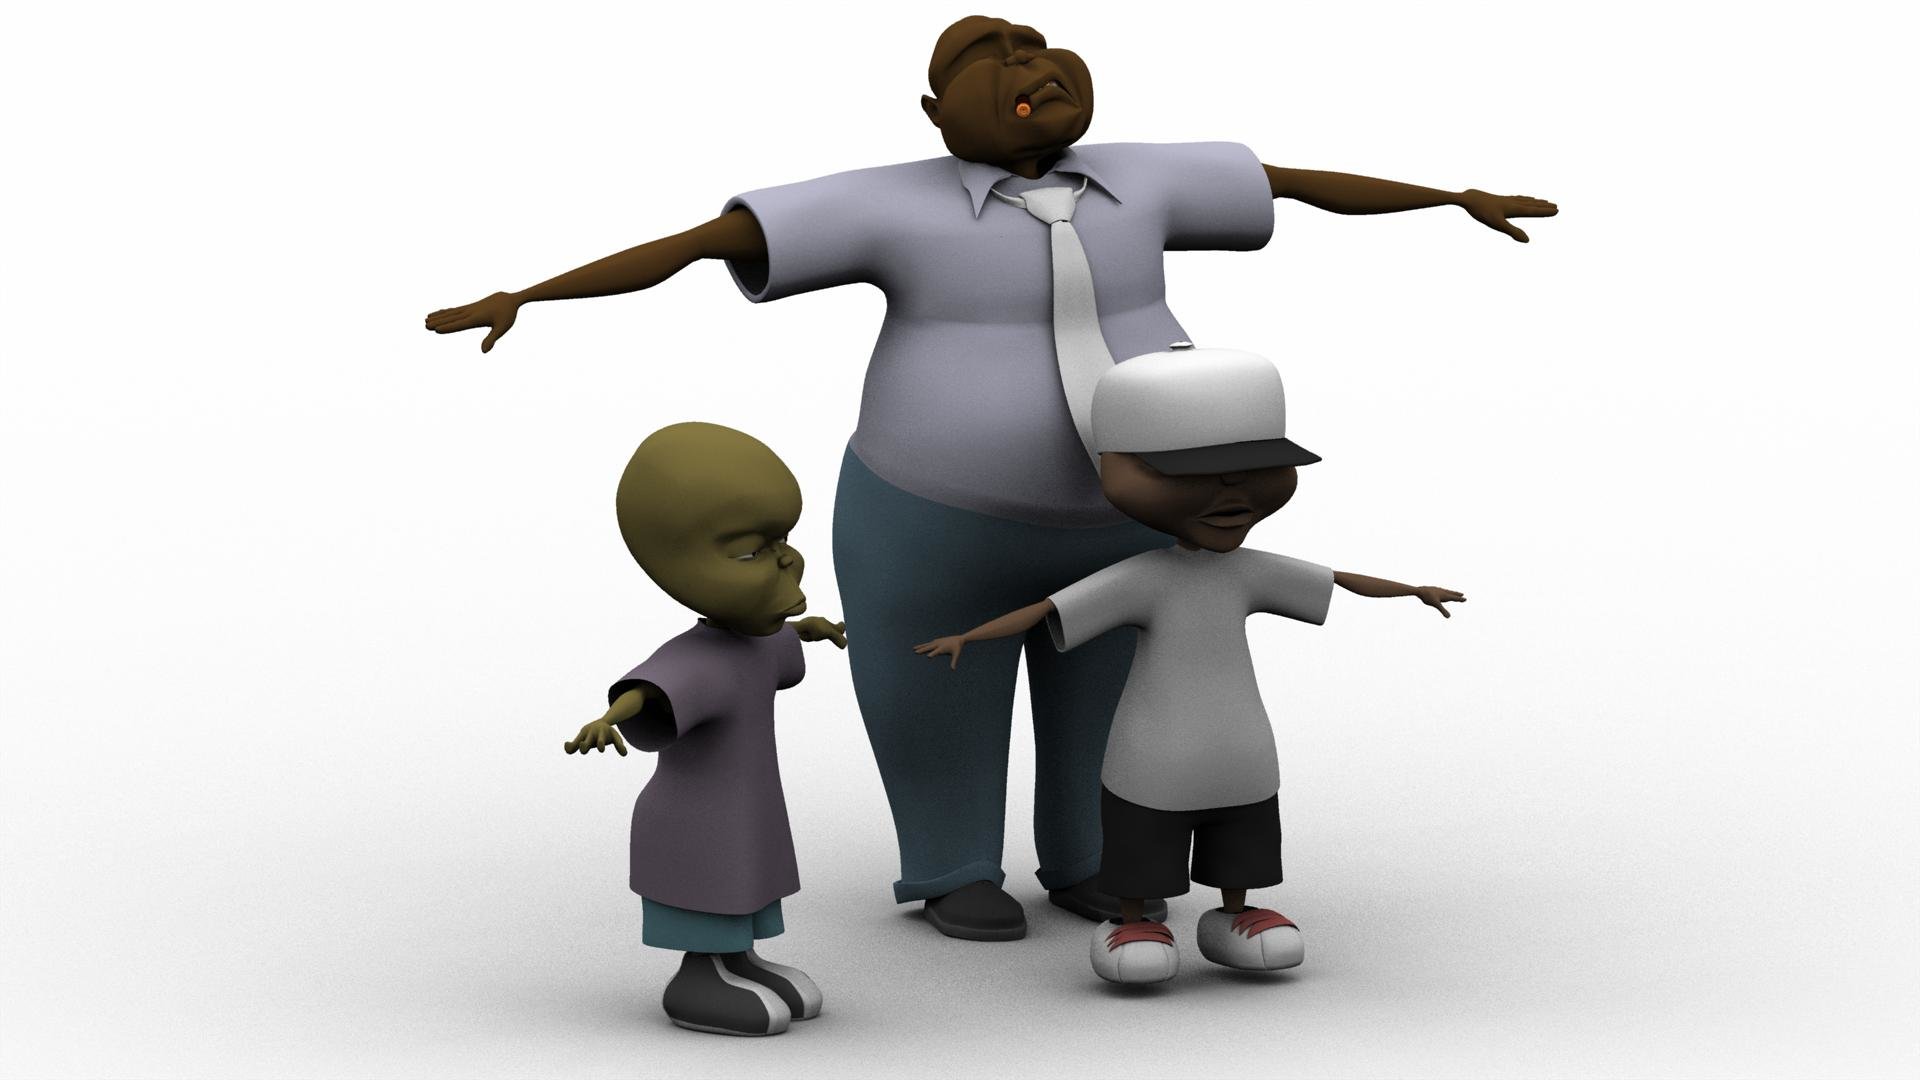
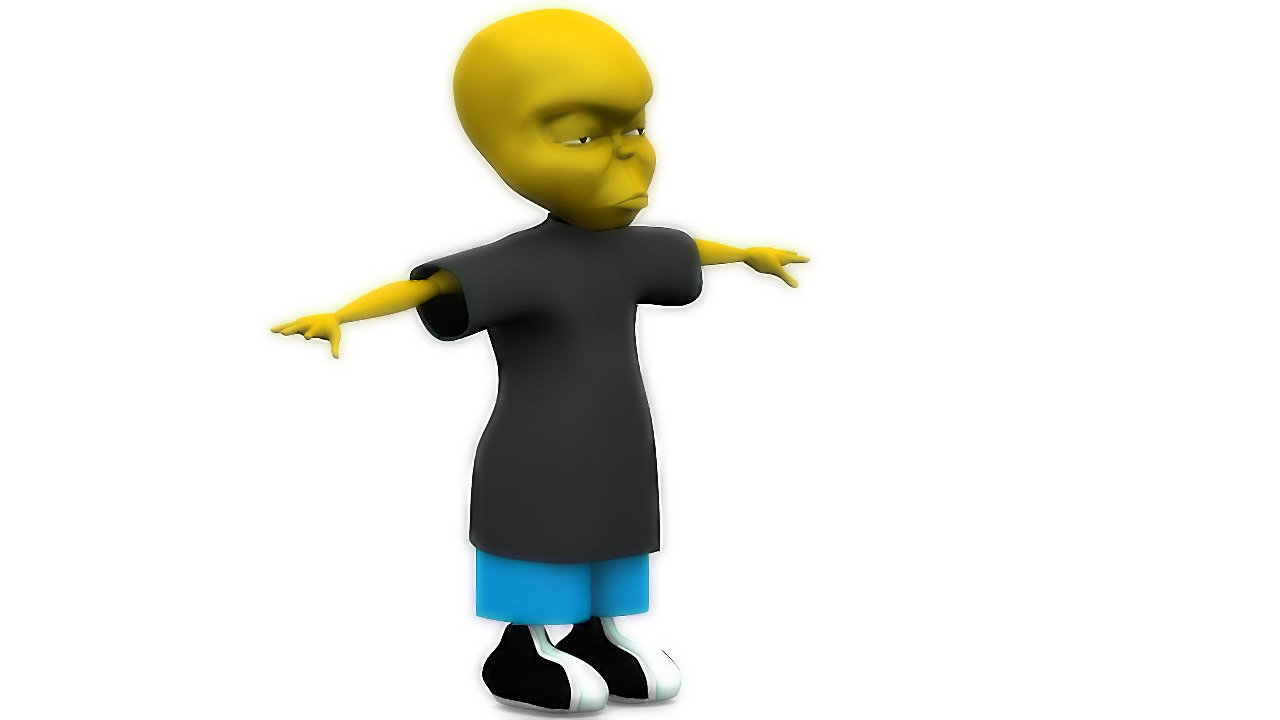
I decided to add a couple of renders that I did. A friend wanted to see the blues guy with some other characters I did so I sent him these.
-
This is a great, fun way to learn the software. I wouldnt have learned about cp weighting if it wasnt for your tutorial. When ya gonna do rigging and constraints

Good work as usual!
-
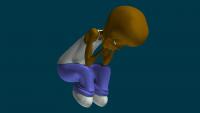
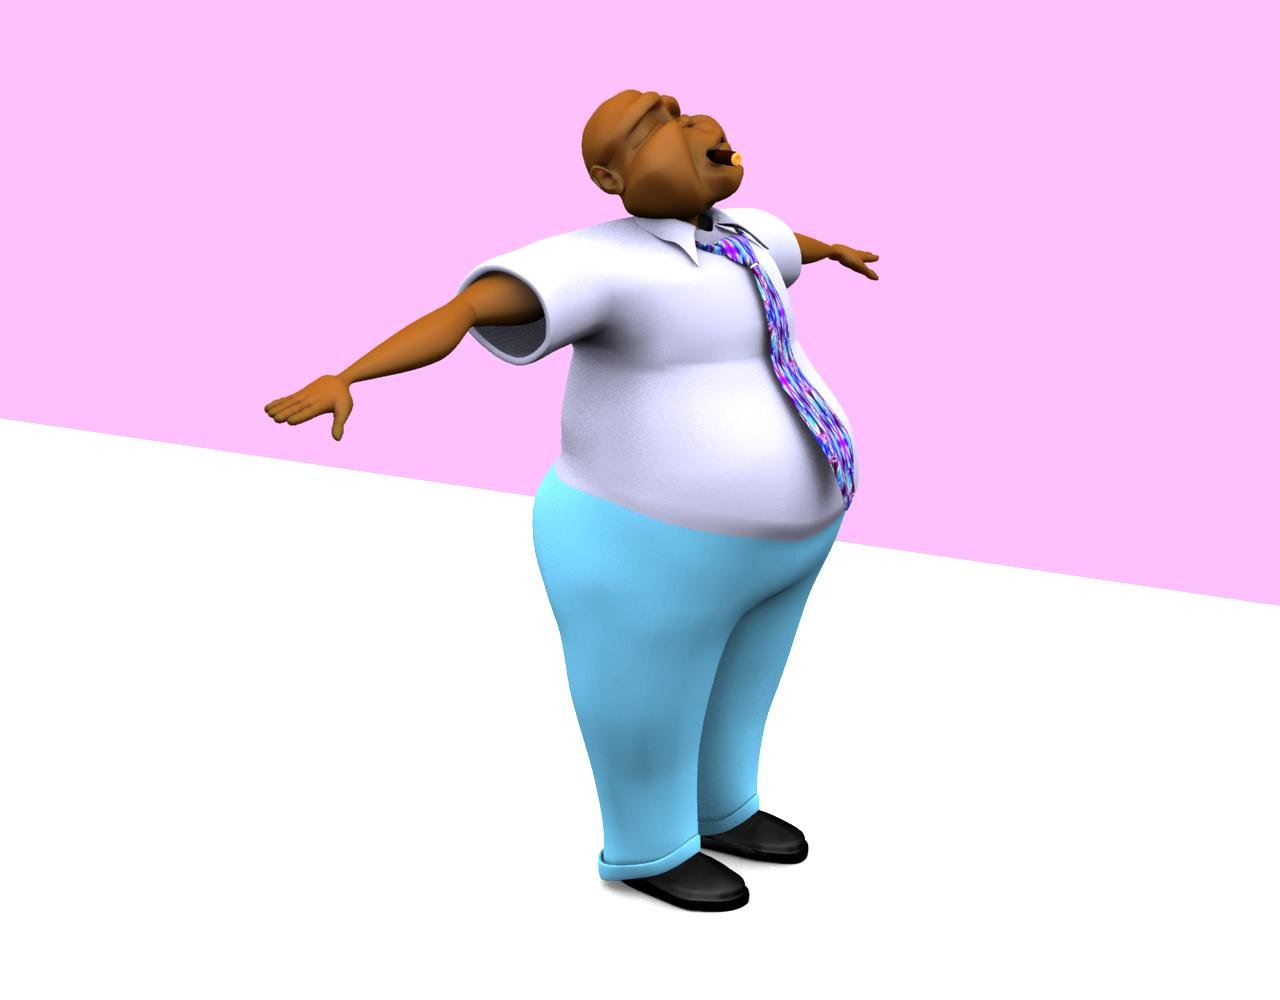
I decided to model the whole body and use some type of rig. I was making things to hard on myself the way I modeling him before. Anyways here is a rendering of the progress so far. I still have some modeling to do on the pants and I want to make some suspenders for him. Oh and never mind the loud tie I just used the first color map I could find.
-
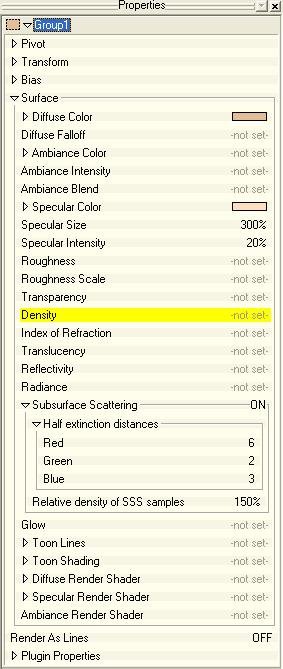
I decided to make sure I was giving you the right info
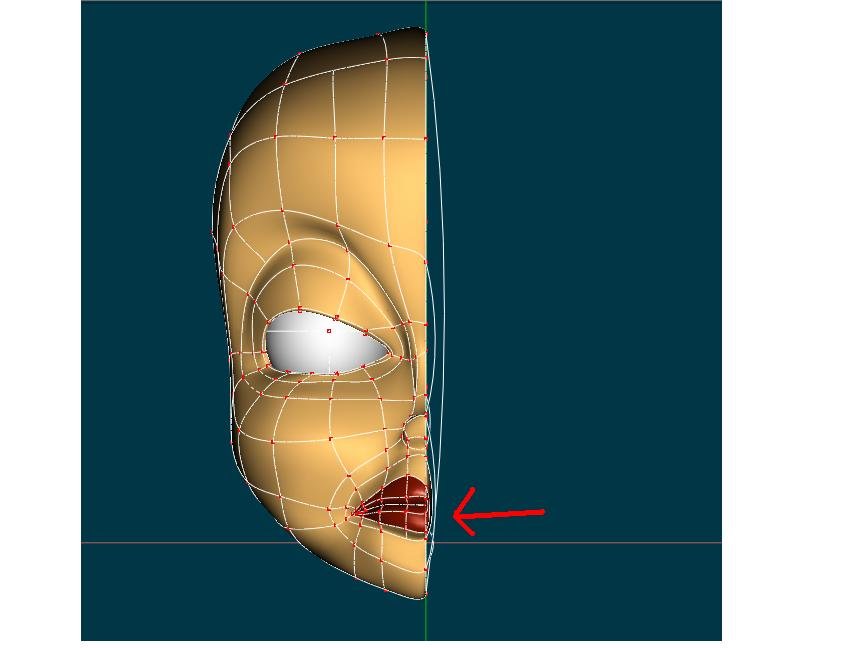
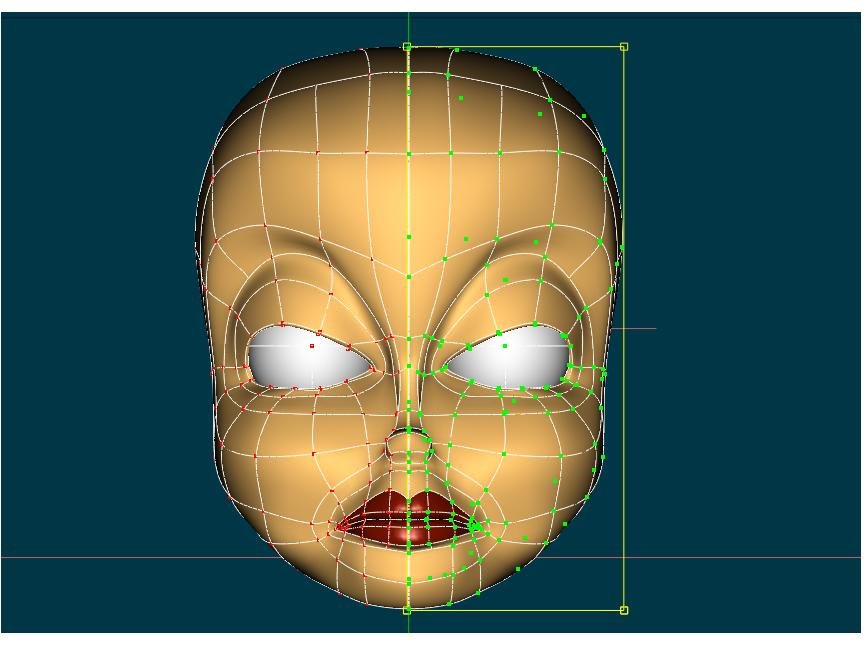
Here is screen grab of the the cho. with the extinction rates, density and size of the model in relation to the lights. It took 1 min 10 secs to render.
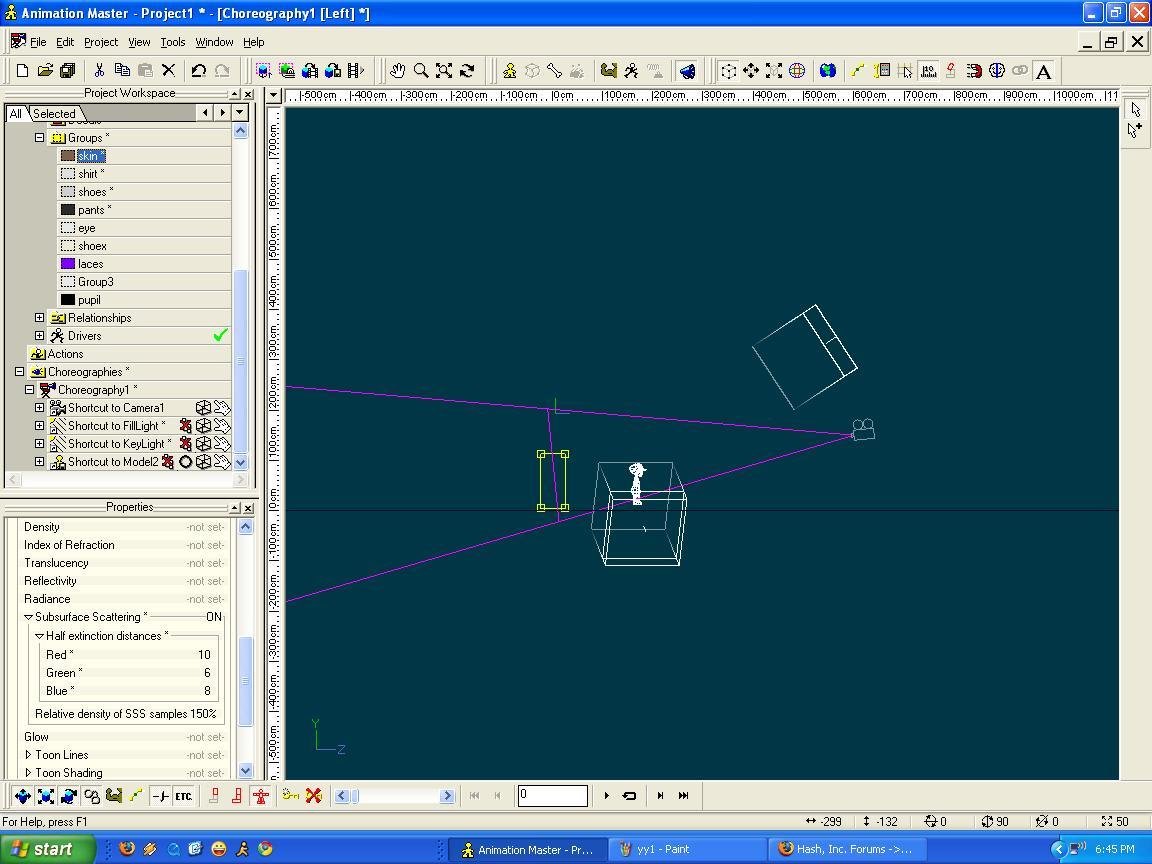
and here is the render (no textures)
-
Thanks guys
My rendertime with sss usually only takes a few seconds to 2 minutes depending on my lighting. My computer is 800 megahertz and I have 256mb of ram with a 10gb hard drive thats 80% full hehe. I usually only use 2 lights but on this I used Yves Skylights. The render time went up because of that. It took 16 minutes to render 9 passes. I always scale the model very small in relationship to the lights and then test the render until I get the look I want without the artifacts. this seems to cut down the render time considerably. I used sss for all of the sufaces and groups on the little kid characters I modeled and they only took on average 40 seconds to render with 1 pass.
-
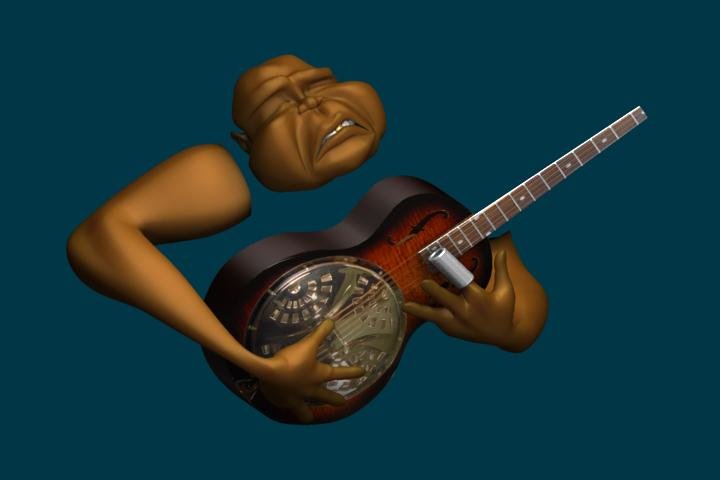
I was listening to blues the other day and came up with this character. This time I am gonna actually try and finish him and build a whole scene, I just cant decide if he's gonna be in a juke joint with a band or outside on his porch all by himself. Ideas and crits are welcome.
-
-
Looks good to me. Can we see a jpeg of her?
-
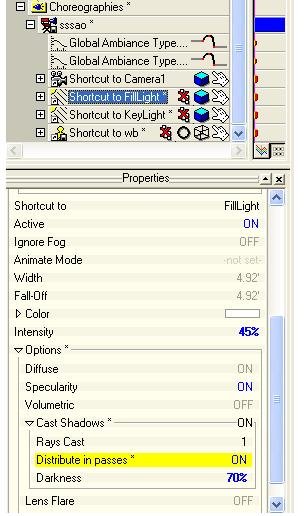
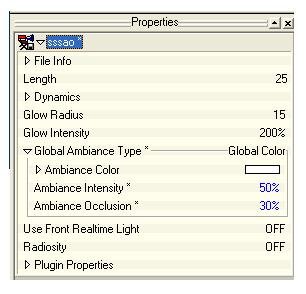
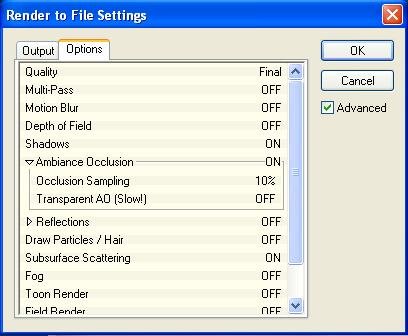
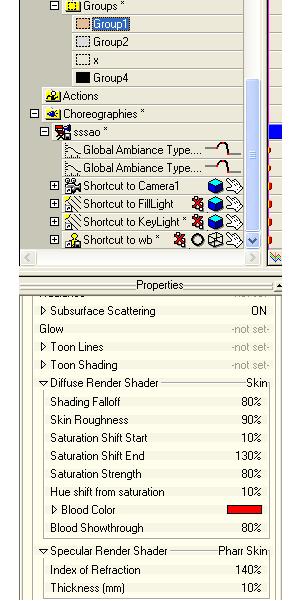
Hey guys I kinda forgot some of the settings.
On this model I decided to play with and use these shader settings for the skin. I dont know how they effect the final render cuz it was my 1st time using them.
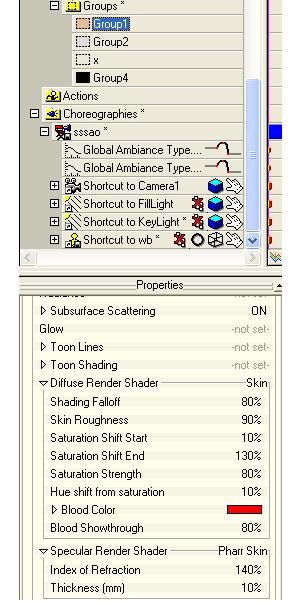
I also want to make sure I put the right light settings
fill light:
key light:
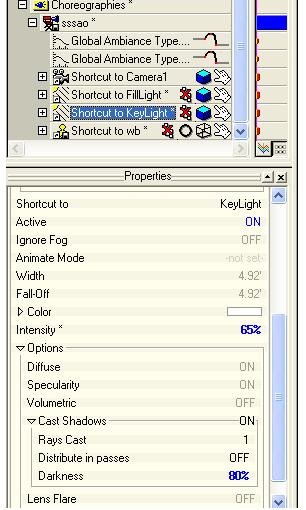
And these were the original settings for A.O.
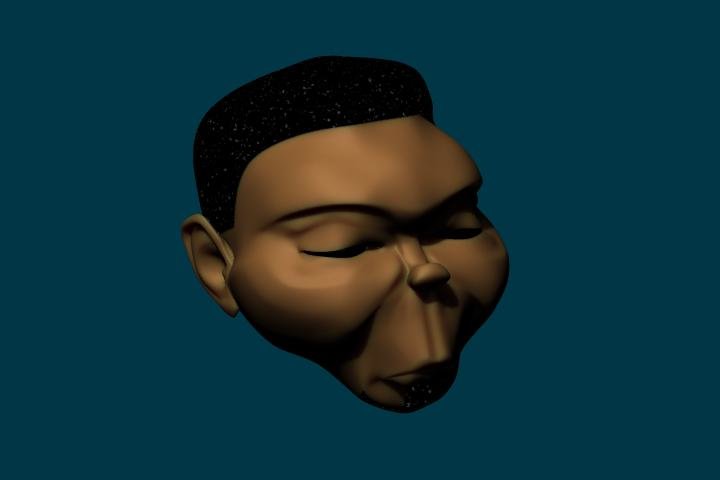
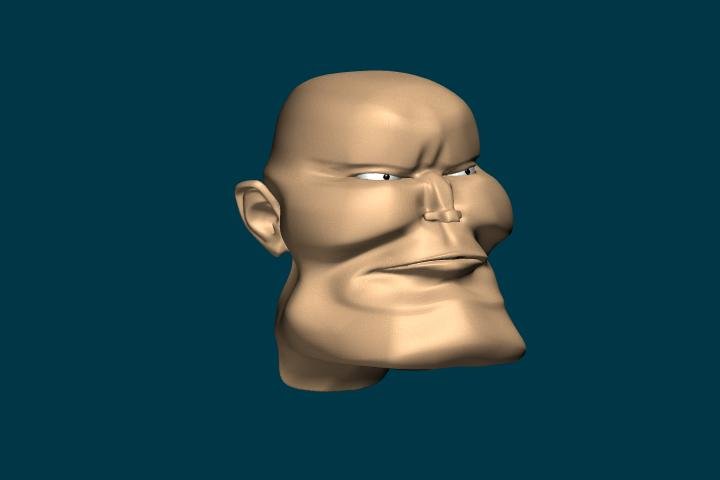
and 1 more face I dont really like it but the render settings are similar
-
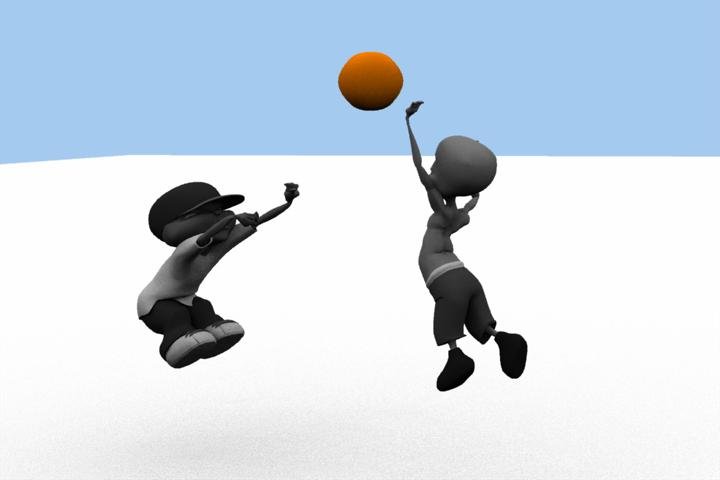
I always like your models, and they look inspiring for animation too.
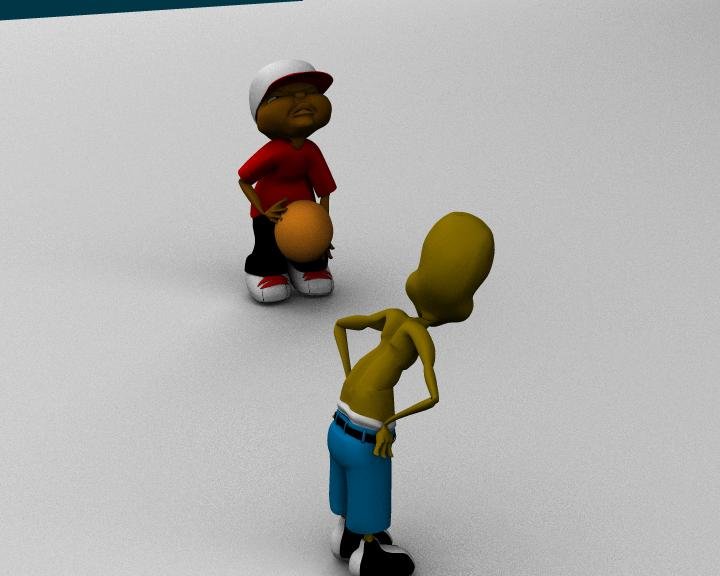
I like your image with the gray ground, but you need more light to show the face expreession
on the guy with the ball.
Michel
Thanks Animus
I used A.O on that and had the Ambiance Intensity set to 100% as well as the Occlusion. I am not quite sure how to direct the light in that case without causing there faces to be washed out.
-
I dont know what he's saying but the animation is very well done.
-
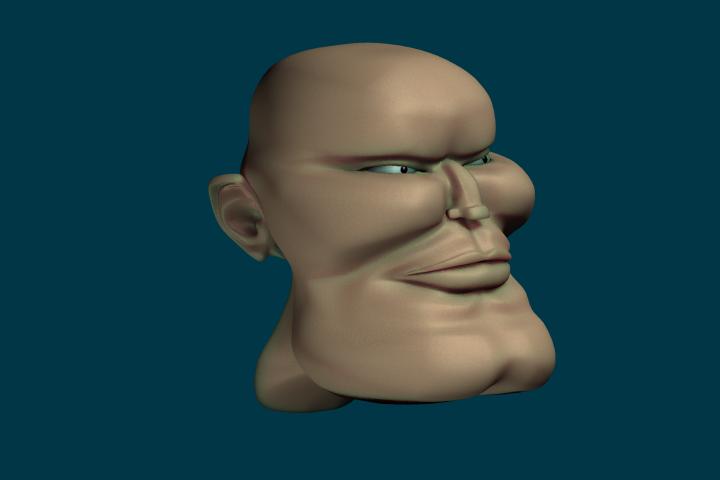
Thanks guys!
The model is actually rendered with both sss and a.o. I forgot to mention the ear was made by William Gaylord. Here is the link to the ear. Thank you William. I did tweak it a bit and took away a good many patches because my computer is very slow. Here are the settings for Ambient Occlussion in the choreography.
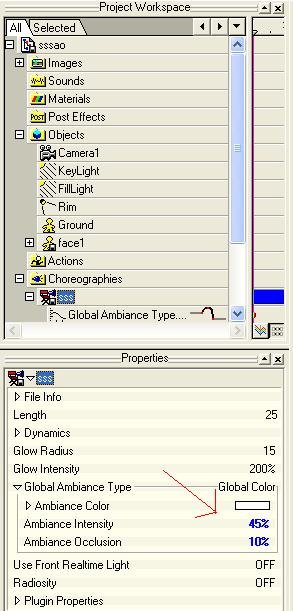
Here are the settings for the "face group"
And these are for the rendering
This is a choreography for the lighting I use. A simple 2 light setup. If you dont use a.o turn up the intensity on the keylight.
Here is a head (same one from a previous post) that has the sss settings that you can use.
-
I have been trying to understand rigging and animation lately so I have not done any new modeling aside from some tweaking to previous models. So I decided to play around and came up with this.

And these are the scenes I have been working with to test out bones and animation. The animation is pretty bad so I wont post that. Crits always welcome
-
It probably seems like a long time because of the amount of much work you have managed to get done in such a relatively short time. This a great example of proper planning.
-
Thanks, I was Just wondering cuz i heard it was supposed to have crashed.
-
Is this it? matrix


Eldar War Walker (Warhammer 40K)
in Work In Progress / Sweatbox
Posted
I am always amazed by your work!
Great model.