pwknox
-
Posts
124 -
Joined
-
Last visited
pwknox's Achievements
Apprentice (3/10)
0
Reputation
-
I have not used the 2008 or Squetch rigs, yet. They seem to intimidate me. But this one doesn't seem so bad so took Robby for a spin. I made him do a standing broad jump. The rig is great, the controls are intuitive and well placed. I didn't expect the legs to squetch, but for Robby this seems natural. Great job guys. At one point I seemed to get the knees stuck backwards. I cannot seem to get them to point in the forward direction again. What is the trick to this? The knee controls don't seem to do it. Thanks, Phil
-
Rodney, I like the JohnL3D method. I did a little more playing around with both methods. I learned a little more... JohnL3D method casts shadow. Render as lines does not. JohnL3D method deminished with distance. Render as lines does not; the line is just as thick in the forground as in the distance. I had a little trouble getting clean sharp lines with the JohnL3D method. It is probably my technique. I tried a cookie-cut and it does not render properly with muti-pass. Single pass it works well. I tried a color map with a transparency but it shows the patches underneath. I think that the best result was a transparencey map with a color map applied as well. Multi-pass can be used with a transparency map. Question: What is the difference between a cookie-cut and a transparency map? The cookie-cut seems to be a subset of the transparency map. Why have both?
-
Not that I know of. Shift-K is a hot key that will disconnect a them, but only one at a time. Sorry.
-
I just tried it as well and learned a few things. If you want it to look like a net then none of the splines can make patches. I did the grid wizard thing and got similar results to yours. Then I disconnected the splines and then got good results. Good luck.
-
I spent a few hours assigning CPs. The body works really well. What is the secret to getting the face interface to work? The interface is in front of the face but onle three of the controls work. The toungue roll works. The eye control at the top works. The rotate interface control works. None of the others seem to be doing anything. I unhid the geometry bones and they don't seem to be moving. Any hints? Thanks, Phil
-
Confound it. I can't reproduce the face high problem. Frustrating, good but frustrating. I opened a new project and imported my JD_pre-installrig model (the face interface was in the right place). I then tried running the install rig plug-in from a bunch of different contexts. They all worked correctly. Humpf! O well, I must have mucked it up before. Sorry to send you all on a wild goose chase. Phil
-
In the modeling window, bones mode, and actions it (face interface) is about half a "JD height" above his head. Ah ha... I think I understand what you are getting at. If I was in an action when I translated the "FACE Interface - Master" bone down in front of the face, I would expect it to be still up high after the install plug-in. Ummmmm..... I don't remember. When I get home tonight I will make sure I am in the modeling window\bones mode when I move the bone and when I run the plug-in. Thanks, Phil
-
Simple question this time. After running the Install Rig plugin, I noticed that the face controls were back above the head. I assigned the CPs. How do I get the face controls back down so that I can play with them? I am in a action now. Phil PS: I am not sure that this is the place for this question. Edit: I started poking around. In the "Constraints (do not touch) Relationships" I found a few constraints on the "FACE Interface - Master" bone constraining it to the "head_control". The enforcement was set to 0%. I set it to 100% thinking it was an oversight. Well, I figured out why it is labeled "do not touch" Ouch! Things went wacky in a hurry. I will now sit down and wait patiently for your answer.
-
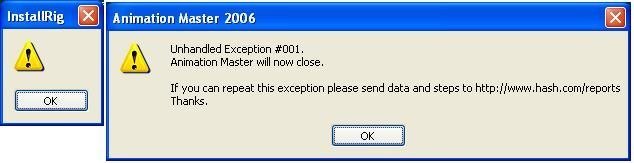
Something I tried which avoids the deadly yellow triangle. After I translated the "Face Interface - Master" bone and before I ran the install plug-in. 1) "Save As" the JD_export model and name it something else. 2) Start a New Project 3) Import the model you just saved. 4) Run the Install Rig plug-in No yellow triangle this time. Strange. Good but strange.
-
I am getting the dreaded yellow triangle when I run the install rig. Here is what I did. 1) Reboot computer (just to make sure) 2) Start AM 13s 3) Open new project 4) Import "JD_export2" 5) Delete Install Poses from model, delete install relationships 6) Translate "Face Interface - Master" using the translate manipulator (thanks for the clarification). 7) Run the InstallRig plugin from the model window. ZAP! JD_export2.zip I re-downloaded the install rig this afternoon (5/6/2007). It was in the "Getting Started" post. It is called "13s_Posable_Five_Finger_Squetch_Rig_05_02_2007_installation.mdl". Any ideas? Thanks again, Phil PS: I feel like I'm being a pest.

-
To: Mark, That fixed it perfectly. Thank you so much for taking the time to track it down. To: Mark and David, I would like to thank you both for donating so much of your time to providing such a great tool, making it easy to use, and then teaching us how to use it. Thanks, Phil
-
Here is the Project and Model if you need it. pwknox_RAWM_2.zip I really appreciate you looking into it, Phil
-
OK. I have completed Steps 1-7 again and I have a stupid question. When translating the "Face Interface - Master" bone, I am not sure what you want here. 1) If I simply select the bone, hold the CTRL key and drag. The interface and the camera stay put and only the "Face Interface - Master" bone moves. Is this what you want? 2) If I simply select the bone and drag. The entire interface moves. Is this what you want? 3) If I select the bone and whack the "n" key (putting the bone in translate mode), hold CTRL key and drag in the Y direction. The entire interface moves. Is this what you want? What is the purpose of holding the CTRL key when dragging bones? What are we trying to make it do? The picture you provide shows the bone being selected but does not show the final product. Where is the interface supposed to end up? How do I know if I did this step correctly? Thanks for your help, Phil PS: I am on a Windows system. Would this make a difference?
-
I scalled the head in step 5 a little larger so that the eyes would fit. I learned this from the last time I did an install. The eyes still didn't fit, so I made the head bone larger again. This seemed to work well. My question has to do with the mouth_right_corner_target and the lip_right_corner_geom. In your example, the geom bone and the targer are in the same place. In my exampe, they are about a centimeter and a half apart. Is this a problem? I am not sure why the targets are visible at this point. They cannot be manipulated independently with the pose sliders. Thanks, Phil Edit: Should I be lining up the target or the bone? I suspect the bone, but want to make sure?
-
I had a similar experience with 13s. This last step Exception faulted on the export model step. I figured that I had done something wrong. So I fiddled this last step a bunch of times. I re-downloaded 13s. I got the latest version of the HTX. I got the latest version of the Rig. I thought I had a working setup at one point. After assigning the CPs in the face, I noticed that none of the face poses work. The NULLS move but they don't move anything else. The face rig controls are in the right place but the boxes and words are sticking to JD's forehead like a tiera. I figure I must have a corrupt file somewhere (or royally goofed something up). I think I will start again from Step 1 in a new folder.