Tralfaz
-
Posts
899 -
Joined
-
Last visited
-
Days Won
1
Content Type
Profiles
Forums
Events
Everything posted by Tralfaz
-
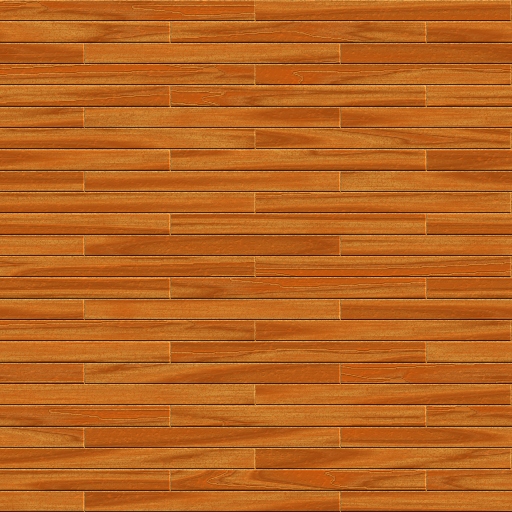
Found a pretty neat program that creates seamless textures from Spiral Graphics ( www.spiralgraphics.biz ). There is a free program called Wood Workshop that allows you to create seamless wood textures with an almost limitless control over color, texture, pattern, etc. You can create the texture in just about any size you want, then export it to a .jpg, .png, .etc. They also have a program called Genetica 2.5 which allows you to create all sorts of other seamless textures, like brick, marble, cloth, wood, stone, metal and lots of others. The Pro version also allows you to create atmosphere and hair textures. They have a downloadable 30 day demo of Genetica. Here is a floor texture I created in about 15 minutes using Wood Workshop. Be interested in hearing what others have to say about these programs... Al

-
I think it was the use of the actual video that bothered me the most. Had you done something like South Park does, (and I am a huge South Park fan) it wouldn't have been quite as bad. Or if this was an 18+ forum, I probably wouldn't have said anything at all. Aside from all that, I agree that the animation of the devil was quite good. Al
-
I have been debating about not responding to this post or saying something about it. I have a pretty good sense of humor and can laugh at just about anything, including death. However, I thought this video was very inappropriate for A:M Forums. This is must my own personal opinion... Al
-
It is indeed the community-window. Drove me nuts until I closed the community window. I hardly hear bells at all any more, just voices... Al
-

Shaggy Takes A Stroll In The Real World
Tralfaz replied to Tralfaz's topic in Work In Progress / Sweatbox
gazzamataz: Not sure why you would be able to download only have the video. The skipping that Shaggy does is the standard Skipping Action that comes in the Action library. agep: I used the Icarus pdf User Guide when I created the camera tracking solution. It was well laid out and pretty easy to follow. I first used their Distortion app to remove any distortion that was present in the original video. Next, I used the undistorted in the Calibration app to calibrate the camera, determine the focal length and create the tracking solution. The solution was then used in A:M. Ethan: Here is a video example of Shaggy skipping along with a stationary "Lazy Dude". The tracking solution looks pretty good with a stationary object in the scene. Starting to get pretty excited about playing around with this stuff. My next test will be take some video that I shoot and try to integrate the CG into it. Thanks... Al [attachmentid=23239] test2b.mov -
Glad that worked for you. Just out of curiosity, what was the problem that required you to roll back to version 'n'? Al
-
If you go directly to the FTP site from the Hash main web page, then go to Updates -> Windows -> Am2006 -> Old, - or - ftp://ftp.hashmirror.com/pub/updates/windows/Am2006/old you will find a copy of AM2006 dated 11/09/2006, which is the same date that WillP posted that 13.0n was available. It may be worth a try downloading that version and see if it is the one that you need. This is a Windows version. Hope this helps... Al
-
Shaggy Takes A Stroll In The Real World
Tralfaz replied to Tralfaz's topic in Work In Progress / Sweatbox
Thanks Paul. I am more and more amazed at what this software is capable of. BTW, I posted a link to this thread in the live action thread. Al -
Downloaded the Iccarus software which analyzes video and re-creates a camera tracking solution which can then be imported into A:M. The video clip is from the Iccarus tutorials. I followed along with the documentation to create the tracking solution and exported the track into an A:M v9.5 project. The project loaded just fine into A:M 13. Then took Shaggy and added him to the chor and had hip skip merrily through the scene. For a first shot at doing this, I think it turned out fairly well (as far as the camera tracking goes). I know the lighting does not match the scene and Shaggy is too crisp and sharp compared to the video, but it was just a test. C&C always welcome... Al [attachmentid=23211] [attachmentid=23210] test2.mov
-
Would it be possible to load a song into something like Sony's Acid software and have it determine the beats per minute? They have a free version is available for download. Just wondering... Al
-
Meet Jedi Dex. He is the second character in my Star Wars Fan Film. The first character is the AT-AT. I recreated the body from a Jedi model that was originally downloaded from Sci-Fi 3D, then converted to an Anim8or file. The face and head come from the Dex A:M model. There are still a lot of things that need to be done to Jedi Dex, like fixing a lot of bumps, creases and proportions, texturing and rigging him. The colors you currently see were used to differentiate a lot of the different groups in the model. I did play around with texturing his vest though. C&C always welcome... Al [attachmentid=22990] [attachmentid=22991] jedi_dex_360.mov
-
Well, I had a chance to try the tutorial William. It was excellent and easy to follow. Not sure if I have done something wrong though, or if this is normal or not. I was working on a vest, and set up my groups (front, back and flap). Flattened each one individually and stamped them with the blank.tga file that I created. When that was done, I took the screen shot and brought it into Adobe Elements, and scaled it up to a width of 2000. Since constraints was turned on, the height ended up at 1499. Saved the image back out as a .tga file and replaced the blank.tga file with the new file inside A:M. When I rendered the vest, I got what looked like some type of distortion or overlapping where the front meets the back. Went back to the decal, and the image looks much smaller than the original blank image. Any suggestions? Thanks... Al Vest with distortion [attachmentid=22749] Flattened vest (flap, back, front) [attachmentid=22751] New .tga loaded into UV editor [attachmentid=22750]
-
Thanks for the link to the tutorial William. I am going to follow it through and try it out on my model. Just curious, where exactly do I find the video demo? I found CDs for sale, but did not find any demos? Thanks... Al
-
Hi Apophis: I guess my answer is going to be pretty simple (sort of) as I have never used Maya. I have used other freeware software modelling and animation programs. A:M is my first commercial modelling and animation program. When you get to College, what software will they be using in the course you will be taking? Or is it mainly theory that is software independent? If your course is catering to Maya, then I would say stick to Maya. If the course is catering to Animation Master, then I would go with A:M. If your course is software independent, then I would say go with whichever software you are most comfortable with. I would think that your time would be better spent learning the character animation aspect of your course, then having to try and learn the software at the same time. As for employers, I don't think they would really care too much about which software you used to create a demo reel. They will be looking more at the animation quality and talent of the individual. You can always learn a new software package. Your future employer may not even use Maya. That being said, there are some pretty smart folks around here who can answer just about any question you may have about A:M should you decide to go that route. The decision is ultimately yours. I hope this has helped a bit. Best of luck in your future endeavours... Al P.S. The A:M is awesome!!
-
Dang, that's great work!! Al
-
I've searched through the forums and found some great tutorials on flattening models for decal preparation. I have had some success using this technique, but am not sure how to proceed with a particular model. The tutorials that I found deal mainly with the face, and not the whole head. Can someone explain or point me in the right direction on how to flatten an object like a pair of pants for decalling? Is it possible to flatten the pants so that both the front and back of the pants are visible at the same time? I tried flattening and decalling the front first, then the back, but you can definitely see where the different decals were applied to the two areas. Also, since this is kind of in the same area, what kind of tools does 3D Painter allow you to paint directly onto the model with? For example, can you airbrush directly onto the model? Can you create color and bump maps right on the model? Are there any tutorials (preferably video) that shows this process? Thanks in advance... Al
-
Had time this evening to try some of the suggestions. The leg is looking a whole lot better now. As suggested, I added the 5 point patches, reduced the number of splines overall in the leg and removed a ring around the knee. I will do final tweaking and fitting of all the parts of the character after they are brought into A:M from Anim8or. Thanks once again for all your help... Al [attachmentid=22647] [attachmentid=22648]
-
Thanks everyone for your quick replies. I was hoping to be able to bring in a model that I already had from Anim8or and just clean it up. I had already cut down on a lot of the polies in Anim8or before exporting to a .obj and then importing into A:M. Not quite as easy as I had hoped... I will take a look at this tonight when I get home from work. Al
-
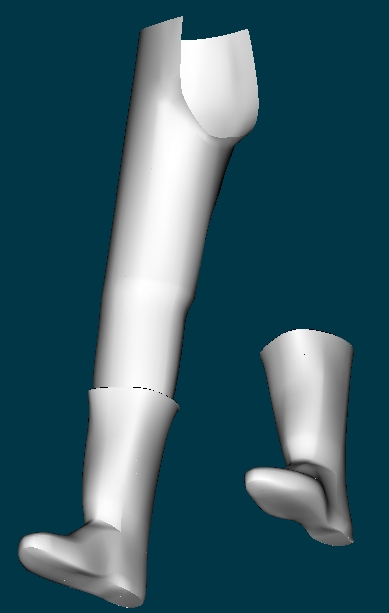
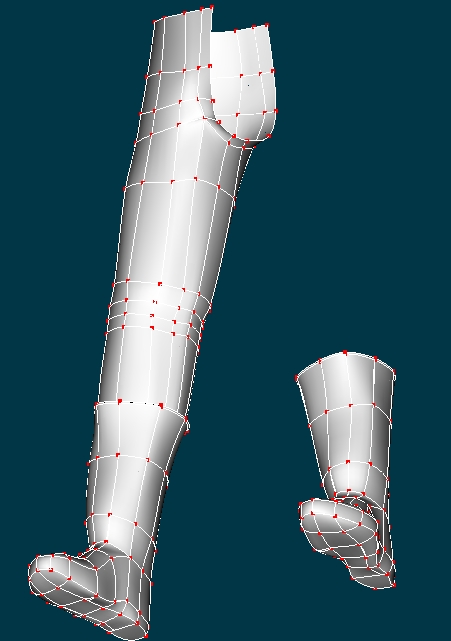
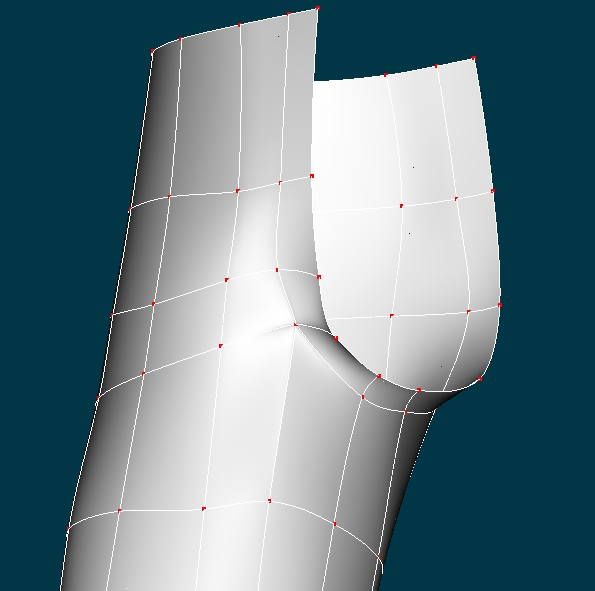
I am working on the legs of a person, and I have this unwanted crease that I just can't seem to get rid of. I have tried deleting CPs and re-connecting them. It will get rid of the crease in one direction, but then the crease will appear in a different direction. For instance, If I get rid of the vertical crease, it will appear horizontally and vice versa. I have attached a shaded view, shaded wire view and a close-up shaded wire view of the problem area. Any help or suggestions would be greatly appreciated. Thanks... Al [attachmentid=22630] [attachmentid=22629] [attachmentid=22631]
-
Excellent video Stian. Very cool to see the car appear before your eyes and how it was created. A tutorial on how you model your cars would be a great asset that anyone would be happy to have. Al
-
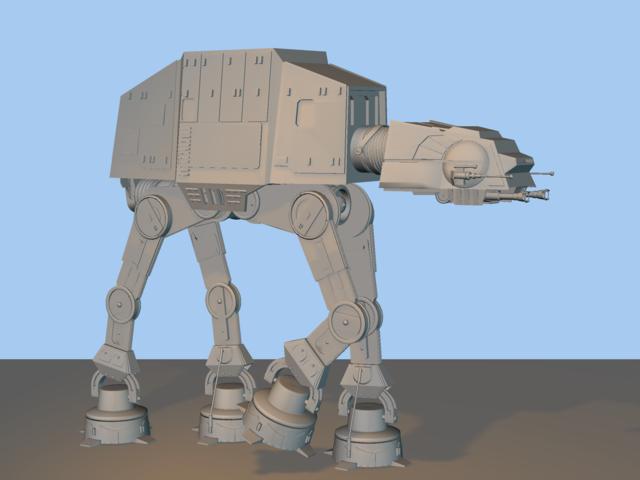
Update: I fixed the legs bowing out at the knees and added more body and head movement. Not sure if this helps to convey that the AT-AT is a heavy piece of moving machinery. C&C always welcome... Al [attachmentid=22525] at_at.mov
-
Hi Bruce: I was trying a full edit on the first post in the topic, as shown in the picture below. I can't seem to find the description anywhere that it can be changed. I tried hovering over all of the icons looking for any clues there, but didn't find anything. This is going to end up being one of those things that is staring me right in the face. I am using FireFox 1.5.0.8, in case that has anything to do with it. Thanks... Al [attachmentid=22499]
-
Is it possible to change a topic description once the topic has been posted? The reason I ask, is that it would be nice to update the topic description when I have updated a WIP. For instance, in my AT-AT WIP, when I posted an animation of the walk cycle, I could have changed the topic description to something like "2006/10/21 - Created first basic walk cycle". At the Anim8or forum, you could do it be editing the first original post, and then change the description there, but haven't seen anything like that here. Thanks... Al
-
Thanks once again Jim. I found out what the problem is (or at least appears to be). In the Render Options, I had the Gamma set to NTSC/RBG which gave it a value of 2.2. When I set the Gamma to none, the value went to 1 and the render came out fine. The render also looked okay when the Gamma was set to PC. I remember reading about the black backgrounds being caused by the alpha setting, but I can not for the life of me find it in any of the render settings. I looked at both normal and advanced screens. Thanks... Al [attachmentid=22494]
-
Really nice job on the cars Stian. Would it be possible to see a wire of the model? I agree with Dhar about being able to see them animated by Dustin. Thanks... Al