Sean delgatto
-
Posts
76 -
Joined
-
Last visited
Content Type
Profiles
Forums
Events
Everything posted by Sean delgatto
-
Having issues creating the simcloth effect. I followed the instructions in the AM book, set up the force and turbulence. And yet when I clicked on simcloth simulate, nothing happens. I've looked for video's but there are usually non applicable. Or they are about what do do after creating all the stuff. Do you guys know a link that will show how to work in AM vrs 13 with Windows xp sp2? Meaning that when they go to a link that I should see the same link in my project as well Thank ya -Sean
-
Aha! So that's why I could barely see the problem (uhh...couldn't see it at all). I use a CRT. Definitely more noticible for sure but even if its a regular gradient I still see it and when What ever it is that I am doing is converted to DVD then plaid on a Tv whether it be CRT or LCD I still see it. I'll see what I can find out about OpenEXR
-
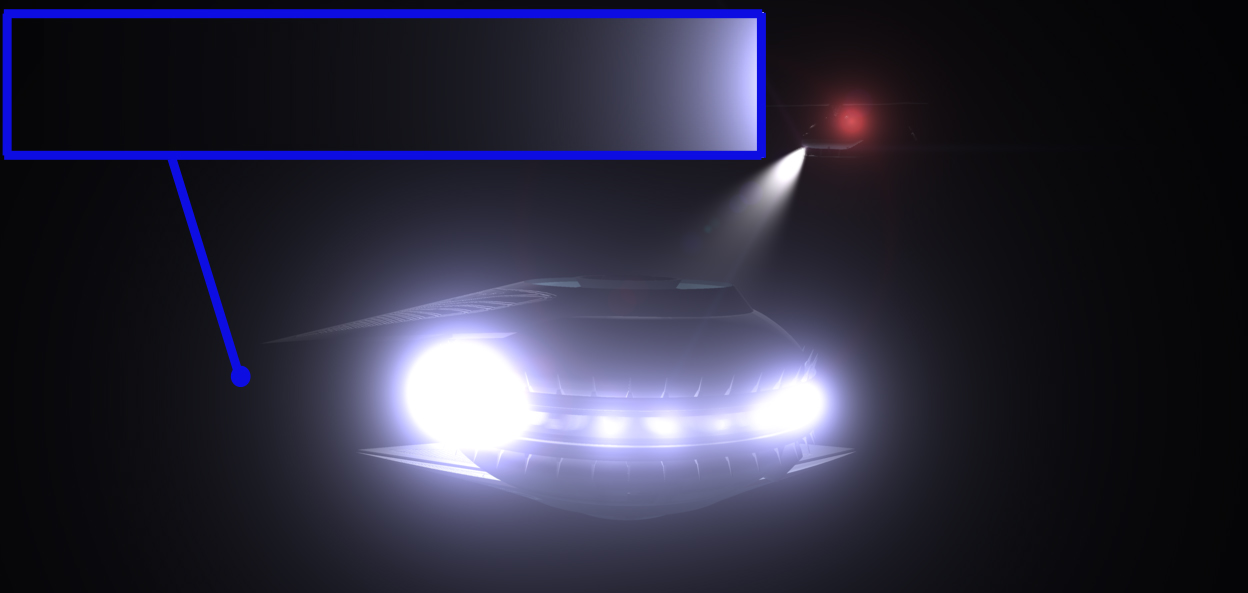
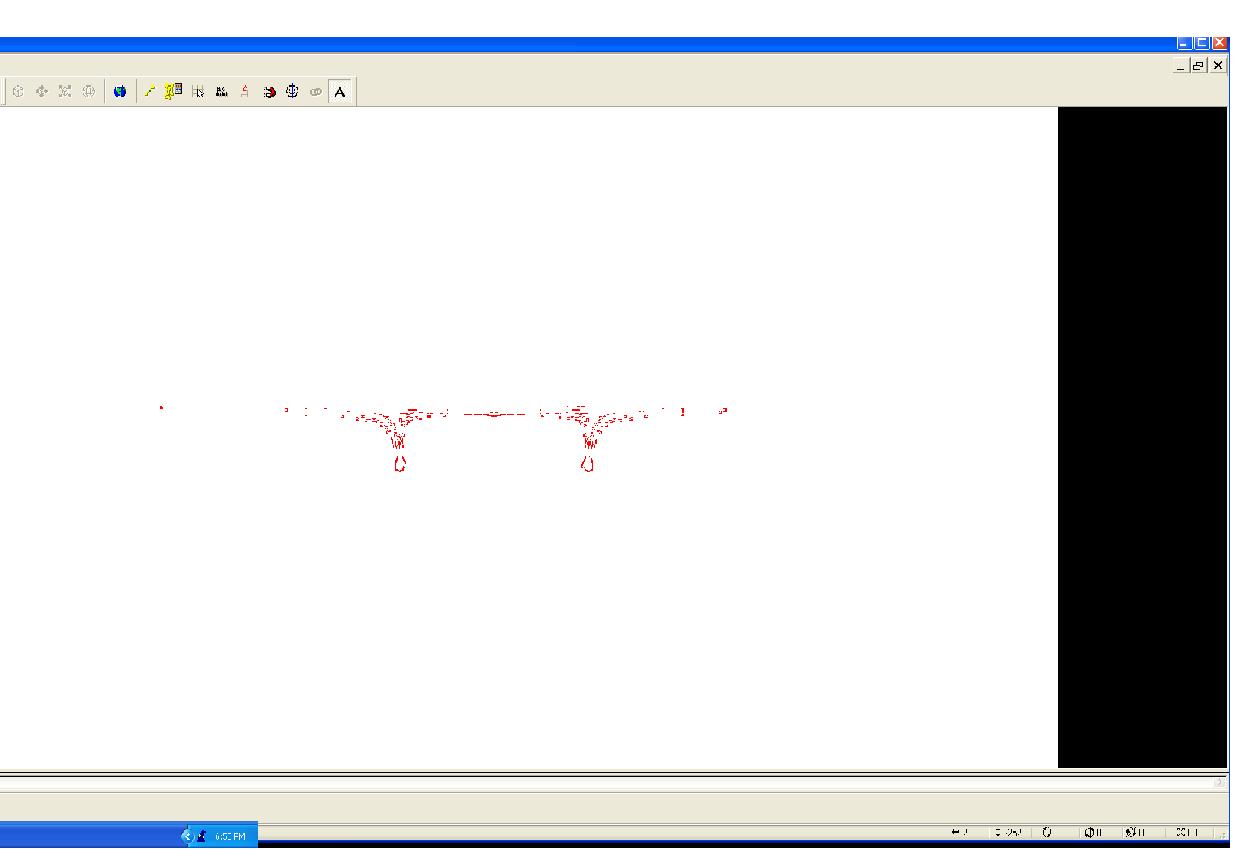
Have been having this issue for a while now and not sure how to get rid of the problem. Basically you see striations in every gradient, particularly bad in areas of extreme contrast. Not sure if its a rendering option, a card issue, or what. No matter what card, amount of memory, or processor I have used over the past, and they are varied, I get the same results no matter what. Info on PC is an Intel Duel core 2.6 G, 2 gigs of ram, 1.9 T hard drive space. Also have tried a variety of passes and between 2 passes and a 100 absolutely no difference. Again if anyone can help me I really would appreciate it. Also side note, when doing alpha layer rendering, I noticed that if there was a light source on an object similar in ways to the one in the attached photo, that it cute out an outline around the object rather than also include the light source and glow. Thats problem number 2. Again if anyone knows the answers to this I would be most grateful. Thanks, Sean

-
2001 - A Space Odyssey - Modelling the Discovery
Sean delgatto replied to Tralfaz's topic in Work In Progress / Sweatbox
Unbelievably fantastic! -
Looks pretty good. Maybe I read to quick but did you have a story synopsis? Im sure as far as everything goes it should be just fine. Some times simplicity can be your best friend. Look at Mickey mouse, especially the first mickey mouse, he's all simple geometric shapes. best of luck with the project.
-
I was able to follow the tutorial and get a rig that you were able to which is great and I think I got my head around what a null does. Though I noticed that when I do something like "lets take a walk" type of animation that its more difficult because the feet still seperate from the legs if you over step, or the body does something odd. Im still going to have to play with it and see if I can figure it out. I just got done with a 12 hour shift so my brain may be a little spent right now.
-
Ah found the link, Was able to get to the video, Very well done! Im very impressed with the tutorial. Most online tutorials sound like they are doing the recording next to a jet engine or something! Thank you so much!
-
"In the chor Null2 wont' influence anything since it is a child of the other bones, not a parent." Yeah I tired making it a parent, or side by siude with the foot bone so to speak, but when its a parent it moves the foot but not the leg. I feel like there is something I am really missing on this one as its the final key to getting this stuff to work. Once I get it I get it and I feel close. So what is it about setting up a Null that makes it so much different then setting up a regular bone? Do you have to do it in a different window than Bone view. Is it done through a Create pose window? I right clicked everything as well as compared with models that have nulls and I have no idea how theirs work but mine doesnt. Even weirder is that the skelital structure is often seperate from the set up with Nulls. Again this is just one of those things that really arent explained well in the book, cause aparently you cant just "Right click select Null" and expect it to actually work. Watch the "Simplest IK leg" video in the tutorial link in my sig for an easy to make leg setup Im not sure what you mean by Sig. I went to your website and looked around, as well as your you tube channel which had some really cool stuff by the way! Is there a link I missed?
-
I have an issue with nulls, I have a bone, foot, that is already assigned to the control point and I created the null. And even if I have Attached to parent neither on nor off mater, once I try and control the null from the choreograph nothing happens. Basically I grab the cross and rather than move the foot, the cross just slides around. Check out the screen shot and see if there is something I am missing cause Ive worked with Poses and Bones before, but never had set up a null. Its my last peice of the puzzle then on my way to animating. As far as attached to parent, if you make that chenge do you have to re drop it into the choreograph?
-
Yep Definitely Jeff, Looking forward to talking with ya! -Sean
-
Filip, I've tried sending a message to you directly but that function doesnt seem to be working so maybe this will work. I have questions about the alien you designed, the one with the attena and spots runing acrross his head and down the back. Would it be cool if we spoke more one on one, my email is sean_delgatto2001@yahoo.com My contact info is always public as I try to make myself as available as possible anyway.
-
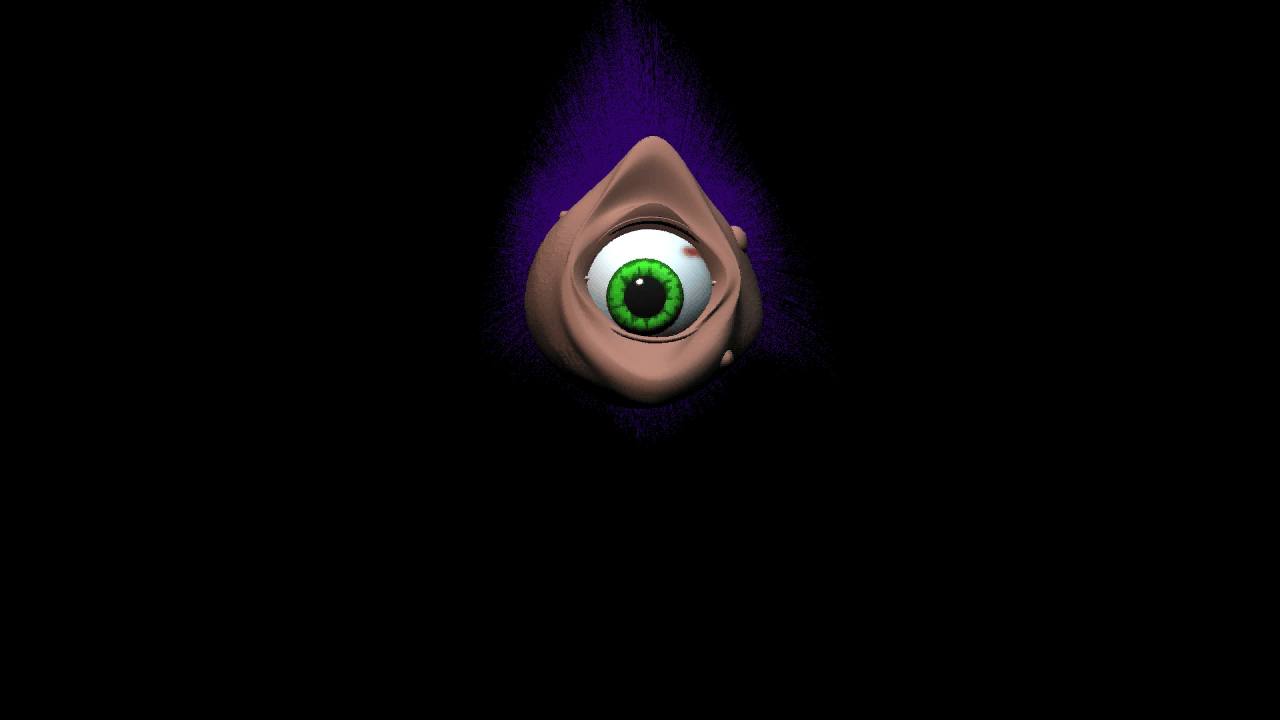
I finally hit that spot where I spend more time creating than figuring stuff out! Im having a blast! I created a little one eyed critter that I was experimenting with expresions. He is simple in design so that I didnt wast to much time fudging but I can still practice the subtleties of expression.
-
Oh you got to be kidding me HA HA HA HA LOL!!!!!!!! That Was so easy! Totally over looked it! Talk about not seeing the forest form the tree's! I think thats why one should always take breaks cause you tend to tunel vision. Thanks for being there Again!
-
And I tried going to settings for the poses and turning Display off. Basically now I cannot create any poses for my character that will work in the choreograph. I dont get it.
-
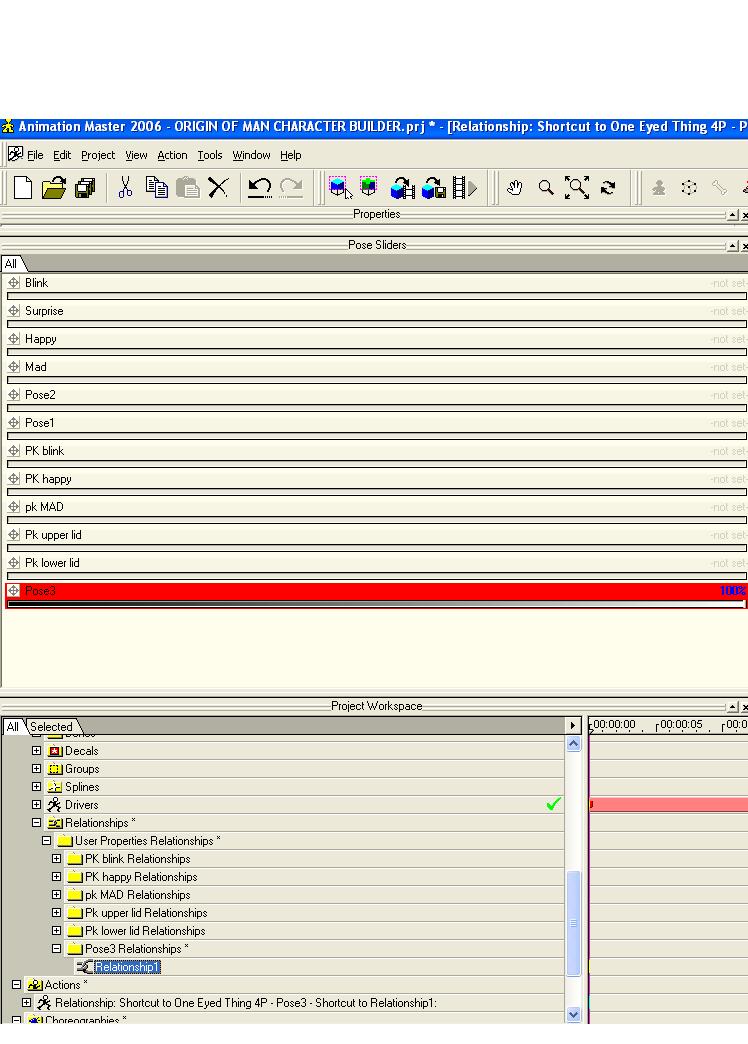
I need to actually remove poses from a project and start over however when I delete the relation ships, I go to set up new poses yet in the pose sliuder box I see that the old ones still remain. AND worst of all it effects the new poses I make. Say I do a pose where the character smiles , the cps hardly move like they demonstrated when in mucle mode setting up the pose. Ive done this many many times but never ran into it before. here is the screen shot. note that in the Relation ships below you see the pose labled PK Blink, PK Happy and etc but yet in the top pose slider box you see the same ones PLUS blink smile and etc? Tried everything I knew, how do you get rid of them?
-
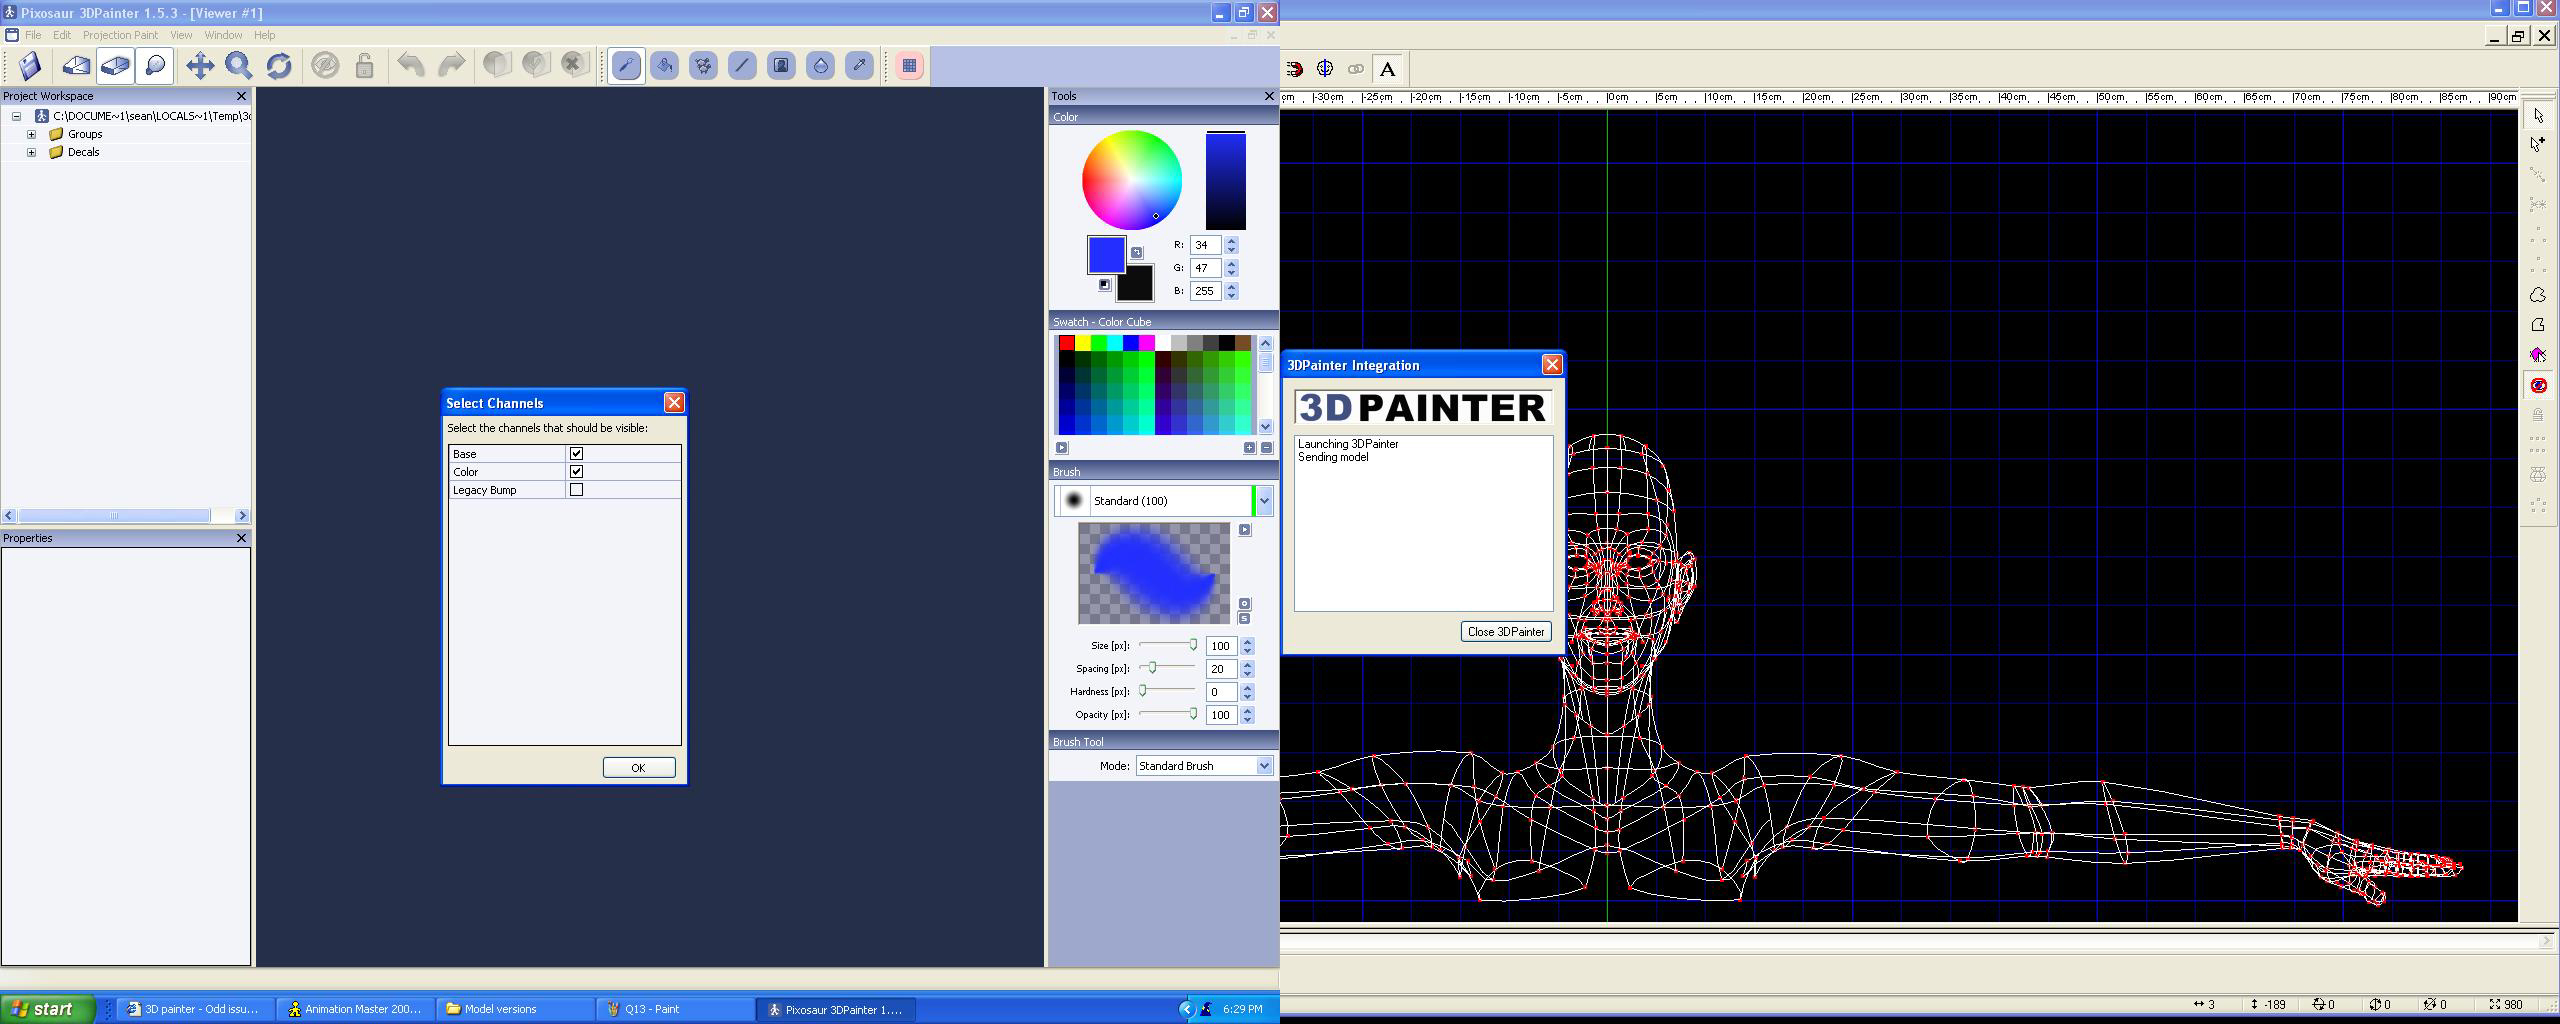
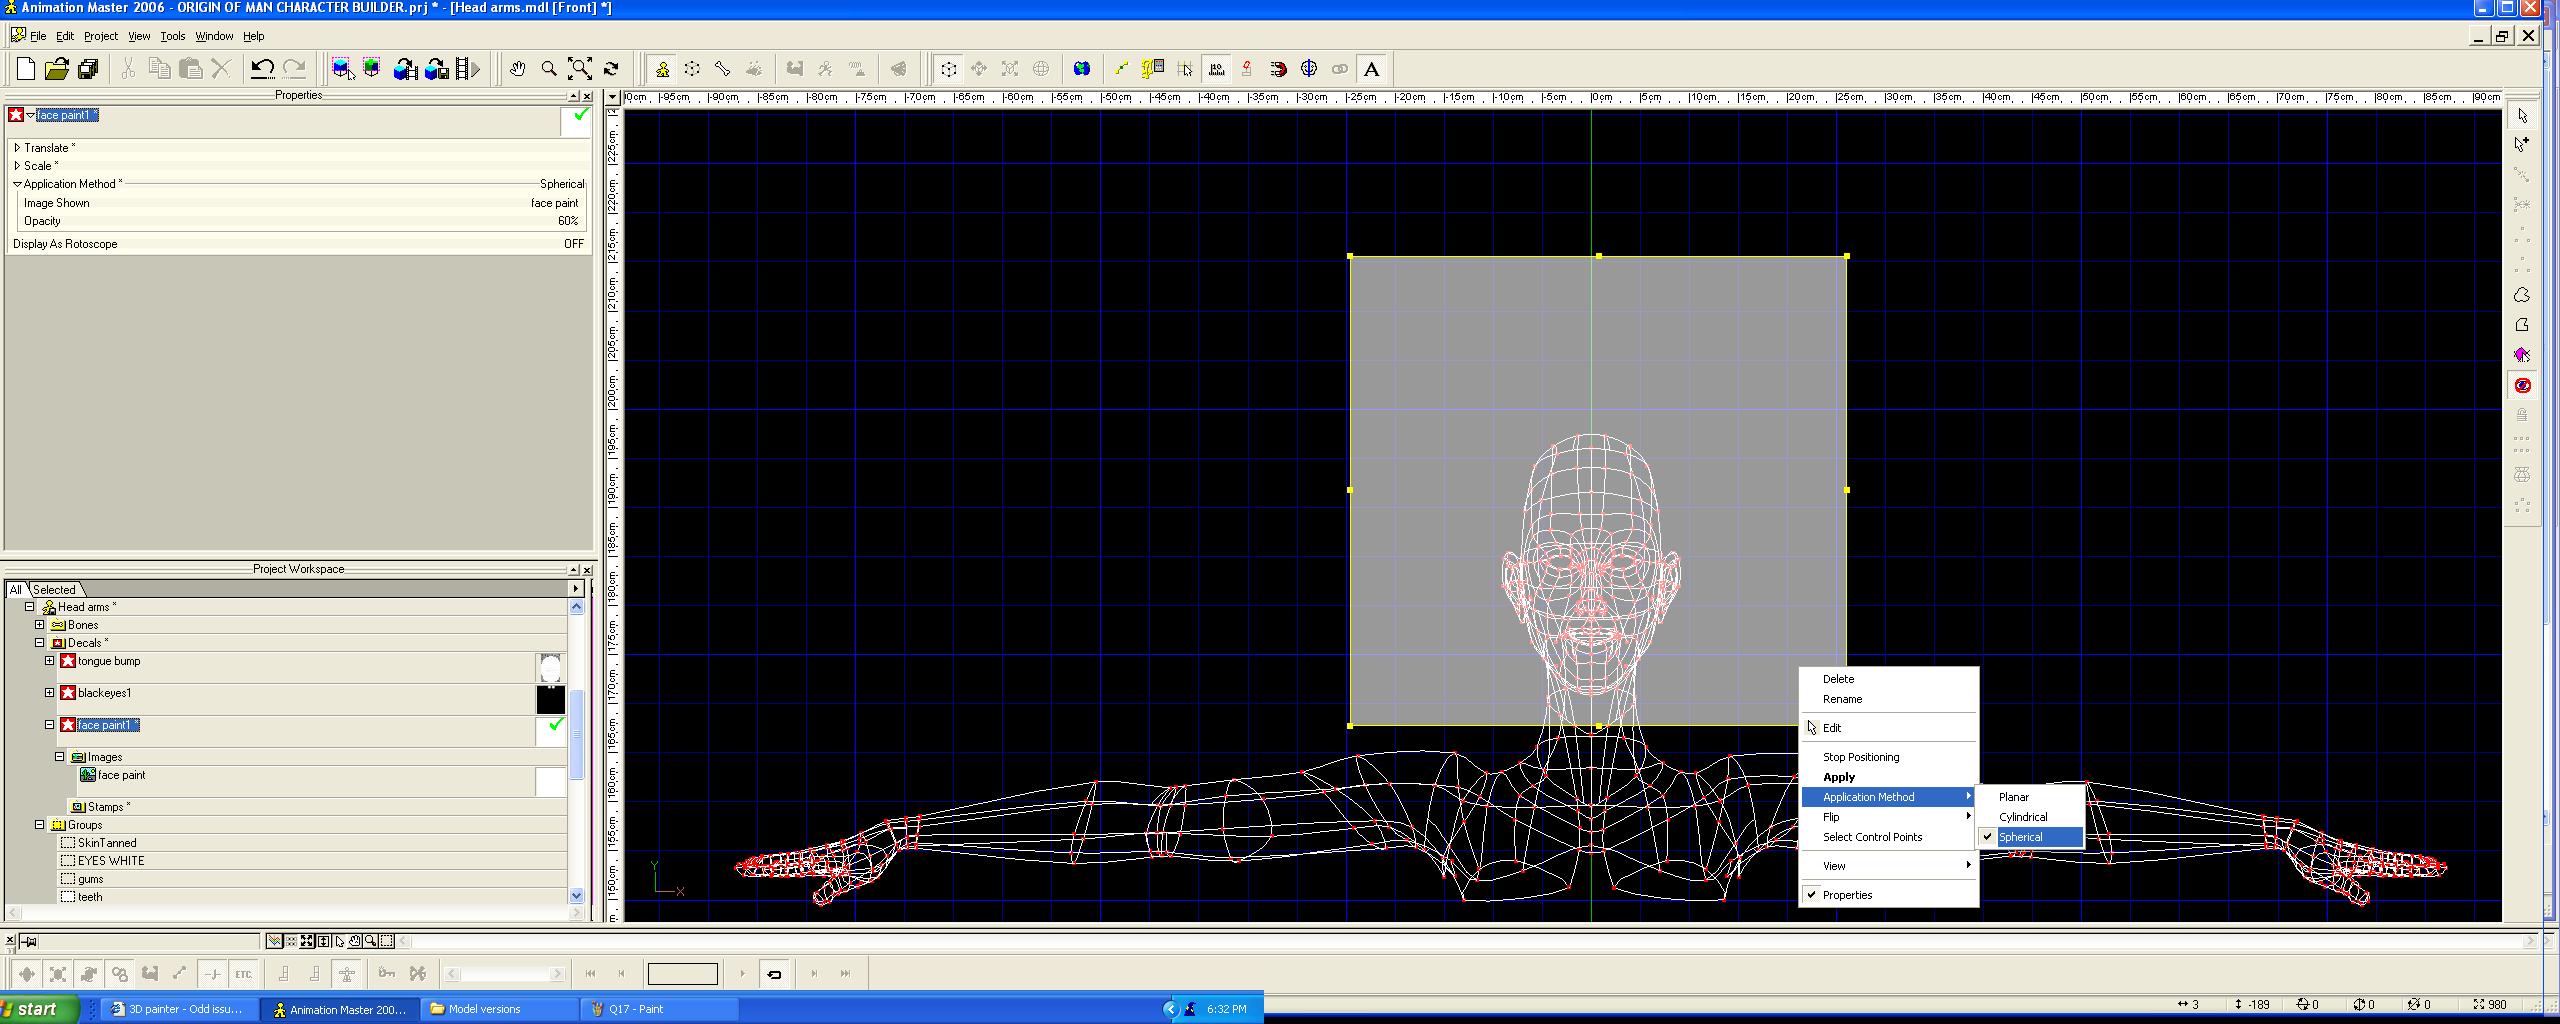
Finally got it to work. Couple problems were since it was a borrowed model for practice I didnt realise there where more than on group attached to the same geomitry. So like the Skin was associated twice. Got rid of that. Then I started goofing with the decale a little more and found Planer really looked bad however cylindrical application" didnt look so bad. Did that and noticed that the brush tool which for a bit was distorted came back to a spherical paint brush shape. And then I did the follwoing. Now that I got my head around how the program works I should hopefully be ok
-
I never even thought of that, heck never even tried that as it might make sense for why it kept drawing on all four when I selected only one and made it editable. Ill goof with that and see where it ends up.
-
I went into Edit mode and here is something else I noticed. In the first image you see me only covering just the face with the Blank white decale right? Then in the second image, when I go to Edit it shows even the arms were included in the decale or at least the view.
-
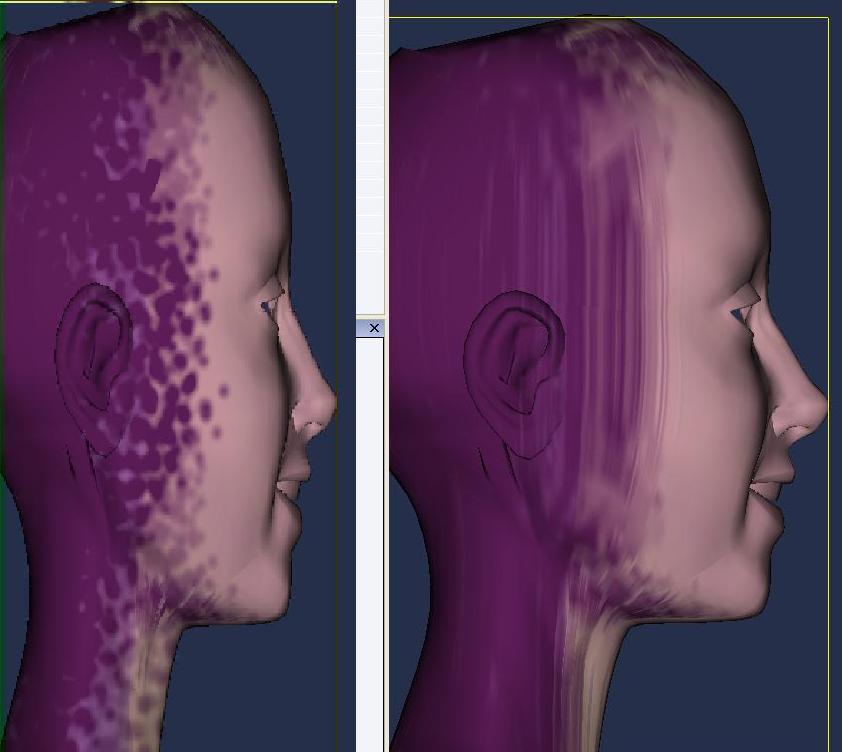
Here are the steps which I took First I tried applying the plain decale to be painted on, plainer style. Then I opened it via Right click plug in. from which it shows the circular brosh stretching and being distorted as it goes towards the side. so Obviously I dont want that so I try Projection painting and then it still distorts (see attached photos which are in order. Then I try wrapping the decale around the head spherically and do the same trick and yet it still distores it. Regardless of Oppacity fall off is selected or not.
-
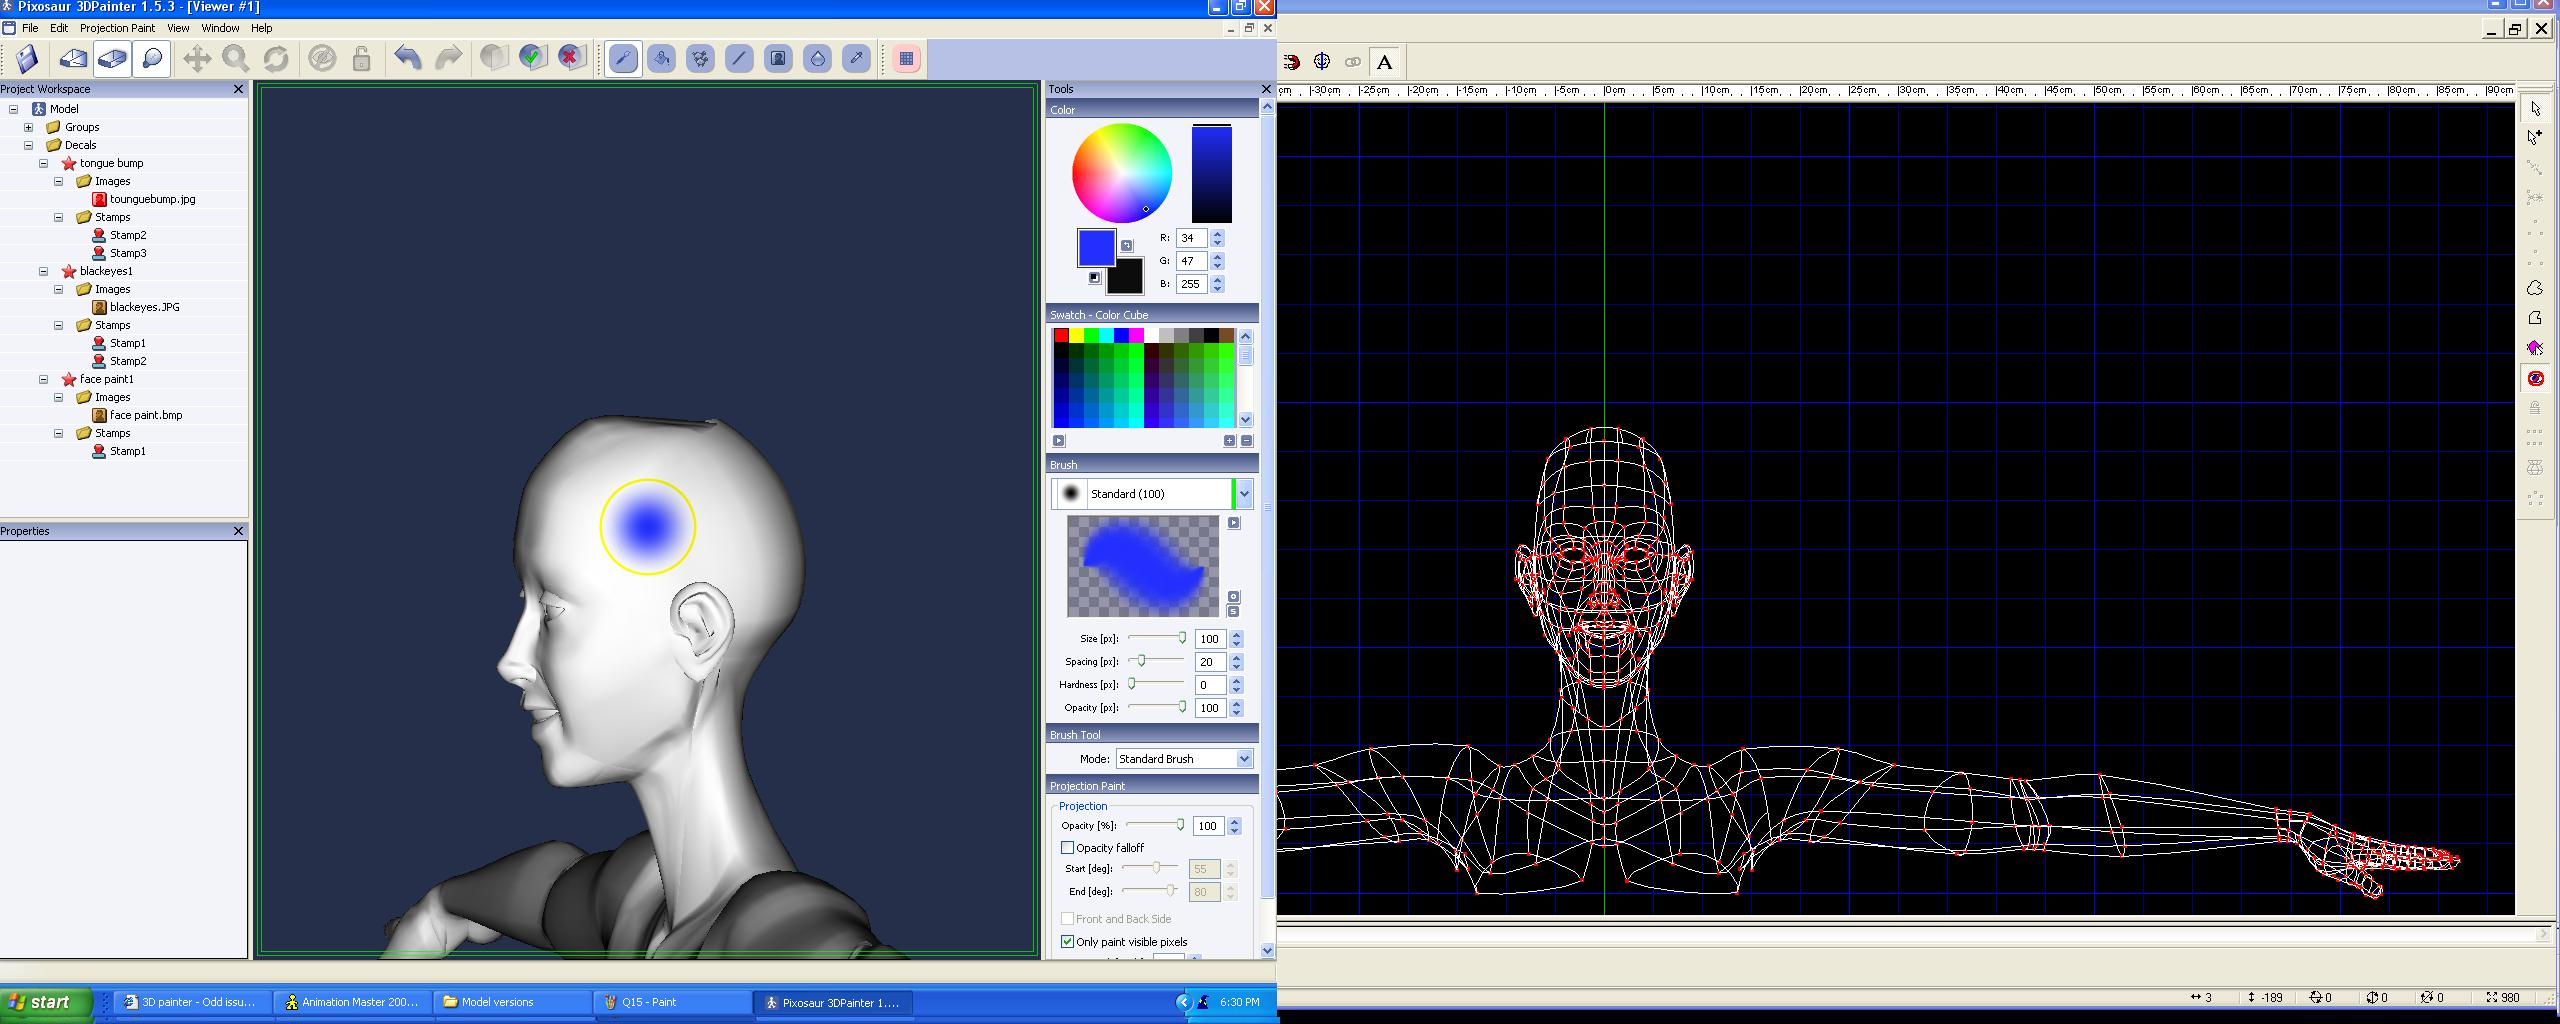
Ok for one fleeting minute I was able to paint the model in Projection mode and hit accept and then it stayed. But now I cant get it to work! This is a little frustrating. As to the UV set up I looked at all of the settings in the program and it said nothing about a UV set up when I launch it on its own. Fact is it really seems buggy. My Pc is fast enough to handle what it needs to and yet if you hit Undo sometimes it will give an outline cut out of the object instead of showing the object (which is weird). I make sure to Make the particular decale Im working on the only one that is editable and yet it keeps fighting with me. The other problem is that if I do one decale and wrap it Sphere wise around it and hit Accept then it stretches the painted markings all over it. If I do one front and back image planer style it sort of works for painting on the decale however there are spots on the side of the head that you cant paint. This program seems like a good idea but is rather difficult to master or even ustilize, but Ill try more tomorrow. I think the frustrating part is it working one minute then not the next.
-
Brilliant that did the trick! Pheeeeeeeeeeeeeewwwwwwwwwww! Thank you guys for being there and helping me out with this!
-
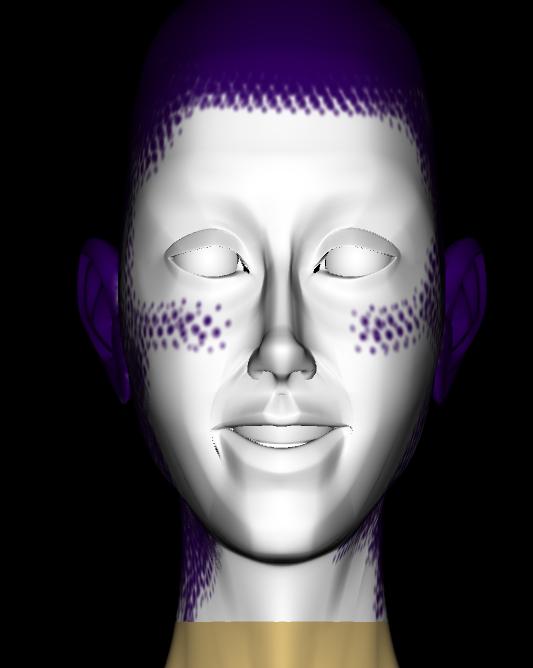
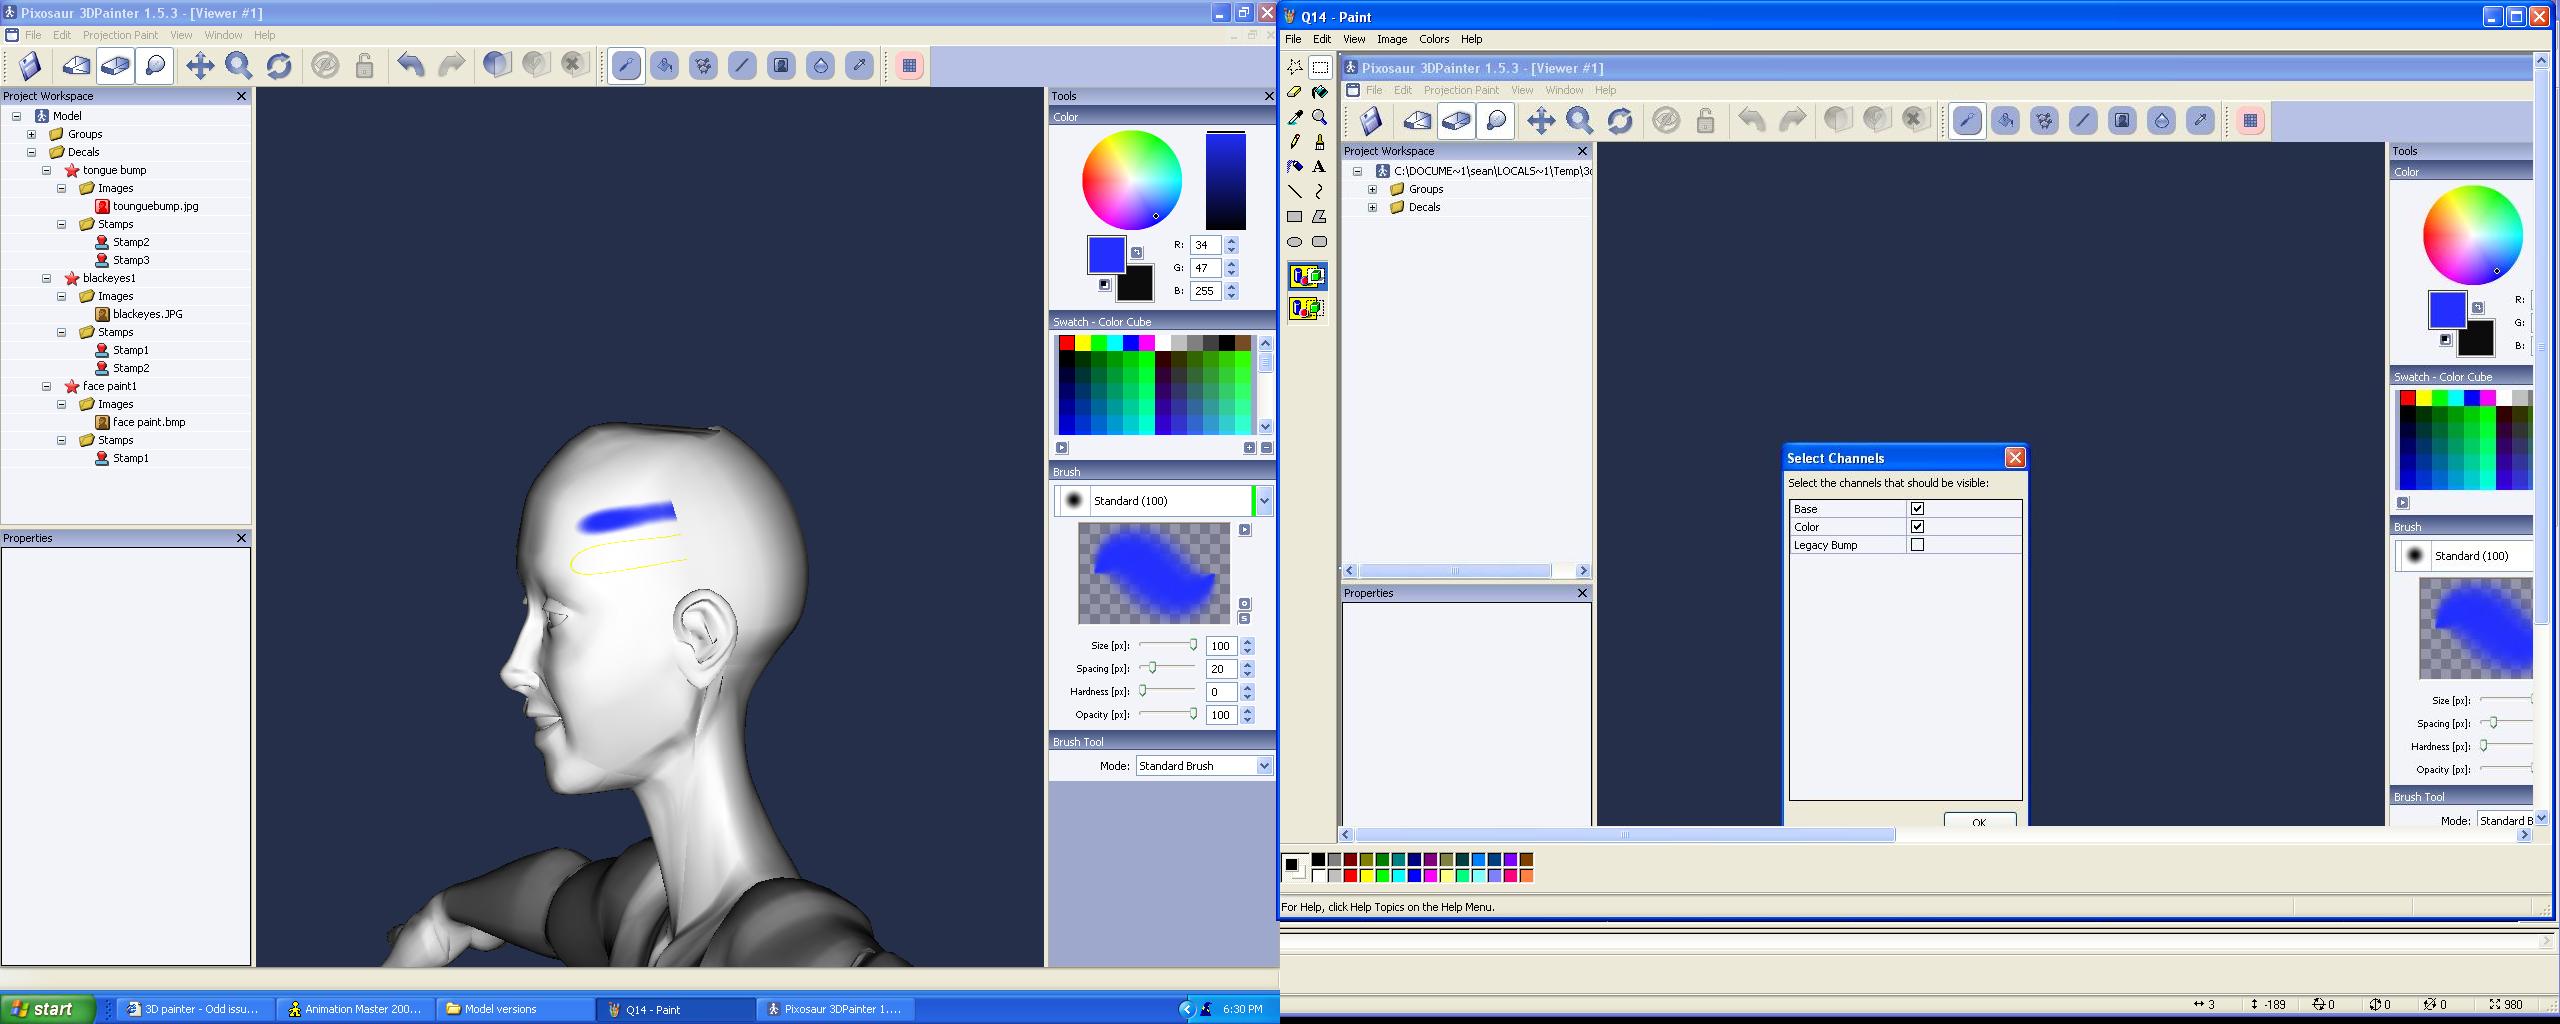
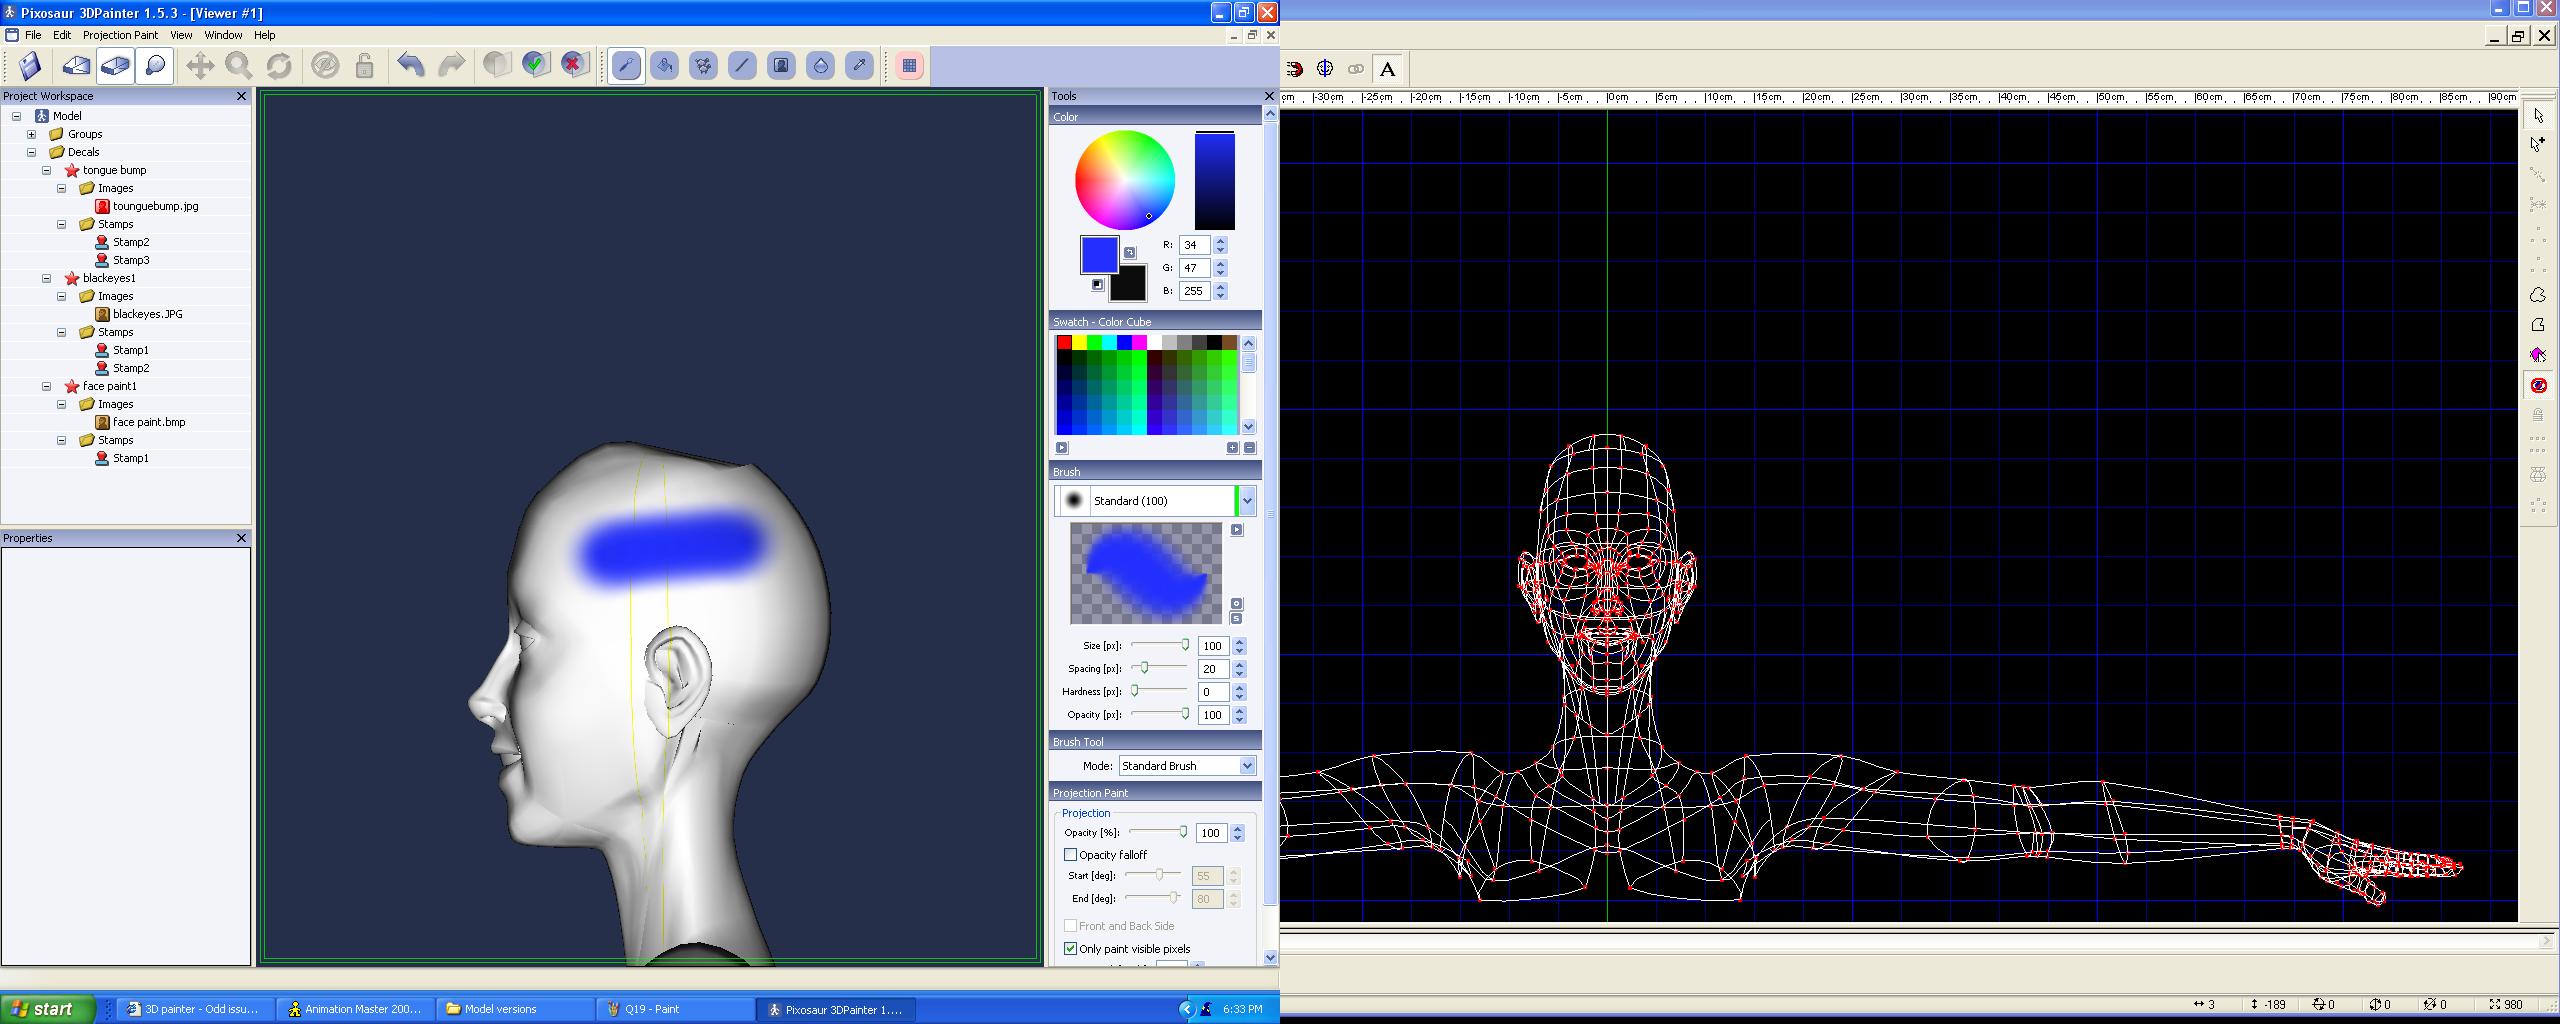
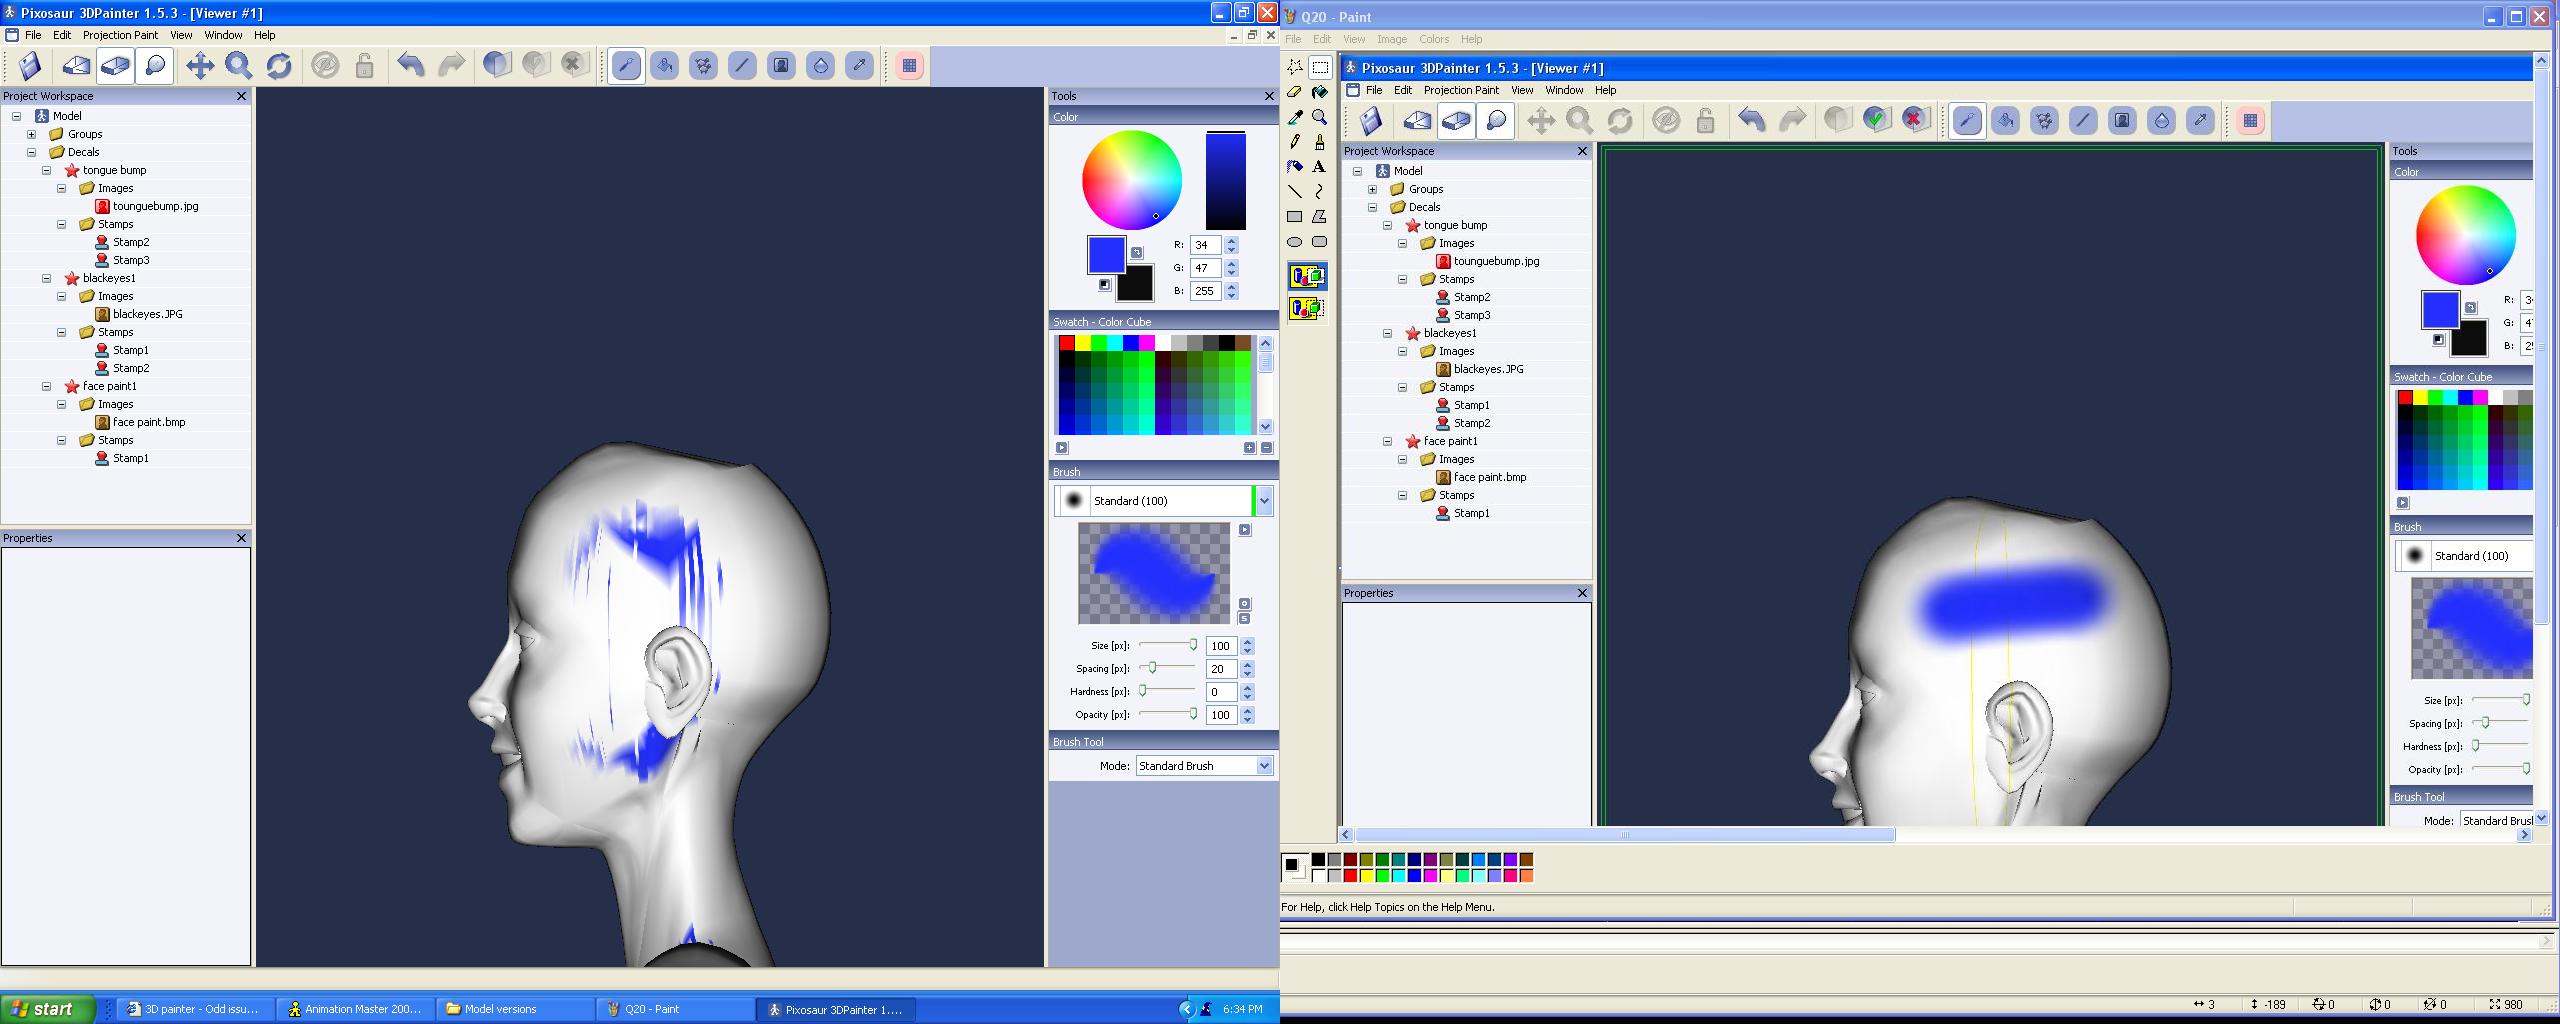
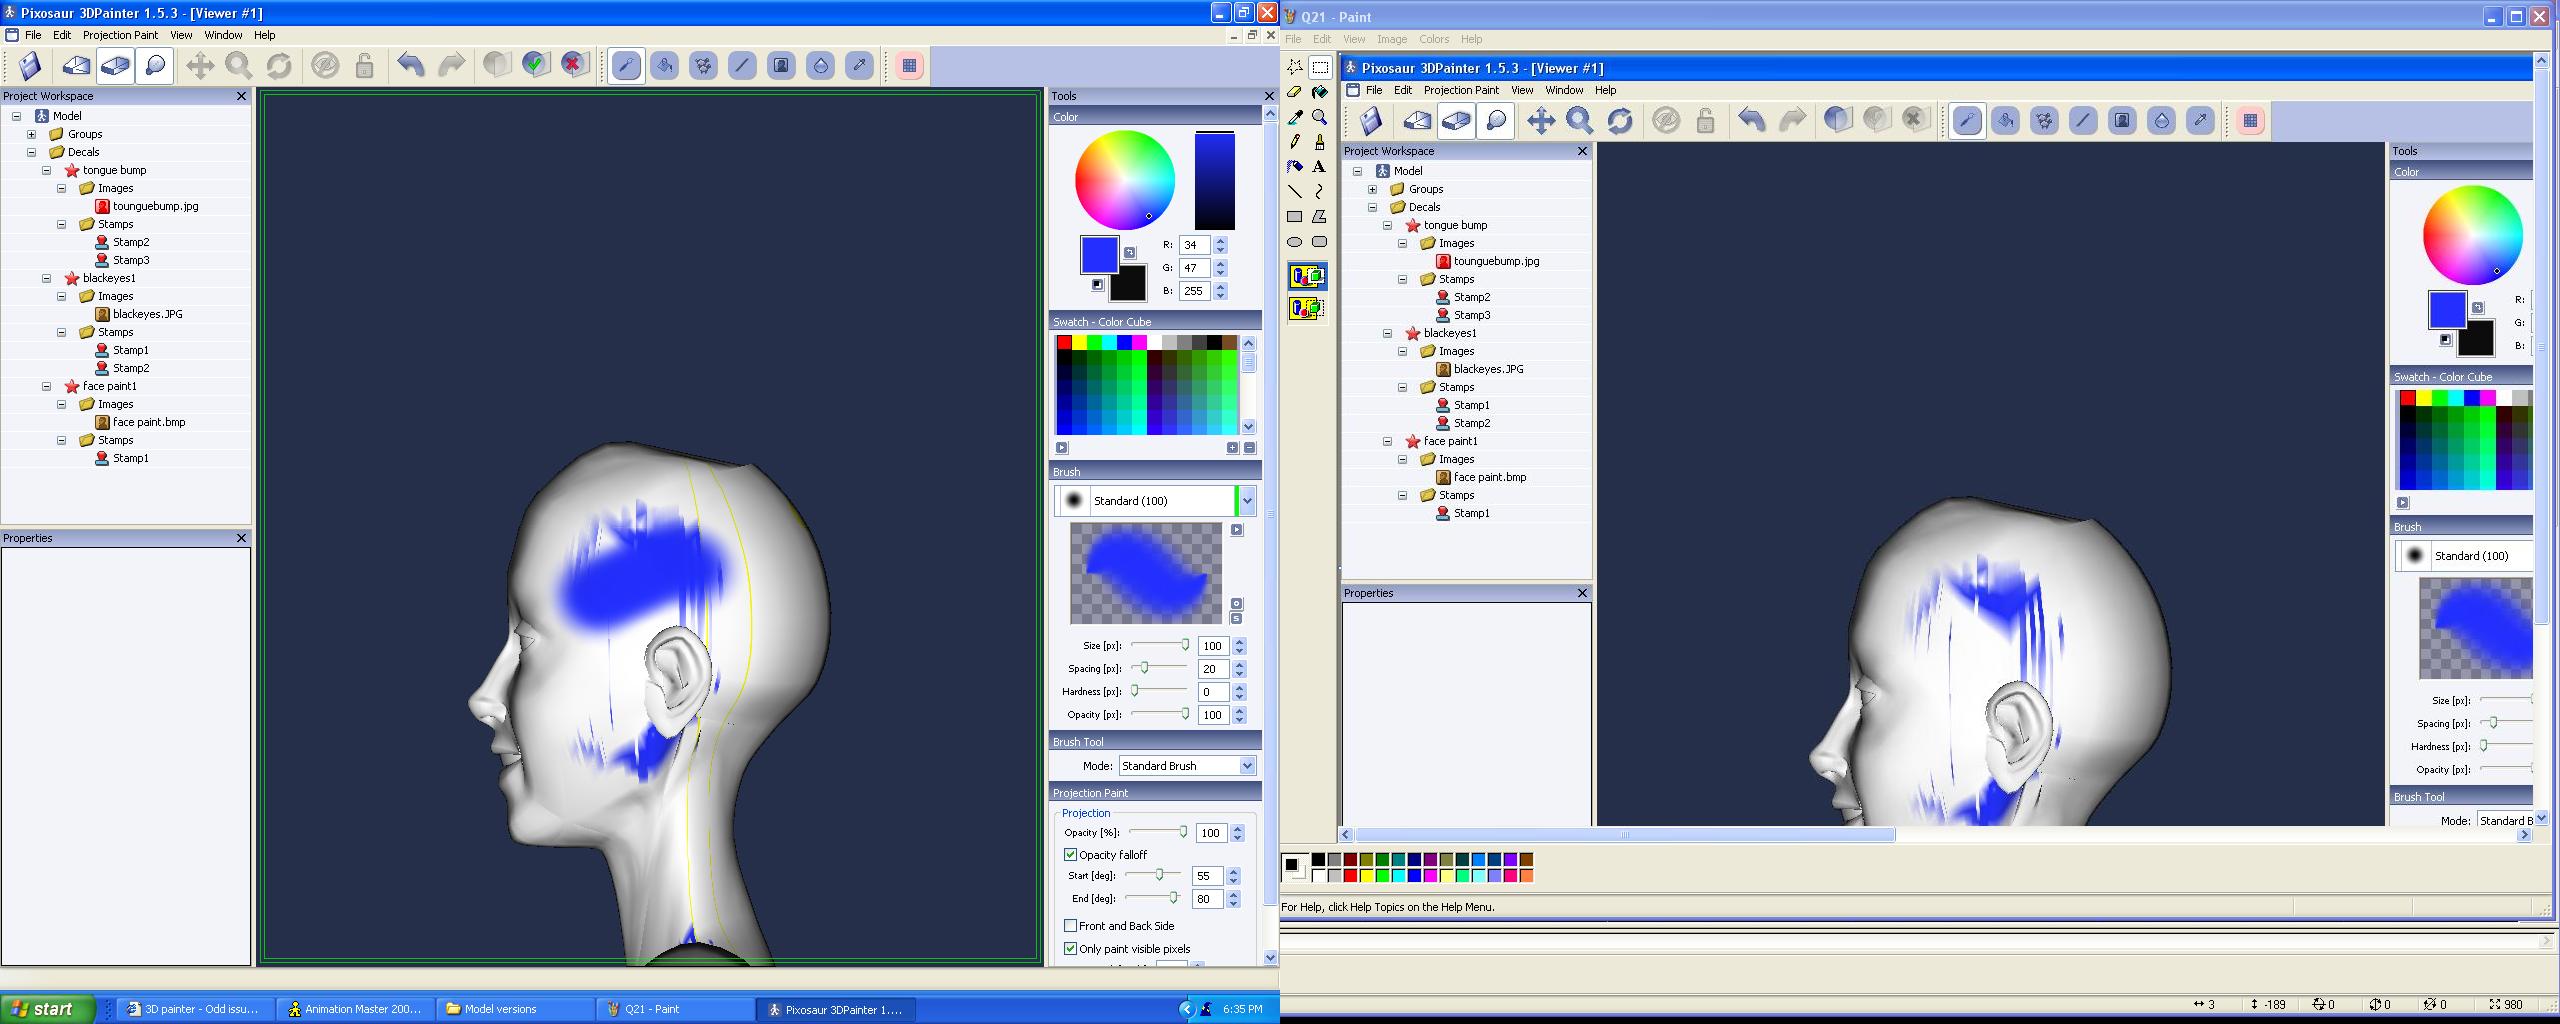
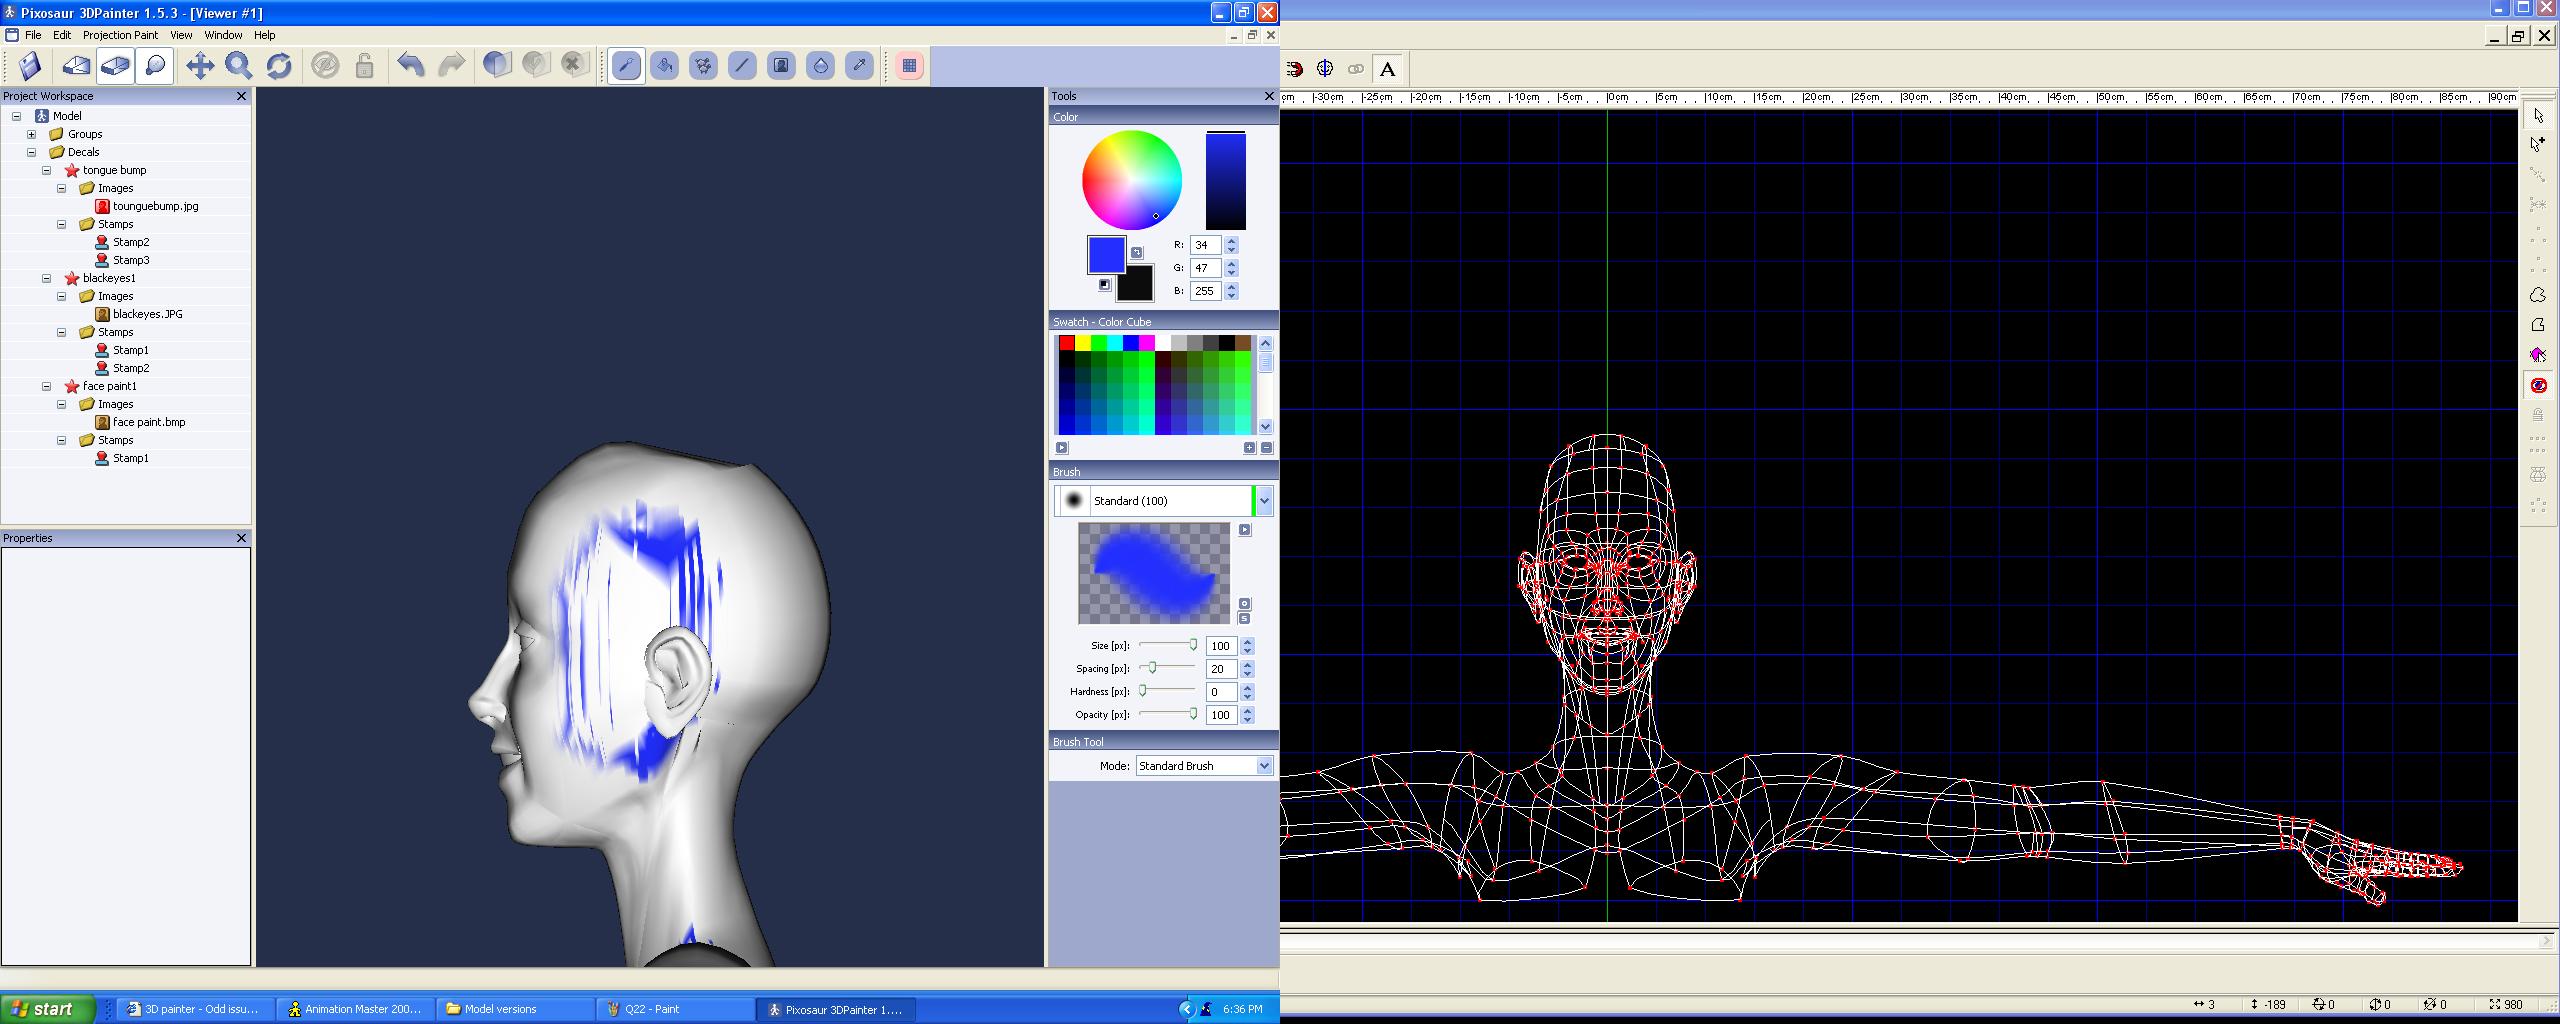
Ive been having issues with painting the models. When in normal mode and I go to paint, lets say a normal round brush, it is distored horribly either long ways or widthwise. SO then I do Projection painting and it looks great however when it goes to accpet not only does it distort what was painted but it also will mirror what was painted on one side on to the other. I tried breaking the head decale in two two seperate decales on front and one back and painted them accordingly but if I painted on lets say the back of the head with the back of head decale then it still copies over to the front decale even though it was never to be painted. If there is an instructional site that helps with these issues or how to work the program that would be priceless right now as I need to get some of these models knocked out. I attached a copy of one of the models I was testing the paint on.
-
I've been animating for a couple years now and I've been curiouse if there where any A:M user groups that have meetings in or around Portland Oregon. Might seem like a laughable question since Hash headquarters is across the river in Vancouver, and Liaka studio is litteraly four miles from my house. But if there is it would be nice to coordinate some sort of meet up, I know Lucky Labs has been more than supportive to local filmmakers, perhapse that is a good spot. Anyway, Im interested to know who's out in my area and completely nuts about making 3D animation - Email sean_delgatto2001@yahoo.com Website: www.novicestarproduction.com I've also started a yahoo group just today but will add more to it soon: http://groups.yahoo.com/group/nw_animation/
-
Im having a heck of a time with this one. Im working on a planet shot of SATURN and the globe itself is fine but doing the rings is killing me. Found some MAPs for transperancy as well as a separate one's for color. Nothing I cant duplicate my self but the problem is that it is just a cross section of the disk. Basically when you look at it, its just bands of various color or lines contained in a rectangular framed picture ( if you can figure out that discription). I have no idea on how to get the one stamp to repeat itself around a selected axis so that when it renders you get bands of transperancy around the disk. Does that make any sense? I have been beating my self up over it for 6 hours now and I figure I would ask you guys incase you know a better way.
-