


DanCBradbury
-
Posts
683 -
Joined
-
Last visited
Content Type
Profiles
Forums
Events
Posts posted by DanCBradbury
-
-
I finaly got a hold of some satallite photos... but aparently nasa didnt want to have it oriented the way i wanted!! darn you nasa!! lol
 i had to spend 15 minutes or so scewing, rotating, and resizing the photo to fit.
-
Anyone have any clue for us poor Mac users as far as normal map conversion using Photoshop?
I have a normal map plugin but it doesn't have any "settings"... it is a one trick pony. I did figure out how to "switch" the red and green channels using it but it has no control on the "height" of the resulting map image.
I also have a PC but I don't have photoshop on it... would there be any optional free PCimage editors that use photoshop type plugins?
Oh... I just bought a new nvidia card for my PC as well... are there any standalone converters to aid in this process that might work with the card? I am clueless about this.
Thanks in advance for any help.
Vernon "!" Zehr
i believe there's a trial version of cs that you can download for pc.
Anywho, Matt and I used the above abient occlusion render to create an abience map for the topography. The renders are very quick and you can adjust the otherwise occlusion color with the models ambience color. IT'S REAL NIFTY!! and did i mention fast?
-
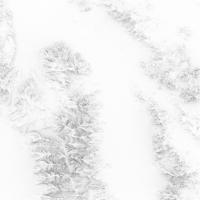
Oh and you had asked about the artifacts i saw with ambient occlusion. When i render a displacement texture, using abient occlusion, with progressive render mode the results are perfect; however, when i render it for real, black horizontal and vertical lines and splotches destroy the image. I've adjusted the occlusion quality settings from lowest to highest and they still dont go away.
The first picture is of a full progressive render; the second is that same progressive render with a tinny square fully rendered. You can see why i'm not to happy with the results.

-
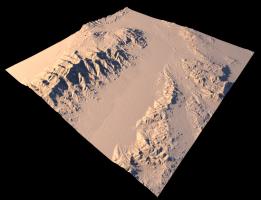
After converting your height map to a normal, using 20 as the maxium height in the nvidia plug-in, you should only need 100% scaled normal maps. Overall your height map isnt very detailed at all, and normal maps will help a little, but not as much as say a real topo height map. Still, you have a pretty cool thing going here. Not realy sure what you're going to do with it tough.
image: Death Valley California, USA
<displacement, normal, displacement+normal>

-
I worked for about half an hour and i came up with this.
Dan how are you getting that nice grey soft look ,can you put a prj up so I can study it ? please ,Iv been trying to get that but no go

-
Your cg blend with a real picture was awesome. Did you use the IBL technique and the environment sphere to do it? Your car doesn't appear to reflect any of the scene, which leads me to believe you didn't. It's a really easy trick to do, and adds a great amount of believability to the blending of cg and live action. It also looks like you went for specularity over reflectivity. Specularity may be easier and faster, but it doesn't exist in the real world. All specular sizes and intensities can be achieved with surface bump size, height, and reflectivity values.
Nifty modeling Stian. I really like the color.

-
Zaryin, did you add a normal map to your set? If you havent you realy should.
I've found that ambient oclusion does very odd things with the displacement. Is that what happend to your desert?
-
Dan,
I just started with a new chor and applied the settings you gave. Hurray, it works now! I think my falloff was too low. Not sure and don't care, just glad to have the rig working again.
Thanks again...
Eric

Good to hear it. NOW WHEN CAN WE SEE THE SALEEN!!
 I delete those annoying lights the second i start a choreography. I wish there was a way to make them not part of a default choreography setup.
YAY!! i always hated those stupid lights. Well... the only problem i had with them was that they didnt start with 100% darkness shadows. Is there anyway to change the values of the default light?
-
that model you made was pretty cool. Is it a wizard that converts black and white images into patchwork? Anywho here's the phone model.

-
I guess i should do that too... but i cant get over some of the big problems. One of the most annoying is after you do your first render, every patch is drawn black so you can't tell with what you are looking.
I worked for about half an hour and i came up with this.

-
Dan,
are there any other light sources in your chor? Are the default fill, rim and key lights on? The reason I ask is because when I set up my chor with just a skylight rig(25) with an intensity of 8% at the height and scale you have, I get a result that's so dark you can just barely see the outline of the model. I had to crank up the skylights intensity to 200% in order to get a decent render.
lol. I delete those annoying lights the second i start a choreography. I wish there was a way to make them not part of a default choreography setup.
Here's my basic c1-ico-f2(25) properties: @yves... what's all that mean by the way? lol
width 500cm
fall-off 75000cm
color 255,255,255
intensity 10%
Attenuation 0%
Rays Cast 2
Bias .05cm
Darkness 100%
There's nothing that specifies that the car has to be 8cm high, or the rig 1300% scaled. I just set mine up that way. So adjust your light intensity untill you have everything lit the way you want it. I adjusted my intensities untill the furthest piece of ground had just barely reached pure white. One thing though, make sure none of the bulbs' width touch any part of your model. This could result in supershadows, artifacts, and a ruined render.

-
-
Dan, thanks for the ligth setup post. What intensity does the light for the rig have? Since the rig is so large compared to the model, the intensity must be pretty high? When I first import the light, the default is 7% for me.
I use an 8% intensity light. When the dome is scaled the intensities are scaled as well.
-
Dan,
would you take a snapshot of your chor lighting setup and post it? I've been having some trouble with the lighting on my attempts.
Thanks

The light rig is scaled to about 1300% at 6660 cm high, and my car is scaled down to be about 8 cm high.
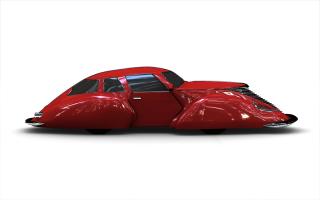
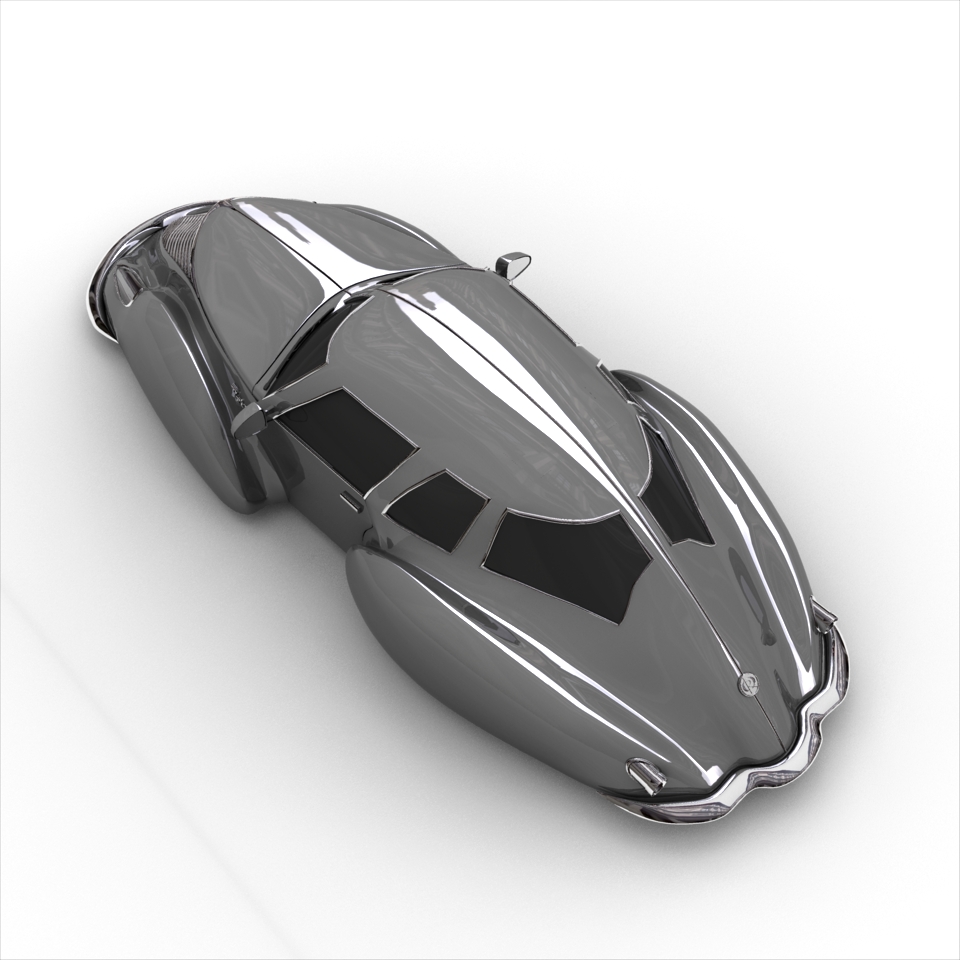
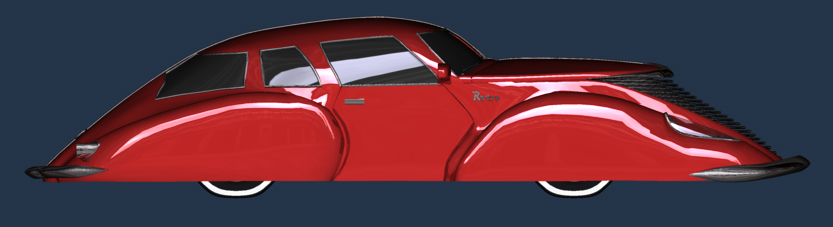
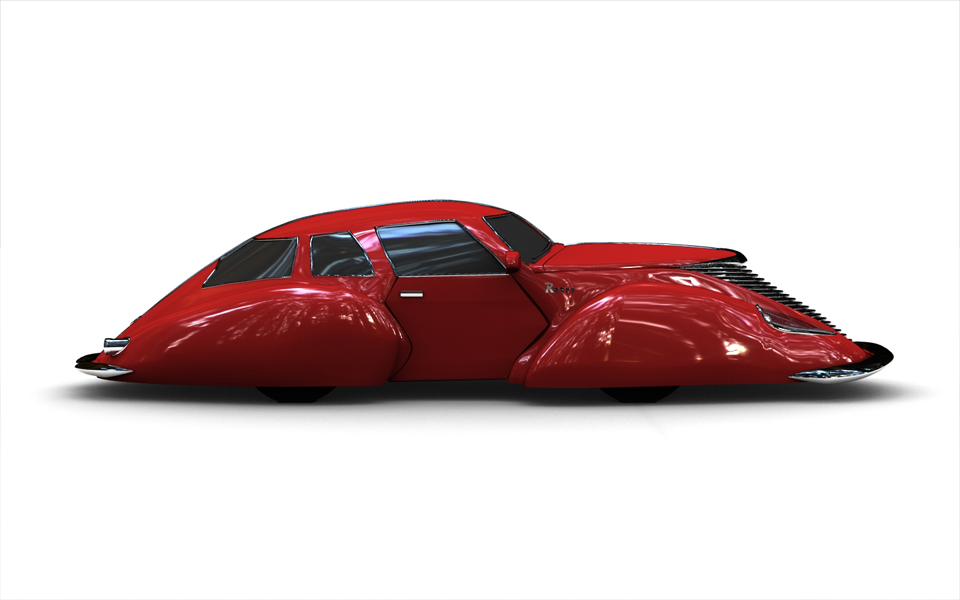
She sure looks better in red. Are you done? Up to you, and John, I guess... still wanna see inside.
Here's what I noticed:
[attachmentid=13476]
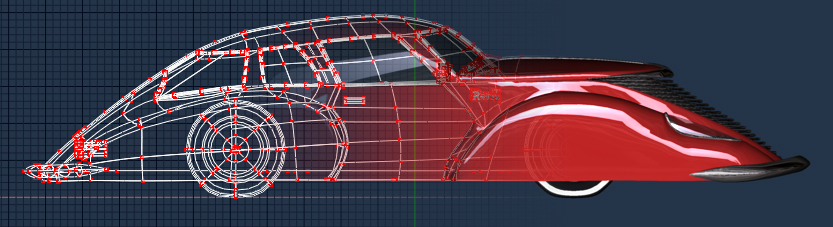
I don't understand what I think are creases from splines in the front fender.
Well, i can tell you, there isn't a single crease anywhere on the model. The areas you're showing there are mostly 3 and 5-point patches that refuse to cooperate. I went through and fixed up those areas a bit. I really don't like working with the geometry near the front lights, because it's the densest part of the model. Change one CP and they all have to be changed.
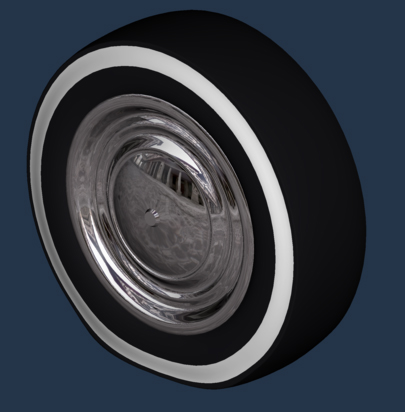
I made the paint material's reflective blend less so that it slightly reflects the ground. The paint, windows, and headlight glass are still using HDR, but I've abandoned HDR in the chrome areas, and am now using the original Uffizi.tga. It looks much better now. I made a progressive render to show some of the changes to paint and geometry.  and I had to bump up the brightness/contrast on my monitor to see the tires/wheels.. I think you need something to bring them out... and I put lo-pros on it. and somehow, the wheels look a bit small for the mass of the vehicle... but with the low profile tires, it gives the gangster whitewall look "Wide Whites".... they're just too small. I know you were running into interference with the fenders... so don't know the solution.
Far better job of modelling/lighting than i can do.
The creator had brought up something about white wall tires. I may just do that now. The tires are regulation size though. It may be the camera angle or that you can only see the very bottom. Here's a wireframe to show you their size in the weal wells.

-
You should not convert your files to v13 yet. It's only an alpha.
-
Dan:
Couple of things, all my opinions, not advice or criticism cause you're doing just great.
The black trim looks a little too glossy to me. It's competing with the paint job.
I agree with the cell turb, I got rid of that too.
I don't know if it has anything to do with scale or what have you, but you've actually overachieved on the paint. The car looks like it has a thick coat of very glossy paint on it. I mean the paint is awesome, no doubt, but it just looks like it's too thick on the sheetmetal. This is just my impression and I may be way off base. How or what controls the depth of the paint? Is it the HDRI?
Btw, I haven't been working on the S7 cause I needed a break from it, but I've been kinda reworking the FW190 excercise. Check out my WIP when I post later on.
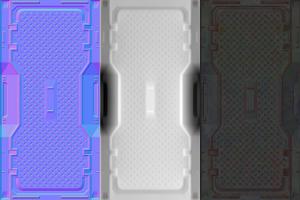
The trim is still chrome. Uffizi is a very dark hdr, and there's realy nothing for the chrome to reflect other than the sky above. I realy want to find a sky scape with mountains, a visible sun, and clouds. Only problem, I havent seen any real hdrs like that. Thick paint you say? Hm... It could look that way because the ground isnt being reflected corectly. I'm sure HDRI has nothing to do with it, but i'll tinker around with the paint settings. Here's a different hdr render and a shot of all the materials i'm using. I need to manipulate the paint reflectivity values until the floor is reflecting white instead of blackish red like it is in the row shot.

-
I hope I didn't scare everyone away with hdr. I can assure you all it's very easy to manipulate. The pixelation on the chrome was caused by over saturation of the multipass sub-pixel averaging. I lowered the chrome's env opacity value to 4, and it fixed the problem right up. I didn't like the paint cell turb any more, so I changed it to a solid color.
Am i done yet? Do other people have projects that last months and months, and never seem to end


-
If you've got something relatively flat, like a floor tile, and you're viewing it from above, why bother using displacement mapping anyway? The whole point of displacement mapping is to be able to see relief when you view the object from the side.
Not neccesarily. Displacement will give depth and dimension to even these floor panels from any angle. Another good point is that, unlike normal and bump maps, displacement will create shadows where they would normally be. You cant get shadows with normal maps, or bump maps.
-
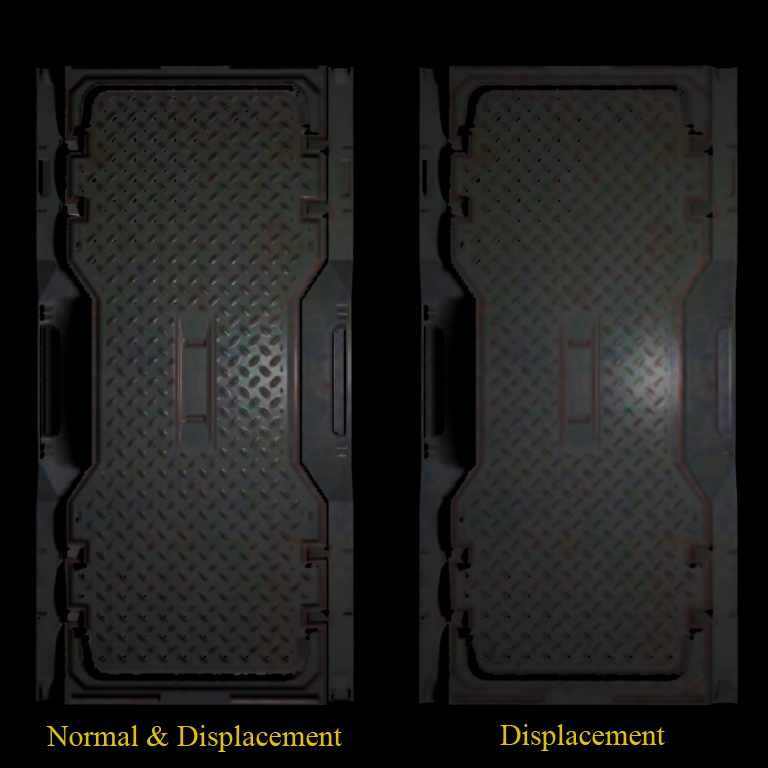
I forgot to post these. It shows the difference between relying only on displacement, or using both a height map and normal map.
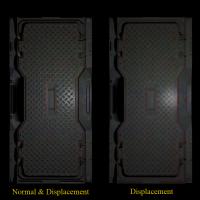
-
Here's a displacement render I did which combinds a height map, normal map, and color map of a Doom3 floor panel. When you combine the normal map with the height map it gives the displacement a much cleaner look. You guys should realy try it out.
-
Here is my test to verify the height changes per color.
You didn't know that? Well, of course thats how it works. I'm currently rendering another displacement test, it should be done in about 15 minutes.
-
yeah, it's a pretty cool new feature. That first one kinda looks like a topo.
-
awe, i destoryed the image files already. lol. But just to let you know... the normal map to grey scale conversion made the areas that wree supposed to be flat, bow like crazy.
-
Let me get this straight, the displacement map basically brings out the detail, right? So for scenery like you made, Jeff, it can be just sorta blurry to make hills and such? What if you wanted to make some details on a spaceship for instance with lots of small square and rectangular protrusions?
Could someone make a quick and dirty map for something like that and show us the map and render please?
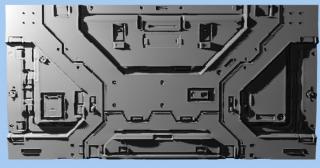
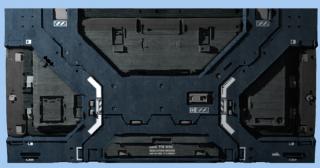
Here's a render i did of the Doom3 jumbodoors. Now mind you it was a normal map that i converted to greyscale, so the conversion isnt perfect, but you can get a good idea of just what we can expect from this new feature.
I did my render with 6 patches (NOTE: quality of displacemnt goes up when you add more patches)


Oz Map -- Another v13 Displacement Fun Thread
in Work In Progress / Sweatbox
Posted
1) The ambient map is gray scale, because A:M does not support a colored ambience map , or specular color map type, for that matter, which they should probably think about doing, maybe. Now if you're talking about the model's ambient color, that's 141, 171, and 241. The only problem with doing it this way is that the ambient color overrides the surface diffuse color and makes it what ever color the ambient color is in shadow areas. Another problem is that pigment color addition and subtraction don't work, because of this color override. For instance, if you have a red ambient color, and the ground is either blue or green, it will still be evenly lit red; however, if you want to spend a few more seconds on the ambience map you can use the diffuse color map of your terrain to generate a selection of only your skylight color areas, transfer that selection to your ambience map, inverse the selection, and lower the brightness all the way to darken the non skylight color areas' . Unless you're really picky, you shouldn't even have to worry about this. Regardless, using an abience map is much faster than the actual occlusion.
2) Real height maps are hard to come by; in fact, this was the only one i could find that was a true height map. Most of the ones that claim to be a height map are only photographs that someone has converted to grey scale. Thought you could be sly with me, aye!! Most of the images of topos that you will find are line elevation maps, which aren't very useful when trying to make mountains in A.M.
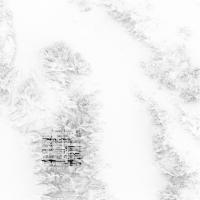
3) The artifacts in the picture are from the top-down view in the choreography window. When I view it with a camera, the artifacts show up as thousands of black dots that seem to blend, but it's incredibly noisy and dark, even at 100% quality on all occlusion settings.
Just to show you what i was talking about with the dimming of non skylight color areas. I used the color selection tool in adobe photoshop on the deathvalley diffuse map, at a Fuzziness value of 200, to select all colors in range of my skylight color, made the selection, draged the selection over to my ambience map, inverted the selection, and then lowered the brightness all the way. I would keep an original of the first ambience map just in case you ever decide to change your sky color.