


nf1nk
-
Posts
189 -
Joined
-
Last visited
Content Type
Profiles
Forums
Events
Posts posted by nf1nk
-
-
Add some slobber and it should be ready to give little kid nightmares
 . it looks great
 -
its lookin good, I wonder if the capitain would look more birdlike, if you made the feathers stop just below his pant line so we get some more of his cool scaley feet and ankles
-
The detail is increadable (with extra letters in there to show how great the model is), and maybe when the model is done your model will answer a question I have had abou the jedi star fighter. Where is the bottom half of the R2 unit ?(I know that this bird has R4, but in episode IV they refer to them with a generic term R2) The wings look too thin to hold the whole robot. This isn't a complaint about your model, as yours looks very much like the ILM model and it has the same issue.

-
The overall design from that last angle looks good ... except at the tail... the vertical airfoil (rudder) looks out of place... dragonflys have no such appendage.
It's just my opinion, but I would loose the rudder and maybe swoop the elevator wings back some and do a 'V' shape that replaces the rudder.
Also, I notice how thin the support structure is for the wings, I'd beef it up some with bracing or make a few more attachement points at the same thickness. The stresses on those single ball joints would be tremendous!

Yes, the canopy glass should at least have a second mesh layer so you can utilize refraction properly.
All in all a very good start!
I agree completely, I also feel like the wings should extend at least twice as far. Most flying things have a wingspan of at least twice the body length. of course there are significant exceptons.
-
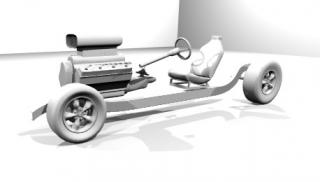
This is very much a work in progress, but I am buiding this car from the ground up, and I will try to keep posted
-
One thought to make it look like he hit the wall harder, would be to add a paper towel dispenser to the wall and have it hang crooked on its mount after the near impact
(they are usualy held up by two screws and one could concievably be knocked loose)
One like this would be easy to model http://www.marketlabinc.com/products/categorydetail.cfm/717
And could add a touch of authenticity to an already stunning presentiation
-
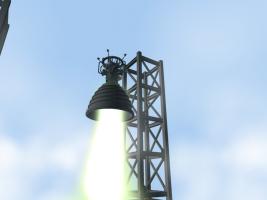
I have started to build the rocket (no nose cone or textures yet). The smoke is streaks of four different varieties and sizes. The rocket looks like it is going very fast but it is only a 4.7g launch (150 fps^2)
-
If you check your options menu odds are you have the grid set in metric even though the scale is in SAE units
Tthe scale and the grid are not linked even though that may seem counter intuitive.
-
Destined to be a holiday classic. Too funny for words you should see about submitting it to hash films
-
That's some nice green fire you got there... Is it stylaized? or is it just the blue sky mixing with the yellow fire to make the outer flame green? Cool engine
There are blue flames and yellow flames I guess when they mix you get green. Of course if you are running a copper liner at excessive temp you will get green highlights in your rocket plume. Strangly some of the newest rockets I have been reading about run copper liners, because of its high ductility and ability to conduct heat. I lke the effect so it stays
-
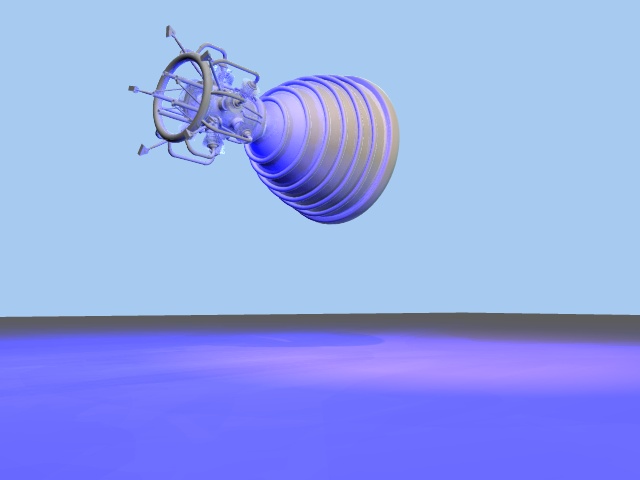
Here is a short vidio of the engine running I wanted the exhaust to be blue ish but no matter how strong a light I stick inside the bell it doesn't seem to show, I guess I will have to turn Glow on
-
Well as with all rocket engines there comes a time to fire em up and see how they look
-
Hi all,
I am having a problem smoothing out the dimples at the Control Points. The Bias Handles seem to be limited to one plane. Alpha and Beta direction do not seem to cover every direction. Can someone l clear me up on why this is so?
[attachmentid=12711]
Technodandy
Those are creases they are the bane of my animation master experiance, the only way (that I know) to avoid them is to make sure only 2 splines intersect at a control point this will mean you need to use the dreaded five pint patch at least four times for every engine. This means at the point where you curently have 3 splines come together you need to split that into two control points, figuring out how you are going to do that is part of the art. Good luck
-
Hi there,
This is a funny rabbit character i am working on right now. Modeling was done in two sessions, first session about 2hrs second session about 3hrs, but almost a year later.
Cheers,
Heiner
Looks fun

is something strange happening on the right side of the face?
maybe a normals issue?
I can hardly wait to see your progress.
-
What amaze's me about this piece of work (which played just fine for me) is how much better the canyon set look in this short film than in the Glamour shot on your website. It has me very tempted to take a much closer look at the set. If only I had a story that needed it
-
It has been an age since I updated this, but I did some light work and now It looks much better it might even be ready for doing a scene now
-
Here is an update on the engine I added a light to each of the cylinders and this upped the time to render by about 3. It is almost unaccaptable (almost 1.5 hr), I was thinking about removing the reflectivity from the metal since it was supposed to be dull metal and losing the refletion might speed up the render time

-
"Just curious about all the tubing. How are you doing that, sweep? What version of AM are you using? I am wondering about jumping from V.11.1 to V.12."
I am using version 11 (but am planning on buying the 2006 disk) The tubing is done with the dupilicator wizard and some hand positioning to clean it up. you would be surprized what you can do with it
"I didn't realize there was a tube spiraling around that "bowl"? Being an HVAC engineer, I'd assume it's a defrost tube?"
On real rocket engines there isn't actualy isn't a tube spirling around the bowl (on any real engine I have seen), for the most part there are instead lots of little tubes that go paralel to the rocket thrust with evenly spaced pressure manifolds to deal with the changing bell diameter. the cryogenic fuel is run along the outside of the bell and throat to keep thing from melting. I put the spiral around the outside because I wanted to, and I think it looks cool. This engine is a mix of real and fantasy I we have things like glass cooling fins on injectors (how is that for thermal conductivity
).since I am working on my ME degree I had interesting Thermo teacher who showed slides on rocket engines and during a lecture on entropy I scetched this on my note pad. I started work on the model after finals, and I realize I still don't get entropy...
-
The progress is fun Gosh. I prefer modeling to animating Next I need to work on making a nice titanium metal for most of the machine and also the exhaust that is the fun stuff.

-
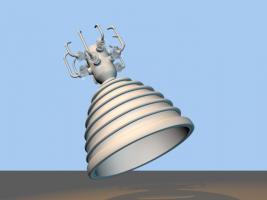
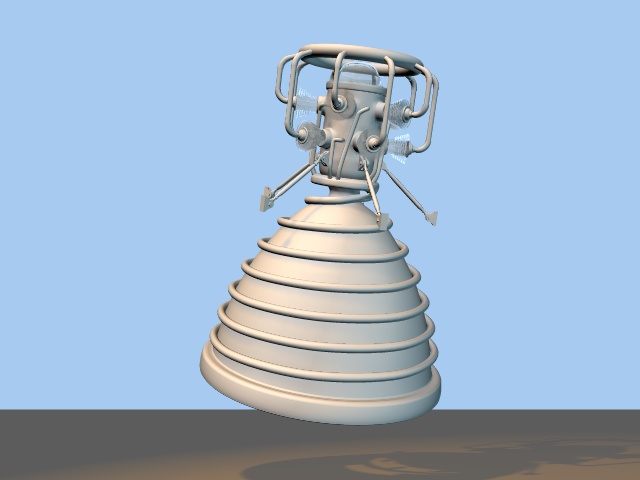
It has been a while since I posted anything so I have the engine I am working on. (Some day I will get back to working on the bar scene just not today) This is a sort of fantasy rocket engine that will have moving flashing lights inside of it (thus the clear sections) I am trying to figure out how to rig a big crysta to the top of it as well as more hoses and some structure, but for now here it is in its unfinished un textred glory.
-
As someone who sells refers (I hate my crappy day job) the stainless steel you have picked is not used in refers. the stainless has a strong vertical or horizontal grain instead. that you can do by using a combiner (sine seems fairly fast) and setting the y (or x or z)scale to 1000 or higher and leaving the other two at 100 or lower
as for the cool brushed stainles I see here I don't know a non decal way of achieving it.
-
The material looks good, but generally with electron micros scopes you don't see any shadows, also consider over-saturated oranges, blues and greens, since false color electron microscope images are popular, and the folks adding the false color generally didn't take any art classes
It is not so much that there are no shadows it is just that the "light" source is at a very narrow angle with the "camera"
-
I have been putting labels on bottles lately and I found that you need to go into to the properties of the the decal and there is an option to adjust the transparancy of the decal. it seems to default to 60% on glass objects.
-
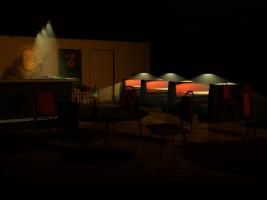
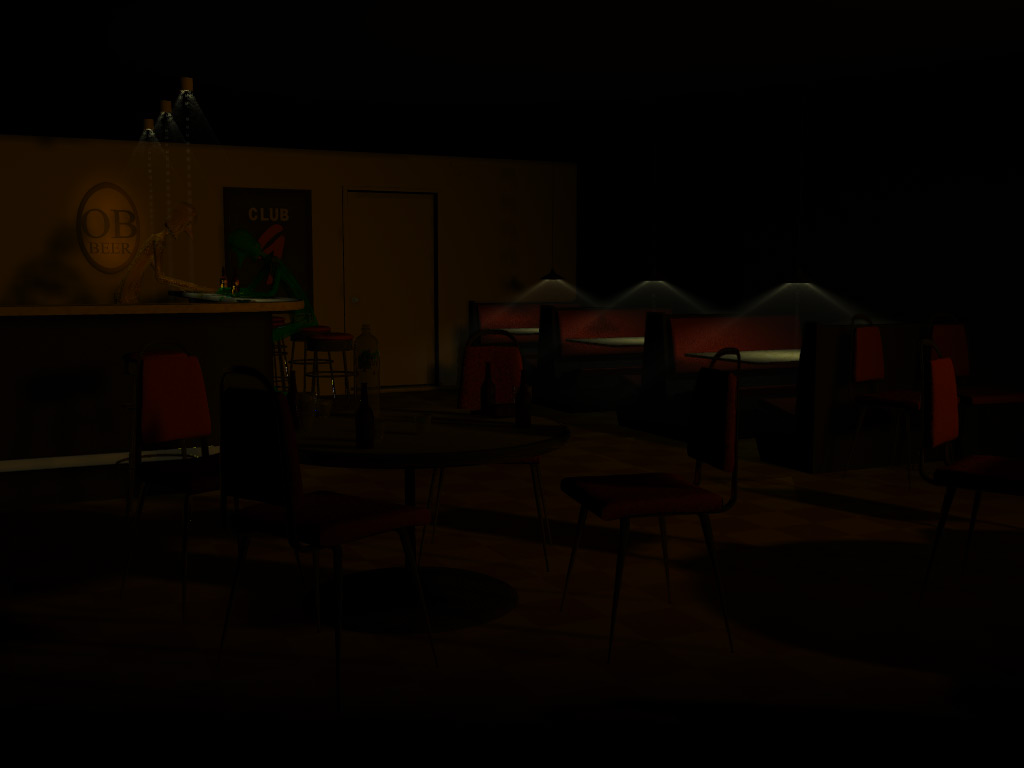
I added some of the denzions of this bar. I wanted them to look like I just sort of sketched them in, in stead I think they look like ghosts


Modeling a Viper SRT. (Car)
in Work In Progress / Sweatbox
Posted
http://www.smcars.net/
they are a pretty good source of of car blueprints, but alas no viper srt top view they do have side, front and back views without perspective. registraion required