

LeeAnderson
-
Posts
400 -
Joined
-
Last visited
-
Days Won
1
Content Type
Profiles
Forums
Events
Posts posted by LeeAnderson
-
-
Wow Stian! What would it take for me to adopt you as my older brother?

Great work! Couldn't look better!
-
This is one of those things that went off my radar a few years ago.... I'm working on the Tar of Zandoria stuff exclusively now (not even accepting any comissions), so I don't know when/if I will get back around to this....
I did suggest it to Lee in another thread where (i thought) he was looking for ideas for a short...Ken already made a troll. If you make a fairy, then it is really just one set and some props, and ready to go...
What about it Lee?, do you want to direct/produce this? it already has concept art and storyboards

This is amazing Will-the storyboards are fantastic. Can I borrow some of your artistic talent for a sec? The idea is great, it's not exactly what I had in mind. Ever since I saw this post though and have been looking at the storyboards it's been on my mind and I've been going over it in mind over and over again like a frustrated troll who can't seem to get any fish
Besides, let's get real, Will, no one could give this the proper directing treatment it needed except for the guy that came up with it. I'd love to see this finished, and if you'd like any modeling/lighting/texturing help, don't forget your buddy with the little video game guy avatar, mmmk? I would love to light something like this. You da' man!
Lee
-
Bevel or no bevel, it does look great! Your attention to detail so far has been really impressive--keep up the good work!
Lee
-
Too true Holmes!
Well, I decided to do a quick face test--the real work here was finding face reference, I just wanted to do a quick test to see how it would turn out--clearly, you can see it's not done from the "A".
I'll give a pat on the back for anyone who recognizes the actor the references are taken from
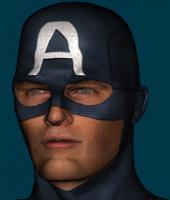
Thanks for looking!
-
Thanks Steve, it was fruitful, and I loved it.
I didn't have time to work on this today--but I just wanted to fool around with it...thought this was pretty funny:
Thought I'd take this in a whole new direction

Lee
-
How does he get into that? I don't see any zippers.

Body paint. It's amazing what you can do with a can of spray-paint can these days.
Fantastic textures.... that the new leatherette/spandex?Thanks...it's called "Leatherdex"
Here's a small update. I only had a half hour. My girlfriend was a little worried when she asked what I was doing and I said "unwrapping a model"
Updated the color map (added dust to the thighs), and painted some wrinkles on. A little worried about the lines showing up on him--I'll just have to erase them in post. The last two in the modelin window were 4 x4 multipass.

He looks bow-legged in this picture. Yee-haw!
Close-up!
EDIT--for some reason specular lights got turned off in my test scene--here it is updated:
Thanks!
Lee
-
Wow, Mark! All of this looks great! You really have such a cool style! Are you still planning on making a movie out of this?
Lee
-
Obviously, excellent work. What sort of maps are you using to get these textures? Or are you using materials? All of them are spectacular!
Thanks Myron! They're really in their early stage. Here's a low-res version of them.
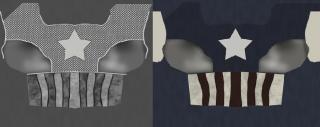
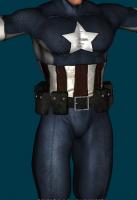
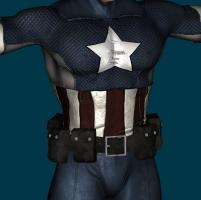
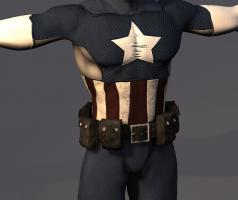
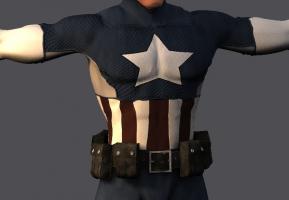
I found one more hour to work on him. Here's some more bump/texture detail--the displacement maps are a little out of control in this one. And I think I need to fix the star stretches
Here's a close up of the texture on the legs and blue part
And for those that enjoy that sort of thing, here's a back view
If I show you'll more, you'll really see how sloppy and lazy my stuff is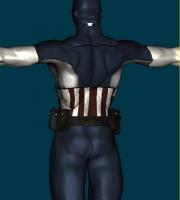
Lee
-
Hey everyone,
Thanks for the encouragement so far. The hands do look a little small, and the arms a little short. This was starting as an older model as a base, and the UV's aren't perfect either--so I might be screwed from the beginning (that's looking on the bright side,huh?)
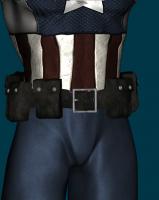
I think that for the illustration I have in mind, though, it the textures will help it turn out ok.Here's the update--displacement lines, and the famous "leather scales" (just for you Mark!) No specular yet...the maps are still in their early stage.
Thanks!
Lee
-
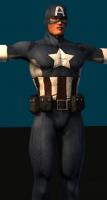
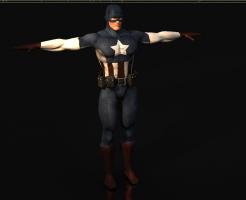
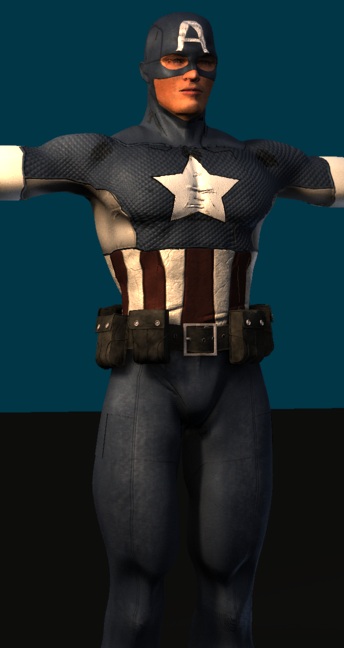
Hey Everybody,
This isn't too exciting...and I can't seem to get away from Modeling super heroes...However, this is an attempt to finish my Captain America model. I'm going to try and sculpt him from an already existing base model (made a little beefier). Here's a dirty start with the textures..nothing too exciting...but I'll post my progress.
It'll be slower than it use to be.
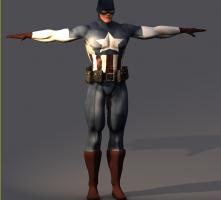
Thanks for Looking!
Lee
-
Shoot, sorry David, I didn't even think about that! I was so glad to have it done, that everything else slipped my mind. That DOES explain why it took a while to upload
Check the first first post, I'll update it.
Thanks for the heads up!
Lee
-
Hey, everybody...as my time draws short (1 1/2 weeks) I've been trying to finish all of the things I've wanted to get done. One of those things was going back and cleaning up all of the modeling/animation/lighting errors in my movie
Well...it turns out that I only had time to correct 1 shot and I chose the one that I felt had the best overall animation. Here's the new one (old one can be found at time 2:22 at above video):
EDIT: Here's a compressed version...not as good and there's a big annoying blue frame at the end that I forgot to cut out.
I changed a couple of things I think you'll notice right off the bat (no pun intended) and a few that are more subtle. One of my favorites is the new lighting...gives it kind of a "Bryar Rose" sort of feel.
Most of the changes came from things that I learned while working on TWO, even though I was never an animator.
There are still a lot of things to fix but I think the end result is really nice. Like I said, I wish I could go back and make all of the movie look this nice.
Thanks for taking a peek!
Lee
-
All of these outdoor sets are great, but this effect makes this set something really special!
-
Haha! Oh man, that's awesome! I love watching movies like this...you guys weren't taking yourselves too seriously but you still took the time to do a decent job. You see way too many home movies that are done in one shot with only the first two or three lines actually planned out.
"I'm deathly afraid of monkeys, anything associated with monkeys, including bananas!"
The shot of the tumbling monkey flying through the air is killing me
Haha!
Thanks for posting:D
-
What i DO need to know is how do you do a bump map? Isn't there some way to make the decals like... pop out of the model?
Easy! Once you have you're color map applied, you right click the images folder inside the color map decal and choose add image and then click you're bump map (for testing you can just use the map you're using as your color map). So now there are two images in the images folder. Click the one you want to use for your bump map and in the properties panel under Type choose "Bump".
I hope that wasn't something you already knew...maybe I misunderstood the question.
Hope it helps though!
Lee
-
Nice work...I'm impressed! I can't wait to see him in action either!
A few notes:
1. Do you have photoshop? It looks like your textures that you're using now could be used as a bump map. If you did that then you could green up the map in photoshop, add some color detail and then save it seperately and use it as a color map.
2. The black parts look completely black (RGB 0,0,0) I would make it a lighter black (and maybe a little roughness) so the details could really come out.
3. If you added a little specular intensity and size to the whole model that would look really cool (espially if you used a bump map on the armor parts).
Keep up the good work!
Lee
-
Both of these models look great, Mark! The lighting looks really cool too! Henrietta looks like she's pretty tough!
So, when do we get to see the Original film?
Lee
-
This thread is going to be for all the hats I make for the generic winkie model.
Here's the first hat I was asked to model: the beret.
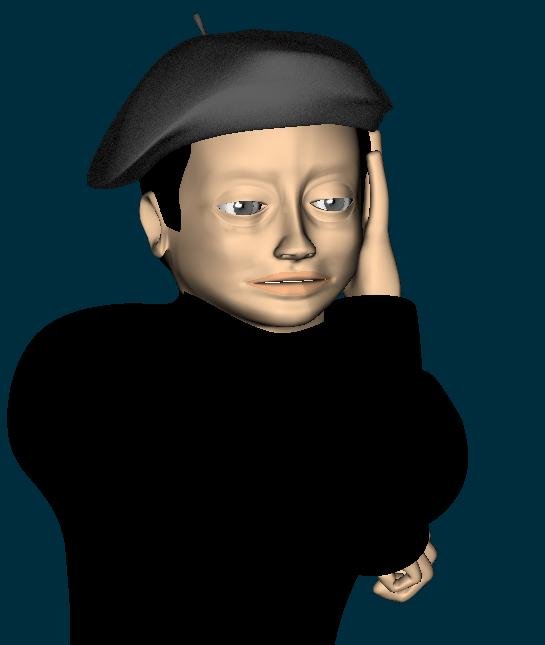
The mesh itself is super simple, but what took the most time figuring it was making the hat easy to put on the Winkie.
There are 4 Simple steps (This will apply to all the hats)
1. Drop the hat onto the Winkie as an Action Object
2. Right click and choose New Constraint/Orient Like and click the head bone.
3. Right click again and choose New Constraint/ Translate to and click the head bone again.
4. Enter the following numbers into the hat model bone's Transform>Translate values
X= -.09
Y= 5.34
Z= -.83
And badda-bing! You'll be good to go.
Feel free to critique this first hat. More will be on their way.
Lee
-
-
Hey this is looking better all the time! Are you using SSS on the candles themselves? That would be cool! Also, this link may provide you with some inspiration. Keep up the good work!
Lee
-
I was thinking of making one of these for my shot. After seeing yours, I'm glad I didn't. This looks excellent!!!!
George
Thanks George, I hope you get some good use out of it!
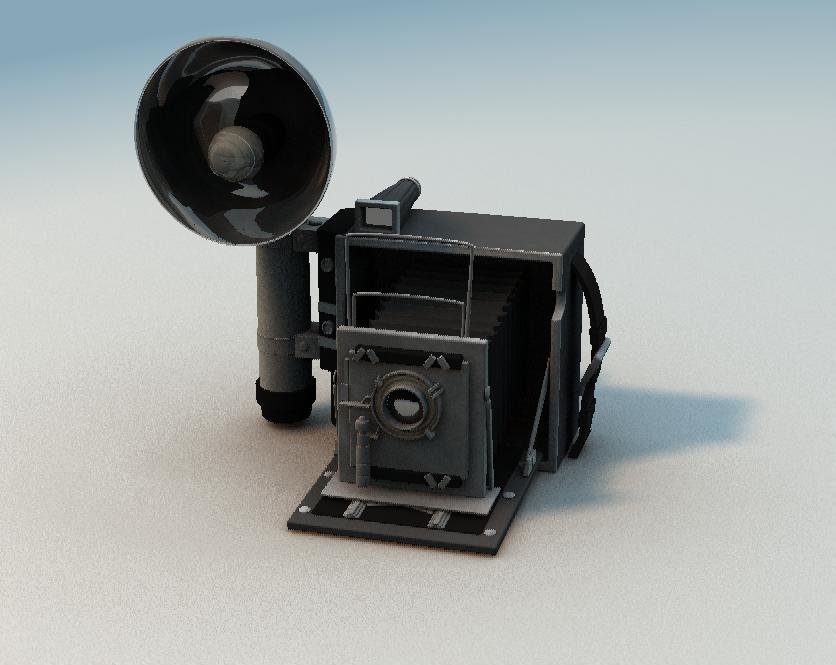
Lee,I've gotta say... that's one great looking camera.
I haven't read this thread yet but saw the last image and thought it was photo reference... so... thought I'd let you know.
Nice!
Dang Rodney, you need to post in my threads more often (even though this isn't really MY thread)
Thanks a lot, seriously!EDIT: Stian, I didn't see your comment until later, but thanks just the same!
Lee
-
That looks fab; more than enough detail.
Shoot...that's what I like to hear!
Here's another update, finished the bellows and textured...check props/misc/camera
Lee
-
Awesome stuff Gary! I don't know that I can say anything that hasn't been said already. Is that SSS in the first pic? It looks like it.
Yeah, MS Paint is where texturing started for me too, it works pretty good to a certain point.
You really should animate them, they're all way cool!
Lee
-
Hey everybody!
Tanner was unable to complete this so I was asked to finish.
The first version was misplaced somewhere so I started from scratch. This is really painfully innacurate and a lot of the cool little details are gone, but since this is for a quick shot and the film itself is more stylized I think it will do. The reflector is from a later model of the same camera that looked like it might be easier to model. Robert, let me know if you would like to have the other style.
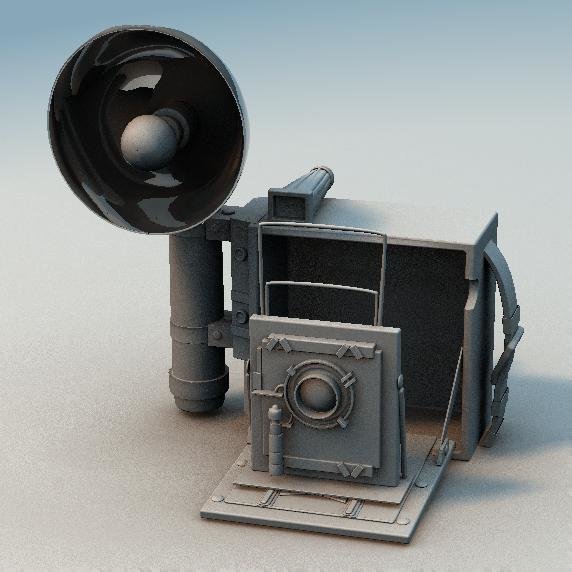
Thanks for looking. The bellows are up next.
Lee


Summer 2017 Image Contest! New Deadline Sept 22!
in Contests/Challenges
Posted
Hey everyone!
I'm back in A:M for this contest--it's on!