Thanks for the encouraging words.
My previous 3D experience consists of a couple of years with Blender. It's been a real challenge relearning everything in A:M language, but my progress has accelerated lately and now it's really enjoyable. The PWS concept was hard to wrap my brain around and there are still a lot of things I don't get, but these boards have been a huge help.
It's funny, I originally became interested in 3D when I saw Victor Navone's "Alien Song", but had no idea he used A:M for that until I started looking at alternatives to Blender. The quality of the other A:M Films were enough to entice me to make the move.
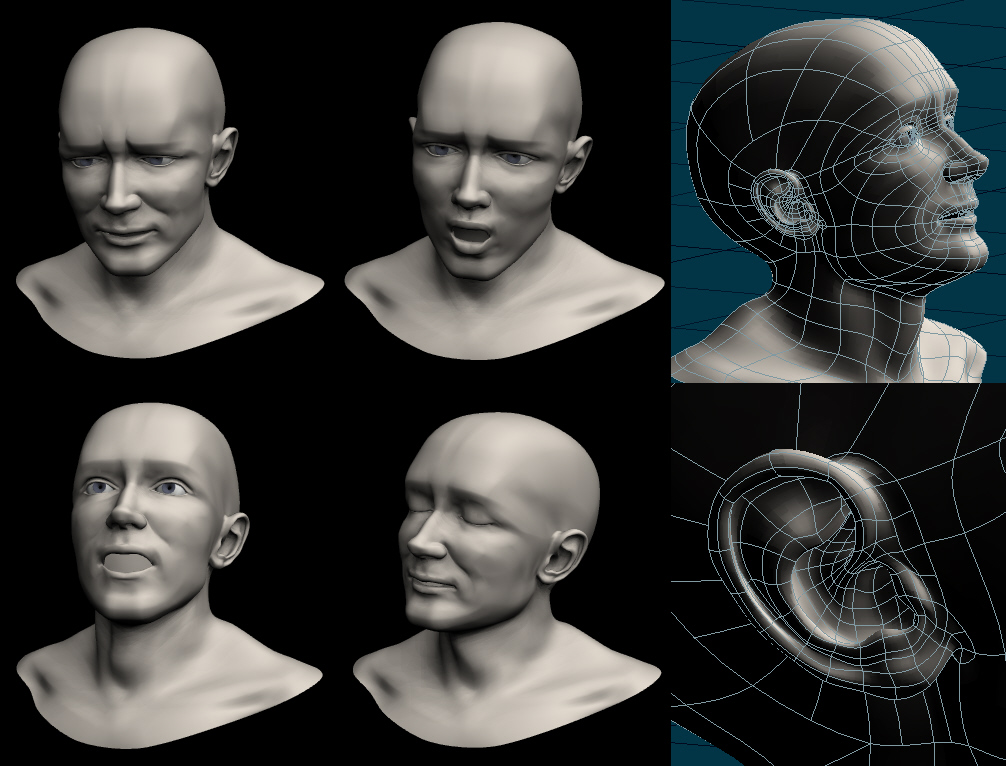
Next on the "to do" list is teeth, tongue, and texturing. I really only intended to do this head to learn spline modeling and lip sync skills, so photorealism is not what I'm after (yet). Many challenges ahead....
Mark Strohbehn