Simon Edmondson
-
Posts
2,579 -
Joined
-
Last visited
-
Days Won
19
Content Type
Profiles
Forums
Events
Everything posted by Simon Edmondson
-

It was a dark and stormy night.
Simon Edmondson replied to Simon Edmondson's topic in Work In Progress / Sweatbox
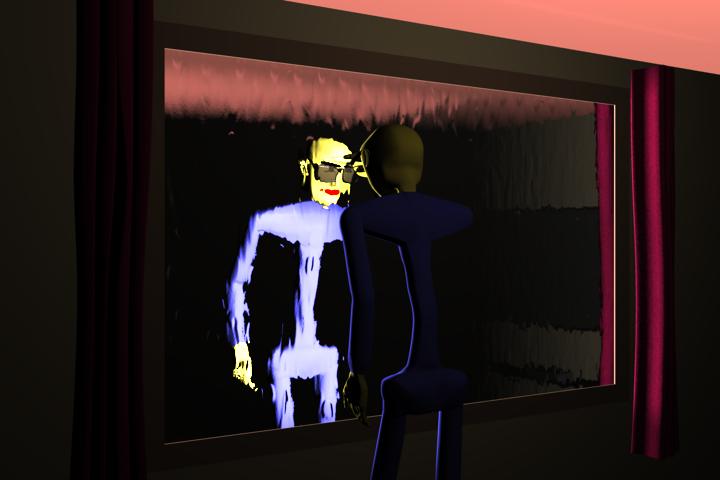
I think I might have found an answer (?) I double skinned the ceiling, but that didn't fix it. Tried it with Black for the ceiling but I didn't like that. So, while casting around as to what to try next, thought I'd try shifting the position of the light. Now, instead of pointing perpendicularly at the window it is above and at an angle to it, aiming at a Null in the figure position of the first frame. Does this work better ? regards simon Stormy_000.mov PS I should perhaps add, I'm working with V15J, in OSX 10.68 -
It was a dark and stormy night.
Simon Edmondson replied to Simon Edmondson's topic in Work In Progress / Sweatbox
A simple solution, but not the answer, occurred this morning. Stormy_000.mov I simply hid the ceiling on the model. It works but I think it does need the ceiling reflected in the window to give a better feel to the reflection (?) I wondered if Baking the textures/materials onto the model might do it ? I don't know anything about that except what I've read in various comics. So I looked in the reference manual to see how it might be done, only it does not seem to be an option ? I'll try another few options this afternoon, in between the domestic duties ( sigh ). The multitude of lights in the chor only comes into play in the last few frames and is supposed to be the wall lights that the figure turns on at the end. The reflections could be seen in the original mov post. regards simon -
It was a dark and stormy night.
Simon Edmondson replied to Simon Edmondson's topic in Work In Progress / Sweatbox
Thank you Gerry. I wish I had your confidence about it though ! I was thinking of ~Following Nancy's suggestion about lighting lists and making the ceiling a separate model so it could be excluded ? The problem is, I quite like it with the ceiling going white because, although its not 'correct' it does almost fit with my idea of lightening ( I suspect that may be "fuzzy Logic" on my part though). I did try this but I'm going to bed to think about it and try again in the morning. I did notice as it was going through that it went darker with each succesive render pass? This one had 64 because it wasn't going to take too long. The mov's only had one pass and the stills were going through on 16 at 1080HD because the render times were up to 20 mins per frame. regards simon
-
It was a dark and stormy night.
Simon Edmondson replied to Simon Edmondson's topic in Work In Progress / Sweatbox
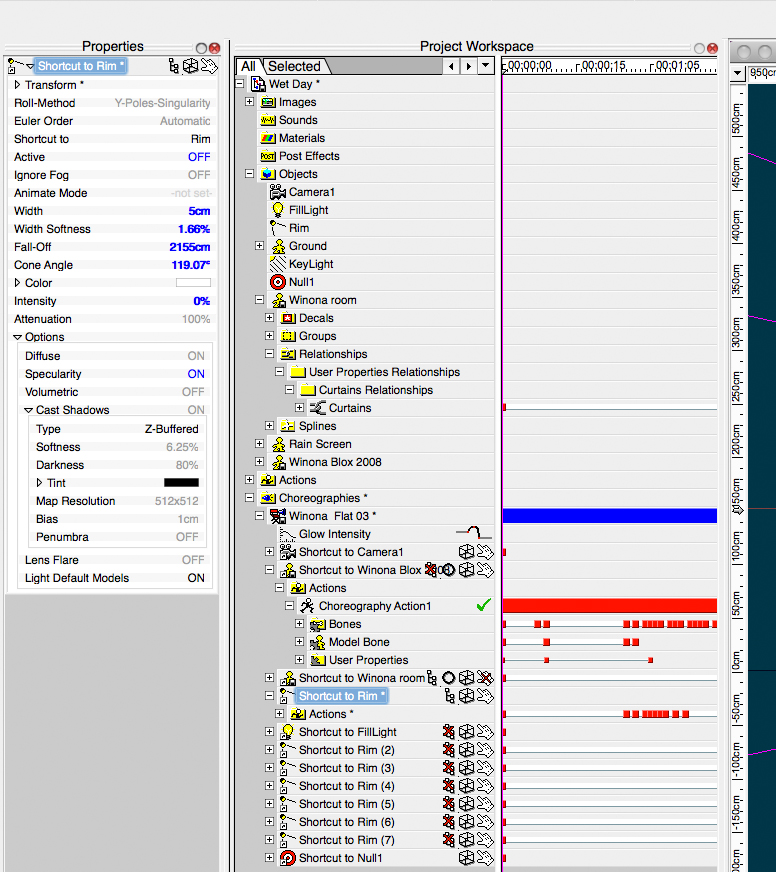
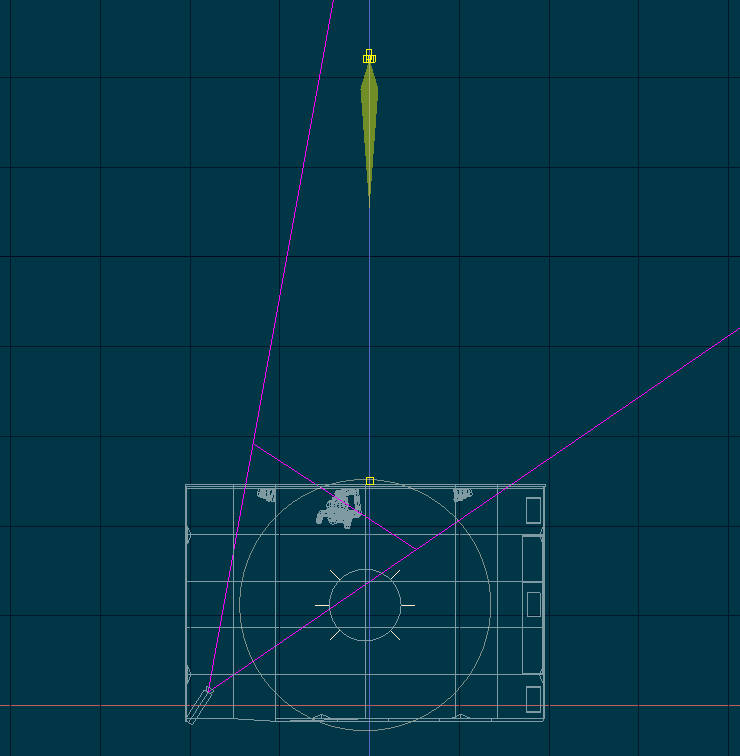
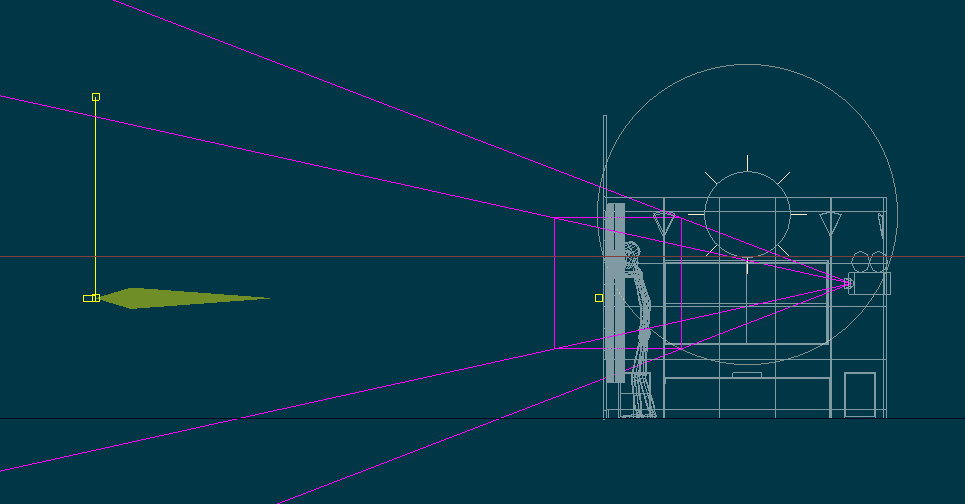
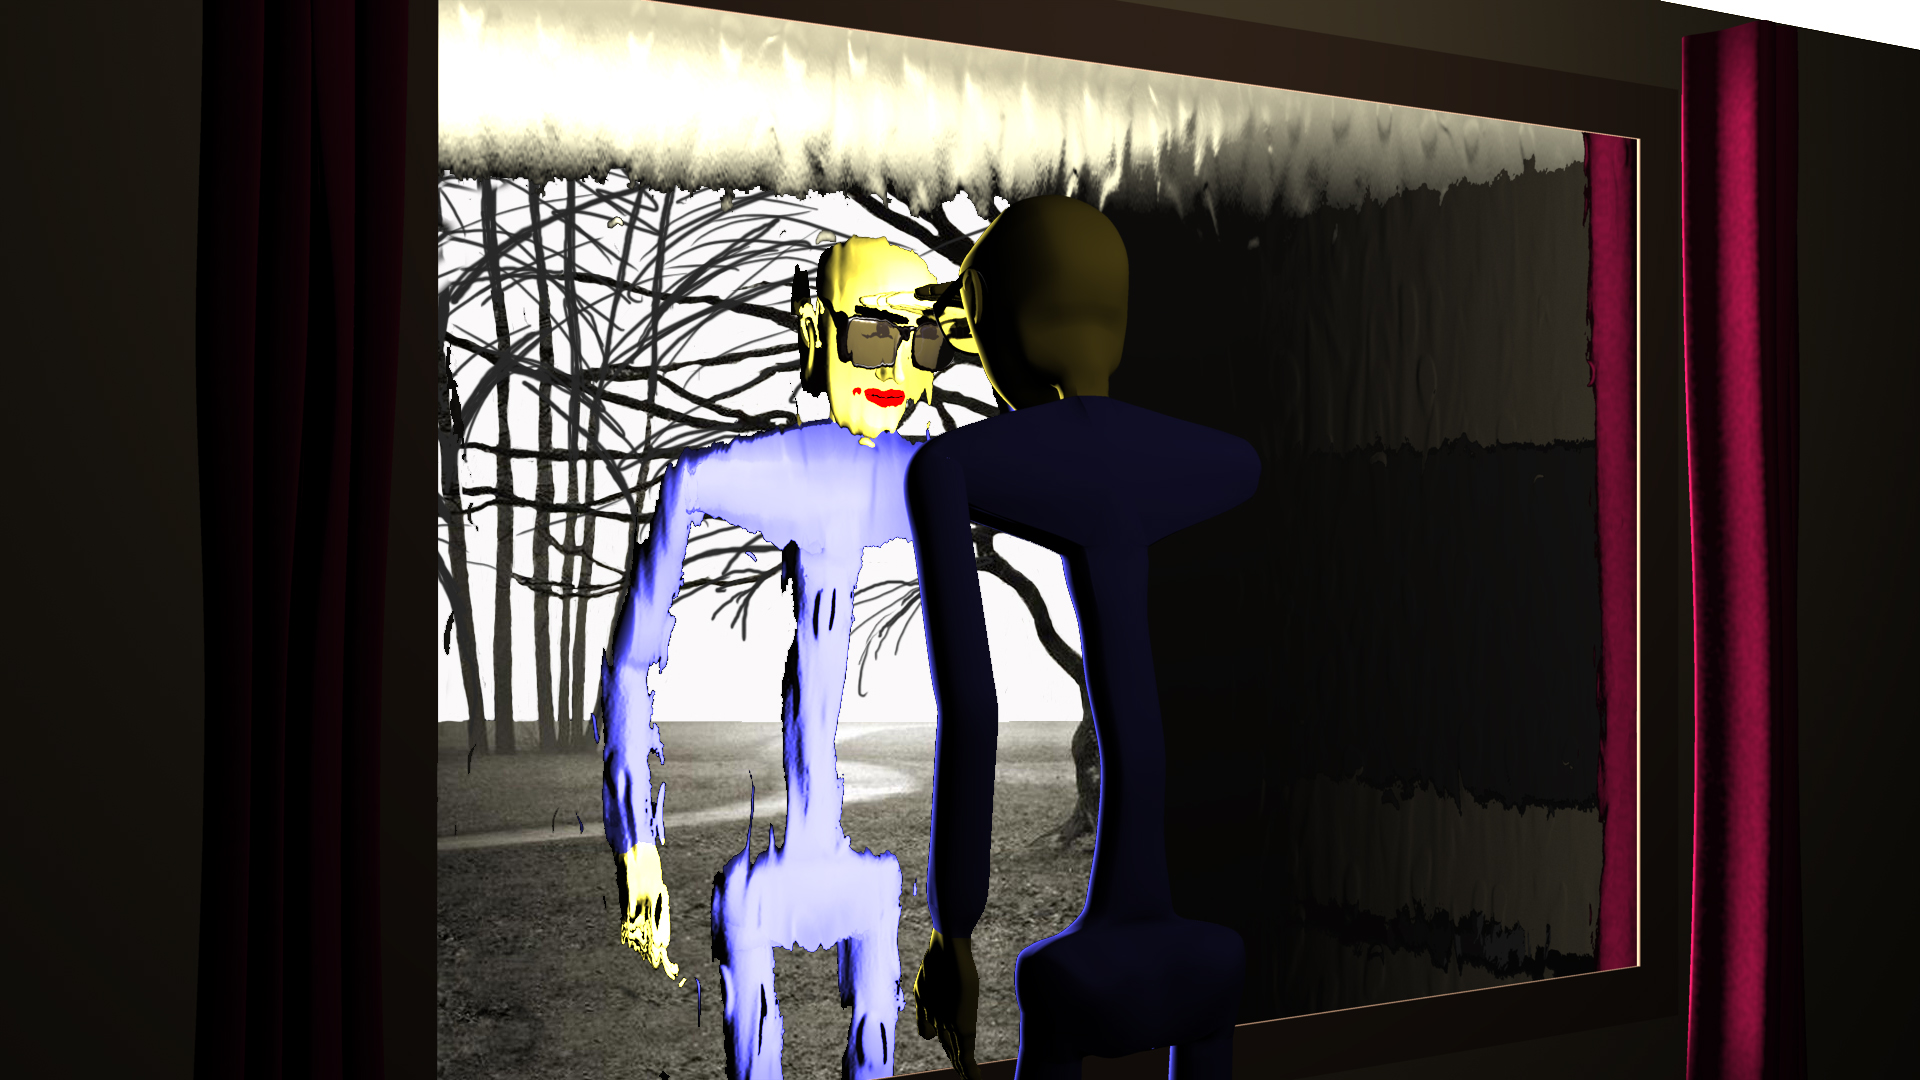
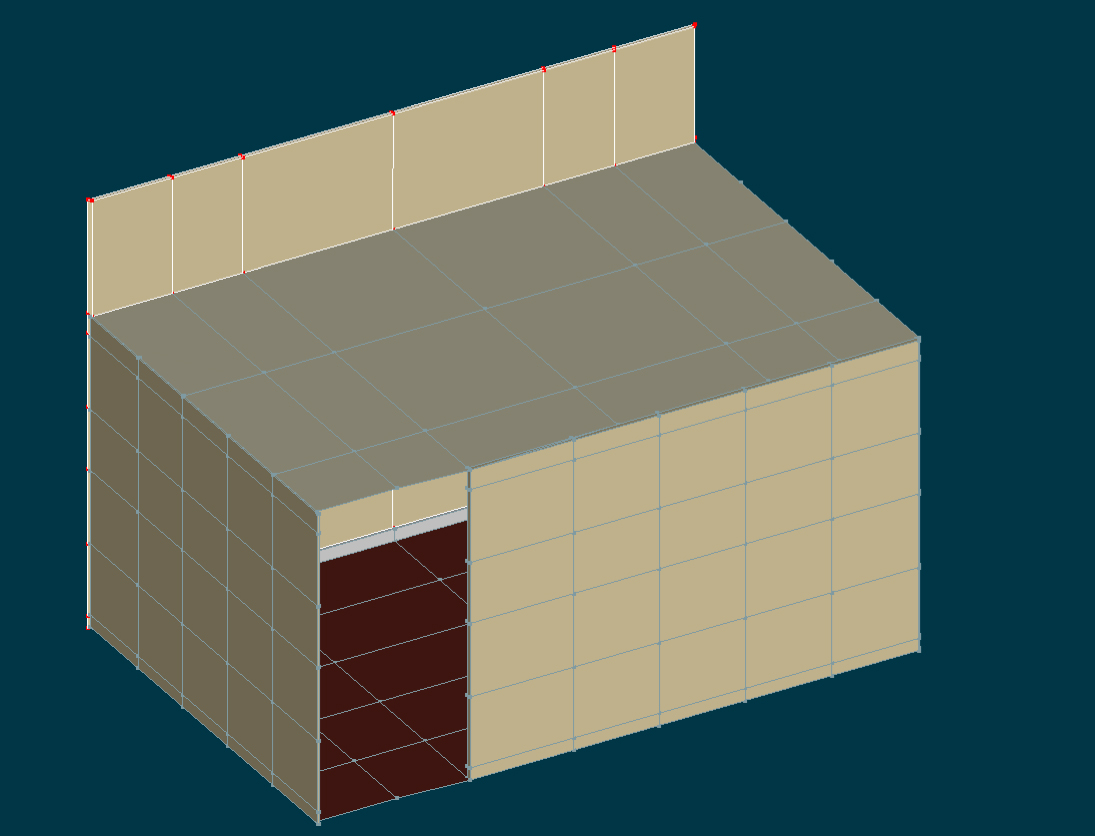
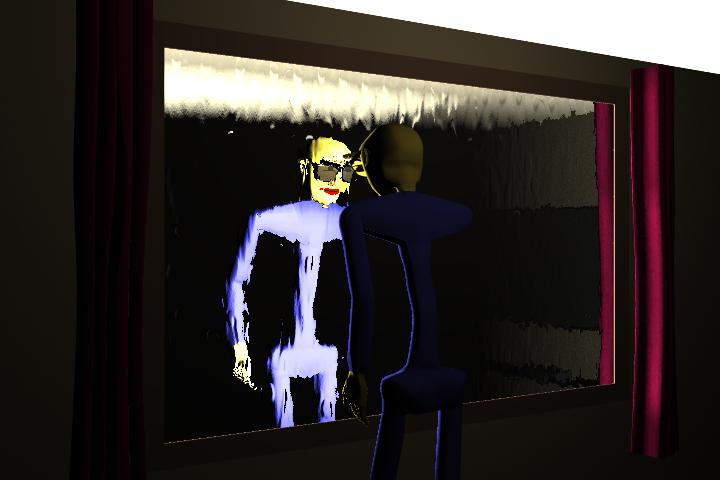
This is the PWS for the chor used This is the Top view of that setup This is the side view There are no objects outside the window as I was trying to keep the whole thing as simple as I could. Following an earlier suggestion I did composit in a still but I prefer it without to be honest. Looking in my own window as I type ( rural location so no real need for curtains ) the ceiling is less visible than the rest of the room in the window reflection and tends to be strongest in the area closest to the light source. I shall try Nancy's suggestion of ambient falloff to get that result on the ceiling. regards simon
-
It was a dark and stormy night.
Simon Edmondson replied to Simon Edmondson's topic in Work In Progress / Sweatbox
EDIT: Just saw your previous post: which way is your klieg pointing? and are you sure it is outside the room? _________________________________ How are you compressing your movs? The best way is to generate uncompressed image sequences of pngs or tgas (eg: image001.png...image00N.png) - and then import & compress the image sequence in QT Pro (or some other editor) with h264. I will try to get the PWS shots later. The exterior Klieg is facing the window and pointed at the figure. To scale, it is a few metres away from the wall. The position is static throughout, only the intensity changes. How would a light list be set up. Is there a reference to it in the technical manual ? I normally use the default settings within AM to compress the movies when testing. When rendering I output as sequential frames, usually .tga, and then assemble in Final Cut Pro with the sound. Still trying to find the best codec setting but, at the moment, use 1080 Prores25 as someone on the Apple site, more professional than I, recommended it. regards simon -
It was a dark and stormy night.
Simon Edmondson replied to Simon Edmondson's topic in Work In Progress / Sweatbox
Its a Klieg ( ?) with the shadows set to z buffer rather than ray traced. The lightening effect is simply done by boosting the intensity to 600% or more, for a single frame, then two or three frames later back to zero. Using the interpolation curve to get the flicker effect. ? Theres an interior bulb light casting no shadows and, at the end, some more kliegs to get the wall lights look. regards simon -
It was a dark and stormy night.
Simon Edmondson replied to Simon Edmondson's topic in Work In Progress / Sweatbox
I extended the front wall, as you can see here, from a rear 3/4 view. I still get this result though The front wall is double skinned and the side walls single. regards simon
-
It was a dark and stormy night.
Simon Edmondson replied to Simon Edmondson's topic in Work In Progress / Sweatbox
A curiosity ? I just did a wireframe of the scene to try a timing change on the turn. The same scene, same resolution, duration and codec ( H264 ), came out as 9.7Mb for the fully shaded version and 27.8 Mb for the wireframe. I thought the wireframe was more economic in file size ? simon -
It was a dark and stormy night.
Simon Edmondson replied to Simon Edmondson's topic in Work In Progress / Sweatbox
I may have misunderstood your suggestion ?. I had tried to protect against that by double skinning the walls an making the leading edge slightly bigger than the wall behind it ( if that makes sense ?). I'd noticed the effect but wondered if that was what happened in 'real' lightening flashes when the glare is overwhelming and gets bounced all around the room. ( that was more of hope I suspect ). Here is the latest version with the reflectivity modified an the internal light adjusted for fall of and position. There is no outdoor scene comped in yet as, regrettably. I have to go to bed shortly. Drat. Stormy.mov regards simon -
It was a dark and stormy night.
Simon Edmondson replied to Simon Edmondson's topic in Work In Progress / Sweatbox
Blast !!! I've just set it up that way... Oh well, I'll let that one go through and do one without overnight. simon -
It was a dark and stormy night.
Simon Edmondson replied to Simon Edmondson's topic in Work In Progress / Sweatbox
Nancy Thank you once again. I shall test away. regards simon Ps Thats a fab colour/texture on your model. Unusually for 3D cg you have a very tactile sense of surface and colour -
It was a dark and stormy night.
Simon Edmondson replied to Simon Edmondson's topic in Work In Progress / Sweatbox
If you don't want to see the reflection (of what I presume to be) the room in the window, you can try lowering the reflectivity falloff of the glass window so that only the man, or anything standing close to the window will be reflected. If that is supposed to be a courtyard outside the house or you want to see the reflection of the whole room, then never mind. Nancy Thank you as ever for your feedback. Would you adjust the rflectivity falloff in the maps, the render or the materials? regards simon ps the overkill was caused by the render resolution (honest !) -
It was a dark and stormy night.
Simon Edmondson replied to Simon Edmondson's topic in Work In Progress / Sweatbox
I'll see if I can output it differently. Stormy03.mov Lower res and quality done with H264... -
It was a dark and stormy night.
Simon Edmondson replied to Simon Edmondson's topic in Work In Progress / Sweatbox
Stormy02.mov the plugin stopped working, closed browser I'll see if I can output it differently. -
It was a dark and stormy night.
Simon Edmondson replied to Simon Edmondson's topic in Work In Progress / Sweatbox
Comped a rough background into the scene. Is this the sort of thing suggested ? simon Stormy02.mov -
It was a dark and stormy night.
Simon Edmondson replied to Simon Edmondson's topic in Work In Progress / Sweatbox
I was thinking of trying to turn off the maps at that point and make the window transparent as material so as to see outside ? Simon Ps I like the phrase "remove the mirror curse" ... -
It was a dark and stormy night.
Simon Edmondson replied to Simon Edmondson's topic in Work In Progress / Sweatbox
I added Curtains but it still perhaps needs to get the transparency to avoid looking like a mirror ? I tried to get car lights going past but they didn't show up through the maps for the rain. Any suggestions as to how to achieve this ? regards simon Stormy.mov -
It was a dark and stormy night.
Simon Edmondson replied to Simon Edmondson's topic in Work In Progress / Sweatbox
I was trying to keep it as simple as I could. I thought of adding curtains, a roller blind or venetian blinds. Not sure yet. simon -
It was a dark and stormy night.
Simon Edmondson replied to Simon Edmondson's topic in Work In Progress / Sweatbox
Its supposed to be a window rather than a mirror. Perhaps I should turn the reflectivity down and put some more light outside ? simon -
With a big thank you to Nancy and Rob for their help last week. Here is the opening scene for a (very ) short I'm developing. Any feedback is very welcome., as critical as you can. Theres no sound yet regards simonLightening.mov
-
Simon, can you tell more about the trouble you are having? Its just a question of comprehension on my part really. Or lack of it ! It is a very comprehensive rig, with a lot of controls. There are no guidelines that I have seen to what the various controls do so I was having trouble getting to grip with what how I did affected the model on screen. I watched your video ( for which thank you ) about draggable poses and realised that the separately coloured axis's affected the geometry in different ways. So went back to the piece I was working on afresh. I think I'm trying to work and learn at the same time and the learning requires more application and understanding at the moment. Simon
-
Dragging the pose onto the character quickly keys all the necessary bones and if I need something slightly different it's easy to adjust the few bones that need to be different. Video Rob Thank you for the video.I shall watch it straight away. regards simon
-
Following last weeks adventures with water, I'm trying to do a little short using the 2008 rig. There are so many controls in the rig that I'm finding it a bit confusing so, two general questions really. Is there a guide available to what the controls do and how to use them ? and Would it make sense to incorporate those controls into a pose slider . So that, for example, the right index finger curl was done with a pose slider rather than using the two null's ? As a supplementary question to that last one, if the poses were set up on the rig, could they then be exported to another model using the same rig ? Has anyone else addressed this difficulty ? Regards simon
-
-
Nancy Thank you once again. The Dsts file was one that someone else used in another thread about wet looks. I had thought they got it from your post but was evidentially mistaken. I shall try yours later. In the meantime, by way of a minor diversion, I tried the technique on an idea mentioned earlier, with this result. Window.mov Only the first pass at it. Macs do understand caps I think, it was my error. regards simon