


John Bigboote
-
Posts
6,562 -
Joined
-
Last visited
-
Days Won
56
Content Type
Profiles
Forums
Events
Posts posted by John Bigboote
-
-
Have you tried using lens flares instead? A:M has an awesome Lens-Flare assortment.
-
The suggestion I was going to make is maybe try a simple Luma Key and have it key out darker. It seems to work pretty well for that type of thing.
Basicly, my photoshop 'work-around' with actions IS a luma-key.
It is taking the image and converting it to 256 levels of black to white, so any pixel with a color value will translate to a grey rather than black and will be represented in the alpha by its luminence value.
If you wanted to use a 'keyer' filter in Premiere or After Effects it would work similiarly, but frequently an unwanted 'ring' around the effect is a by-product.
Any work I can do in Photoshop is preferrable to working in AE or Premiere. Remember, Photoshop is an image manipulation and photo-retouching APP, whereas the others are video based. I see this most via 'scaling'. Take an image and scale it down say, 33% in both apps and compare...Photoshop does a better job.
-
Have you tried turning off the hair in the chor. and then back on? both by turning it to off in the render settings and in the chor's camera render settings...then back on.
I would also recommend that you close the chor. while editing the hair, and reopen when done. There are lots of quirks with hair, espescially when dynamics constraints are also used...and I just don't know how to communicate with the guys at support. I sent an erroneous hair project in recently and got the reply..."in this project file the hair does not work- we'll need a better project file."
So get used to the workarounds.
Also, do you turn dynamics and preroll OFF while grooming hair? Makes things go much quicker, and turn back on when done... I don't know if this character has hair dynamics...hope you can get it aworking!
-
Yeah- thats the 1 mb limit for you. I had to compress the details out of it. Picture AND sound.
-
OK- I'm posting 1 more...then I'll leave you alone for a while until I have something more linear. This is ANOTHER test, and as an afterthought I tagged some sound onto it and it 'sort of' fit. If you can get your QuickTime to loop...loop it and this conversation goes over and over like the ones me and the wife have.
I rendered this 10 sec sequence with and without porcelin and was able to frame for frame compare it at D1 resolution. The porceline STAYS.
A colleague of mine once said..."sound is half the picture." That was the same guy that said "She's got freckles on her but she's pretty.
Hope you enjoy.
-
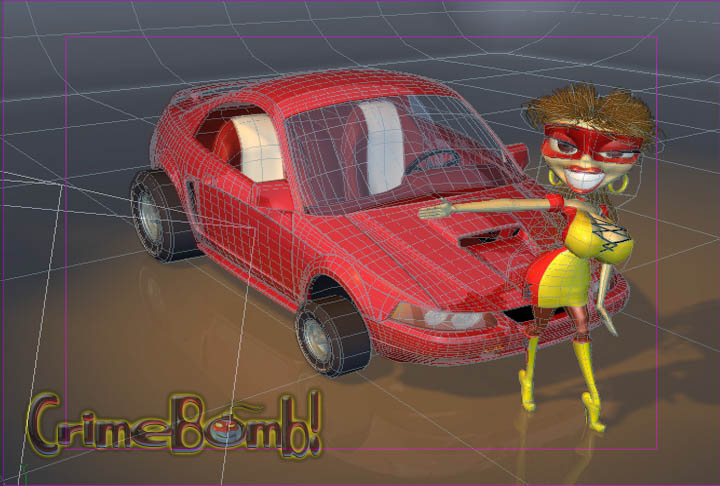
And the mesh. Total patches on car: 17,824.
Total patches on girl: 2,944
-
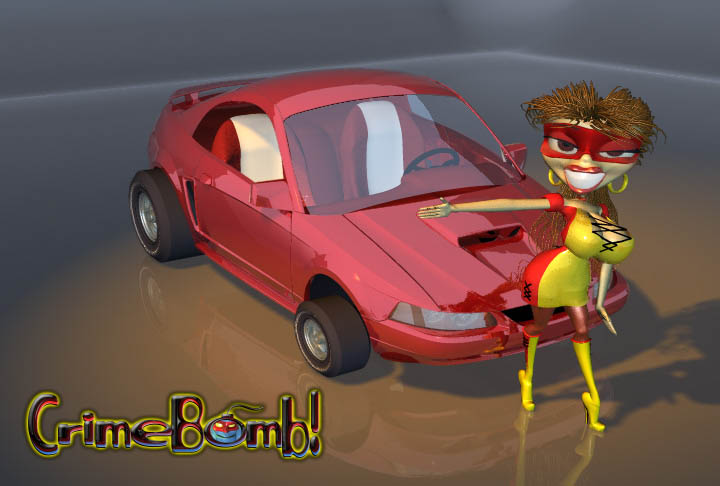
Here's a frame at D1 (digital video) resolution.
-
Attached loop of a car I am working on for CrimeBomb...
I am looking for a Hasher named Charles Cronley. About a year ago Charles and I traded CAD data for Mustangs, I finally took a look at his dense 'paint-only' mesh and decided it was a perfect test for the DISTORTION BOX tool and this is what I have come up with. Just wanted to let Charles know I am using it if he has any objections...
I added lights, glass, mirrors, wheels and interior (WIP) I plan to make poses for door and hood openings, steering, suspension, exaggerated distortions for cartoony takeoffs and handling, and an action for wheel spin with stride-length. Then I plan to use it extensively as a CrimBomb prop with Ms. D driving and Crimebomb in the motor compartment making it 'go'... could be humor-invoking...
Also- I've discovered 'porceline' material! I added it to my characters and WHAT AN IMPROVEMENT! Can't believe I stayed away from it for so long. I thought it was for making 'teapots' and stuff. Its on the car's paint too.
LOOKING FOR FEEDBACK GOOD AND BAD. I value your opinion. Really!
LOOKING FOR CHARLES CRONLEY...
-
I was in the same quandry when I made my Jeep-TREO animation. What I ended up doing was renderring BOTH with and without and then half mixxing them in AfterEffects.
By rendering the character WITH background in toon mode I got the main plate, then I renderred JUST the character with an alpha in shaded mode. In After Effects I could then bring down the transparency on the shaded to just where I wanted it. Also because of the alpha I could use a filter called 'simple choker' under 'matte tools' to add a thicker outline around the character, which I call 'the powderpuff girls' effect. A thicker outline around the perimeter of the character REALLY pulls it off against the BG.
Just suggestions. Your animation looks really cool.
My animation can be seen here on A:M Films to see what I am talking about...
-
OK. I tried it. I liked it. A LOT!!
I followed the easy tutorial and added porceline to my CrimeBomb and MissDemeanor characters and did a compare...MUCH NICER!
Of note: I tried dropping the material onto my character 'MsD' who has hair and I crashed...I then went and dropped the material on JUST the attributes I want smoothed...skin...clothes...etc SEPARATELY and it did NOT crash.
I notice about a 10% longer render per frame...which is worth it for the smoothness.
The guy with the shark at the top of this post needs to have a look at his basic splinesmanship and maybe work from a sketch... GREAT idea doing a shark though, not too many of those in these Hash waters!
-
I too, am new to the porcelin. Does it increase render times? How come you have to 'dig' thru the CD for it? Why can't they put it with the available materials?
Thanks for the tutorial Pablo- it could'nt be simpler!
-
Thanks Ross! Thanks Rodney! Thanks JIM!
The walk cycle was actually animated for another character, and a last minute drag-n-drop onto this one. I can do better, wait n see! This project was inspired by the new 'Incredibles' movie...I hope to initially just get some good samples I can plop into a demo reel to offest all my motion-graphics, and then I would like to make 4 or 5 short episodes of a very formulaic nature. Maybe something I might pitch to spikeTV or some other non-childrens production...
ROSS- Here's my little explanation of how I get the cleavage to bounce.(attached jpeg) I would love if Joe Williamson(?) of 'Hunter Dynamics Test' fame could illuminate how he does his magic...
God Bless our emerald coast today, may Ivan's wrath be mercifull.

-
If its ANY consoleation...
I find I do things a little BETTER the 2nd or 3rd go round...
-
And a 4th...thanks for the Hash Forum generousity!
This one shows Miss Demeanor's 'dynamics' in another action. Also testing some new facial pose sliders here.
i LOVE the new DISTORTION BOX feature....! This adds a whole new dimension of squash and stretchiness! For this animation... I made a pose called with a +100-100 value and named it 'Head Squash- Left-Right' used the distortion box tool to squash everything BUT her eyeballs, then I sort of slid that pose back and forth in this animation. Hope you like, if I offend anyone...please let me know and I'll never place 'jiggle' on the Forum again.
I DO find it an intriguing aspect of nature and fair game for over emphesizing in animation.
-
And another...These animations are mostly me becoming familiar and testing my new characters, add things and taking away...general kibbitzing...so the animation is NOT fully tweeked but feel free to comment.
This is CrimeBomb juggling some timebombs:
-
OKAY...I'm gonna catch hell for this one, but I can't resist!
I've spent WAY too much time playing with the dynamic constraint on MissD's bosum, and learned what it can and can't do for you. I'm still learning. This is the silliness that occurs with too much jiggle...
-
Still playing around with these 2... Here is a title sequence.
-
Yes- Hash gets fussy with sprites and alphas, glows as well do not appear in the alpha. But here is a quick Photoshop workaround:
Open a middle frame One typical of the imagery, say frame 78...)in Photoshop. Find the 'actions' window and choose New action, name it and 'start recording'. This will automate the process you do on 1 frame to ALL the frames.
Now Photoshop is 'recording' what you do:
Choose 'All', Copy. Go to channels, click on the 'bad' hash alpha channel and Paste. You know have a workable alpha, tweak it with the Brightness and Contrast effector.
In Actions window, hit 'stop recording'.
Close the frame WITHOUT saving. Now, under file, find Automate-Batch. Your action will be the default, so leave that, simply find the folder where all your .tga's are and choose 'save and close'. Now hit okay and stand back and watch as Photoshop does your wishes to ALL the frames in the folder.
NOW open the sequence in After-Effects, AVID or Premiere and say 'Thanks to the guy on the hash Forum!
DAMN! I'm good!
BTW- your sprite looks really cool!
ATTACHED- Example of the action as I did to your file in 10 sec in Photoshop...

-
Do you mean animated 'gif' files? I have not heard of animated bmp files... or are the bmp files needed for your psychological software?
-
YES! Nice bump-mapping...i LIKE the blockiness in the cheek area, works for me!
What rig and rig solutions are you using...fan bones...TSM...weights...smartskin...cogs...?
-
Awesome- here's my two bits.
1- I saw an earlier version where as the character stepped in from stage right he paused and then looked at camera...I thought that worked and missed it in this version...
2- As your character is running away at the end...which is hilarious... you need to add some inertia to his direction changes, as they are quite abrupt and everything else is SO fluid.
can't wait to see more from you, your style is ripe...keep it up!
-
Have you referred to the Hash Online Documentation?
http://www.hash.com/htmlHelp/v11.0/Technical_Reference.htm
cool test, I find that TONS of tests are in order to get oriented with hair, I'm rendering one now as I type...
-
Alas- NO.
I can NOT get my dynamic restraint to render. I can see it working in the choreography but it WILL NOT RENDER. I just tried it 20 different ways and all were for naught. I wrote hash support. The only thing I can figure is there's a conflict between the dynamics of the hair and the dynamics of the dynamic support.
When I send my project file to Hash do I need to send all the models, decals, matierials etc. separately?
Yeesh!
-
And here is a fun action test, where I was really glad to see MissD's V11 hair perform quite well... the Mustang in the background was from somebody here on the list, I was just throwing props in to populate the scene. Once again, the dynamic constraint is NOT working (in her chest) Perhaps I'll turn off the hair and render a movie and see if it works then...yeah- thats what I'll do.
And this is an action blending into another action and back into the first...
I smartskinned the big guy, but need to remove it all and do it all over again... tricky stuff, that smartskin!
Happy Holiday (to all that applies to)
Cartoony Ford Mustang
in Work In Progress / Sweatbox
Posted
Thats a GREAT link! Wish I had that Mustang illustration when I commenced. The car actually started as an experiment with the 'distortion box' feature...I wanted to throw something really dense at it to see if it could handle it, and it did. Yes, the original model came from CAD data from someone on the list named Charles Cronley, whom about 1 year ago he and I were comparing notes on CAD data cars and 'scanned' cars, which my company uses scanned models from Viewpoint data labs. Charles sent me this mesh to show how he was able to use CAD data thru various file transfers to finally get into Hash. I sat on the file for a year, and finally took another look at it when I realised the power of distortion boxes. I am a fan of the 'big daddy roth' cars and had that loosely in mind when I went about distorting, once I had done the deed to this 'stang I absent mindedly started adding windows and tailllights and more and more detail just to see what it would look like finished.
The beauty of distortion boxes is that I do not have to stop here, I can do more distorting in poses and actions. Meaning I can have an action where the car takes a hard turn left and really compress the body to emphasize. Another pose or action for a takeoff where the wheels lift off the ground...etc.
I admit the car sort of looks like an old AMC Pacer, which is bad. Its one thing though, to 'toon a car in an illustration and quite another to 'toon it in 3D with animation in mind, which is what I'm planning. I also want my characters to interact with the car...cartoony muscle cars and cartoony hot chicks... that's the formula I'm after. Think it will appeal?