Moonsire
-
Posts
89 -
Joined
-
Last visited
Content Type
Profiles
Forums
Events
Everything posted by Moonsire
-
Rodney, I work as a background actor, I read several books at the same time, usually at least one magazine, have several animation projects, a newsletter, webmaster 6 web sites, read dozens of blogs a day, work tutorials on photoshop elements and other similar software, research my family genealogy, read/correspond via email with family and friends, and try to keep up on my favorite t.v. shows. And you want me to reign you in? Does this include reflections, like on my Stalk character? What is the other method for creating shadows? Learned my lesson on this one with that brick building. More materials than I have eye lashes. Didn't even consider this one. The Tech Ref: Animate Mode things didn't make much sense to me, but I'll look at them again. Then again, the Constant Drivers explination may have just put it into context for me. This is a problem I have had with other projects.
-
I will look at these posts again on Tuesday. I had 5 hours sleep before I had to be on the set of "24". I am a little tired. I will post again, tomorrow. Phil...
-
Filters it is then.
-
I took Rodney's suggestion, (I had already decided to try that anyway) and used model mode to hide everything but the windows. Then I left them in the scene with the character render. Hardly slowed things down at all. I think part of the reason that Stalk (the model's name) turns is because he hears the van start up. I have noticed the Van in the window from day one, an felt like it belonged, assuming I could make all the reflections work. You could say that you like his reflective nature, but shininess works for me. The fix is as simple as my going into Gimp and copying the shadow and part of the fire plug, then doing a quick fix on the other images. I only need to do that for the first few seconds of the film. Or I can render those first few seconds again with the shadow. 1. Where is the animation driver to change to 'constant'? 2. Where is the animate icon you speak of. 3. On of the problems I have had is that I make the character do something, and at the end, I change the way it looks or moves and that change is incorporated into the movement from the very beginning, starting when I put play. How to avoid that? I could do it quickly with the car. Step one, import new car. Step two, go to properties of old car. Step three, click on Short cut to .... Mini Van and pick the name of the other car. Job done. I would have to render the scene again with the van, Stalk, fire plug and windows...total time: Total Frames: 361 Rendered in Multipass: 2 Total Render Time: 00:48:43 Average Time per frame: 00:00:08 Actually a little less on render time, because I would only have to change the frames with the car or it's reflection. When it passed on the left, I would have all that I need. If I wanted even more control, I could alway render each of the characters separately from each other. Then the plug fix would be even faster with only the plug to render.
-
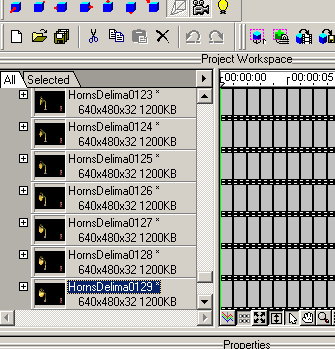
Hi all. Here is the first scene from Horn's Dilemma, thanks to the help of all of you. Rodney, I have learned a few things about doing the TGA renders with Alpha Channels and Shadows. You must make sure that the chor. is lined up at 00:00:00 or some of the things don't pop in till later. Example: Watch the attached movie and you'll notice the shadow on the fire plug (before and after the van). This is reduced from the original and thus a little less crisp, but should show you that I am learning from all of this. Total Render time (total of 4 renders) for this scene is 1 hr and 58 min. Beats heck out of 75 Hours. scene1.mov Comments welcome
-
Hmmmm... What happens if you just hide the building (in the model) and leave the windows? Clever. Just might work. Then place this layer over the layer of the building. I have rendered the background, and the character passes, and am rendering the shadows as I type. The grand total of render time should be less than 100 minutes (1 hour and 40 min). The I must composite them. And I might even try adding the reflections (or may just leave them out). All still less than 75 hours of work, much less render time. We'll see how this works out by tomorrow.
-
Reflections here then. Satyajit had a good post. The materials do effect the shadow it seems. Bumps and maps. Let me know how the greenscreen works out.
-
Hey Hey, Ho Ho slower renders gotta go! I stripped the building of all materials and decals, and ran the shadow render. When I ran it with the building as it was modeled, it took just over 10:00 minutes. See, Caroline, I don't have one of those fancy smancy gigafast beasts like you do. But, without all the extras, the shadow render took 13 seconds. Now that, I can live with. As to greenscreen, I haven't a clue. This will work out great for me however, doing the composite work after quicker renders in parts. I'll play refections with your, but should we start a new topic for that or, continue it here? Rodney, any input there? In the mean time, I know I've learned a lot about Alpha Channels in the last few days. Is there more, or "are we there yet"?
-
Funny, my wife says the same thing all the time. Hey, I tried it out, and guess what. It worked. I used the background, and the action TGA's and ended up with a .mov. Now that I've done this, I am ready to go back and rework the scene to get better actions out of my main character, and to use the low rez version of the building (which will be done by ridding it of materials) to make the shadows. Would I be right in the notion that I could get the reflections if I set up the render in the same manner as the shadow render (except with render reflections)? Just a thought. It will take a while to do this, but when done, I will post it here with notations about what steps I took. This has been very educational and a ride worth taking. Thanks all. Phil...
-
I'll try following these instructions, though I need to do it tomarrow. My call is 8:00 am, and that means a 5:45 wake-up. I managed to get a first render of the scene with building/background and characters (van, horn, and fire plug). Now, all I need are the shadows, and having seen the scene play out, I may need to fuss with the actions, to get the look a little more spot on. I'll let you know tomarrow if this all works out. Thanks. Phil...
-
Thank you Caroline. That was the missing peice of information. I was highlighting all the images 000 to 249. I just tried it and it worked fine. Alas, in most programs, if you want to import a group of images, you import them all by highlighting them all. Now I know better. When this is all done, we need to put together a simple step by step. I have a question for you. I tried rendering my shadows (test rendering a single image). It took ten minutes to render, taking almost all of that time on rendering the invisible building. What am I doing wrong that I am getting a ten minute render time? I thought I followed your settings, and nothing showed in the viewing window or the rendered TGA (except the shadow of course).
-
Rodney sent me to this tutorial to learn to convert the tga's to .mov, Only it doesn't actually show that specific funtion, so I don't know how the tga files are supposed to look in the images folder on A:M. Alas, so far I have only been able to load one tga into rotoscope/camera at a time. The tut info is below. Very good tut for convert of .avi/.mov movies to smaller files or to alternate files, includeing TGA's. The direct link to John's WMV file is: http://johnl.inform.net/images/convert.wmv I should get home around 8:00 pm tonight, and I will try to run the shadow render. At least, by the time I get the TGA to .mov figured out, I should have all the tga files ready to go. later...
-
Once again, I want to ask if anyone can think of a reason why I can not load more that 100 images (TGA) at a time. And when I watched the tutorial, the images were stacked left to right, is this really the way they are supposed to be? And why can't I load more that one at a time into the camera? I am assuming I am doing something wrong. Phil...

-
DY-NO-MITE! This is what I'm talking about. Well done Caroline. I will give this a try on Thursday when I get home from work. That is exactly the type of approach I am looking for on doing some of these scenes. That's an easy fix. Top rate job Caroline. I'm sure there will be an answer to this soon enough. We could just make duplicates of the windows and put them just over the background windows. I am going to filddle with this for a little bit before I have to go to sleep. I'm not do on set until 11:30 am tomarrow (doing "24"), so I get to sleep in some. Phil...
-
Yves, When you say attributes, your talking about the items under the "Surface" heading? (color, roughness, transparence, etc...) I really like the brick look, but I am always going back to how much is that brick look worth in time and effort. I have done decals and have a pretty good idea how to place them, though more work needs to be done on non-regular surfaces. I tried for a decal brick exterior and still have a way to go on getting one that I like. I tried a few brick tutorials and still didn't get a brick look I like. I like the idea of striping the building of its materials and trying a decal/attribute approach. It just might work. Dhar, I have the street set peice with the sidewalk, and the two of them together, with that little fire plug added up to 16 minutes. I think I'll look to using Yves suggestion in the future, and aim for more decals and attributes. But I am still wanting to work with Alpha Channel, as I can see much there that I may be able to use in the future. Still, I also need to find out why I can't get the "save as animation" option to pop up when I want to convert the tga files to .mov. I am off to my sisters for my dad's memorial, but I will likely borrow her computer to visit here. Thanks all, Phil...
-
Definately not! But you're going too fast - I shall have to catch up on all that I missed today. And, Phil, you can do alphas with Photoshop Elements - only black and white ones though, I think - I've used Photoshop Elements to do simple alpha selection in the fly particle movie that I did. All you do is a selection, then you do Selection Menu > Save Selection, and save it to Alpha 1 (or whatever). You then save to a .tga, I think 32 bit, but I'm not sure that matters, I can't remember for the moment, and it's a working week (bother work). I also have Paint Shop Pro 5 off a magazine, in which it is easy to check the alphas. Photoshop one day maybe, but Elements has been good enough for me so far and is 1/5 the price, and being so used to it I much prefer the workflow. OK. Really. It's bed time. One more reply is all I have left before my wife drags me kicking and screaming from the computer. Caroline: I have Elements 3, PhotoImpact Pro, and Gimp (newest). I like to use Elements and been doing tutorials. Gimp does color tga Alphas. Now I'm off to bed. Phil...
-
My sequnce starts at 0030. Would that be a problem? The tutorial shows the .mov file as a single file which he converts to a greater compression, and then takes the .mov file and converts it to a tga files. He does not show how to take the tga files and turn them into a .mov file. When I load the tga files, they run from top to bottom, and no matter how I click on them, or the image file folder, the "Save as animation" option never becomes availible. the files list like this: 1 2 3 4 5 6 Not like 1 2 3 4 5 6 I have tried everything I can think of. Thankyou.
-
-
I can see how that will join my TGA files into a .mov, but, how do I do that <b>and</b> intagrate the single background image? I tried to load the image sequence of 240 images, and it said there were too many. And once I have them there, the "Save as Animation..." feature does not come up for multiples.
-
How do I run the render again with the group images, and how do I place them? Gimp is what I have that can do the job. Photoshop Elements doesn't do TGA with Alpha Channels. Step 3 is a little more work, but worth it I think. I'll watch my shadow placement in the future. Thanks. I called Hash today and it's in the mail. I'll take what I can get on the compatiblity front. Phil...
-
My oh My! I have had an epiphany! Back On Topic. While going through the Mossor tutorial, I got this really clear image of what I sould be doing. 1. Run render of background only (with fire plug for shadow). 2. Run render of Van, Character and fire plug (car in front, character behind). 3. (If I want the shadow of the Character to show (not worrying about the car)) then I can put a white plane where the street is and one where the wall is and render. In Gimp, remove the character, Invert the image, move on to the next frame and repeat. There are not that many frames with the shadow. So not too bad a job. 4. Import the background image. 5. Import the group render from 2. 6. Import the group render from 3. 7. And this step (for what I want) is different than what the tutorial calls for, because somehow, I should be able to export the bunch as a .avi or .mov. So, assuming 1 through 6 are right, what is step seven? Phil...
-
Its out! Hash Inc is mailing it with new updates. Those that have missed it should visit a Hash Inc booth at a tradeshow near you and get yours. I'm hoping mine will arrive on monday. I'm still operating on V12 and will be for a while, as funds don't allow an upgrade now. The tradeshows are out for the same reasons, though I might be able to scrape up shiping and handling. Will a phone call to Hash inc. generate such an arangement?
-
When does the DVD com out? Just a 147 pages of light reading? The math is likely beyond me, but I like the pictures. <g> I'll look it over, over time, as I can't print this one out. I have seen this one before. I'll print it out and read it along with the Darrin Mossor tut on Layers. I have seen the Mossor tut before too, but didn't make connections. Phil...
-
Now if you could teach George Lucas to embrace this thought... I have looked at things I have done, and my thought is "Ah, I could have..." or "Ah Hah, I should have..." and I know that those projects are done. Next time, I take what I have learned and make the next project with that extra bit of awareness. Still there will come a moment when I am likely to say, "Ah, I could have...", but that is they way of things. And the bar is raised or lowered by the level of your personal investment. Just a reality. I work background, and get paid minimum wage. The star of the show gets paid gobs more (which is the way things are) and we both have a different level of investment, thus bars are placed differently. After the 10th take, I can see how "good enough" is reached. The star, however, may want to go for take 11, or may take it futher. When I am in his spot, the bar will be higher. When your giving your time and effort willingly, and without monitary compensation, and the love of the art, or even the stroke of the ego is involved, improvement is alway ready to be had by the one who keeps his or her eyes open. You just want to do your "best". Good enough becomes a higher bar, by choise. That's a good thing.
-
Hey Rodney. I've read the above and have printed out the tutorial to read in the morning. Bed time now. But I have one question I haven't asked anyone yet. What is with http://www.AnimationPitstop.com. People keep saying what great stuff they have, and all I have ever seen there are paid ads and pop ups. Is there a deep dark secret not shared with outsiders that I know nothing of, or is there really content on the site that isn't just ads? Now I can walk the dog (she'll like that) and go to bed. Phil...