

cribbidaj
-
Posts
317 -
Joined
-
Last visited
-
Days Won
4
Content Type
Profiles
Forums
Events
Posts posted by cribbidaj
-
-
Have any of you seen the recent Jose Cuervo ads on TV and have suggestions on how to light and render models in A:M in the choreography to simulate that look? It seems to be a 2-color (red/black) psuedo toon render in 3d, with the shadows being black. I write "psuedo" toon render because it seems like there is depth to the scorpion model though it is only two colors.
-
(consider using SSAO instead)
I'm using A:M 15j, so I don't believe SSAO is an option in that version. Also, using occlusion yields such killer results!
-
Thanks, Nancy! Yes, your "White Render" posts on this forum are what I've used to inform my experiments with white rendering - thank you!
I hadn't thought of Toon Line Rendering while white rendering - will give it a shot. When White Rendering, I also had turned off all lights in the choreography and just used Global Ambience to light my scene. I didn't realize using other lighting would work - will give your "klieg" suggestion a shot.
Side note: I really admire your models. They have a very distinct and unique style that must be very personal to you.
Thanks Chris...I just do what I do...and don't try to recreate anyone else's look (normally), but will find inspiration, new ideas from everyone.
Hmmm... I am just now experimenting with flat shading, toon lines, front projection and global ambiance type/global color - in 18d/64 and things are not quite how I remember with respect to all this (something is funny). My brain is currently in a muddled state due to migrating to new computer...so take what I say with "caution" until further notice (uhh...which may be never).
I can get lines, I can get shadows, but I'm having a hard time getting both with flat shading (ie no gradient - this is different on my old machine last I looked)???
EDIT: If I change diffuse falloff of teapot surface to 0% then I get no gradient (again I'm not sure of all settings, this graphics card, 18d/64 works differently)
How do I select z-buffered shadows and tweak the level? Experimenting now - I really like the Global Ambience lighting without toon render when white rendering - very "claymation"-like! Would like to get the shadows a bit less soft, or at least more "present".
-
WOW! - I loved it!
Loved the render style, movement, music! well, well done!
The toon lines look great, and that is probably where the render hit comes from.
There are ways to do a "white render" that are lickety-split fast rendering, and even have a ground shadow, but the lines will still add time.
In general:
have ONLY 1 light klieg with z-buffered shadows (tweak the shadows darkness, softness to your liking)
have ground plane options set to front projected, flat shaded (in chor)
set your model option in chor to flat shaded only (not front projected, also assuming your model's surface diffuse color is white)
set camera background color to white
render with toon lines only and
test rendering with Final (no multipass) versus Final with multipass (with minimum # of passes you can get away with - like 3? if go above 4, then turn soften off) to see which way shorten's your render times (in your version)
Thanks, Nancy! Yes, your "White Render" posts on this forum are what I've used to inform my experiments with white rendering - thank you!
I hadn't thought of Toon Line Rendering while white rendering - will give it a shot. When White Rendering, I also had turned off all lights in the choreography and just used Global Ambience to light my scene. I didn't realize using other lighting would work - will give your "klieg" suggestion a shot.
Side note: I really admire your models. They have a very distinct and unique style that must be very personal to you.
-
I thought that looked cool. It almost looked like an animator's red pencil sketch.Nice movement is really more about animation than rigging.Point taken. So, is rigging really just a process of learned preferences? Is there no really tried & true biped rig?
Thank you. Yeah, I really liked these rendering options for this as well, though A:M's "White Render" parameters create stunning results when I have the time and patience (& processing power) to use it. This animation is aver 450 frames. I can only imagine the "white render" time using my poor, feeble computer.
-
Chris
I'm not in a position to offer advice on rigging but I did enjoy your animation. The movement was fine and I especially liked the look of it. What settings did you use for the render ?
regards
simon
Simon -
In my model, I created a group called "Head" and in the surface properties I set the line color to a "red" that I liked. Line Thickness for "Head" = 1, Toon Bias = 6. Another group I named "Body": color = red; Line Thickness = 1; Toon Bias = 3. A third group, "Teeth": color = red; Line Thickness = .85; Toon Bias = 20.
The reason I set the "Head" group at a different Toon Bias is because it is more complex in splines and cps and I experimented til I attained the look I wanted.
In Rendering options, I chose "Toon Render/Lines Only".
In the Choreography I've hidden the "Ground" and chosen "white" as the camera's background color.
-
I did enjoy that.
If you're going to have trouble rigging, a thin character like that is the one to have it with.

Yeah, Robert, I guess the close proximity of control points can create havoc while animating.
I normally just use one "smartskin" relationship per bone (and, honestly, I don't use smartskin on every bone), which probably explains a lot. Weighing the control points is also something helps, although my process is at best random and pretty "uninformed". One quick question: To what use would I create more than one smartskin on a bone? Hack that I am, I just manipulate a bone at various angles in a smartskin and start moving points to my liking. While this offers some decent results, I still find myself sometimes (not often) moving control points within an action to serve my purpose.
Some of the great animators using A:M (Anzovin, and whoever it was that years ago created that warrior princess walking through a jungle) seem to get flawless movement from their A:M models. I wish to work towards that kind of seamless joint movement.
Obviously, my using Toon Render/Lines Only is a shameless way to hide glaring obstacles in my path to enlightenment.
-
Hello -
attached is a short dance animation test I've done in A:M for a music video to my song "Ol' Scratch".
I know, I know . . . there are various aspects of the rigging and animation process which are, to be generous, flawed . . . but the spirit is there!
In short, I really love this software and the creative and helpful people here on these forums. I am in awe of how intelligent, insightful, and quick to help all of you are - thank you!
To rig my biped models I feel compelled to thank David Rogers for this brief tut: http://am-guide.com/SetUp/
My models still give me trouble in the "knee, elbow, and hip" joints, some of which could be alleviated were I to use "fan" bones, and were I to really delve into rigging properly. I say this humbly, welcoming advice from anyone here who sees answers to any glaring missteps.
That said, I hope you get a kick outa this short sequence!
-
This (mirroring) is such a useful concept for modeling, rigging and animation that I thought I'd put together a quick video to demo the process of mirroring and saving out an Action.
Nothing fancy here... just a cancan dance mirrored by scaling as Robert suggested (the model being scaled -100 in the X axis producing a quickly mirrored Action that can be saved for later usage.)
Note that this is in an Action... but only because I wanted to export/save the mirrored Action.
If not I might just flip the Action in the Chor and called it a day.
I distinctly recall the first time someone clued me in to mirroring via scale in a Choreography and I was considerably impressed that such an easy and straightforward solution was available. Prior to that I had thought of Scale as only useful for making things bigger or smaller. Go figure.
Amazing! Thanks so much for this quick demonstration. As you stated - "easy and straightforward". You guys rock!
-
If you just need to use the action without transitioning to other actions you could scale the character -100% on one axis (probably X) to mirror him and everything he does.
Thanks Robert! That should have been obvious to me as that's how I mirror the bones while rigging. Truly appreciate your help!
-
I have a model performing a dance action and am wondering if there is a quicker way to mirror the whole action other than to "copy/paste mirrored" each keyframe. Using A:M 15j on Mac OS 10.6.8. Thanks.
-
The first thing i did was compare the beginnings and ends of the two files.
The beginnings looked fairly similar but the ends were very different
Junkman07.mdl (the older file) ends normally with a tag, but Junkman_full_02.mdl (the new model) doesn't get that far. It looks like it died halfway through writing a tag:
I copied the missing text from the first file and pasted it onto the end of the second file.
Try this. It looks like it loads OK. I didn't test it beyond that.
We're lucky that it died at the very end of the file and that only basic housekeeping info was lost.
And we are lucky that A:M stores its files in human-readable text so that this sort of repair is easy to do!
That's it! Wow! So, do you just open the two files in a text editor and edit from there? I've never done this.
And yes, very grateful that A:M stores its files in human-readable text.
Thanks so much. This alleviates the dread of starting several hours of work all over again immediately after completing it the first time. Not quite "Sisyphean", but an undesirable task all the same.
You rock!
-
Here they are. One being thecorrupted rigged model, the other half of same model "pre-copy-flipped" and without bones or rigging. Thanks for looking into this.
I f you want to send me the two versions of the .mdl file I can look at it.You can attach them in a private message if you don't want to post them here.
-
Not sure what may have happen but the mdl file is a text file if you look at it and compare to another mdl file it could possibly be fixed...or it was possible in earlier versions of AM
Please let me know possible procedure(s) to fix. The file is listed as a .mdl file in the folder, so . . . Thanks!
-
I was saving a newly rigged model in A:M v15j+ on my Mac running OS 10.4.11 when the power to my computer was disrupted during the save. Now, when I try to open the model in A:M it's properties (bones, groups, etc.) are listed in the workspace window, but the model itself, and it's name, do not appear (see attach picture). The model is still listed in the folder in which I saved it, showing a file size of 553k, but it won't "appear" in A:M. I do have a "pre-rigged", "pre-copy-flip-attached" model saved under a different name, but I'd like to know if there is a way to access the rigged model again before beginning the rigging work all over again. Thanks.
-
Is there a way to render a model performing an action in a choreography so that the model and it's shadow are all that render with alpha channel = ON in the rendering options? Basically, I want to render a scene to targas with alpha channels with only the model and it's shadow appearing in each frame.
-
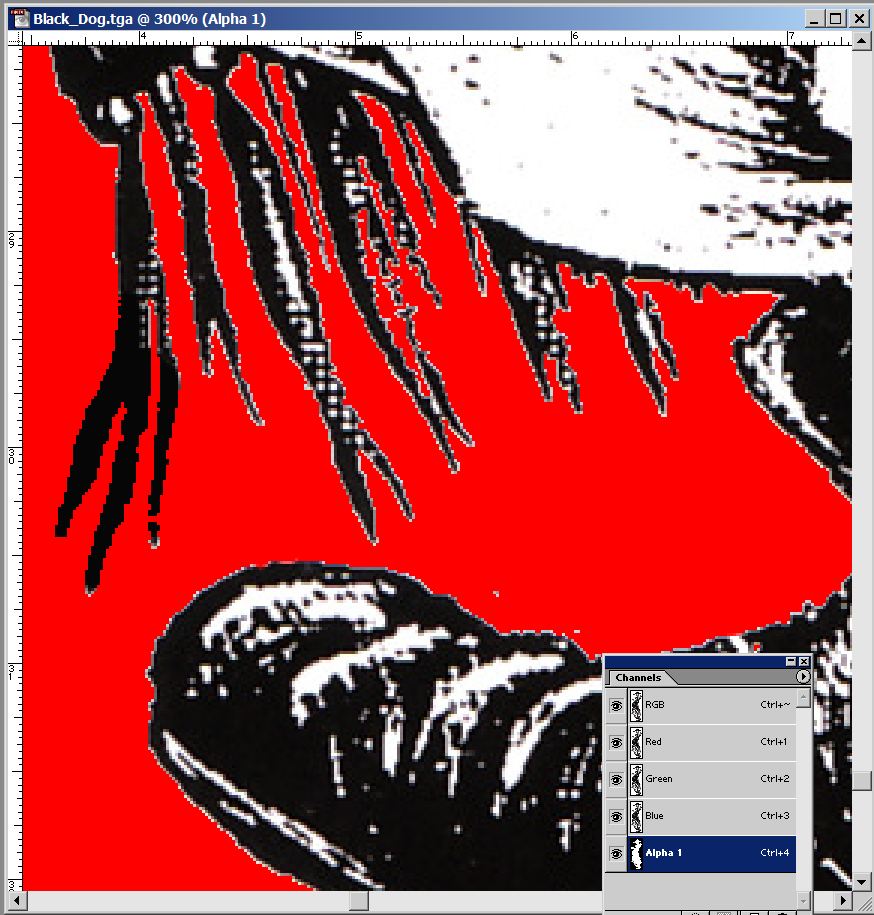
Thank you! I guess I have some preference messed up in photoshop where a pasted object is placed several pixels askew from the copy. Really appreciate the help & the edited file!
I think it's a case of the alpha channel not being tight enough.I took it into PS and saw there were still areas where the alpha channel wasn't quite making it to the black edge of the drawing.

For a quick fix I...
Under "Selection" I did "Load Selection" of the the alpha channel with "invert" checked",
did "Grow" several times,
Filled the selected area of the Alpha channel with black
resaved
Some parts like the tassels still have a white edge, they would need to be tightened by hand some more. Also drawing a black border all around the perimeter of the figure would ensure the alpha channel is catching no white pixels.
-
Here's a the sine turbulence combiner inside a gradient combiner to fade it out at the top, all on a stack of 40 flat plates
Amazing Box o' Clouds (by Whammo!)
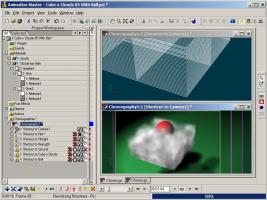
Cube_o_Clouds_05_With_Ball.prj
I dimly recall trying something like this back in the 90's but gave it up when it was taking an hour per frame. Now it takes 55 seconds and NetRender can do four at once!
Possibly with a different turbulence combiner more daylight between the clouds could be had?
Rob,
I'm having trouble downloading this project and would like to explore this topic more. Can you advise me how to download this since clicking and/or right-clicking on the link just sends me to a page with script? Great looking clouds!
Thanks,
Chris
-
-
I am rendering a scene with 2 models and a targa imported as a layer in a choreography. The tga image appears with a "white" outline when rendered. I have edited the image in photoshop, making sure all of the edges of the image are black, and included an alpha channel and played with the layer's options settings - "flat shaded", "occlusion", etc. - but the white outline continues to render. The image I've attached is a render using the"white render" settings I just found in another post in these forums (very beautiful, soft rendering style! - thanks, Jason!), but this "white outline/edge" I'm describing appears on the targa no matter what rendering options I choose. How do I get the image layer to render without this outline?
Thanks.
-
On the PC - all the animatable elements for a LAYER are in the Properties for the Layer.
Which property do you want to animate? If it is the frame number for your sequence - In the chor, go to Shortcut to Layer/Image/Timing/Frame
Thanks, Nancy!
-
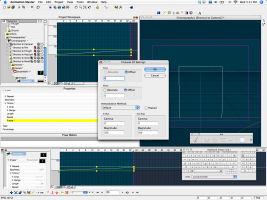
I am trying to repeat an image sequence imported as a layer in a choreography. As the attached jpeg shows, a "show more than drivers" icon is unavailable in the choreography. Where can I access "show more than drivers" for this image sequence & what the best way to repeat this 9 frame sequence?
Mac OS 10.4.11 using A:M 15.0j+
-
Thanks, guys. The video's great, Rob. Unfortunately, using Mac running OS 10.4 I can't seem to get the Post-Extrapolation dialog box to appear when selecting and right-clicking the keyframe points. The Channel CP Setting dialog box appears with the interpolation method choice.
You're saying there's no "Curve" listing in the menu like there is in my video?
What's the mac equivalent of right clicking supposed to be? Do that. And show me the menu you get when you do that.
Well - it seems the 'right-click' function on my Wacom stylus is not set up properly to function correctly with A:M. So, what I'm getting by 'right-clicking' with the pen can be seen in the attached screenshot. I guess it's working as a 'shift-click' in A:M for some reason. Once I found the correct keybard mac equivalent to 'right-clicking', (control-click) the menu with "Curve" appears just as your video shows. Sorry for the confusion. Thanks.
-
Okay, if that's the case I'll make my suggestion. Once you set the first and last keyframe (zero and 23), on frame 24, set the keyframe to zero, then back to 23 exactly twenty three frames later. All you're doing is manually creating what Robert was setting up automatically. Also keep in mind that you can vary the playback speed depending on how you set the keyframes, it can play backwards, etc.
EDIT: Hey robert, I noticed cribbidaj is using v.15. Is that function available in that version? I'm going to check on it on the Mac tonight and I think I've still got older versions installed.
Thanks, all, for the help. Gerry, your method works perfectly! Thanks so much!


2 color render
in A:M Rendering
Posted
Thanks for the replies, Mark & Robert!
I'll dive into better lighting with more colors as you suggest, Robert. In the meantime, here's a render that I have done with basically just red/black.
camera: black bacground
devil model:red diffuse/black specular_size 100%/intensity 140%
terrain model: black diffuse/ red specular
4 lights: Rim=default/Fill=default/1st Keylight=default white facing up at devil model/2nd keylight backlighting facing down at terrain_color red
I actually like this look for my purposes, though it's not the look from the ad.
Thanks!
red1.tga