


Eric2575
-
Posts
2,615 -
Joined
-
Last visited
Content Type
Profiles
Forums
Events
Posts posted by Eric2575
-
-
The 3 point actually isn't that bad. I need to rework the lower a bit better.
Btw Stian, love your Robot on treads. You do great work

-
Thanks! I found a site that had a really clear side view of a fossilized T-rex skull. I am using a Rotoscope of that skull for my model. The pic below shows two areas I'm not happy with.
I used a 3 point patch in the upper jaw to seal off ends and a messy looking mesh to seal off the bottom splines. How could this be done more elegantly and smooth - more so on the bottom splines.
Stian, the T-rex model you made available to me is also a great reference, thanks again and would you please give kudo's to the originator of the model.

-
Here is an update.

-
Ouch, that looks like it hurt!
-
Well, Idid get a laugh out of it

What! You were serious??? Ahem,...yeah, ...I came to similar conclusions, ahem, ...yup, you're on the right track...hmmm...nanopores.........
-
I like your first image already. You can only go uphill from there. Btw, is the center of the star a 5-point patch?
-
Mark, if you could find that T-Rex model, I'd sure appreciate getting a copy of it. Although I'm going to model mine totally from scratch, the reference model will surely help.
When it comes time to animate the Rex, should I also attempt that from scratch, or should I go the TSM2 route? What are everyone's thoughts?
I will keep progress posted as time permits. Keep the input coming.
Thanks
-
Read about someone who was looking for the T-Rex model from the free models section and couldn't find it. I thought, that would make a nice project for me.
Please give me your input; I need all the help I can get.

-
Good guess, but I flipped the normals too. I don't like loose ends, that's why it's bothering me. Any of you have this problem?
I'm starting up AM now, gonna make a 5 point patch, apply a decal and see what gives....The patch accepted the decal fine. I then skewed it to look like the one in the giraffe model and that went fine too. I then patch selected the offending 5 pointer in the giraffe model, turned it to get a better angle on the decal and applied. This time the decal went on better but still had some distortion.
It must be a combination of spline issue and Video issue. Ok, so long as it doesn't show up in the final render.
Thanks for your patience and input.

-
It doesn't show up in the final render. Definitely only on the 5 point patches. The model is clean, no double patches anywhere.
Pressing pg down doesn't make it go away, just makes it look blockier. Changing from OpenGL to DirectX and vise versa doesn't change anything either.
Deleted the decal and applied again with same results. When I change the geometry to eliminate the 5 point patches, it works, but I need to find a way around this because we all use 5 point patches.
And don't tell me I don need no stinkin 5 point patches


-
Going back to basics and completed the giraffe. Glad to see that my mechanical modeling on the sub has paid some dividends. The giraffe was fast and easy compared to the Nautilus.
Only problem, though, is that the giraffe decal is distorting in every 5 point patch. What is the remedy? The tut includes the 5 point patches also, but gives no advice on the distortions.

-
Makes me wanna open up AM and give them balls a try. Very cool!
-
Kinda like the lagoon at Universal Studios with the big screen in front of it. He, he
-
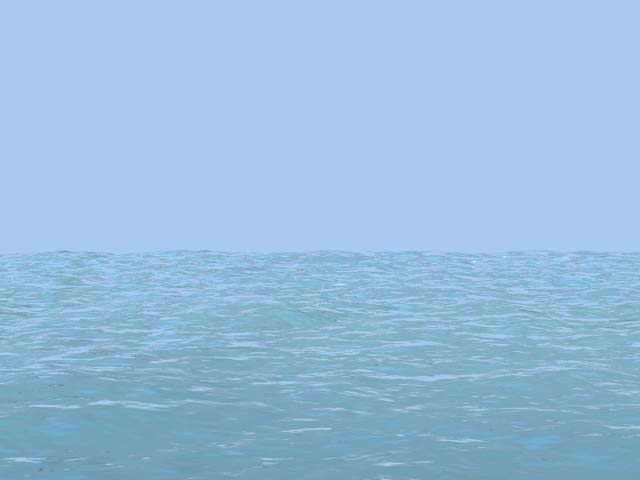
The water is a result of a lot of experiments trying to figure out how Charles Babbage did his water tutorial. There are so many variables that have to be accounted for until you get semi realistic water - it almost drove me nutty. You see, I'm not a vary smart person, but I am diligent. If I hit the nail so many times the wrong way, chances are that one day I will hit it the right way

The background is just a jpg of a sunrise that I stood up at the end of the water map. Play around with the focal distance, color of the water, reflectivity, color of the light, etc, etc, and if you are lucky, you get a decent shot. The birds are three brush strokes in Photoshop - ok, ok, so I cheated on those - told you it was just a quick lighting experiment.
Another thing that bugs me in this shot is what the focal distance (FD) has done to the water surface around the sub. The FD is centered kinda tight around the sub because I wanted the background, where the water ends and the sky jpg begins, to blend with a little fuzyness. Well, that part went ok, but I don't like the way the water around the sub looks closer than the water in the foreground - the ripples look bigger along the horizontal plane parallel to the sub than the ripples closer to the viewer. But, as I said, this composition was just a quickie, and for that, I'm really happy with it.
P.S. Egads Chris, I was hoping my comp looks a little better than the pic of the Stingray? I do remember seeing something about the super puppets.
-
Thanks for pointing that out...I've been up too long working on this and that...yawn...should have know...yeah, I knew that
Wait till you see the underwater shots.
Hey, Chris - I searched the forum for Stingray and came up with zip. What is Stingray? I probably know that one too, but am just too tired to realize it

-
Hi all:
This is a quick test of the Nautilus on the surface with a klieg as the sun and a fill light in front of the sub for a little ambiance. The problem lies with the sub's shadows reflected on the surface of the water - they are casting in the wrong direction. The light source is in the back to the left, ergo the shadows should be pointing to the front right, yet they seem to be pointing straight at the viewer. No diff with the fill off.
Any ideas?

-
Hi Drago:
I have been working on that tutorial and am about to make a tutorial similar to it for newer versions of AM. At the time that tut was written, you had to create an action to animate the water. In newer versions of AM, you animate the materials in the chor after unchecking the little red mark behind the wave model. Unchecking the mark will allow you to see the hidden properties of the model, which will give you acces to the material and the x/y/z translate coordinates that have to be changed over time to animate the material on the wave model. I know this is a lot at once, but I hope it gets you on the right track.
Like I said, I will be working on a video tutorial for creating water and hope to have it done in the next week or two, time permitting.
Let me know how far you get.
Eric
-
Nice work, very likeable gull!!
-
Problem solved!!
I am somewhat embarrassed that I haven't noticed this before, but I dropped the sub model into the animation at frame zero at it's normal size - the enlarged size you see in the pics - then I reduced the sub's size and moved it around. While doing the moving and resizing, I somehow changed the timeline. If I would have rendered a TGA at the last time increment recorded, in this case 4:34 it would have come out great. Well, I kept recording to file at frame zero, the frame that I dropped the model into the chor at it's normal size. That is why I kept getting the artifacts, because I was rendering the sub way too close to the camera.
Thanks all for your input and patience with me, hope this may help someone as dumb as me in the future


-
Take a look at this render to file on the right - the sub is scaled way up in size compared to the water grid. The smaller pane on the left shows the top view in the chor that I rendered to file. Nothing was changed, yet the rendered results are way out of whack.

-
I tried another render with the sub and got the same artifacts. Notice the water is dark again??? And yes, I am not changing anything but the models in the same scene.
Will try a render from the top.
The render from the top is also very strange - the orientation from the view in the chor has changed from the model's diagonal position to a vertical position and zoomed in very close. This is really weird.
From left to right, the pic shows the render to file with the sub, the chor as seen in AM top down, and a render from the top down.

-
Ok, the submarine must be the problem, because the basketball rendered fine

-
V.11.1
I shut down the computer and restarted everything. Took out the sub and rendered to file the water; below is the result.
Now the water doesn't look as dark as it did nefore and the background lightened up too. As I am writing this, I am rendering the water again, but this time I added a basketball. I'll post that as soon as it's done.
-
The left pic is a quick render with the sub above the water - the right pic is the same scene with a render to file. I have no clue why the render to file is not working.
Sorry guys, I did not update the page and did not see your posts. Yes, the ground plane is deleted from the chor. The chor is composed of the Babbage water plane, which seems to render fine mostly, the camera, key and fill light, rim, the sub model, and another light that is supposed to simulate the sun reflecting off the water.
As you can see in the attached pic, quick render shows both the water plane and the sub, but when I render to file, I get either the garbage in the pic above, or the latest version of pretty much nothing as seen in the right panel below.

My first organic model WIP
in Work In Progress / Sweatbox
Posted
Here is my first body attempt. The Giraffe tut really helped here. I had a rotoscope of a t-rex running and modeled the half in that position and then flip/copy/attached. Prolly should'a modeled him standing still first.
Critique please.