


Biotron2000
-
Posts
208 -
Joined
-
Last visited
Content Type
Profiles
Forums
Events
Posts posted by Biotron2000
-
-
Mike,
Nice work on the giraffe!
Do you plan to add bones and animate it?
-
And one more:
-
More images:
-
More images:

-
More images:
-
More images:

-
More images:
-
More images:

-
More images:

-
Ken,
Nice work!
Here are some reference pics I found:
-
Close to being finished!Here's the latest version.
What do you think?
-
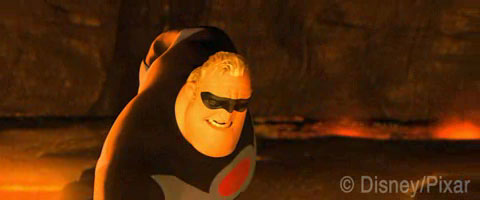
****Warning: Possible Spoiler****
They voiced two old men near the end of the film, saying something along the lines of "Old school is the best." The characters were pretty good likenesses of them, too.
-
Here's another attempt. I still need to fix the fall (too slow) and other timing issues. Forgive a newbie question, but I'm not in front of my on computer right now: Is there a way (other than lassoing) to select a keyframe so you can slide it around on the timeline? That would make adjusting the timing much easier. Anyway, here it is:
Thanks for looking!
Comment, critiques, suggestions, etc. welcome.
-
One thing I accomplished here is getting a character off a path and animating it further without disturbing the previous action.
How did you do it?
 This seems to cause a lot of problems judging by the number of questions posted.
I'm not really sure which thing helped. First, I set the ease on the path to 100 percent at the frame I wanted to stop the walk cycle. I move forward one frame, set the enforcement to 0%, then the model bone popped back to the placed it was originally. I set it back to 100 percent, hit the Key Bone filter, selected the model bone and made a keyframe. Set the enforcement to 0%, this time it stayed.
Next, I created a new chor action and set it to begin on the first frame after the walk cycle. I made sure the chor action was below the walk action in the PWS. I selected the walk action and moved to the last frame of the walk cycle and hit the Key Model filter, selected Shaggy and copied the keyframe. I selected the new chor action, moved to the next frame, pasted the keyframe, and that seemed to do the trick.
Forgive me if I've left something out, I don't have time to open A:M and try it before work.
It's looking good so far, you should maybe consider a slight delay before the door opens ( like it springs open after shaggy catapults away) but other than that no useful suggestions from me.That's actually the effect I was going for, but by the time I finally got Shaggy on the floor, I just wanted to render the darn thing and take a look.
 When it says 6 hours to complete this exercise in TAOA:M, that wasn't an exaggeration. Luckily, I saved a copy of the project at just the point Shaggy setpped off the path and grabbed the doorknob, so Ill be able to pick up from there when I get back to it! Tip: if you have reached a point in a project, chor, model, etc. that you don't want to mess up with tinkering, save it as a different file name and then make the file Read Only. That way you can keep it intact in case you need to go back to that point later.
Thanks for the comments!
-
It needs work. This may be the hardest thing I've done to date. I downloaded the "fixed" Shaggy, but I had a lot of problems with the hands slipping and popping, probably due to pulling beyond his arm's reach.
One thing I accomplished here is getting a character off a path and animating it further without disturbing the previous action. Yay!
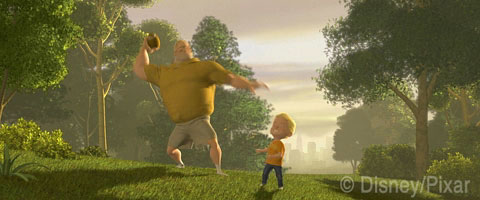
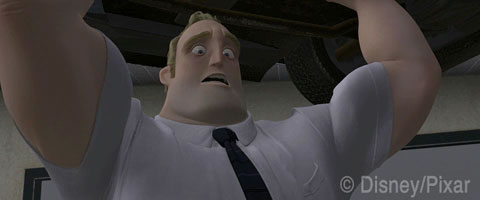
It needs a lot of work, and it's not even really finished, but here it it:
The Door's Stuck 960KB Quicktime, Sorenson 3.
Comments welcome!
-
Here's a thread from a few weeks ago. I don't know if it would work for you, but it may help:
-
Looks great, I like the way you handled the ears.
Yo quiero Texaco Bell!

-
Looks great, Bill - can't wait to see him in action!
I'd like to see it against a lighter background. Also, is the abdominal connector accordian-ed? Its hard to tell as it's so dark.
As for the ears, I think a tranparency map might work as well. I tried to do it yesterday but could not get it to work (still learning about alpha channels, etc.). I also tried adding control points to a similar-looking ear mesh model. That worked, but the extra CP's distorted the mesh. I don't know if you can add a CP to a spline that stays in line with the rest of the spline.
-
The vertical lines are cylinders and the horizontal lines are toruses. I tried the spline route but wanted them to show up more clearly. This seems to work well.
-
I think you could insert more control points so the patches don't render, then select the entire mesh and set it to "Render as Lines." You can set line thickness and color but not reflections or specularity (at least in v9.5).
-
Okay, here's one in 3D. And starwarsguy, you might like this 'cause he kinda looks more greyer.

Again, comments and critiques welcome.
-
Thanks for your kind replies!
Hypnomike: I want to do a 3D render but I want to make a copy of the model with appropriate textures or materials that wouldn't work for 2D. I'll play with that later today.
starwarsguy: It depends. Sometimes he looks more blue, like on the Volume 4 DVD set cover, sometimes more grey, I prefer the blue more but may try some grey coloring to see how it looks.
-
Here is a short clip of Bender from Futurama saying his trademark phrase - there is one potentially objectional word, so be warned.
My first version of Bender used a decal for the teeth, but I wanted to do lipsynch. I thought of just using spline rings set to "Render as lines," then I decided to use mesh in case I want to do non-toon rendered clips as well (I do).
Enjoy, and critiques are welcome!
-
I'm only working with 9.5, but I notice that as the model gets more complex, pasting does take longer. YMMV.
The Art of Animation:Master
in The Art of Animation:Master (TaoA:M) < (Archives)
Posted
Here's my take on The Door's Stuck. I originally posted this in WIP; I didn't realize this post is the place for TAOAM progress. I'm kind of spotty on these exercises, I like to do things the hard way and try to bite off more than I can chew. It was a lot of work doing what seemed like a simple exercise, but also a lot of fun. Maybe I'll go back and do some more of them!