-
Posts
2,579 -
Joined
-
Last visited
-
Days Won
19
Content Type
Profiles
Forums
Events
Everything posted by Simon Edmondson
-
Rodney. Thank you for your reply and encouragement. I'm working on a variation for sports day. Will try to post for the weekend if I can get it done. regards simon
-
Robert Thank you for your reply and help. There are still a couple of bits I missed with the maps and will have to redo. I didn't notice them until I made the base colour bright red, will change that today. Tried this for a bit of fun before going to bed last night. regards simon Bert_Cycle.mov
-
Quick bash at Bert on Unicycle. The fur is a bit noisy in this version and its onle a quick setup of the cycle action Any feedback welcome. simon Bert_07Cycle.mov
-
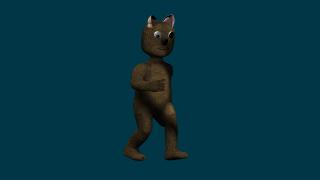
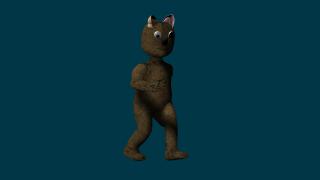
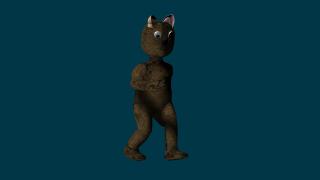
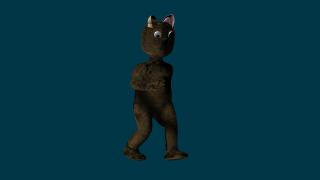
Don't think this will be the final texture used but, still trying to find a suitable one that can be scaled to the right point. Thanks to everybody for their help. regards simon Bert_07_Walk.mov
-
Sports Day (2014 Open Games) February
Simon Edmondson replied to Simon Edmondson's topic in Contests/Challenges
Thank you Jack I haven't done any more yet because there was a danger it would be all me and the idea is for everyone to have a bash it it. I was thinking of having the knights jousting on Unicycles but that will have to wait... regards simon -
Ken I'm not organised enough yet but, if your character is symmetrical in build could you just use and 'mirror selection', make a temporary group if needed, and apply from there ? I'll try to post a render of what the bear currently looks like later. regards simon Ken Just noticed. Happy Birthday. Thank you for your help.
-
Ken, Robert, Nancy Thank you very much indeed for you help. Very much appreciated. Pardon my delayed response. I promised to test the stop frame setup and hadn't anticipated such a swift response from the forum. I should have known better. I will test my understanding of your suggestions tomorrow after an early start. I'm looking forward to it. The reason for all the groups in the PWS is to keep track of them while I learn what I need to list. At this point, too many is better than the opposite as have been caught out a few times were I needed to select something and had to go back in and faff around trying to select some cps in close proximity. At the other end of that scale is the bones in the 2008 rig installed in the bear. There are so many its difficult to keep track of. Thats not a complaint, I like the rig, I just find it a bit overwhelming at installation. Thanks to everyone for their help. regards simon
-
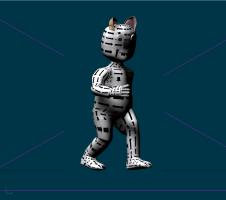
Nancy Pardon me, I missed your first reply when posting the model/project. The untitled groups occur whenever I select a group in the window but don't name it though save the project, I usually delete them or rename them according to what is required. Not always successful, but try to keep track of the various parts and put them in a a sensible' sequence at the end for when editing is required. Initially I was selecting the CP and shift clicking the others to get the patch, then Robert suggested the patch select tool, and I used that, shift clicking every so often for multiples. The screen did refresh each time. I think some of it might be perhaps to do with the fur maps being used but, the reason for the attempts was because there were some peculiar results on the thighs of the bear in particular ( noticeable in the walk sequences ). They were 'fun' but not the intended result. It was when Mark told me about the image rotation that it started to become apparent where some of the problems lay. I didn't think to check the normals but will do so in a bit. Some of the maps were made in Pshop to make them tileable but, when used across the whole figure, unintended patterning occured and have spent some time trying to eliminate as much of that as I could. The scale of the image within the map area also has a marfked effect on the image made in terms of the 'noise' it generates at render time. I did start thinking of scaling the map for separate areas but haven't done that yet. One thing that eventually became apparent was that, if the same map was used for colour and displacemt then the lines of the splines were becoming visible in the render. Very pronounced in a Toon render but also marked in non toon. Two separate maps were used in this example. There is a line on the right knee when it bends but not down the whole form as on other examples this afternoon. regards simonBert_06__Walk.mov
-
Nancy, Robert Thank you for your replies and help. Here is the Project with the model and the pointer decal embedded. My subscription is close to expiry so I will buy V18 in the next few days. regards Simon Teddy_Bear2.prj
-
Ken Thank you for your reply. I'm working in V17g on a Mac ( pardon for not mentioning that before ). Just spent 20 mins arranging the direction on the left leg to match the right, only to have them revert wne I changed view ports, grrrrrrrrrrrr . O'm going to try copying the leg from one side to the other to see if I can get around it that way. It is very aggravating ! regards simon
-
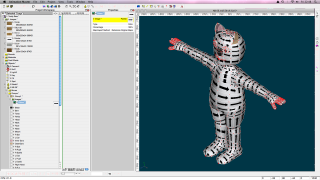
Spent the morning getting them all correctly aligned only to have them go askew afterwards. This is what they looked like I then unhid ( sp ? ) the other patches, only for this to have happened before I could test it, 30 seconds later, Rather frustrating. Is this a problem other people have encountered and, if so, how did they fix it ? regards Simon
-
Robert Thank you for the help. In truth I'm not sure how its going to be used as yet. I have the script story boarded ( but under change ) and the original idea was to do the cars stop frame with models for the chase sequence ,but using AM for the other parts. I'm trying to cover the possibilities at the moment, and learn some new methods ! regards Simon
-
Retopology Here's the link in his signature... http://www.patchwork3d.de/html/page.php?page_id=24 Robert Thank you. I shall go there now. I have a car I want to convert for the bear to drive. regards simon
-
Nope. It isn't your imagination. While technically termed 'Snap to Surface' it started life circa v17 known as 'retopology'. Fuchur has a tutorial on his site on here's a short article to get started: http://www.hash.com/forums/index.php?showtopic=44299 Impressive work Jirard! Pardon me jumping in here, but this was something I had wanted to try but didn't have the chance before. I have followed up Rodney's link to the tech ref page and started the process. It is going to take a long time. Using a 3DS model, its been stuck at 2% for the past 30 mins, that has happened before, its a sunny spring day here, so the seaside is calling while that gets underway. However, I also started the process using an obj model. That imported really quickly but, when trying to turn to modelling mode ( f5) that option is greyed out and unavailable. Is there another way to go about it ? regards simon PS I tried to find the tutorial on Gerald's site but to no avail could you kindly post a link to it ?
-
Taking longer than expected as they keep changing after they have been reset. These were all oriented correctly but, when checked afterwards, some had changed. I will try to complete tomorrow. Thank you to everyone for their help. regards simon
-
Rodney Thank you for your reply and help. I'm plugging away at it and will try to post a shot later, I'm ( very ) slowly learning my lessons and try to keep all groups named as I'm going along. The real tedious bit when doing all the stamps earlier was keeping track of what each one was, "Right Toes Upper", for example covered two patches. Fun was not the first thought ! regards simon
-
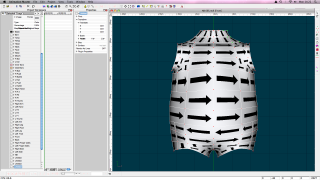
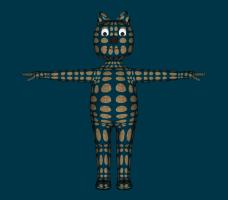
Now, looking at that, you can use the "Patch Group Mode" tool to click on any patch to select it and then >Rotate Images to turn it 90° until it faces the way you want. But first... how did you do the image substitution? Robert I wasn't aware of "Patch group Mode" but, I did group them by using the shift key and rotated them like that ( still plugging away at it ) The image substitution was straight forward. I just substituted the arrow under properties so that all the patches used it rather than the earlier texture. I keep going back to it to see how it looks. If I get it done tonight I will post a pic. regards simon
-
-
Mark Once again thank you very much indeed for your help,tis much appreciated. How did you get the first screen shot that showed the orientation of the images ? The process looks straightforward enough, albeit rather involved in having to check each patch. I marvel at your knowledge of such things, way beyond me. Thanks again. regards simon
-
Rodney Thank you for your reply. I wondered about that but then tried something else which might be the cause. I postef the file in the message above. regards simon
-
Working away on the textures, there are now several versions. However, have encountered a curious effect. When the bump map is turned up some of the patches seem to show up in the render. This is it at 0% at 10% Fifty % Two Hundred % The only settings that have changed are the bump map settings. Everything else is the same. Does anyone have any ideas as to what might cause such an effect an, most importantly, how to cure it? regards simon Edit May have accidentally stumbled across the reason (?) Mapping.zip It seems to be caused by the order and direction in which the Cp's are extruded . Model one was expanded in different directions before the final set up . Model Two was extruded in one direction, When rendered the results are notably different?
-
Nancy Thank you. I think I know what to do next so will press on with that. This is a larger res version with a bump map added. He looks like the creature from the Black laggon in this. fun. regards simonBert_Walk.mov
-
Nancy Thank you for your reply and help. I resized the map and the resolution thereof from that used for all the stamps on the earlier version. This was the result second time, Bert_Walk.mov. It still needs some adjusting but is less noisy than before. The problem was caused by having expanded the original map that Ken kindly supplied. It was at 460 x 413 but had a large background area around the main image.. That was copied and pasted multiple times into the 1000x 1000 map used for the stamps. That was done to try to avoid repetitive pattern becoming apparent. The map was bigger than the model, and sections of it were applied to small areas on it. When Mark suggested a way to avoid all the stamps the oversized map was used and the detail caused the noise problem. Went back to the original with this amusing result. Bert looks a bit like one of those Magritte painting with the clouds going over the figure.. Hadn't realised until then that it was applying the whole map to each patch. So went back and resized it and tried again, taking up your suggestion of blur at the same time. Still needs some work but a better result ? regards simon
-
Ken Thank you for your reply and help. That was just working with the texture maps, no hair or shag material tried as yet. The one with the busy surface was done with the standard render and the other was with a Toon render . Both had the same settings and texture maps applied, only the render mode was different. I'm spending today trying to sort out some cp weighting then will return to the surface tomorrow. Haven't tested it yet but, wondered if the busy surface was caused by the resolution of the map used. I had expended the one you kindly posted out to about 1000x1000, Its quite large with a lot of detail? regards simon
-
This is entirely trivial, for which apologies. I was so exited by the prospect Mark explained that I couldn't wait to try it so, here it is with a curious result, one that might be worth exploring further. This is the same walk cycle and model as before, but rendered without Toon, using the method Mark suggested. Bert_Test.mov This is exactly the same setup but with Toon render turned on Bert_Test_Toon.mov Almost makes him look malign... "You lookin fer trouble? You came to the right place" Best go to sleep now. Thank you once again Mark. regards simon


