


filipmun
-
Posts
255 -
Joined
-
Last visited
Content Type
Profiles
Forums
Events
Posts posted by filipmun
-
-
-
For your information, I found that Carrara-3 vertex editing can add or delete cps while keeping the pre-asigned UVW mesh arrangement.
I switch between a few programs and never use hooks nor 5 pt patchs in the initial stage of modeling and export with UV, the same model can be edited in both Hash or poly in the Second stage to increase geometry.
All I use is one decal and simply re-stamp after editing, by doing this, I can not joint parts in true geometry but using alpha decal to blend them togather, you can say that all my parts is a cylinder and I build everything with it, not primitive toy model but realistic.
Oh yes, thank you very much walasek for the plugin.
-
I notice very few of us is into RGB/CMYK, here is an example that might offer you some idea.
http://www.renderosity.com/viewed.ezgaller...un&ByArtist=Yes
-
I wonder if you have solved the size/dpi/pixel issue, here is picture example:
Dpi is meant for printing( offset )
Pixel is meant for display device.
Most people(non professional) get confuse easily with these technical terms, the fact that our monitor is set at 72 dpi, it is only good enough for viewing purpose but not dense enough to emulate the details for printing, which is why we need another sets of scale.
You must first decide the dimension in inches or cm, then choose your dpi or pixel depend on the purpose of your work whether its for printing or web display. You can use either dpi or pixel, as you change one value the other changes relatively.
The ruler available to us is either inch/cm not in pixel, you can see the difference under view manu-actual pixel size or print size. You can only see the real diffrence if your image is over 72 dpi or else the appear the same.
Now back to what you wanted, to export a vector document into a bitmap, once you have the dimension, choose no less than 300 dpi if you wanted sharpness. A value too high is a waste of disc space if the final intension does not require it.
It is always advisable to start a slightly larger image for detailed texturing where you can scale to reuse later.
In any case, the current emulation process tends to softern the image but you can sharpen it 1 pixel at 50% with no threshold.
Note: It is the amount of sharp detail that influence the file size where a soft focused background is lighter bytes.
(I don't mean to show off but its my area of expertise.
 )
) -
Understand that 600dpi does not guarantee you the finest detail, your image size in dimention has to be big as well, the ratio is like print size A4 at 300dpi, the standard resolution for most printing.
800x600 pixels at 300dpi is only 2.6x2 inches. You can check this under image size settings.
-
Thanks for the reminder Rodney,
I forgot about this, just have some time off to catch up on things I missed for the year.
where are the link to third party plug-ins? I am looking for a few that I can remember like fatten or shrink and am2flash.
-
First, you can refresh by asign a custom key, by default the space bar.
If you are working on a heavy scene, it is best to relaunch AM every nowand then, it works for me on a slow machine.
-
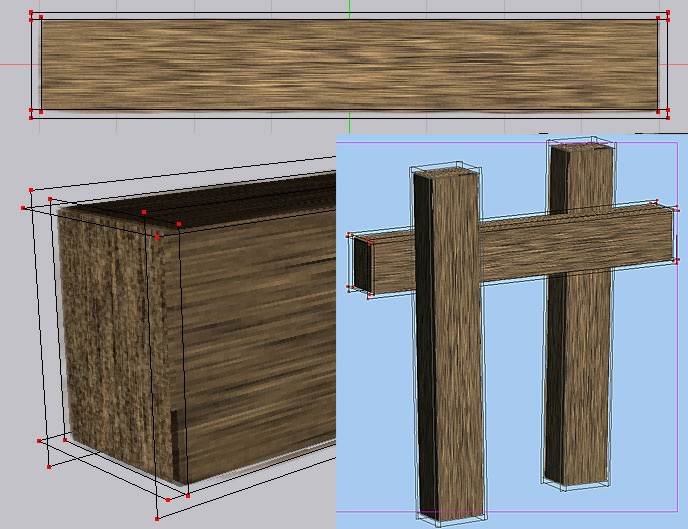
This is the cookie-cut 4 cp plane, it may not make a lot of difference but when you have an entire scene, the result is clear.
I have some portfolio at Renderosity;
http://www.renderosity.com/gallery.ez?ByAr...=Yes&Artist=Mun
-
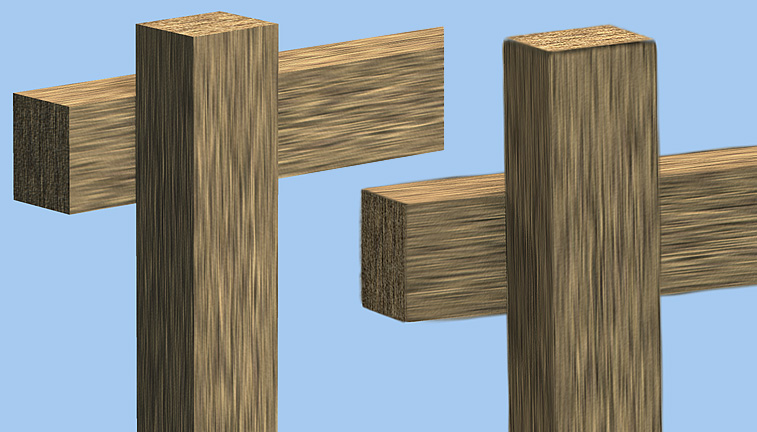
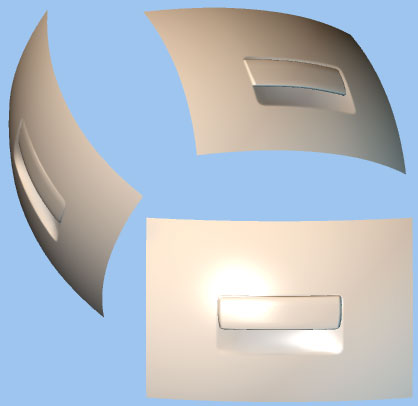
Sorry, I should show more detailed sample to illustrate this approach of mine.
A box is easy enough to build but stiff when rendered due to the harsh edges at the corners, most untreated 3d images have the same CG look.
Bellow is the comparison of a box model and a cookie-cut model at close up, it is more evident when you try to composite CG into real photos. I started as an illustrator and now a half baked animator supplying bitmap to flash arists.
Since many of us here is in for the animation part, I like to show how I use AM for still image composites.
-
They are quite simple, all you need is alpha embeded decal and apply as cookie-cut.
Another way is to wrap with another set of identical mesh and scale up just to show the texture floading in the surface.
-
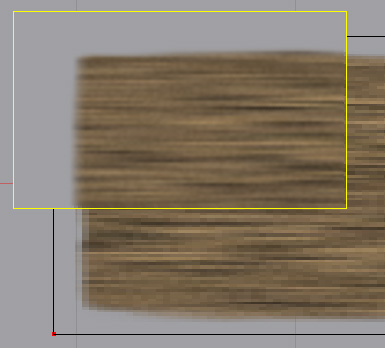
Since I am on the topic at the other thread, I'll show an example of faking geometry with images on 4 cp plane.
Low patch but high quality at a glance which otherwise stiff looking wood stick.
-
Here is the sample prj
-
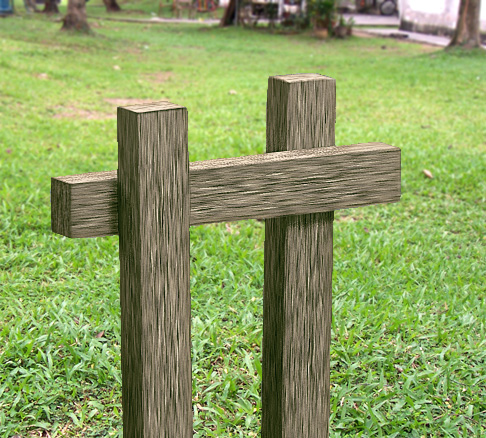
Hey, here is my version of faking the geometry with decal.
The fact that I usually don't have the time to do everything in AM and mechanical modeling is quite difficult, so I come up with this technique.
No tricks, just use a transperency decal to cut a hole and place the necessary parts in place.
-
My idea is not a solution but a work around, I don't use volume effects, in fact I fake it by building a model to mimic the volume light with transperency and noise.
I have lost a great deal time perfecting these settings but still did not get the results I hope for, so I work around it. Since then, I have been faking geometrcal structure with image map too and the result is quality visuals with eficiency.
Well this is because I can paint better then doing maths.

-
Great development ideas guys,
I am not so sure about the $100, maybe not for still life object but a uber human seem reasonable enough.
Hey, it opens another accessory like clothing and such. I know its going to sound like Poser but nonetheless, human characters is the most used model. Myself is working on animals, wild pets for your uber human? Hehehe...
'3Dartz', you should get into somthing like this with your kind of rigging, I am sure its an advantage.
-
Hey thanks Ken,
I really didn't know that but my master models always have the original construction cps for shape morph, especially if decal is created.
I used to tweak those bias handles in the previous version but it work differently now, so I'll keep those extra cp. Beside it does not slow dow the work flow since there is no patches.
Technically, I always read your posts because I think you are much more familiar in it. I am just an artist focus on final render.
-
Thank you ypoissant,
I ought to be ashame of myself for not knowing this at all, well AM is full of features and surprises.

-
I am missing somthing here, can you please elaborate?
I don't mean action but in model, a way to create high geometrical definition or to asemble in chor.
Thanks, I must try to build something in choreography, it never accur to me before.
-
I was wondering if Hash could have a new tool like 'instance' where only the master is editable and the rest is represented in proxy and can be drag into position freely, while only visible when rendering.
Due to hi-res geometry, I switch to poly modeler. Better still if AM can have an additional poly functions.
-
Sorry, here is the image...
The technique is to have a bunch of floating cps so that you don't have to set those bias handles individually.
This I learn since version 8.5.

-
Here is the mdl since I don't have a personal website.
-
Try this mdl, its a lab equipment.
I'll post it in the wip thread
-
Experienced user here is very helpful, I don't have the habbit showing my work in the past, well they are mostly P&C.
-
Well, yes its animated but I am a beginner to aimation since ver 11, I do quite a lot of animals with AM with ver 8.5 only 3d illustration and children's book too.
I left still imaging and when on to 3d for flash, due to file size restrictions, I can only render as targa and do animation in flash instead.
so, all I get to do with AM is to pose actions and render but I am learning from you guys with those great mov/avi. AM forum is rich in resorces.
Thanks.
gold fish.
in Work In Progress / Sweatbox
Posted
This one is rejected, so I post it here, I missed the dead line.