


Stuart Rogers
-
Posts
1,205 -
Joined
-
Last visited
Content Type
Profiles
Forums
Events
Posts posted by Stuart Rogers
-
-
By default A:M renders the first one second of your choreography. This can be changed in the "Frame Range" setting in the render options panel that pops up when you select Render to Disc. To render a single frame, set the start frame and end frames to the same value (0 for the first frame).
-
Or another step placed before the entire structure, so any visitor would have to take a couple of steps up before choosing to go left or right.I think the first step should be either lowered or made into the floor. -
I haven't got as far as decalling the main body yet, so as it's a fairly simple structure I might simply rebuild that part.The weirdness on the body had me going for a bit, but after nudging some cp's, they jumped right into place. When I reopen the model tonight, I'll see if the nudge fixed it permanently.
No I don't, but Stian has made a nice table with drawers for Ku Klip's workshop, so maybe you could sweet-talk him into modifying it for our needs.Stuart, I don't suppose you have a nice little sewing table we can put that machine on?I spent much of yesterday working on decalling the sewing machine, and wasted a good two or three hours trying to pin down a bug in the software - there was this strange hard-edged cut-off appearing in one of my colour maps. It was definitely aligned with the choreography layout - quite bizarre. It turns out the bug was somewhere between my ears - the hard edge was the reflection of the top edge of a huge white backdrop object I was using... D'oh! (I wouldn't mid so much, but this isn't the first time I've been fooled by this phenomenon.)
-
Will do.Got it. Thanks Stuart. Please let me know when the final is ready so I can put it in the final "beauty" shot of the scene.BTW There's a Set Up pose to put the various components in their appropriate places. There's a bit of weirdness going on as sometimes this pose needs to be toggled a couple of times in a choreography to get the thread to take up its proper place.
EDIT: The model seems to have some slight weirdness with a couple of the CPs, making the machine's body look a bit distorted at the back (it's still useable as a proxy). Despite fixing it, it recurs when I reload it....
-
It's not on the SVN, so perhaps Eric can put it there for me. It's not finished yet - it needs a couple of extra nurnies and lots of decalling, but it'll do for a proxy. It'll probably be a couple of weeks before the final version is ready.
[attachmentid=20232]
BTW That image was my first attempt at AO. This feature is fabulous - it can make mediocre models look great!
-
Do you think Nimmie would have one of these...?8. other suggestions for items that might be in Nimmie's cabin[attachmentid=20220]

-
I think I smell the faint whiff of revenge...
This is just a guess, but I'm going to say yesGot a little story to go along with that? -
Or leave the legs stiff and put the compression in the spine. Some belly jiggle would probably work well too.Well, if I were going tweak one thing I'd make the body continue down for a frame or two after each foot contact so the legs don't look so stiff (the compression pose). -
Like you I never used to use the Timeline. However, these days I use it extensively if I'm doing a lot of detailed work on one object - I get the Timeline to show the object's Chor Action Bones folder, and then I lock the Timeline. That way the object's bones are quickly available and I can quickly return to it should I want to briefly adjust some other object via the PWS.I've never found much use for "The Timeline" window proper since the PWS timeline does all that and more. -
First of all, open up the Tools->Options... panel. In the Global tab, tick the "Show property triangle" check box. Close the options panel. Now, in your choreography, click on the action that you dropped onto your model. You should see a little triangle appear to the left of the action's "Shortcut to..." label. Click that triangle - it should reveal such things as the Repeat value. That's all you need to adjust.I tried adjusting the length of the cycle in the workspace, it does not seem to make a difference. -
Try taking the receiver's bone (the intended target of the kinematic constraint) out of the cord's hierarchy of bones.I am trying to IK constraint that last bone of the cord to the hand receiver, but it won't give me that option. It won't let me IK anything that is part of the phone! -
I did wonder if making the currently optional profile fields (system description, location, etc) a mandatory requirement for registration would make it more hassle than it's worth for these spammers, but I guess if they're working through a validation e-mail exchange then it probably wouldn't. ("If you can't provide an interests list as long as Martin's, you ain't joining!")
-
Windows Media Player 9 for Mac OSX will play it OK.Agh, people and their Windows-only video codecs. -
It's interesting which details catch people's attention. The eyes didn't grasp mine at first, but the subtle finger movements really did (check out the hesitant move to pick up the apple). And the transfer of objects, such as when she put the knife down. And the teddy bear's acting is gorgeous...People have mentioned the darting of the eyes... um... still don't get it. -
Try working on Woot's centre of mass - the head and arms may be the main moving parts, but the rest of the body should move to cater for this. I tried acting out this movement and I found I naturally started leaning slightly forward, left and up (listening intently to TW), and ended up with my weight shifted back with a twist in the spine slightly away from the original gaze direction (privately considering the possibilities). This would leave Woot in a pose ready to push forward with an offer to accompany TW. (Of course, in acting it out you might come up with another interpretation.) A little more 'before' and 'after' footage to show context will sell it better.
-
If you're using A:M on Windows you have the option of using DirectX or OpenGL rendering (you can select this in A:M's Options panel). Try switching from whatever you're using to the other - that often cures such problems.
-
By that token, Earth isn't a planet because it hasn't cleared the Moon from its orbit. And Jupiter isn't a planet because it shares its orbit with dozens of Trojan asteroids which it hasn't cleared, and probably never will given that they occupy the L4 and L5 Lagrangian points. It'll all end in tears!When they say Pluto hasn't cleared its "neighborhood" of other objects, they're talking about Charon and the entire rest of the Kuiper Belt. -
That occurred to me too, and I now learn that some IAU members are up in arms over the new definition because of anomalies such as this.As I understand it (and I may be wrong) pluto is classified as a dwarf planet because it hasn't cleared its path of other objects (in this case being neptune)?And if that is the case, wouldn't neptune be demoted also?
Given that they're trying to make arbitrary classifications over a smooth spectrum of objects, I think they're on a hiding to nothing - whatever definition they use there'll be something that doesn't quite fit.
-
If find it quite scary that with each iteration this guy looks more and more like one of my colleagues back at the office...
To my eye the horizontal wrinkles on the forehead look too regular - very straight, the same length, and equally deep. Otherwise this is really nice - I like the bump and colouration of the 5 o'clock shadow particularly.
-
Ah, I mis-read you. No, I haven't used it yet, but I can see how it could be very useful for creating fine detail - especially for those of us who aren't so handy with Photoshop! (I think we're wandering off-topic a bit here...!)What I mean't was the normal map plugin to make a normal map from geometry. -
Not yet, but it's only a matter of time - I'm really impressed with some of the normal map work some people have produced here.Have you used the normal material plugin?I used it the other day and it worked great.
-
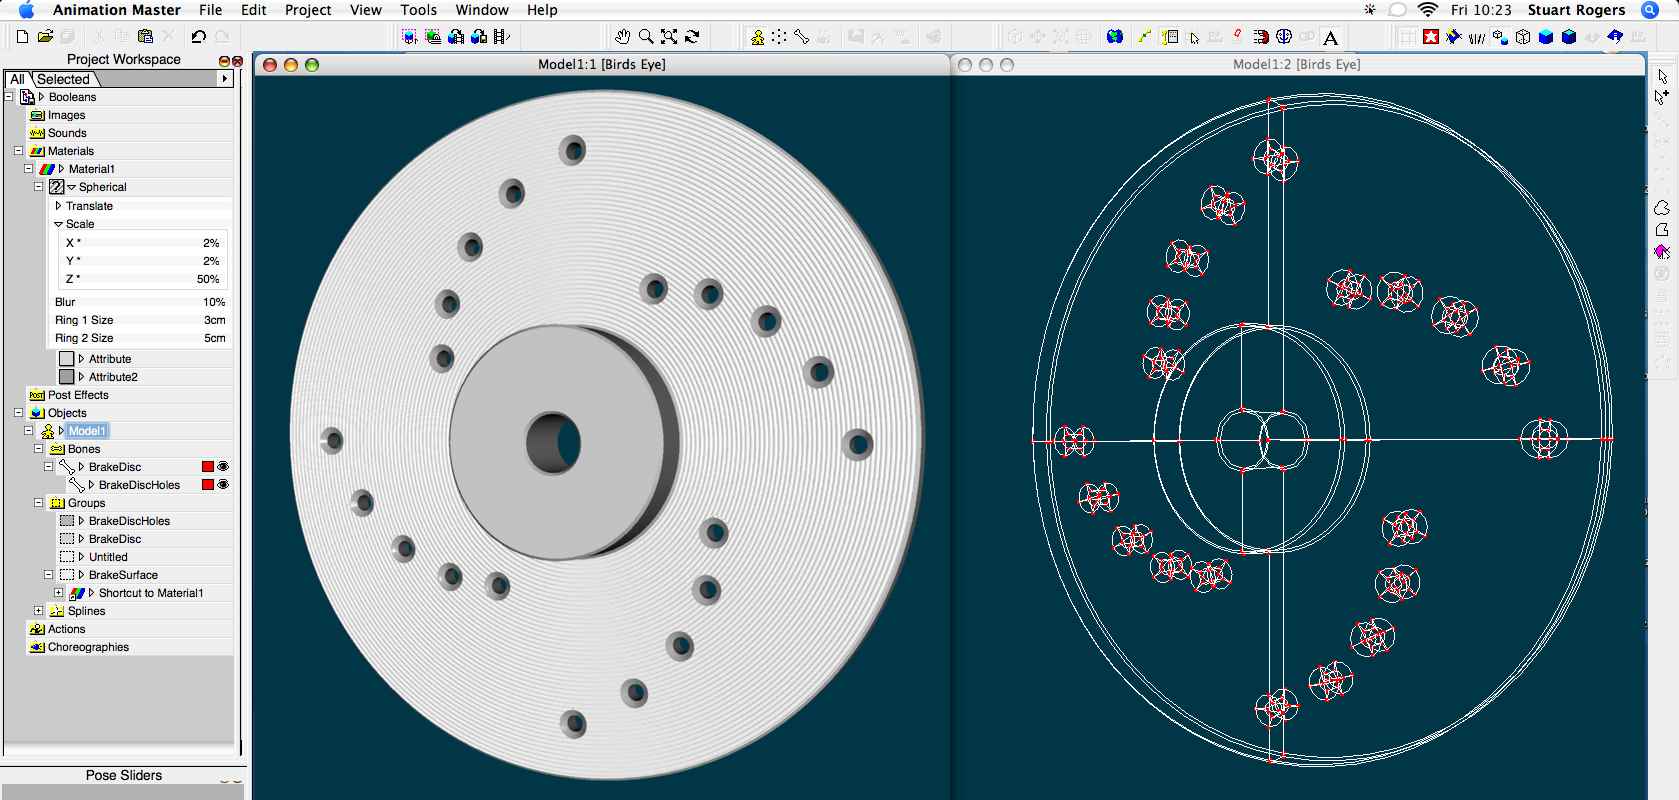
Yes, and the bump (not normal) comes from the material - I should have exposed more of the various settings for the screen shot.Are you saying the normal map (assumption) on the rotor surface does not apply to the boolean hole (good thing I would think)? -
I don't use booleans very often, but in the right situation they can save you a lot of work.
Here's my quick and dirty attempt at a brake disc using booleans...
[attachmentid=19993]
...and the zipped V13 project file: [attachmentid=19994]
Notes for this project:
1. All the boolean cutters are assigned to the BrakeDiscHoles bone
2. The BrakeDiscHoles bone is a child of the BrakeDisc bone so that the holes move with the brake disc
3. The material on the face of the disc show that the holes don't take on the attributes of the surface they cut into. Rather, they take on the attributes of the boolean cutter surface
4. The boolean cutters are closed on all sides - there aren't any holes in them.

-
That's not cheating - that's knowing what you can get away with! There's little to be gained from building it all from one continuous mesh when you can accomplish the same thing with separate pieces in far less time.As you can see I cheated in a few areas.

_2_01_06 WIP
in TWO Animating
Posted
What kind of mood is he in? A happy-to-be-alive mood, where he cares about getting his hat at just the right jaunty angle, or a dark I-hate-mornings mood where he shoves the hat on and doesn't care how it looks?