AMSpector
-
Posts
63 -
Joined
-
Last visited
Content Type
Profiles
Forums
Events
Everything posted by AMSpector
-
I had a rather shaky start on the forum as well, a couple of months back , but then I got over myself and began learning the software. I couldn't be more pleased with the performance and power of A:M. I decided to go with the web subscription. My thinking at the time of purchase was that even if it took me three years to learn the software and create something worth looking at, A:M would still be less expensive than any application on par with its capabilities. In no time at all I had modeled a character from head to toe (minus clothing that is), then began testing rigs. I started out with "The Art of Animation Master" video tutorials & the "Technical Reference" PDF manual; both of which I found exactly three clicks off the main page... LOL (Home> Support> New Users>...) I've only been here for a short time, but in my opinion, this community is worth the price of the web subscription. In answer to the original poster's question regarding system requirements, I found this: SYSTEM REQUIREMENTS PC with Windows XP, or Vista Mac with OSX 10.4.11 or later 1.5 GHZ or faster processor 512 MB ram Not sure if these are still valid requirements, but I agree with robcat2075, "faster and more is always better".
-
This is probably a good place to start: http://www.hash.com/forums/index.php?showt...st&p=277645 Two posts below that (#60) completes the sphere.
-
OK, so the problem is not with TSM2, but between chair and PC... got it.... LOL I plan to test the other rigs as well, assuming I can figure out how to install them. Is there a preference for a particular rig, used in TWO and the upcoming SO for example? Thanks.
-
Well, the spine, legs, neck... If I open an action and turn TSM Constraints on, those bones are not available for animating. Here is what I get after running TSM Flipper:

-
Hi, I finally managed to get my model to a point where I was ready to test TSM2, but for some reason, several of the main bones are hidden (see attached screenshot below). How do I determine which ones to turn on? Is this an issue that has already been addressed on another thread? If so, just point the way In the manual I read the following: Q: What are all these extra arm and leg bones for? A: See the previous Q&A. The use of two bones per limb segment is a new feature in TSM2. When rigged, these bones will help spread out the twisting of a character's geometry in a realistic manner. However, if you don't want to use the "extra" bones -- if your character is a robot composed of rigid segments, for example -- you can disregard them. If you don't assign any points to the "extra" bones, they will have no effect on your character. However, do not delete them from them your model. TSM Rigger won't work on any systems that have missing pieces. Q: What are all these extra bones I see in my Project Workspace? A: The Setup Machine works by creating special bones for its own use. They should not be animated or modified, and are hidden for your convenience. Could something be wrong with my model which would cause main bones to be hidden? Thanks. [Edit] I am using A:M version 15.0d, and TSM version 2.0.7
-
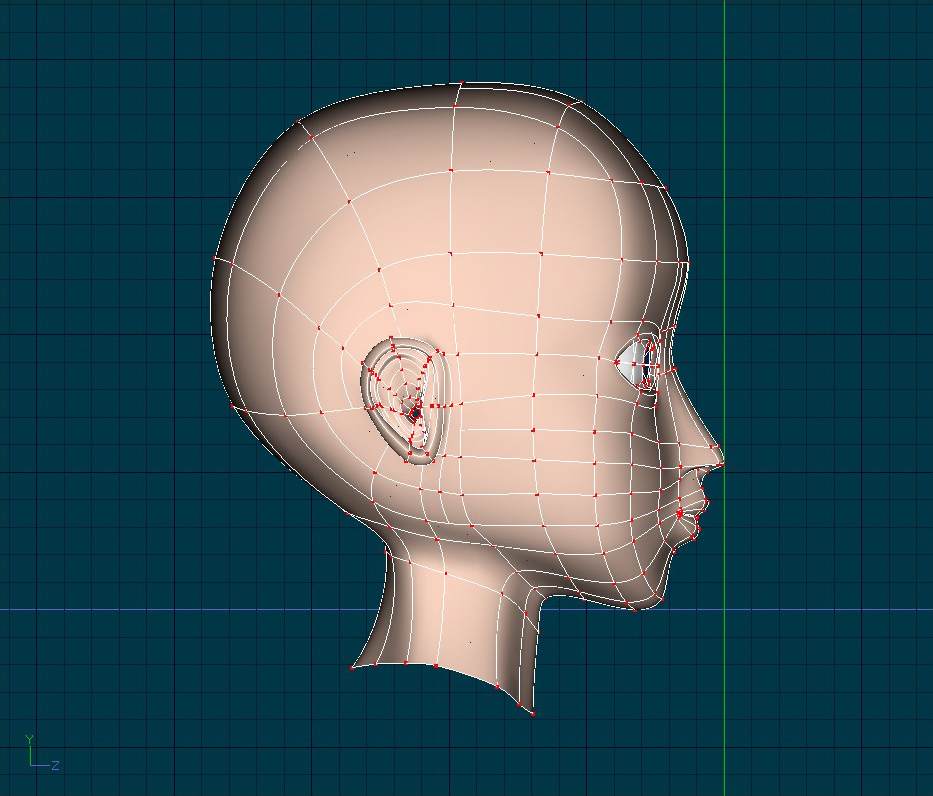
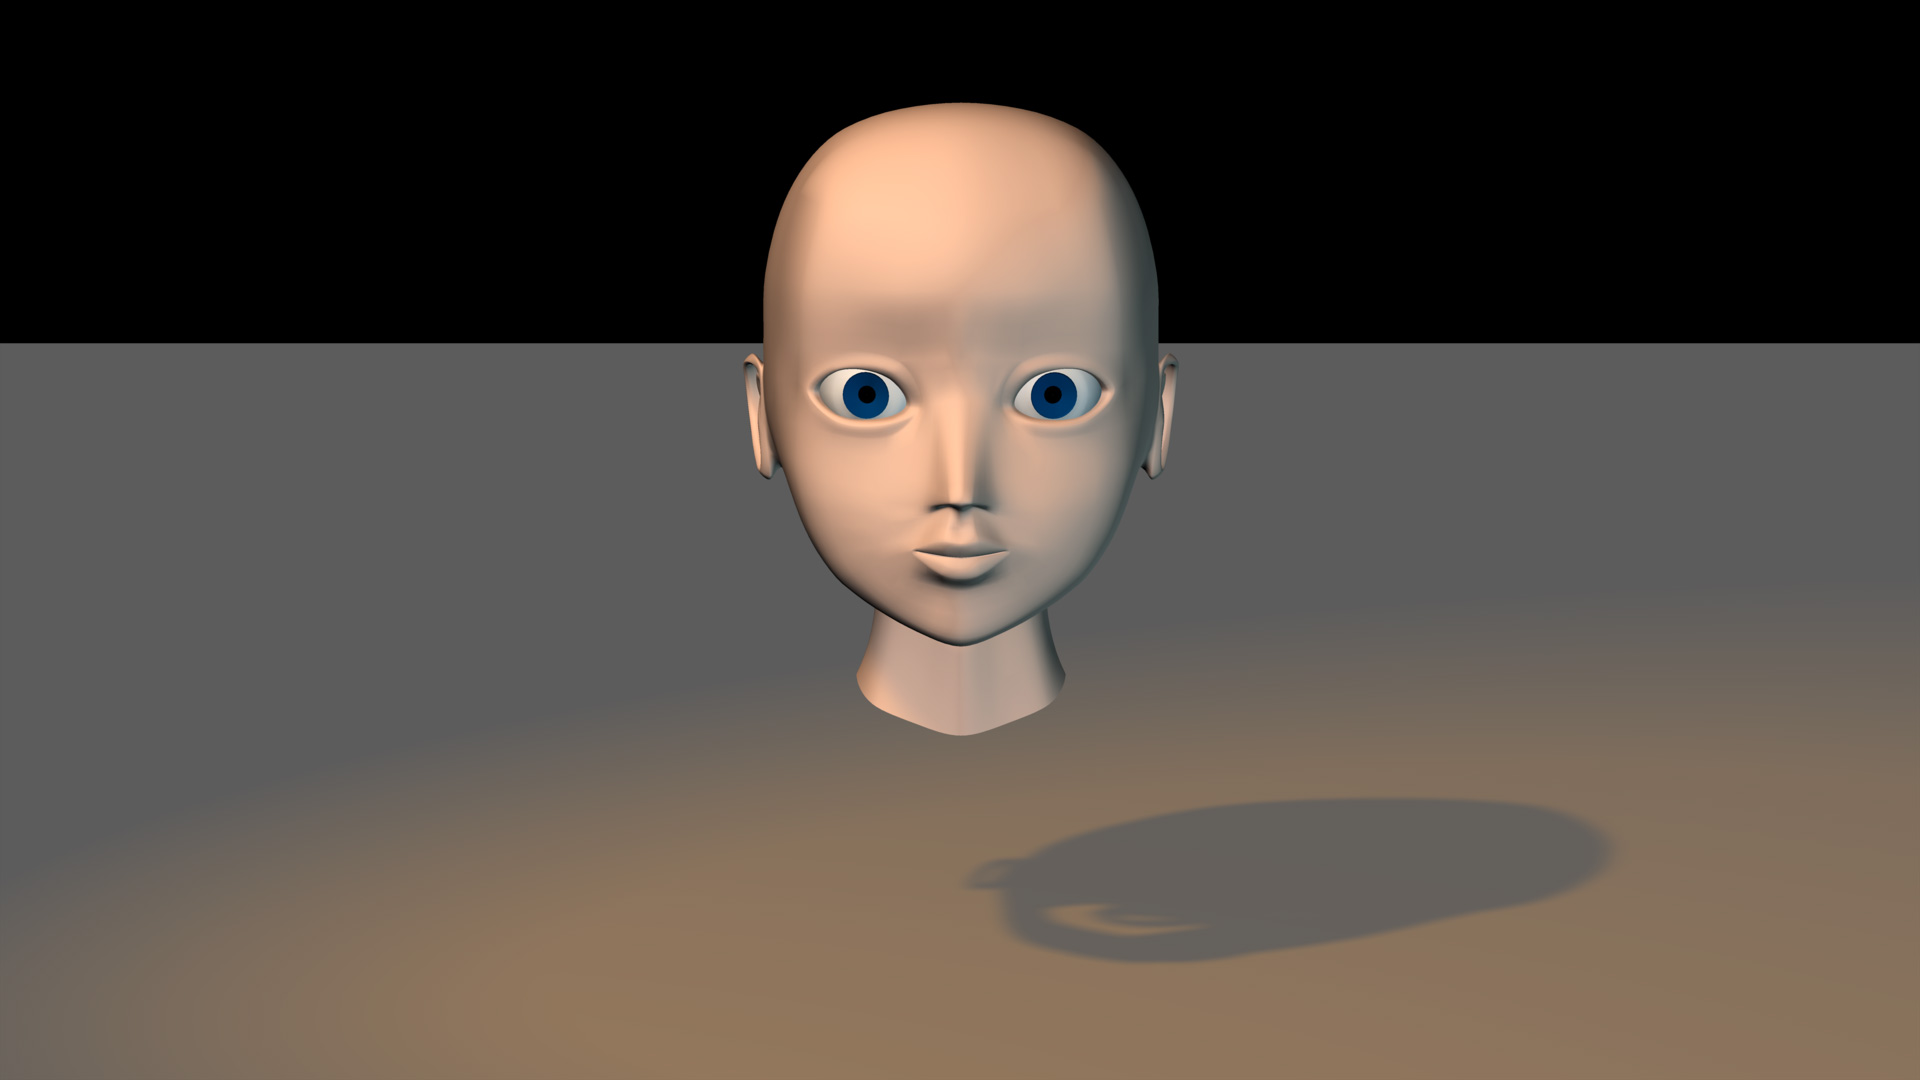
You know, this forum is worth the $49 subscription I paid for A:M, you guys are awesome!! I did start out working out of the library, and I made it through approximately half of the tutorials, but I began to feel that it was important for me to learn to model organic subjects from scratch (using rotoscopes), so I decided to focus on that for the time being. I did OK for my first full head (see below), but I'm not sure that the mesh is good enough. My concern is that there are too few spines for proper animation. Also, I can't seem to completely smooth out the area around the upper lip and nose, any thoughts? Anyway, I was hoping to generate several characters from a mesh of my own, once I can come up with a good mesh. Then I want to pick back up on the tutorials and learn to animate them. I really appreciate all the great advice. Oh, and the ears in the model below are really bad... LOL, I'll definitely have to fix them at some point. Thanks.
-
Hi, I was wondering whether, as a rule, A:M pros usually build each character from scratch, or whether some use an existing base character to generate others? Thanks
-
Well, aside from the pivot issue (which I missed), I was not group selecting my half-model, then shift-selecting a CP on the center spline. After reading robcat2075's reply to a previous C/F/A issue, I knew it was option 1 for me... The half is replicating and attaching fine now, thanks for your help.
-
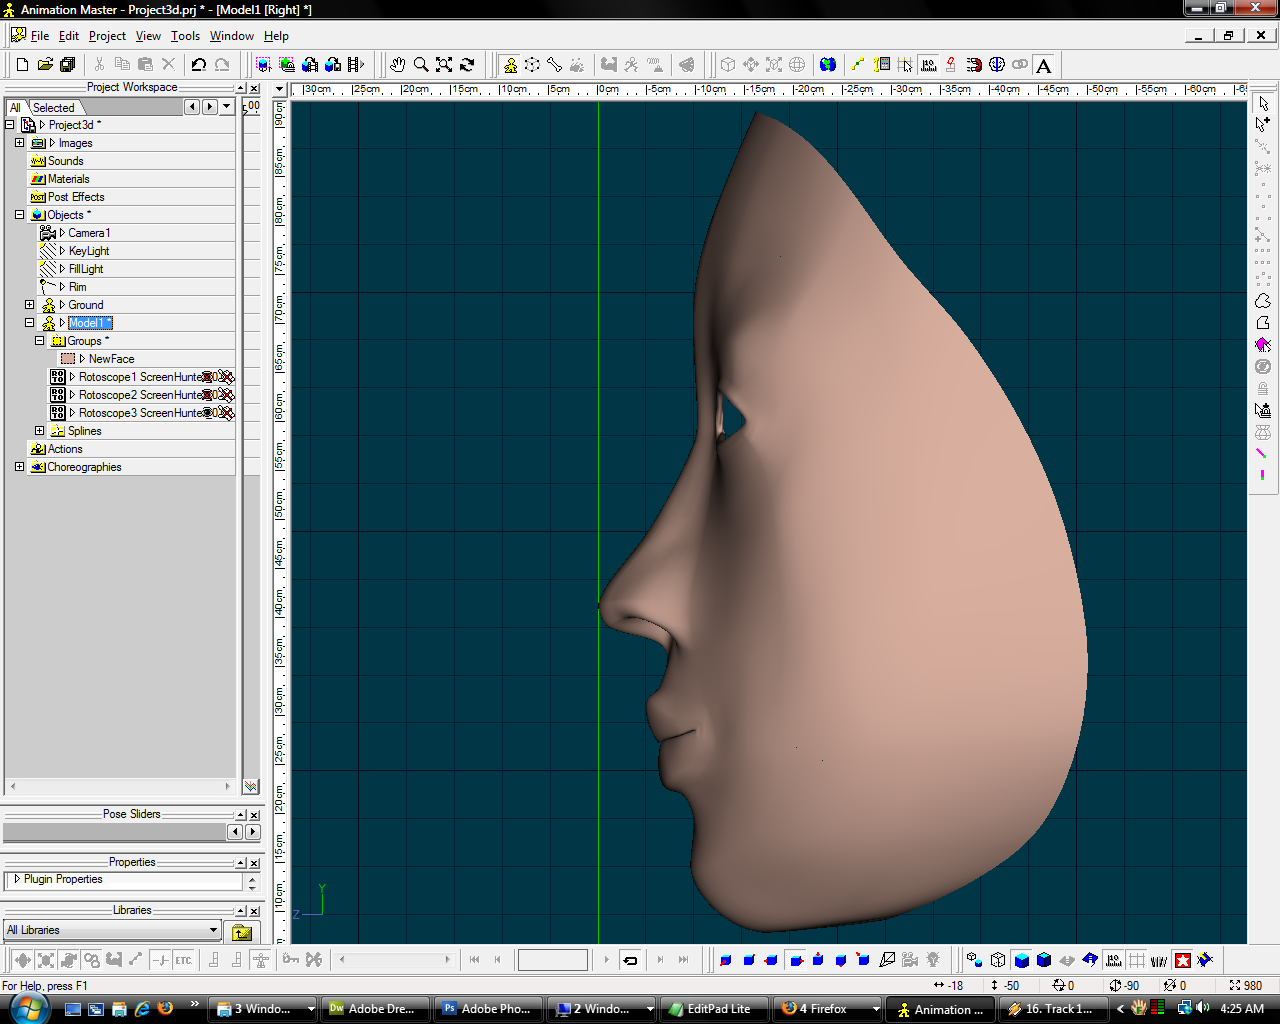
Very nice! Thanks. OK, I've split the model in half again, but I still cannot get it to C/F/A. Either I'm an idiot, or there is something wrong with the model. I'm going with option 2... Could there be a setting in A:M that I might have changed that affects this command? Here is the new half: Project3d_Half1.prj
-
Oh yes, I learned that years ago with my Photoshop designs. I always start with something like "Name1", and then work my way through the alphabet until I think it deserves to go to the next number. There are dozens of versions leading up to "Project3d". Makes perfect sense. Your characters are great BTW.
-
I guess I need to study the tutorial a little more closely because in the next section I'm going to be asked to delete one half of the face; I should have resolved my Copy/Flip/Attach issue head on. Maybe I can test the half in mirror mode? Thanks for your help Caroline, I was able to separate the outside spline from the center, next I'll work on separating the mouth.
-
Hi, After much trial and error I managed to complete the face portion of the Cooper tutorial... using an alternate subject. In the tutorial, the initial central spline was only carried down to the bottom of the upper lip, so by the time I finished the face half, the central spline was not continuous. Using "Shift + }" I could see that it traveled up the center spline, around the outer face (is this normal?), but stopped at the bottom lip. I tried unsuccessfully to make it continuous. Anyway, I could not get Copy/Flip/Attach to work (read some really good posts about it though), so I copied, pasted then manually broke and connected the splines from the new half to the original. It seems OK, but the central spline, at the top and bottom, has creases which could cause problems as I work to complete the head. I've tried breaking and reconnecting the splines adjacent to it in hopes that I could make it behave, but something in my model is off. Is there a way to change the direction or flow of a spline? Would that help in my case? Thanx. Here is the project file: Project3d.prj Edit: I forgot to mention that I must have began modeling facing the wrong direction, because I had to switch the left and right perspective to match the Rotoscope. Couldn't figure out how to resolve that.